
Decorate a birdhouse with a charming gnome theme using Mod Podge and paper! This fun and easy DIY project adds a whimsical touch to your garden or patio.

So . . . who here likes garden gnomes? Raise your hand!! Me mee meee! Am I the only one raising my hand? Gnomes are so fun and remind me of spring – as do birdhouses.
So to celebrate, I created a birdhouse for some of my family members with spring colors and a happy gnome. You’ll need a birdhouse to start, and the rest is fun.
This project goes well with the fairy garden and painted rocks I’ve also done. You’ve got lots to make for the out-of-doors this year, so you’d better get crackin’!
DIY Gnome Bird House
Gather These Supplies
- Wood birdhouse
- FolkArt Outdoor acrylic paint – Burnt Umber, Fresh Foliage, Pure Orange
- Mod Podge Outdoor
- Woodland themed scrapbook paper
- Martha Stewart Gnome and Woodland stickers
- Martha Stewart Log Alphabet stickers
- Cardstock – yellow, brown, orange
- Craft knife
- Ruler
- Paintbrush
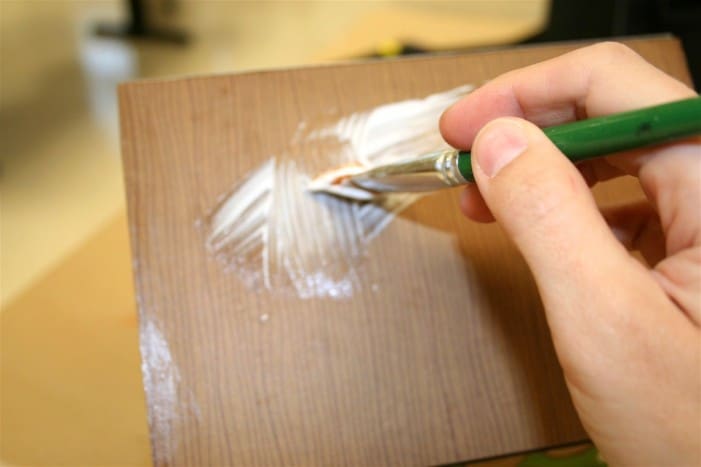
Paint the Birdhouse
Paint your birdhouse with the FolkArt colors. I used Fresh Foliage for the sides, Burnt Umber for the roof and Pure Orange for the perch.
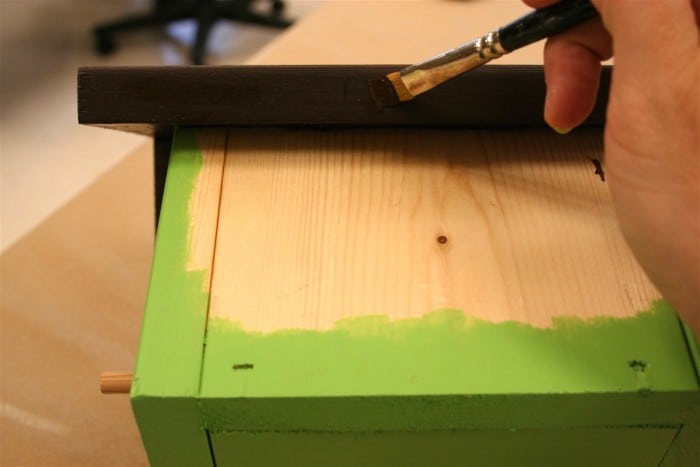
This Outdoor paint is self-sealing and really durable, so you are good to put it outside. (PS – I just did the edges of the sides where I would be covering with paper).
Cut the Papers to Fit
While waiting for that to dry, I cut the papers to fit my birdhouse. I used one design around three sides, and another (woodgrain) design on the roof.
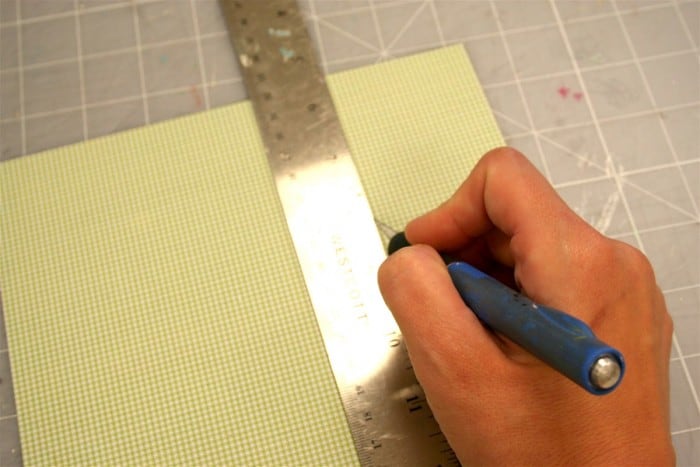
It takes a minute, but it’s really about measuring and cutting carefully to get the exact fit – so it’s not hard, just time consuming.
At this time I also used my Sizzix Big Shot to cut the mushroom shapes. You don’t have to do that though – you can draw and cut by hand just as easily.
Apply Paper to Birdhouse with Mod Podge
Paint a medium layer of Outdoor Mod Podge on one side of the birdhouse.
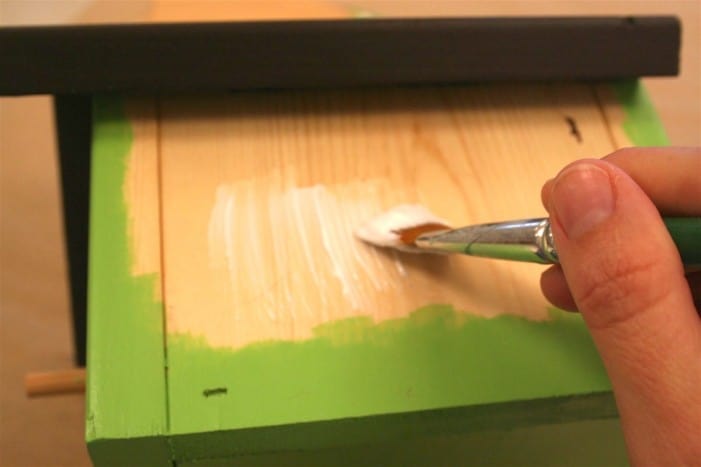
Adhere the (nicely) trimmed paper and smooth thoroughly. Let it dry for 15 – 20 minutes and repeat on all sides.
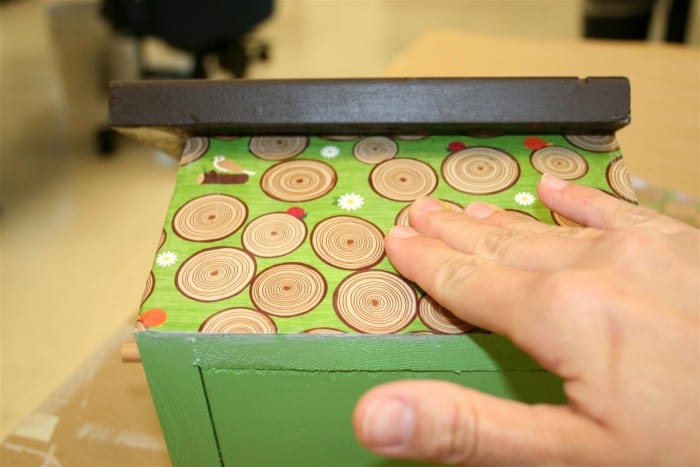
Seal Your Project to Finish
Once dry, paint a coat of Outdoor Mod Podge over the whole birdhouse. Let dry and repeat.
I attached all of the embellishments with craft glue, then gave the entire birdhouse a third coat of Outdoor Mod Podge (including over the embellishments).
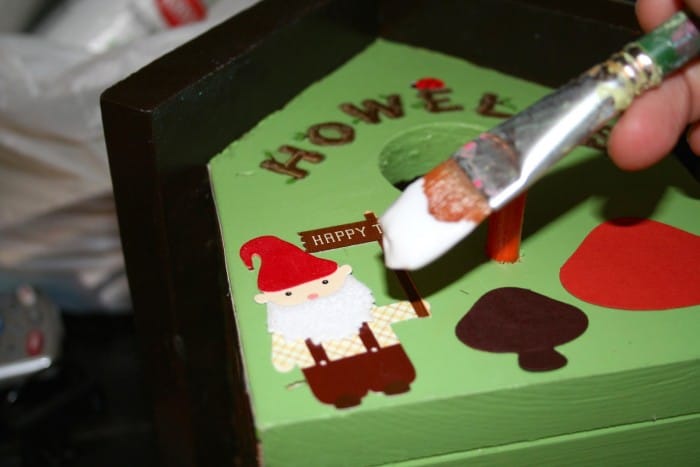
Let dry completely before hanging outside.

To finish and make sure it’s extra durable, add an Enamel outdoor sealer (this is optional, but important with intense UV exposure). Now you can enjoy your happy gnome birdhouse.
If you enjoyed this outdoor project, I’d love for you to check out these other ideas:
Beanbag Toss • Birdhouse for Kids • Clay Pot Gnomes • Clay Pot Lighthouse • Clay Pot Mushrooms • Garden Markers • Mod Podge Terra Cotta • Painted Mailbox • Rock Mushrooms • Spoon Plant Markers


I LOVE gnomes! This is AWESOME!
So very very cute! We just got another bird feeder so it’s only a matter of time ’til we progress to bird houses. This one is adorable! (and yeah, I kinda go for gnomes too) 🙂
So cute, Amy! Can’t wait to read your book!
Love it!!!!
That is really funny and cute – those log stickers are my favorite part!
Okay, I guess I will be making a trip to Michael’s to get some outdoor Mod Podge! Love the cute gnome, and this totally looks like my kind of bird house.
So adorable!
Soooooo cute! And hey I didn’t even know there was “OUTDOOR” mod podge .. holey moley coolness!
Raises hand…I love gnomes and this is so adorable. I can’t keep up with all the kinds of MP there are!
What a cute birdhouse, Amy. I love it!
Robin