
This IKEA easel was trashed by my three-year-old, so I gave it a complete makeover with clear chalkboard paint. You’ll love how easy this is!
Skills Required: Beginner. You’ll be applying clear chalkboard paint, Mod Podging, and a few other craft basics.
I know I’ve said this before but I’m so excited to share today’s makeover with everyone today!!
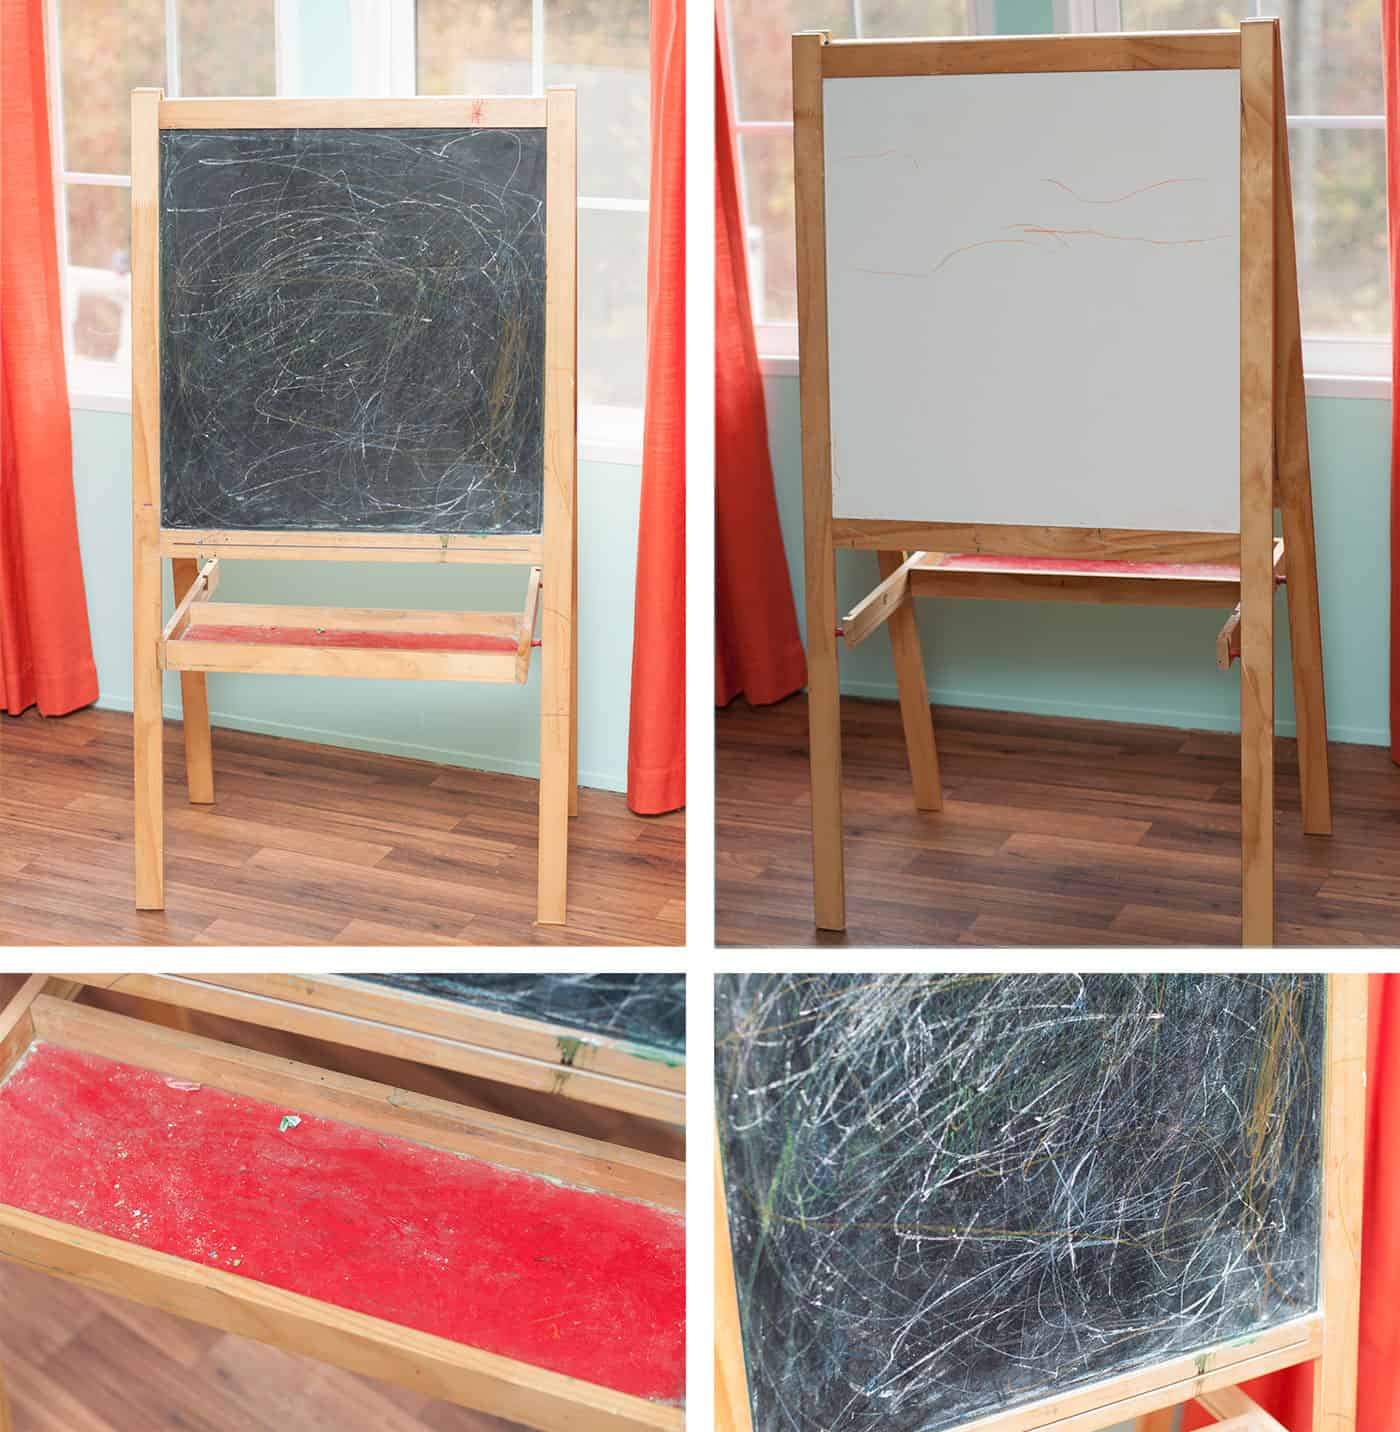
I got this easel from IKEA about 4 years ago for my boys and it’s in pretty bad shape. I’ve been wanting to give it a makeover for a while now.
I got some clear chalkboard topcoat and I practiced on something small. It worked perfectly!! So I thought I’d give this easel makeover a try. One of my favorite parts – you can make the chalkboard any color!
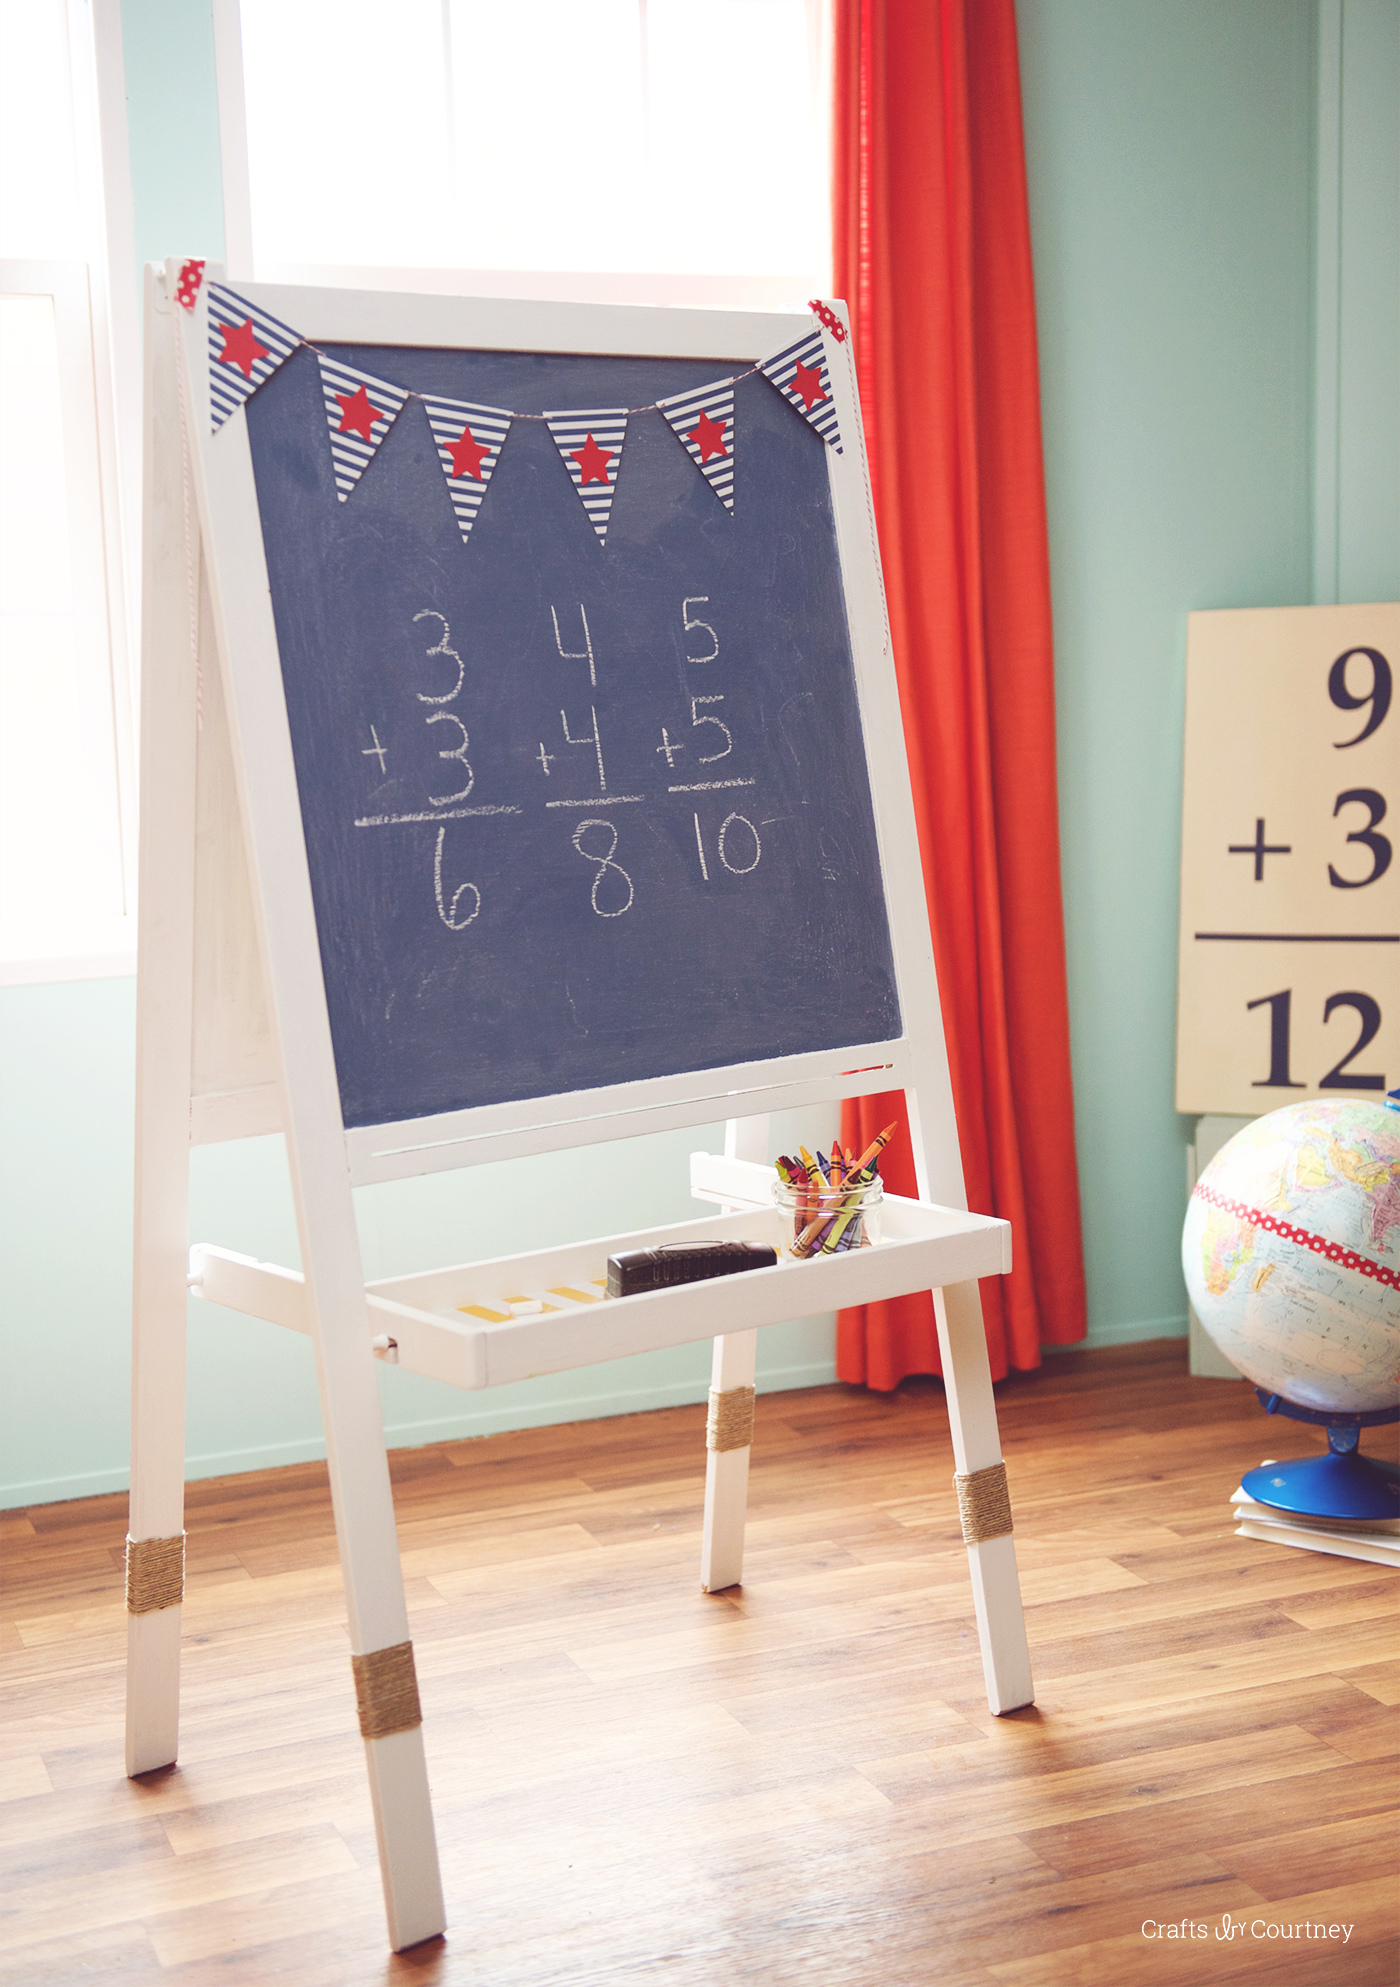
I plan on putting this in my son’s room, so I gave it a little nautical makeover.
IKEA Easel Makeover
For this makeover you’re going to need:
Gather These Supplies
- Clear chalkboard paint
- Mod Podge Furniture Matte
- IKEA Easel
- Paint
- Scrapbook paper
- Paintbrush
- Decorative rope
- Hot glue gun
Getting Started
As you can see this was in pretty BAD shape. My 3-year-old wrote all over it with a crayon and totally messed up the chalkboard.
To get started I cleaned it up as best as I could.
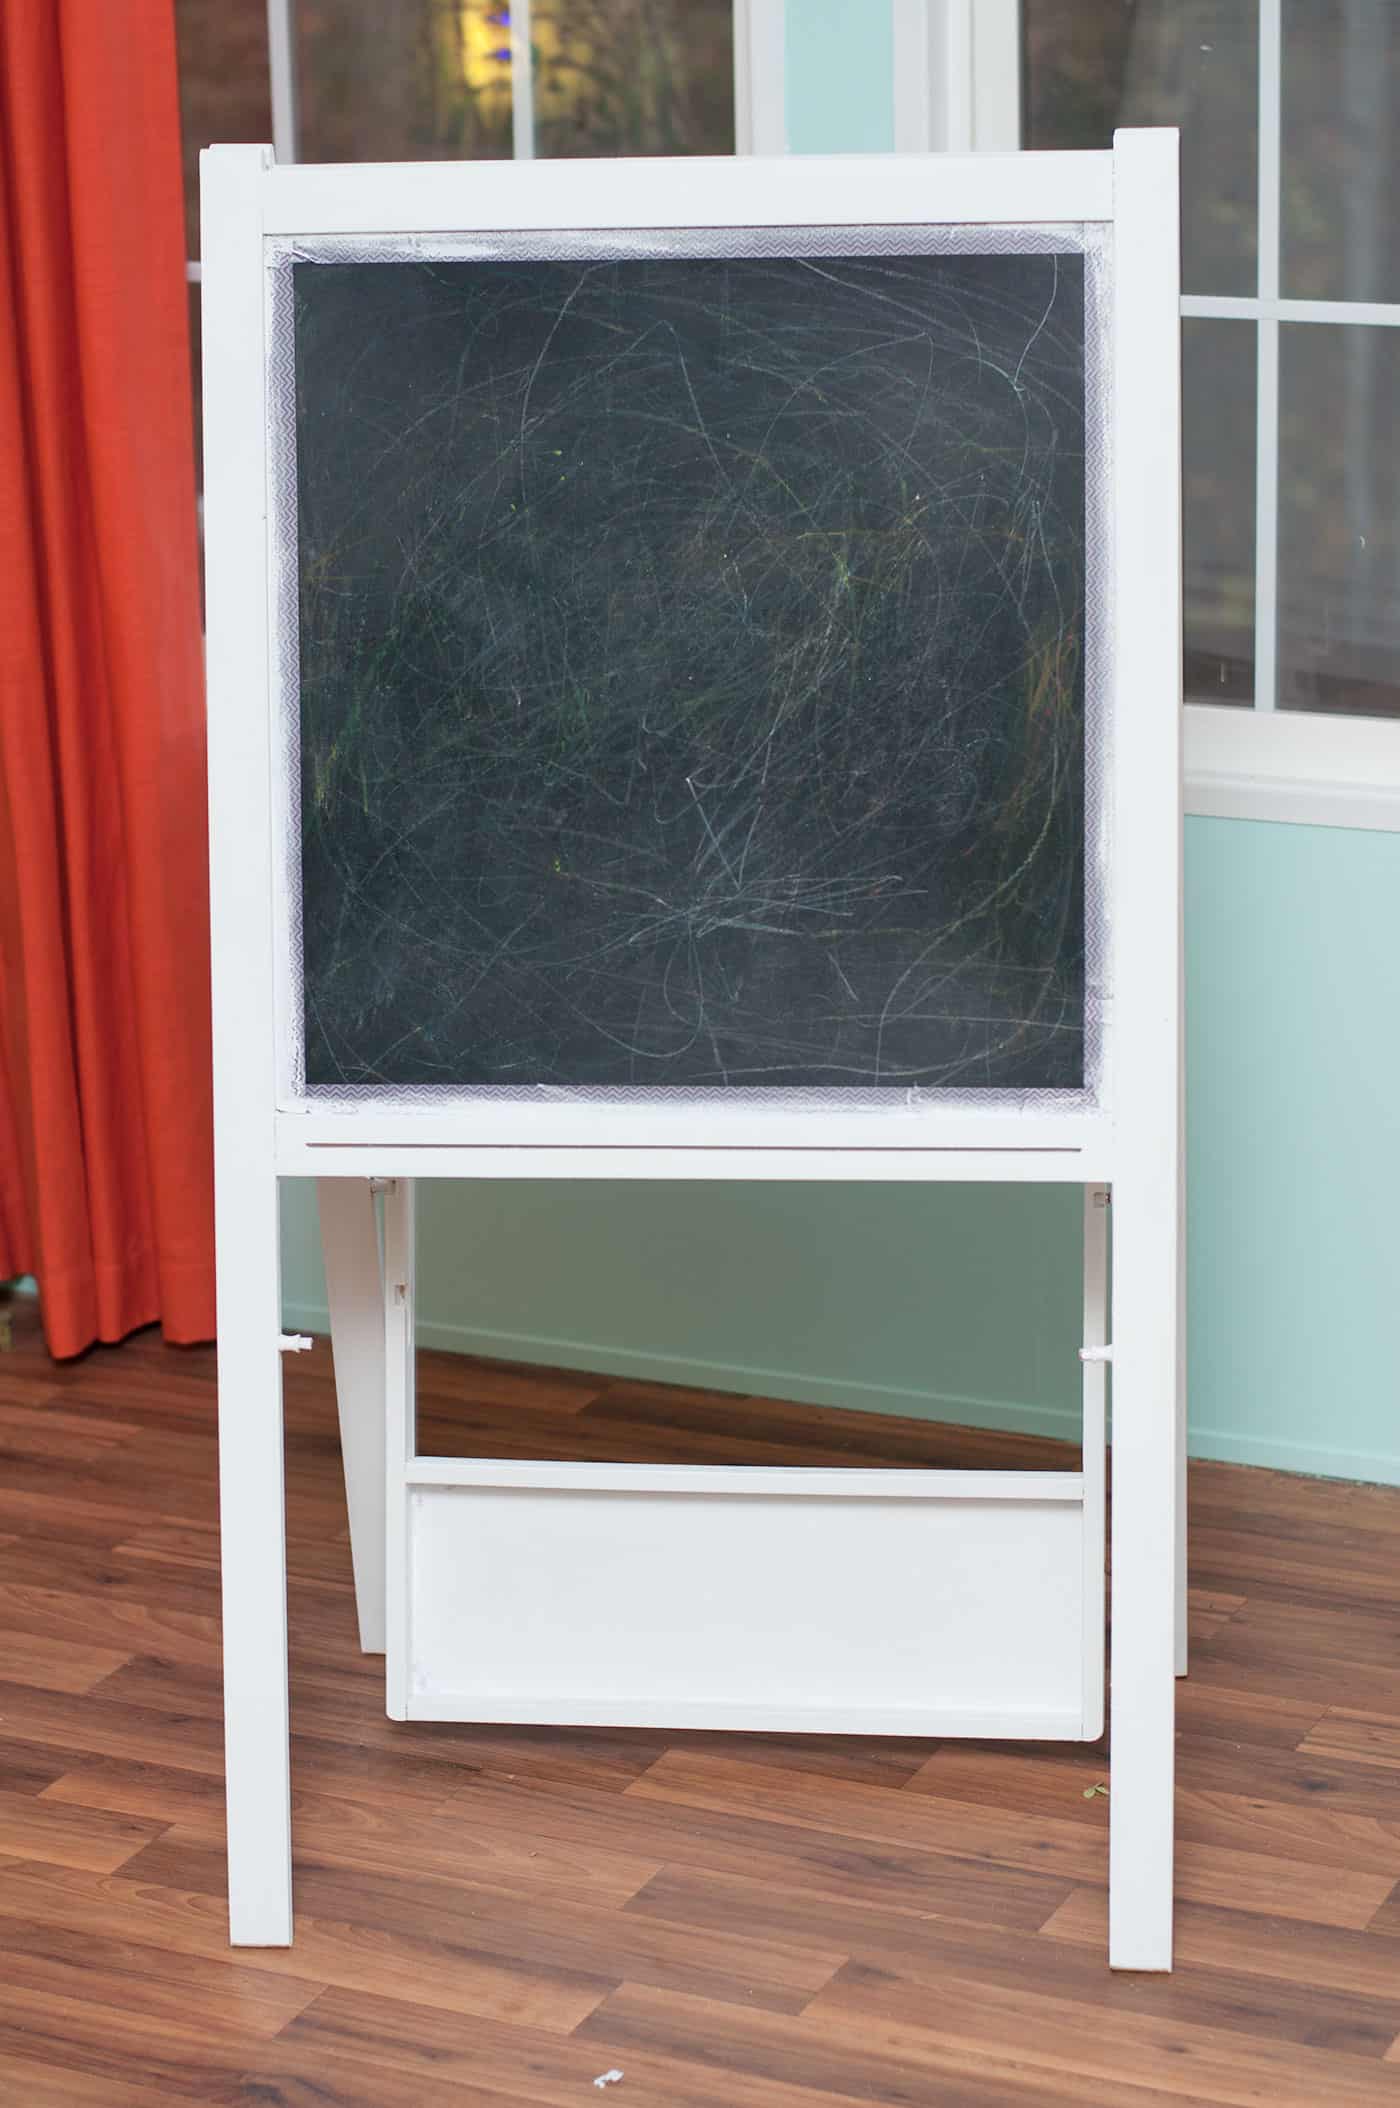
Step 1 – Paint the IKEA Easel
I taped off the easel and painted on two coats of white chalk paint. I let each coat dry 30 minutes.
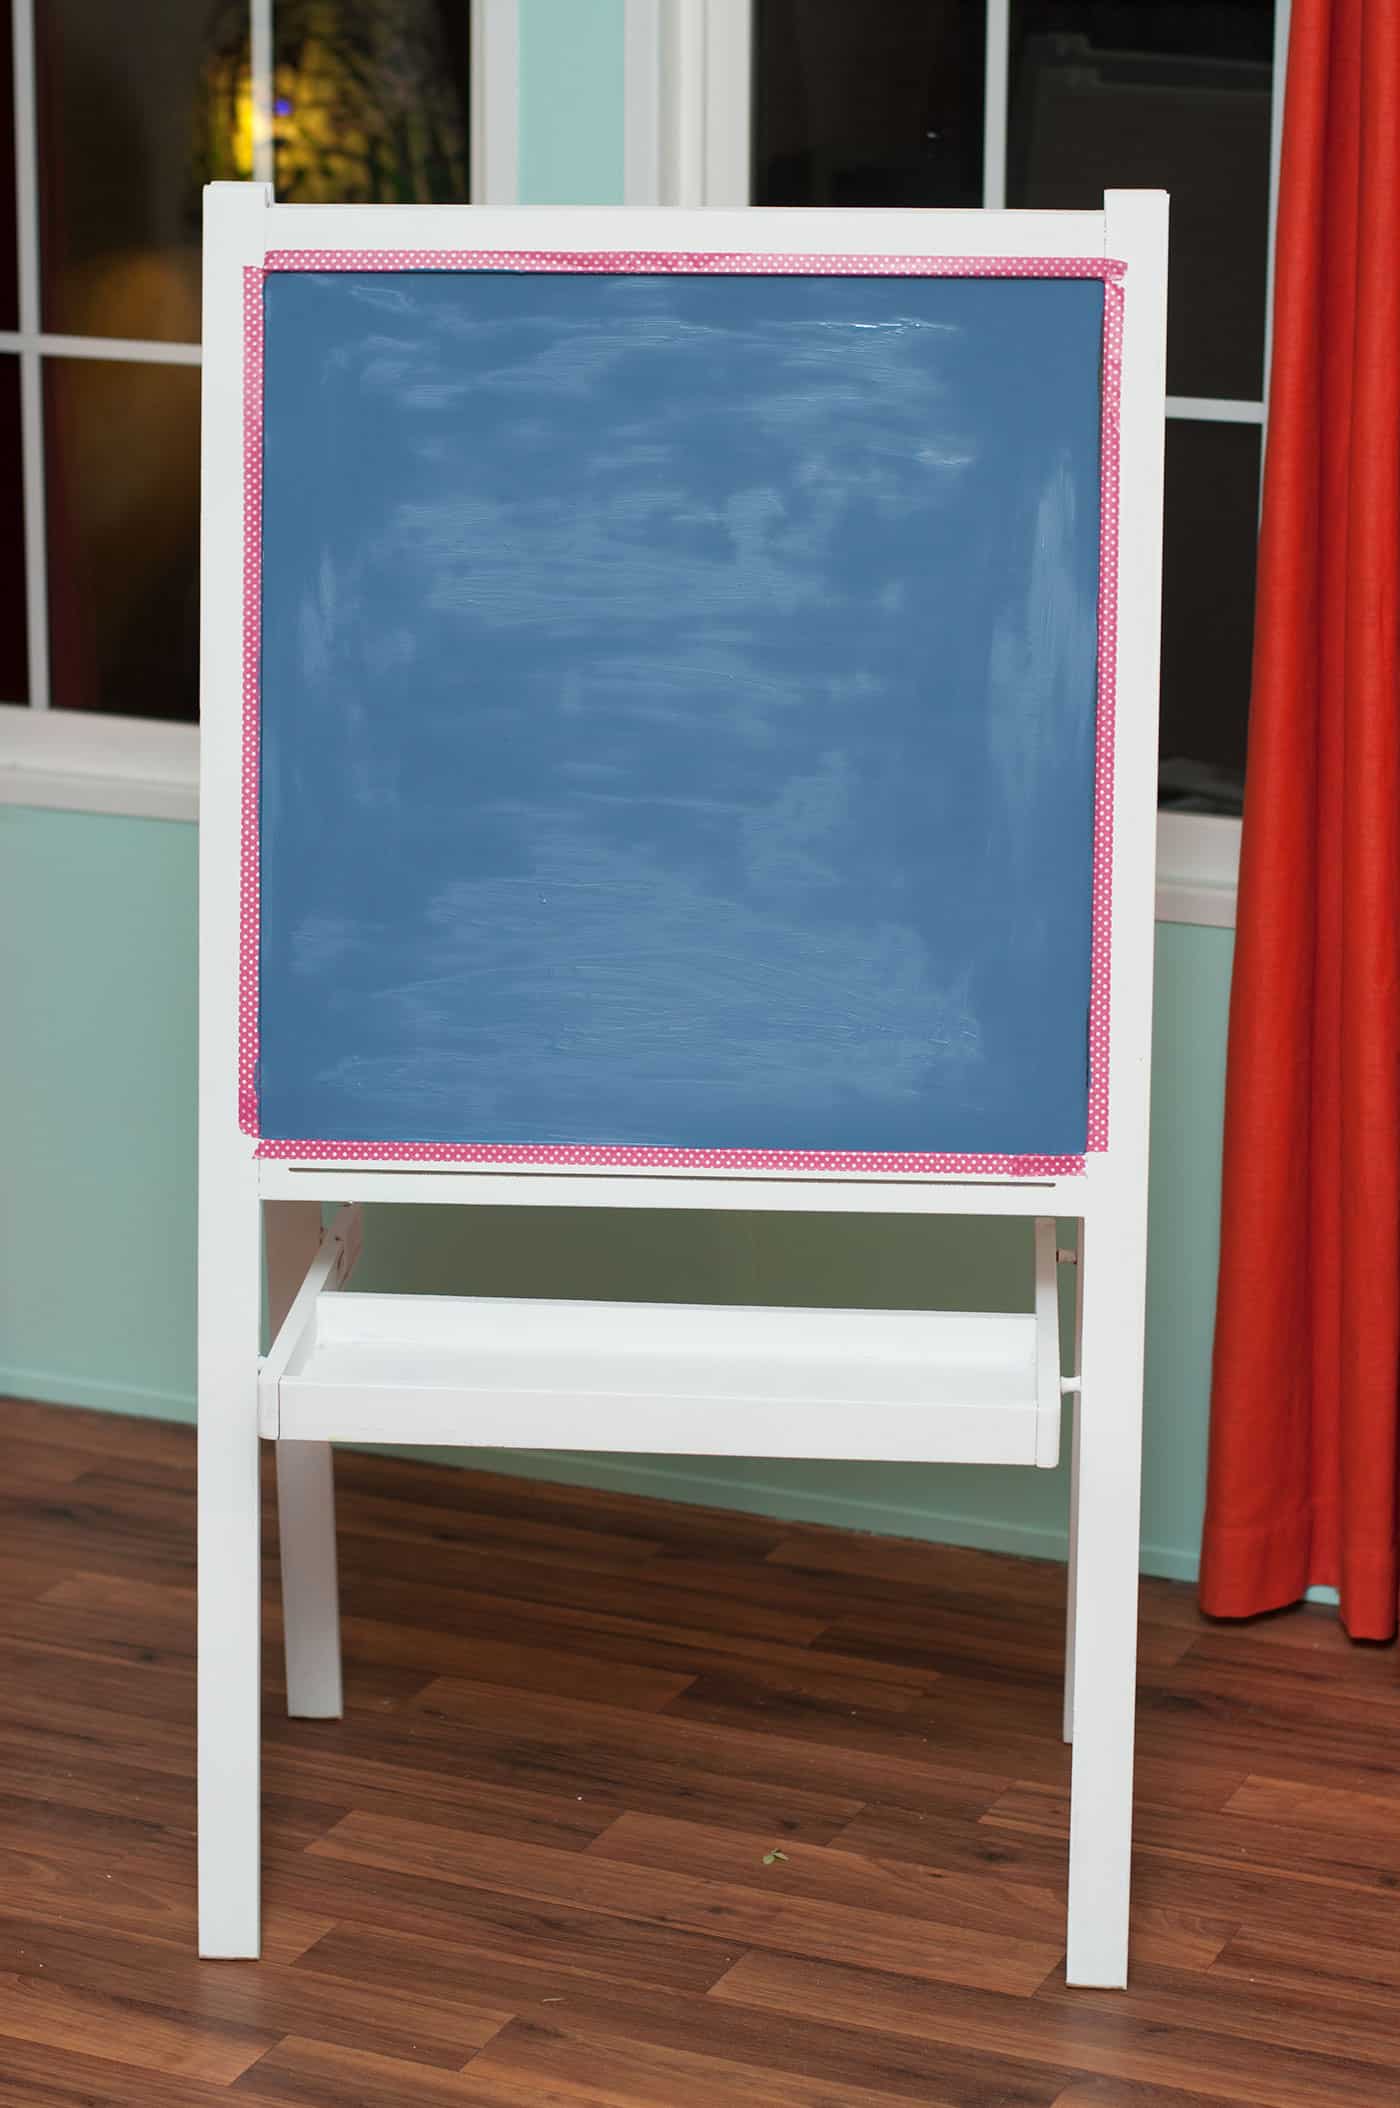
Step 2 – Paint Front of Chalkboard
I really wanted to make the chalkboard blue. I thought the blue against the white would be perfect. I painted on two coats and let dry 30 minutes.
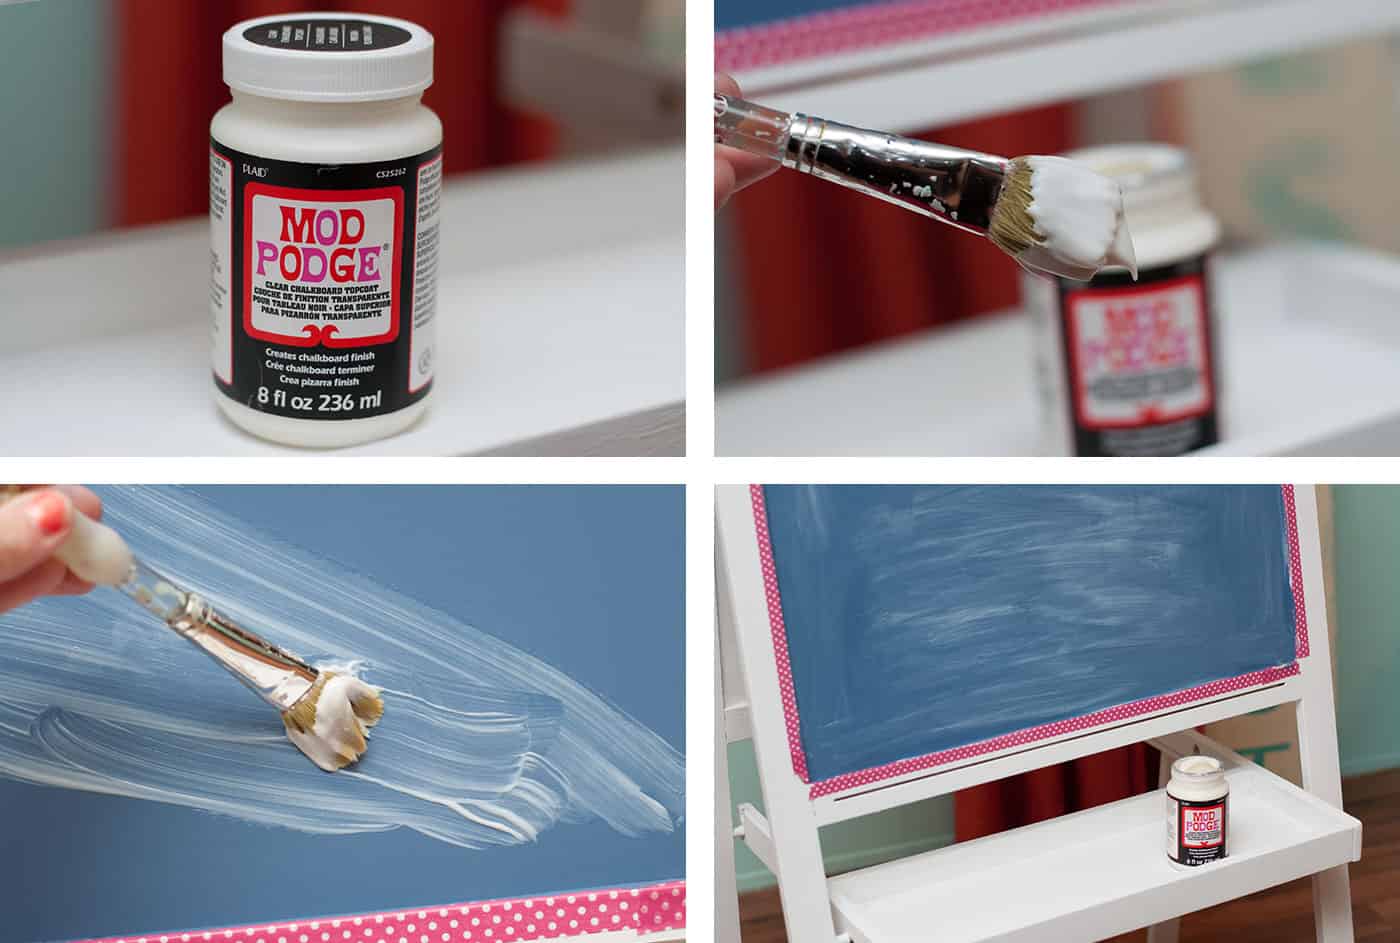
Step 3 – Add Your Clear Chalkboard Paint
Now the fun part!! Adding the clear chalkboard topcoat. As per the directions. I painted my first coat and let dry an hour, then painted on my second coat. Let it all dry 24 hours.
Note: Mod Podge Clear Chalkboard Topcoat is no longer available – hence the recommendation to use clear chalkboard paint, which works just as well!
Step 4 – Set Chalkboard
I got a piece of chalk and rubbed it all over the chalkboard to set it. Then I wiped it down with a piece of cloth.
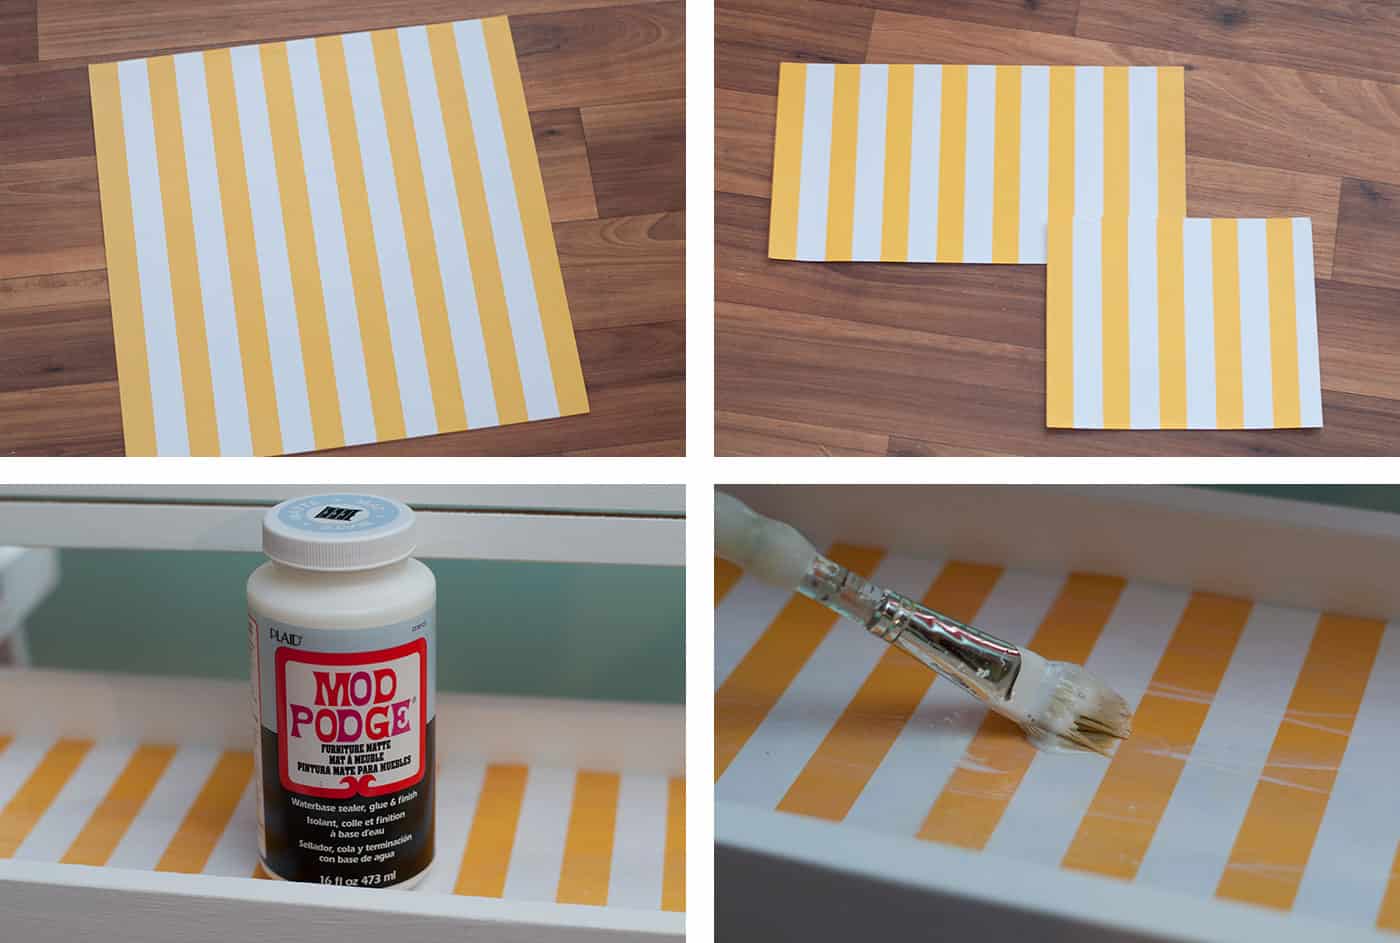
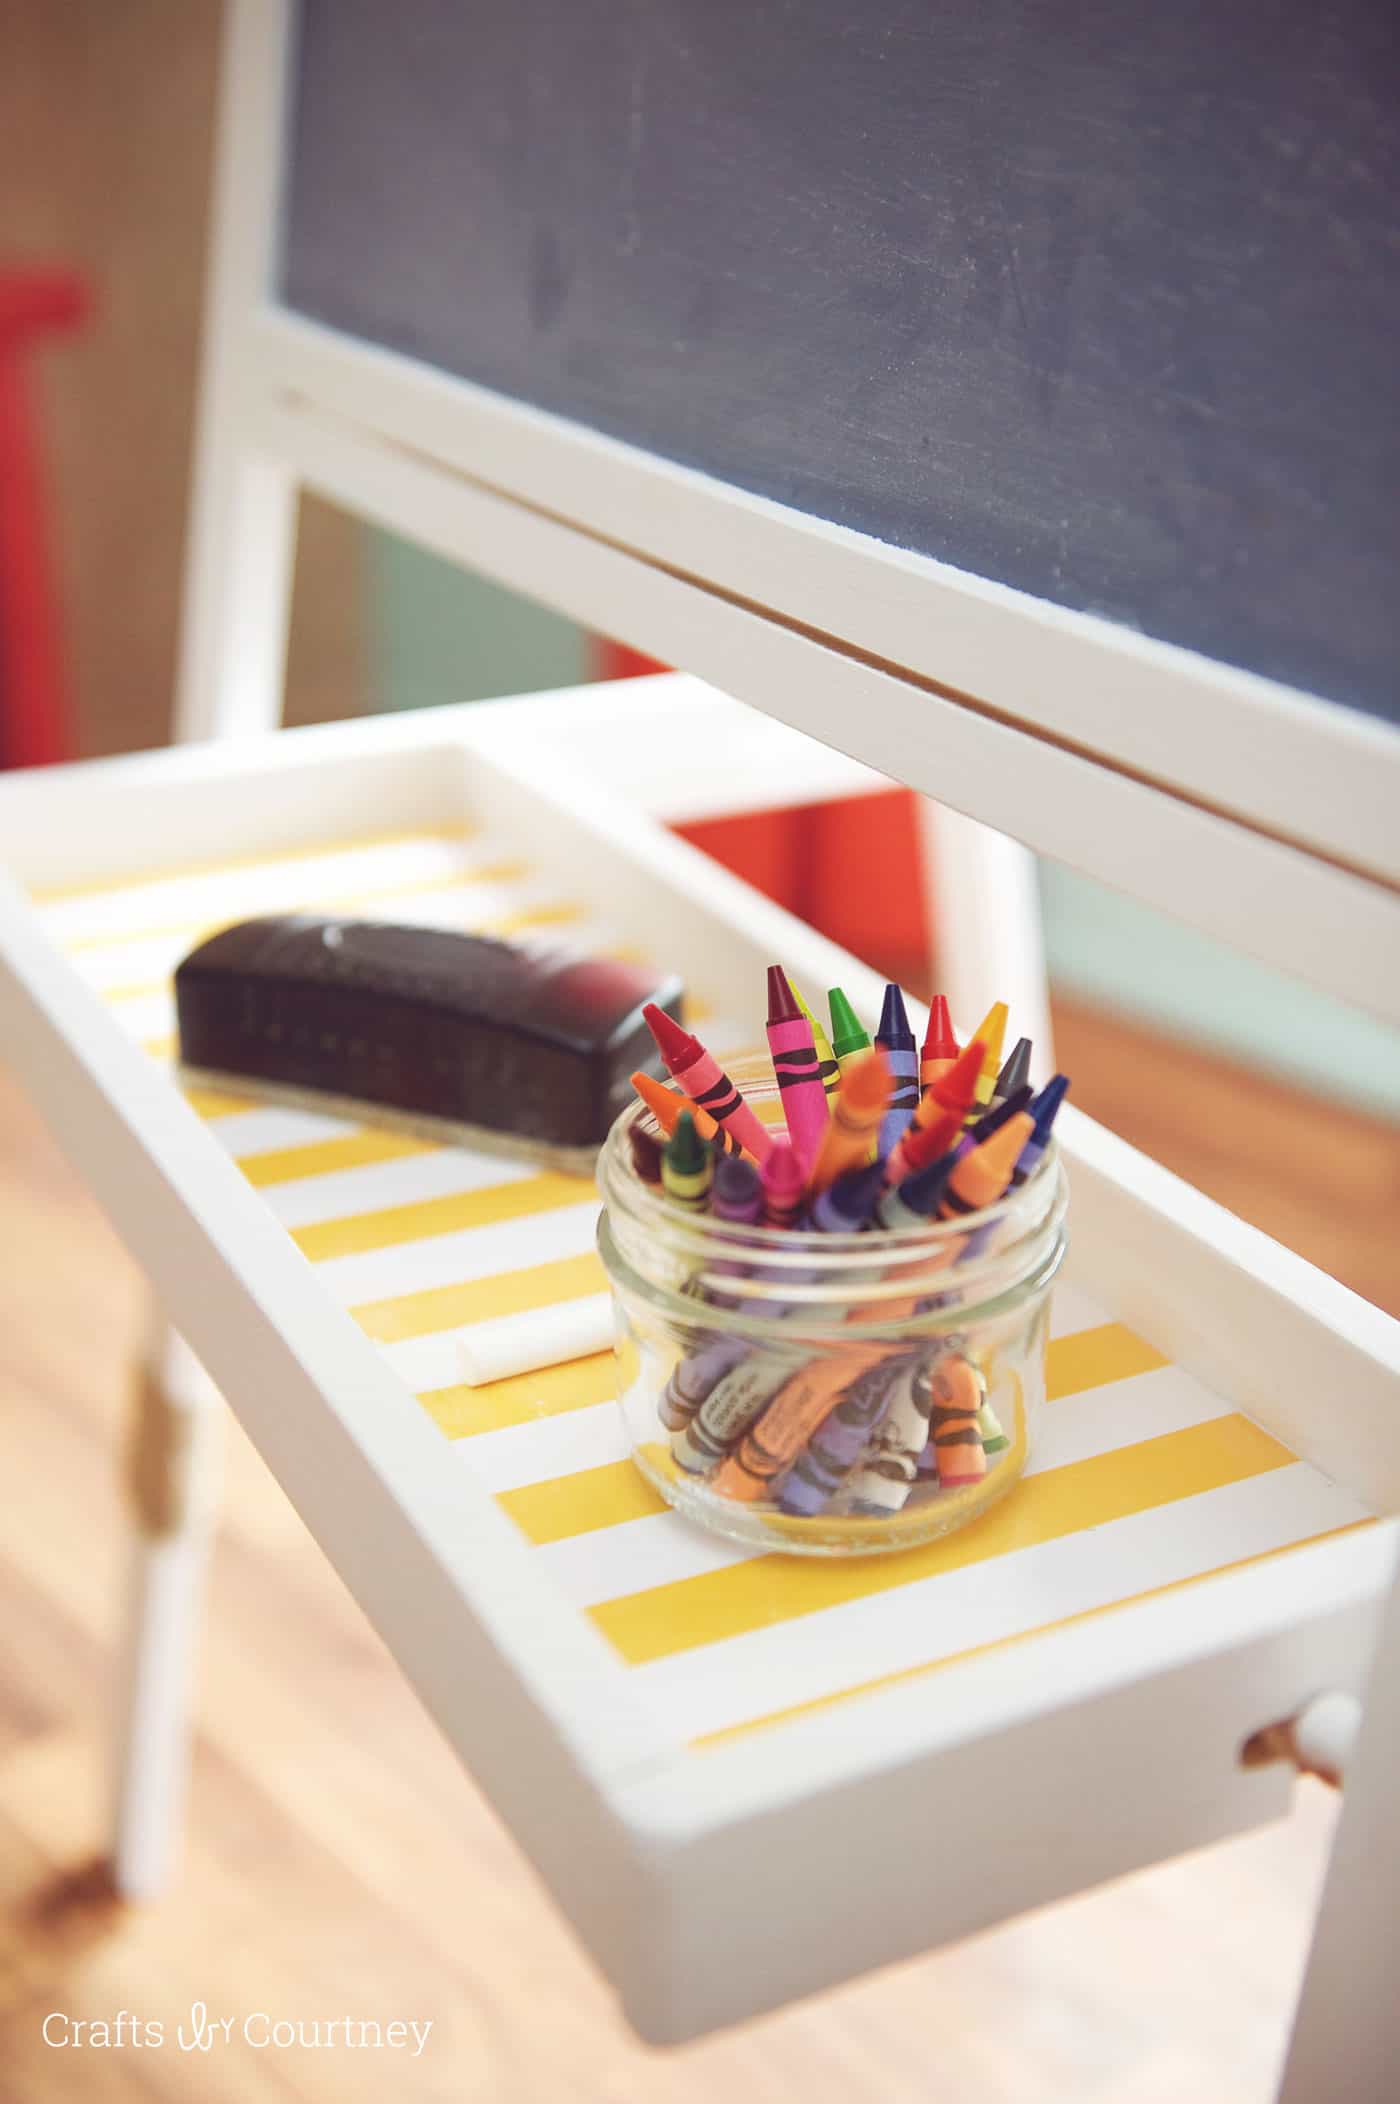
Step 5 – Line Tray with Paper and Mod Podge
I wanted to add a “pop” of color to the tray with some scrapbook paper. I cut the paper in half then sized it to fit the bottom of the tray.
I pulled out my “handy dandy” Furniture Matte Mod Podge. I added a layer to the bottom of the tray then gently placed my scrapbook paper on top. I rubbed out any of the bubbles.
Then I added some Mod Podge on top. Let it dry for 30 minutes.
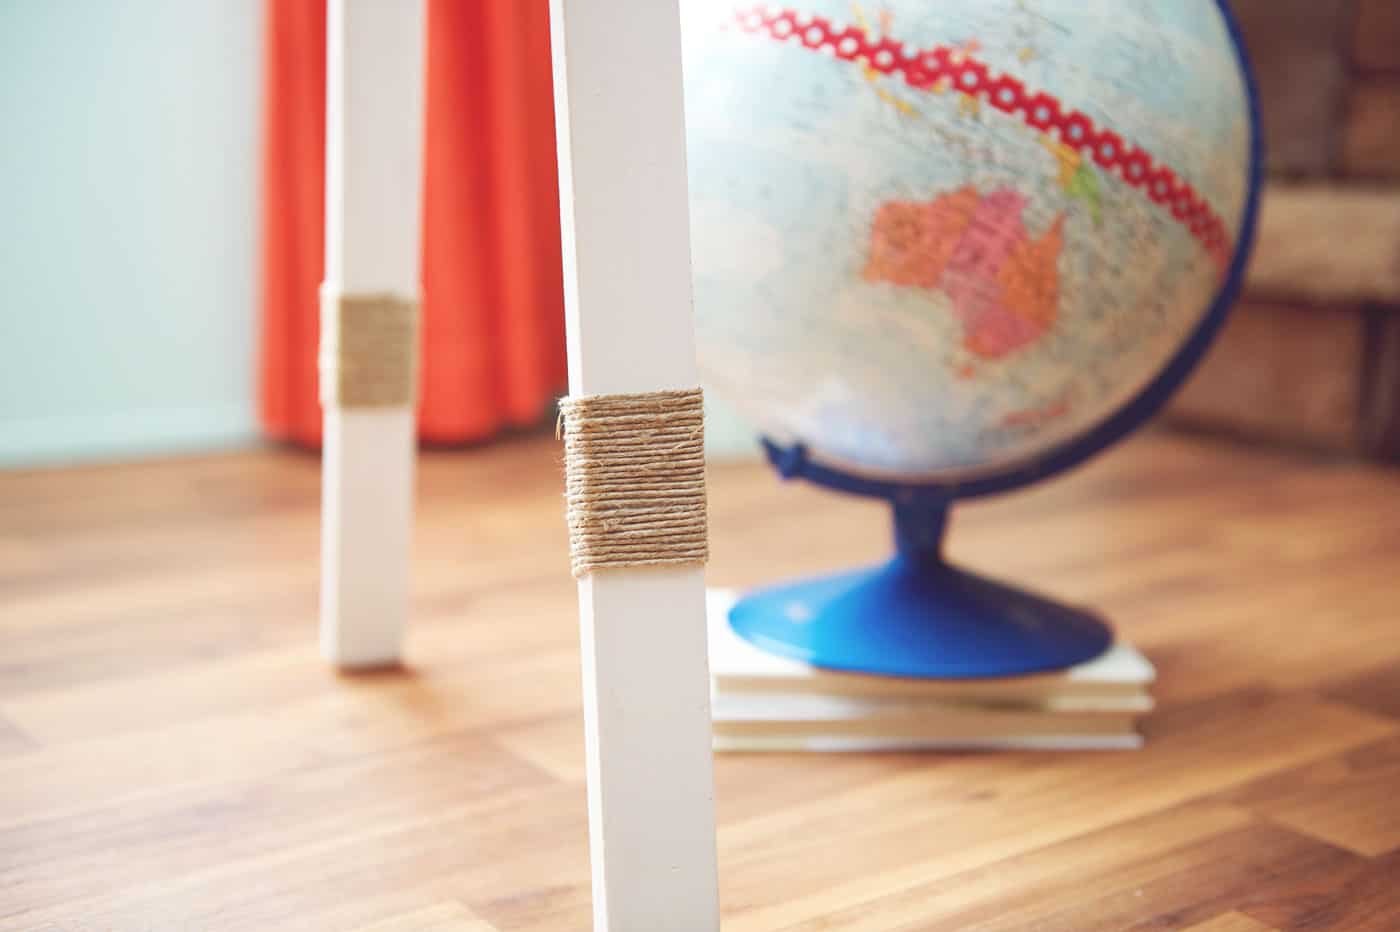
Step 6 – Add Your Rope
To add an extra touch to the easel I used some decorative rope. Rope is always a perfect nautical touch, right?!
I measured it out, then hot glued into place.
Finishing Touches
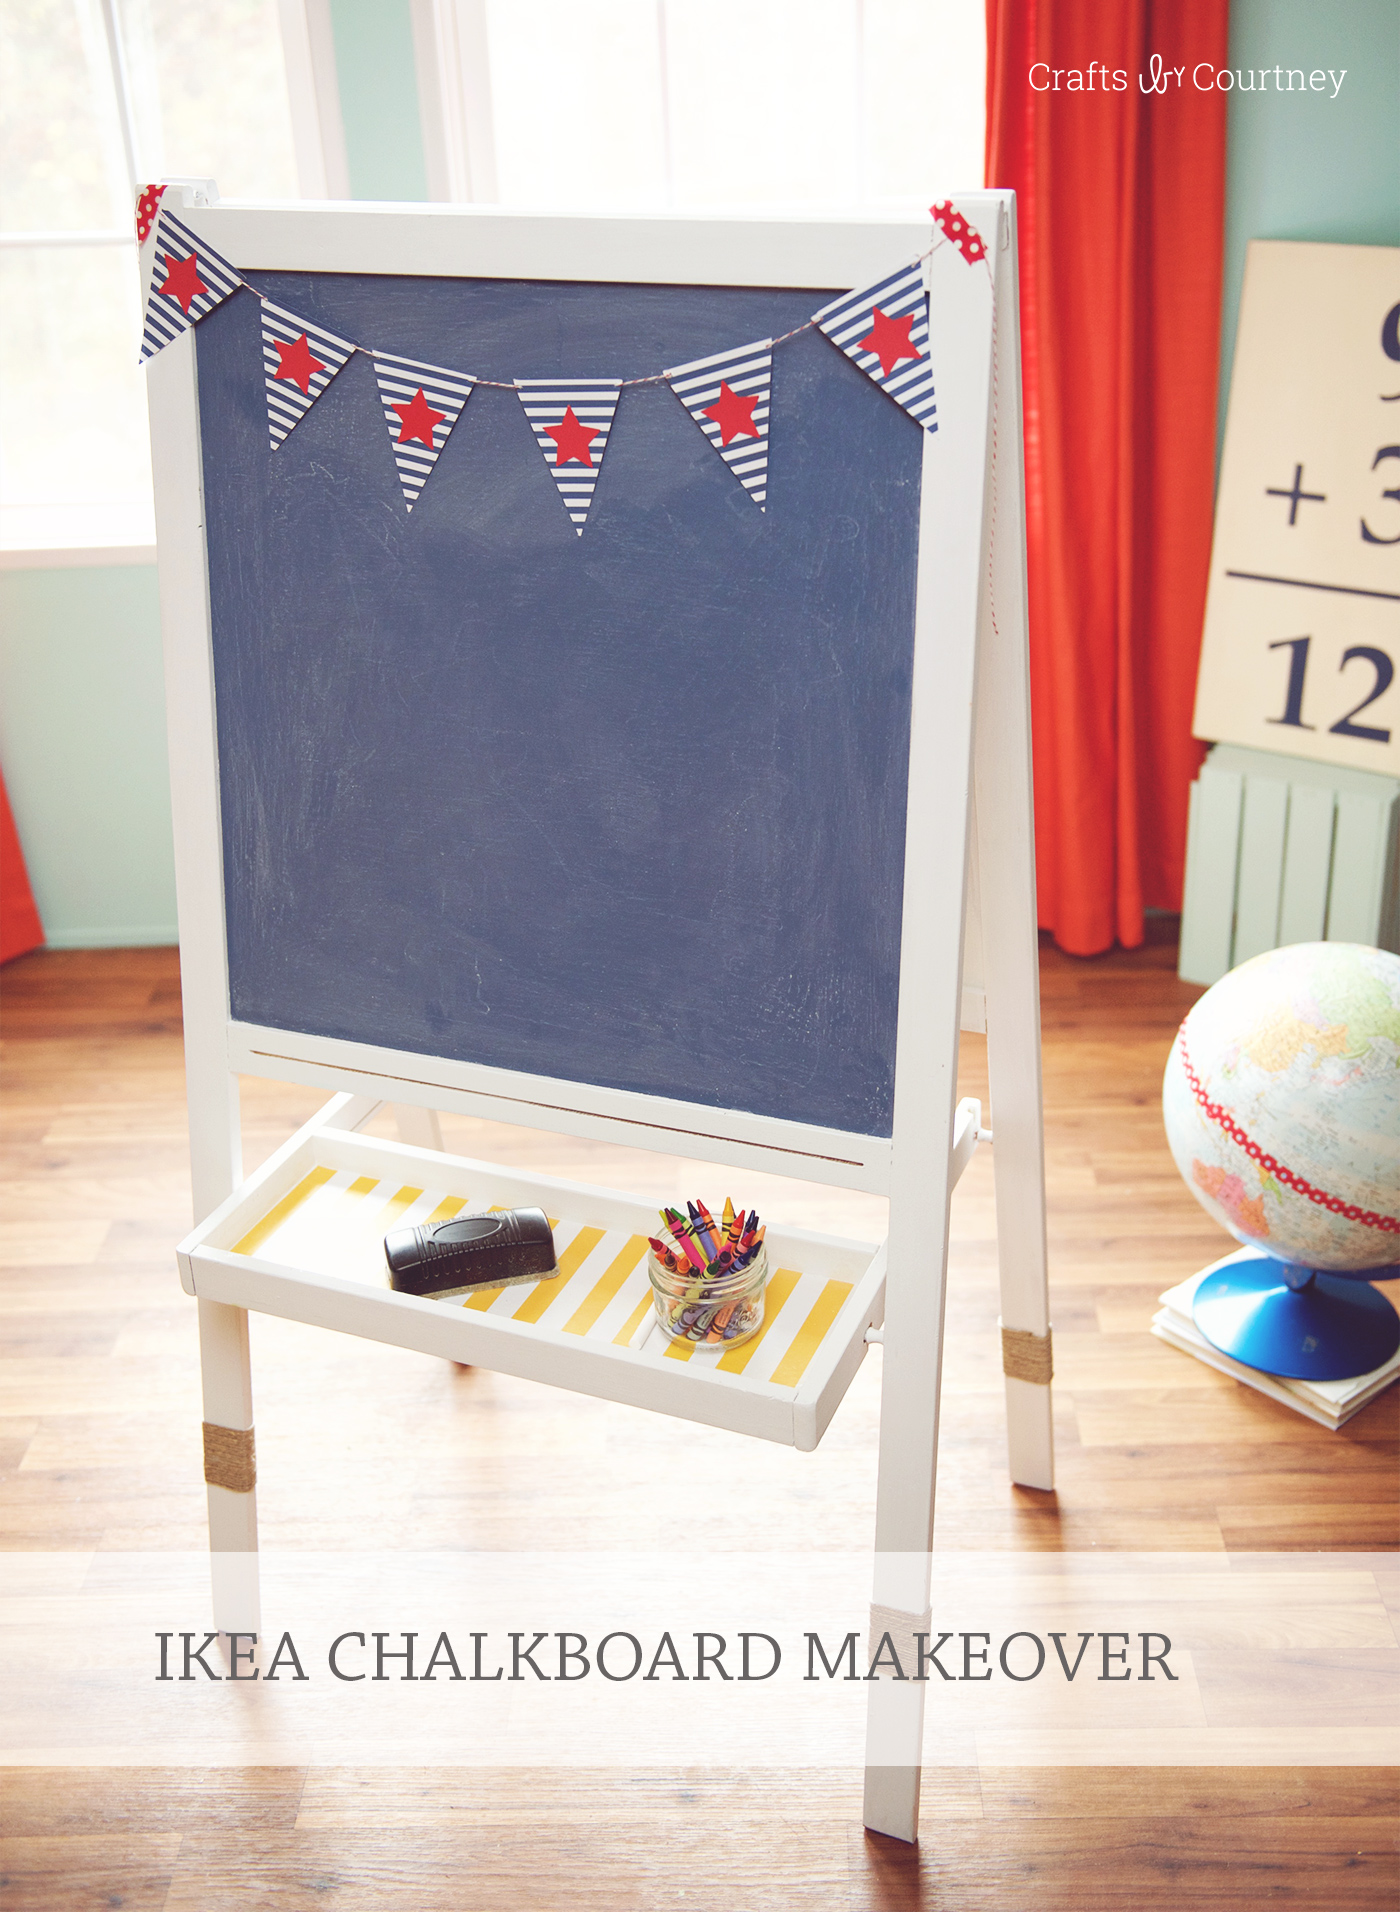
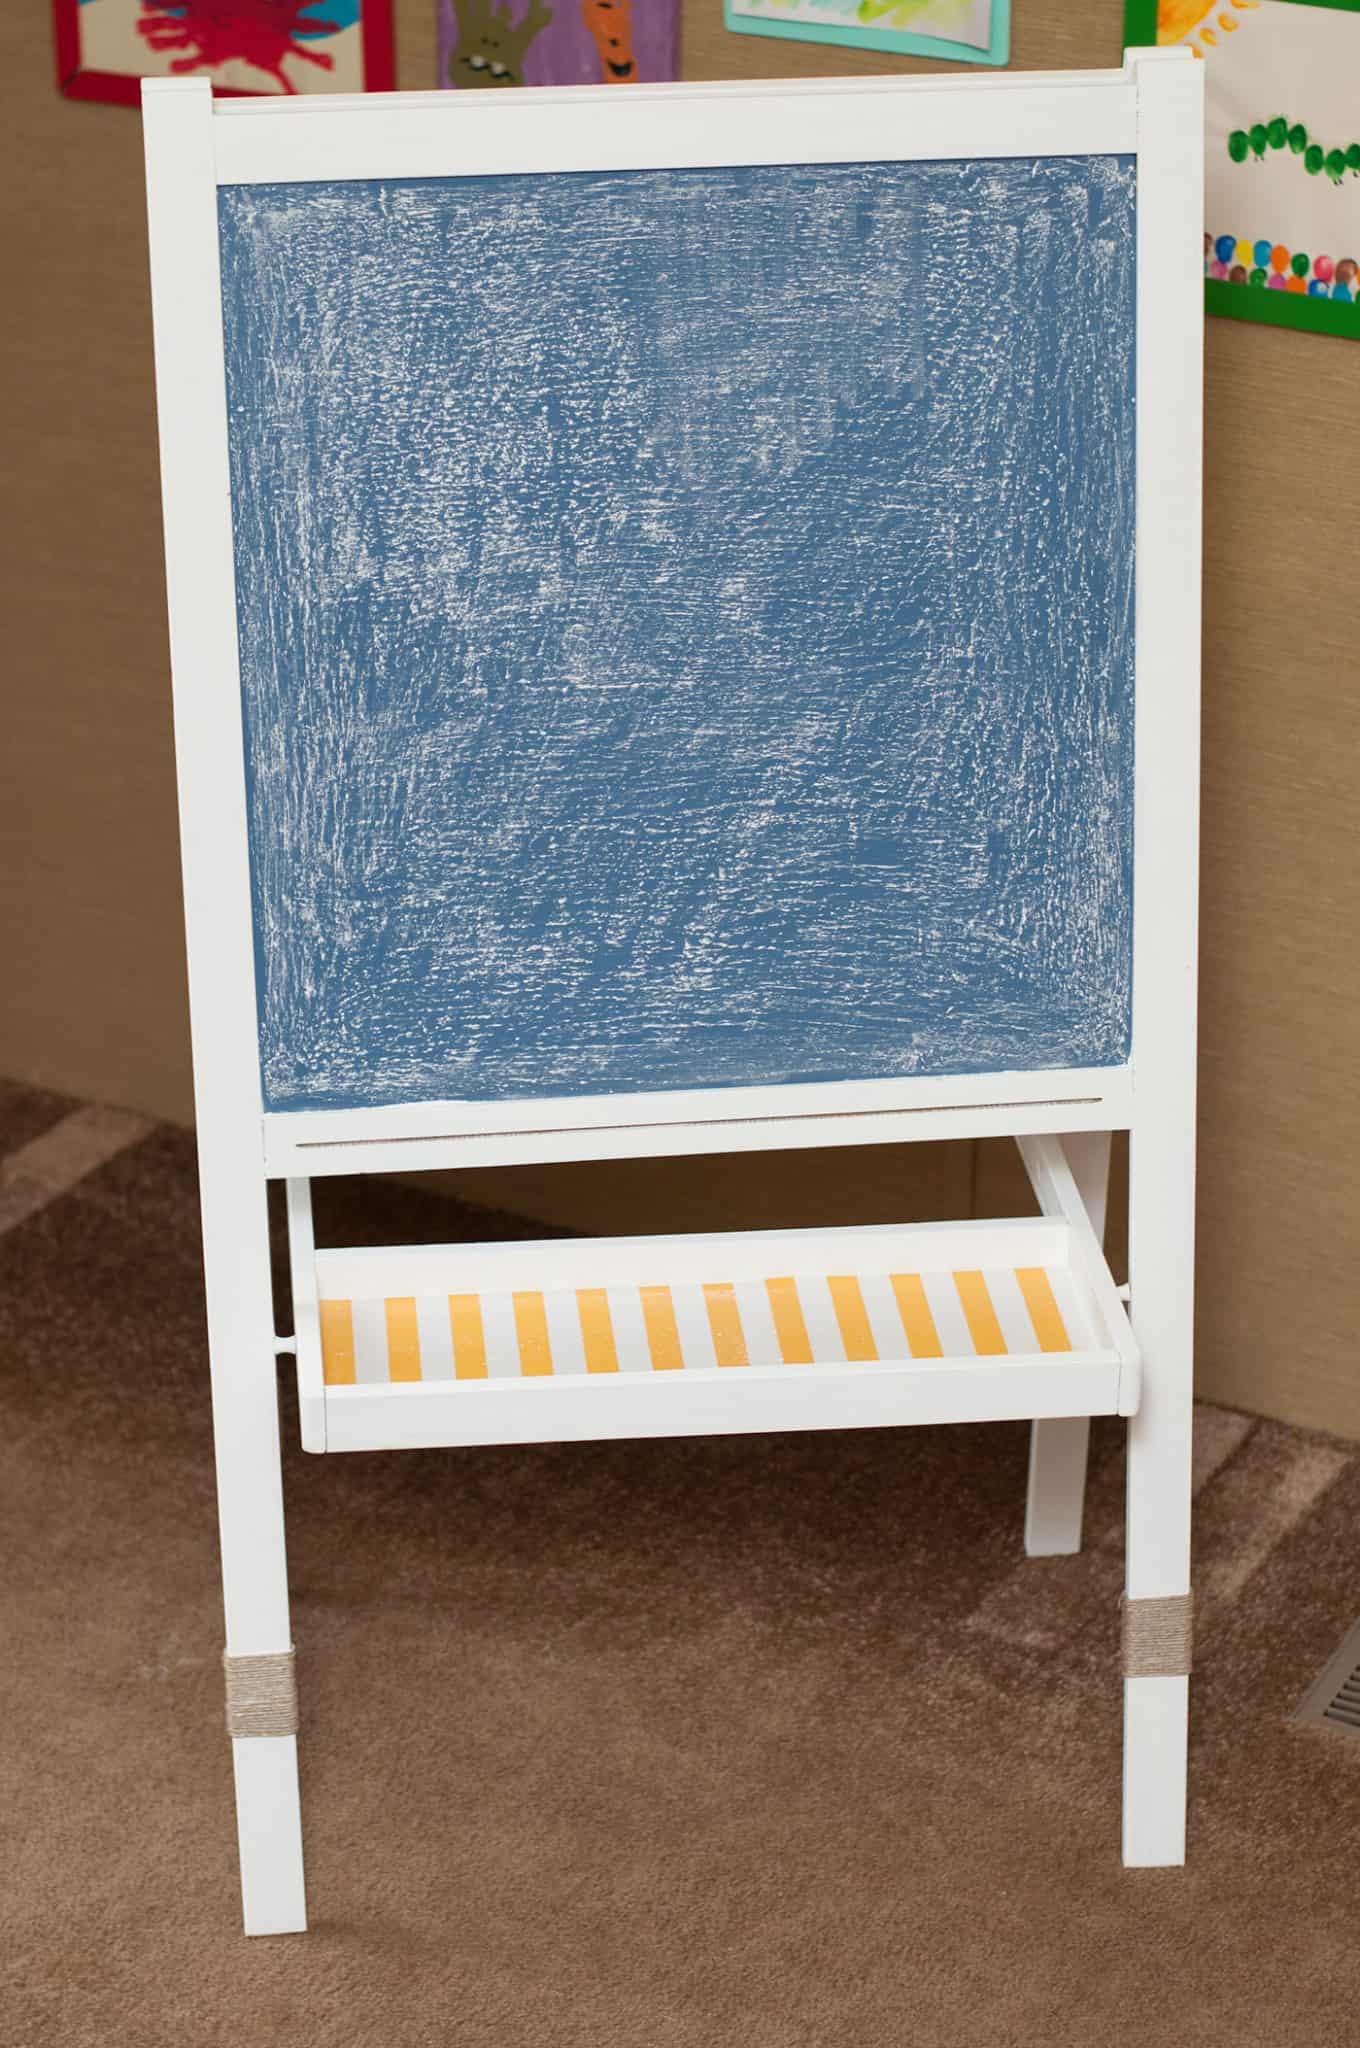
I’m SO happy with how my IKEA Easel makeover turned out. I made a cute little banner for it (I’ll see how long that lasts “-“) and now I’m ready to put it in my sons room!!
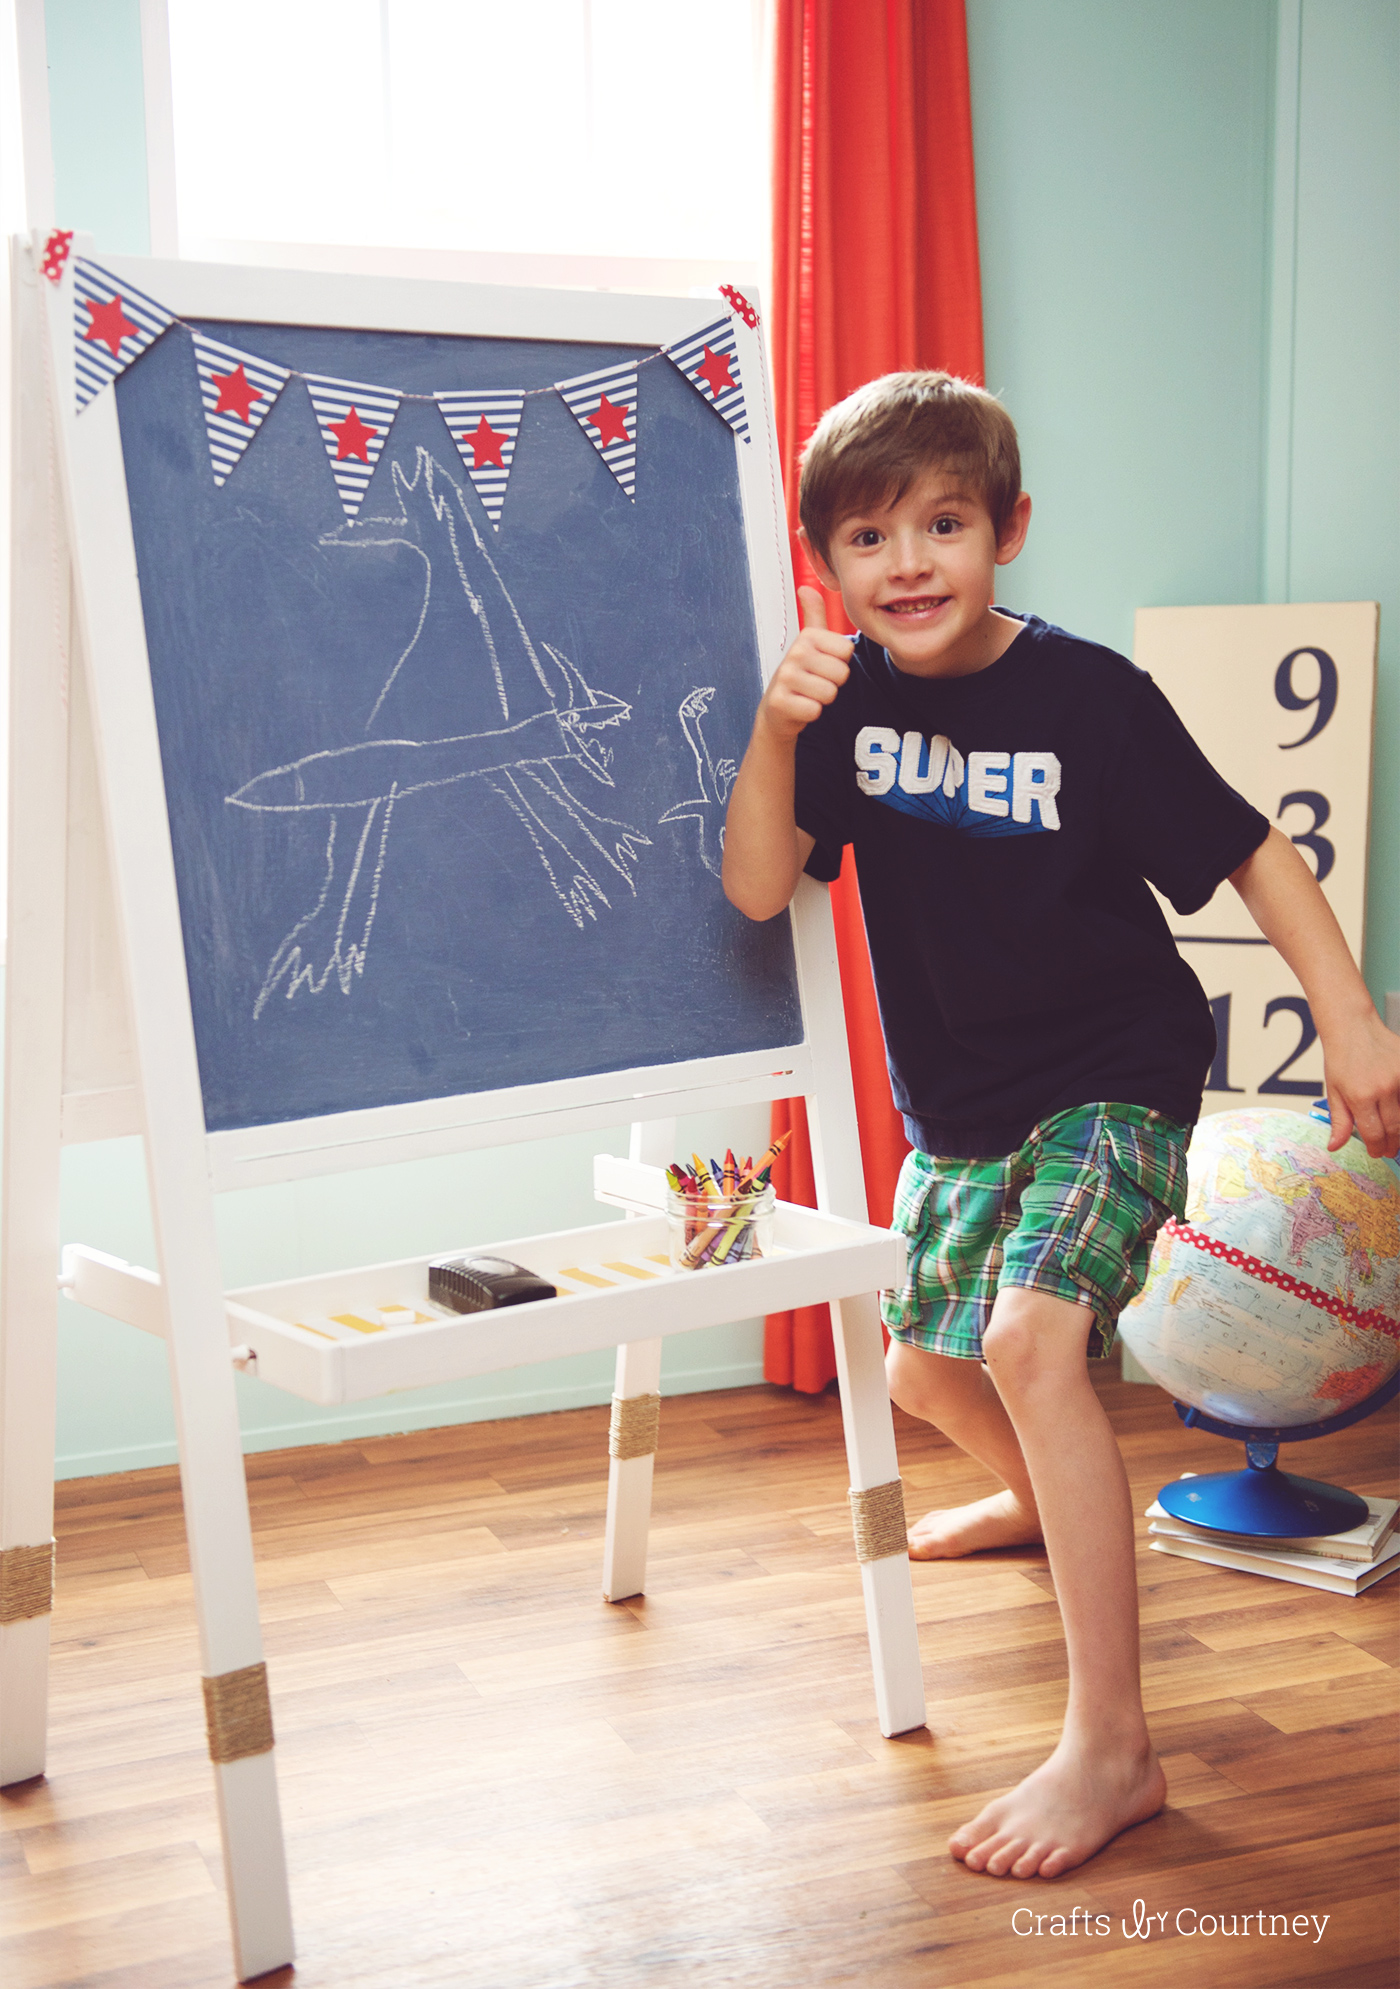
See how excited he is about his IKEA easel makeover!! Plus I think the chalkboard works better than before.
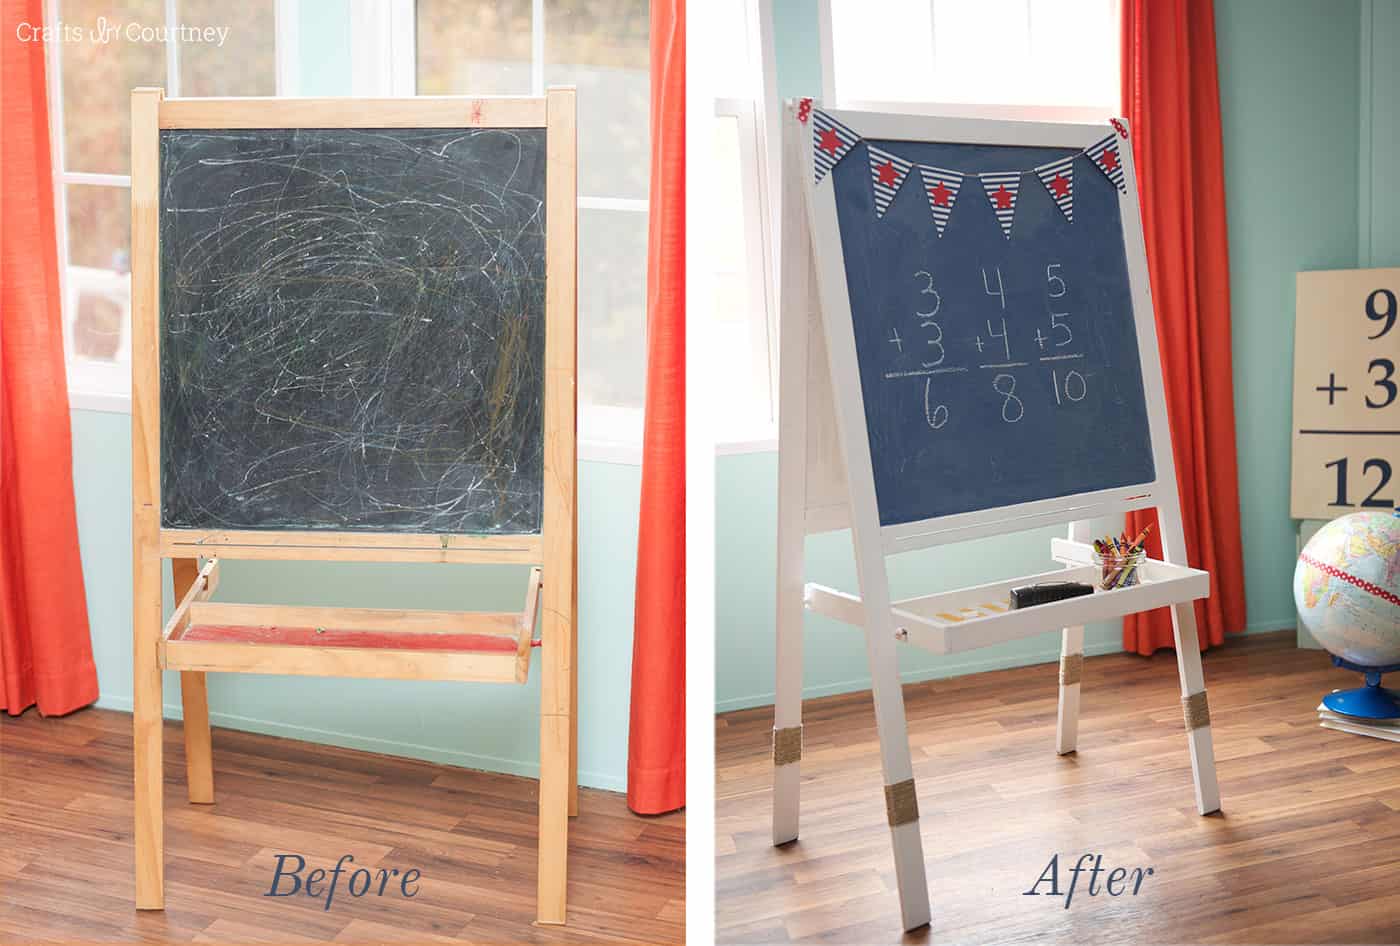
Love the before and after picture!
After I made this chalkboard over I went to a thrift store and found another one. So I’ll give that one a makeover for one of my other boys.
Just so everyone knows I LOVE this clear chalkboard topcoat. I plan on making a chalkboard for myself now. Maybe a light coral color for my office!
If you enjoyed this easel makeover, I’d love for you to check out these other projects:


Great Job! I don’t think I would’ve put crayons in your finished picture though, lol! Kinda funny!