
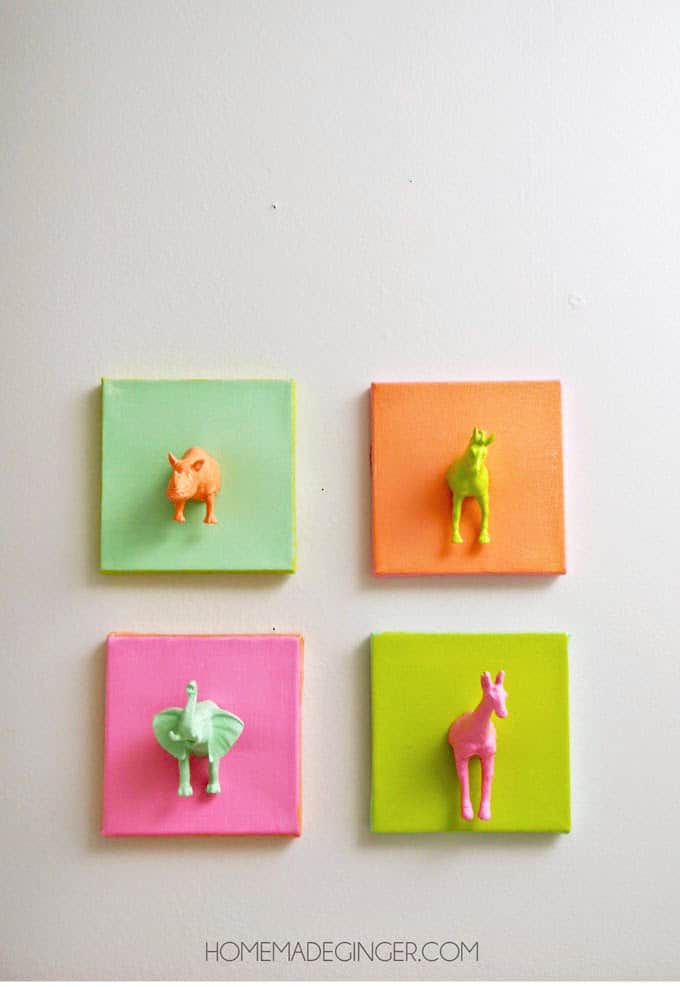
This cute DIY canvas art made with plastic animals is such a fun and easy idea! Mini canvas art like this is perfect for a nursery, kids’ room, or craft studio. You can complete this project in five simple steps.
Skills Required: Intermediate Beginner. It’s not difficult to paint canvases, but you are going to have to cut your mini animals. If you want children to do this project, they’ll need help. I’ll give you details on that below.
Hello everyone! This is Megan from Homemade Ginger and I’m so thrilled to be a contributor for Mod Podge Rocks. I have a really fun and playful mini canvas art project to share with you all today.
This home decor project uses plastic animals, which is pretty fun. This is one of those cute things you paint you’re going to LOVE making!
This DIY canvas art is perfect for a nursery or kid’s room and would also be a great gift idea. All the materials to make these canvases with mini animals were very inexpensive and I absolutely love how they turned out.
Mini Canvas Art
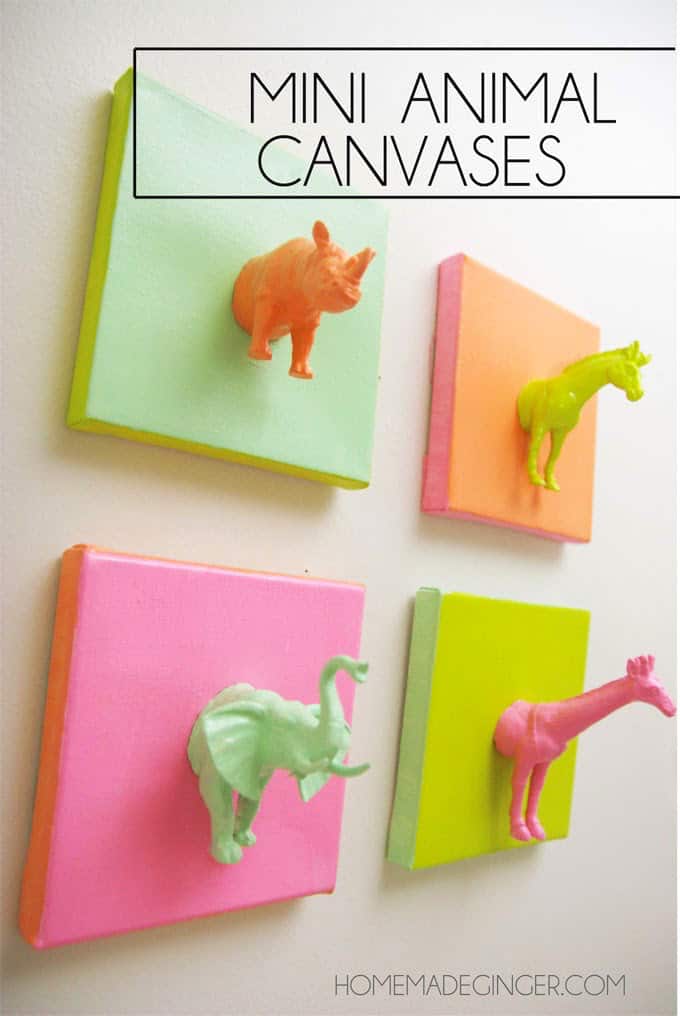
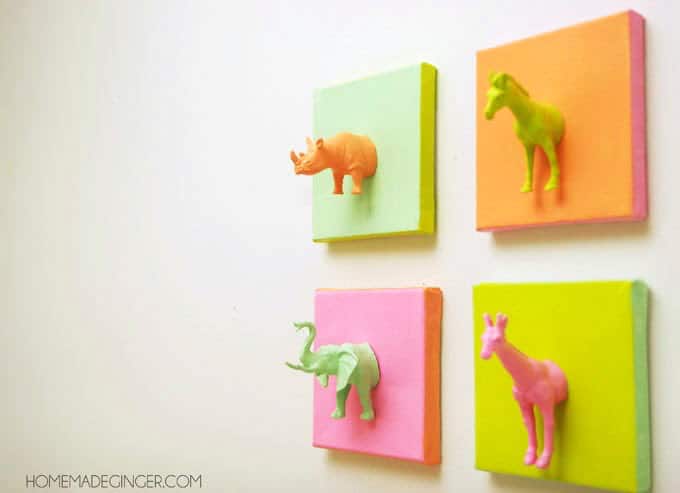
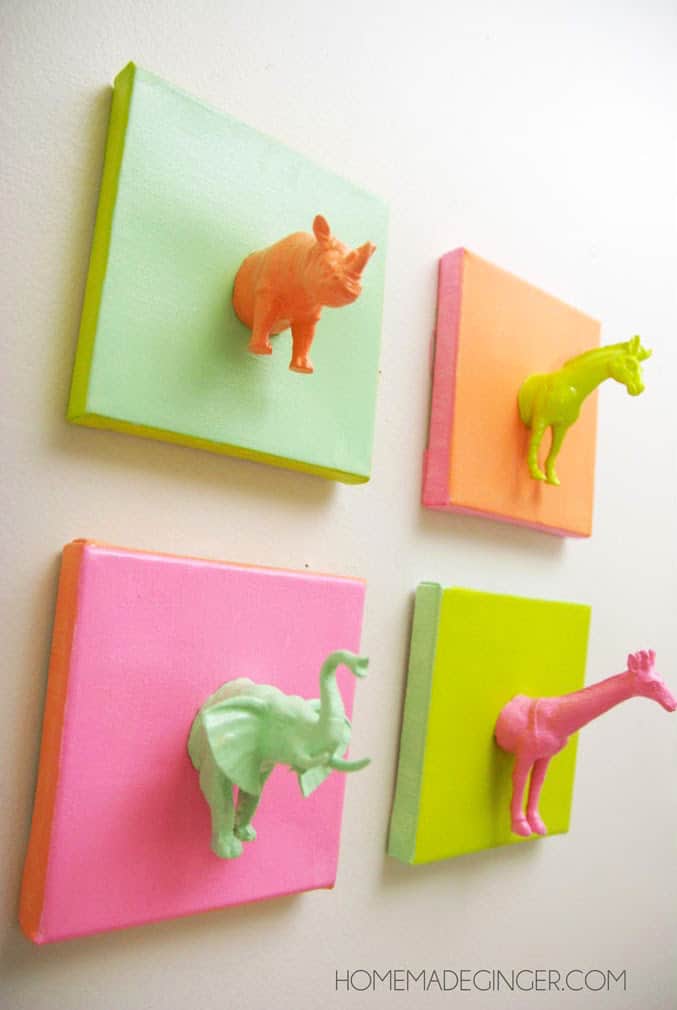
If you’re wondering what we mean by “mini” canvases, the ones used in this project were 5″ x 5″. You could probably go a little smaller if you wanted to (either 4″ square or 3″ square) but I wouldn’t recommend going much larger unless you are going to put multiple plastic animals on one canvas.
That’s always an option if you can’t find small canvases – get a larger canvas and line the animals out in a grid, kind of like specimen art. That would be a fun project as well!
Cutting Plastic Animals
I used a heat knife for this project, which cuts a lot of stuff very easily, including craft foam. I love mine and use it all the time!
If you don’t have a heat knife (and a lot of people don’t), then you’re going to have to rely on a little arm strength to cut the plastic animals.
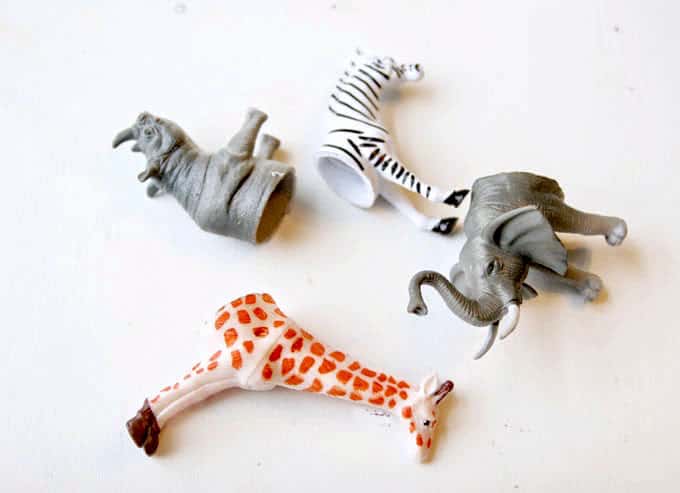
I recommend using a utility knife or hacksaw to cut through the animals! Most of them (including the ones I used) are hollow in the middle, so it’s not as hard as it looks.However, it does take a minute.
Please be careful and guard your fingers! This project isn’t worth losing a limb 😀
Gather These Supplies
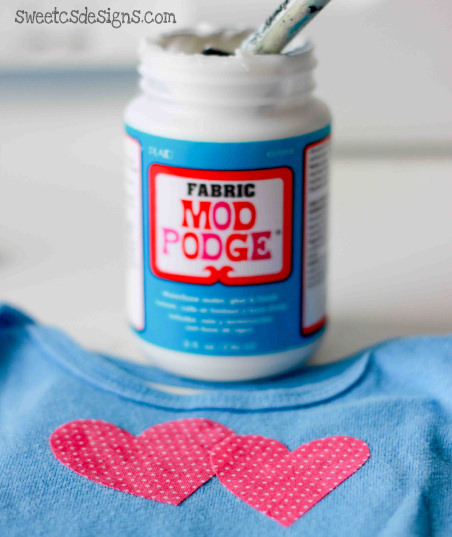
- Mod Podge Gloss
- Acrylic paint – white for priming; other colors of your choice for painting
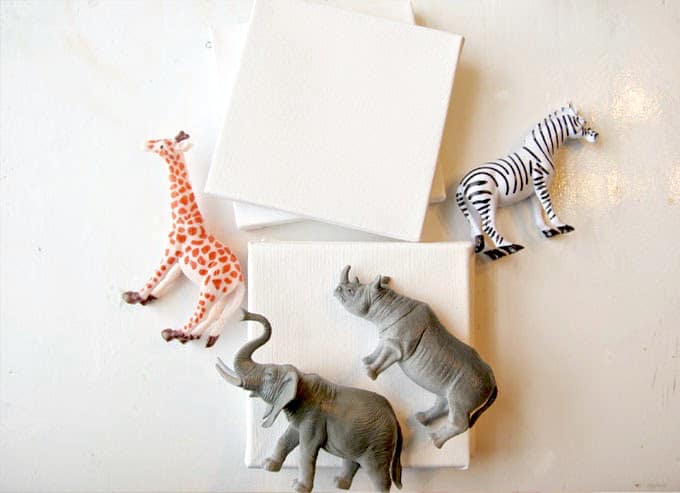
- Plastic Animals
- Canvases (I used 5 x 5 inch ones)
- Heat Knife or Utility Knife
- Super Glue
Step One – Cut the Animals
Begin by cutting your animals in half. I found mine at Dollar Tree. I was happy to find ones that were a slightly larger size than the typical tiny ones. To cut them in half, I used a heat knife. As I mentioned above, you can also use a utility knife or hacksaw.
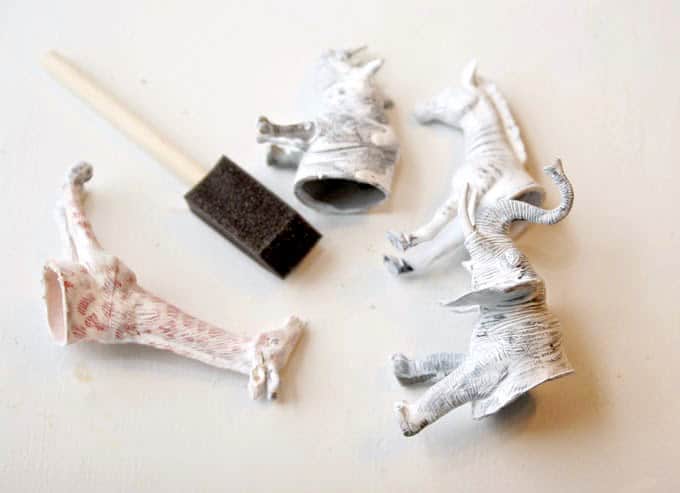
Step Two – Prime
This is probably optional, but I decided to paint a coat of white primer on my animals. I figured it would save me from a few coats of the acrylic paint down the road, and it did. It also makes the neon colors show up a bit brighter!
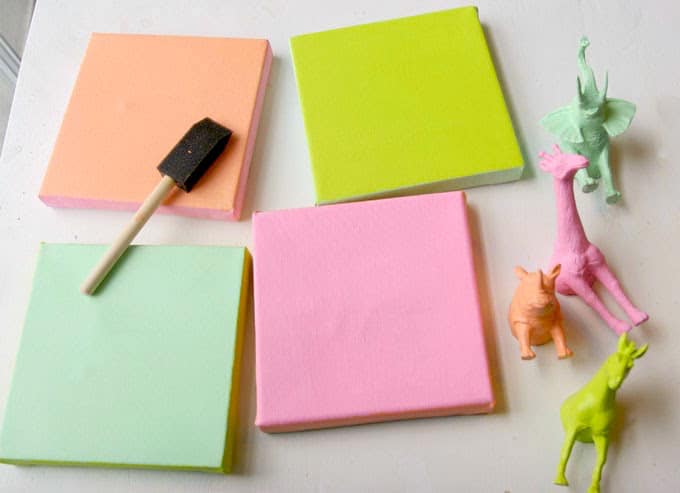
Step Three – Paint
Once the primer is dry, paint your animals and canvases with acrylic paint. My animals all required about three coats and the canvases needed about two coats. To make it go faster, I used a hair dryer in between coats to cut down on drying time!
This is where you can get fun and creative with your mini canvas art: use boy colors, light pastels for girls, or neons. Anything goes!
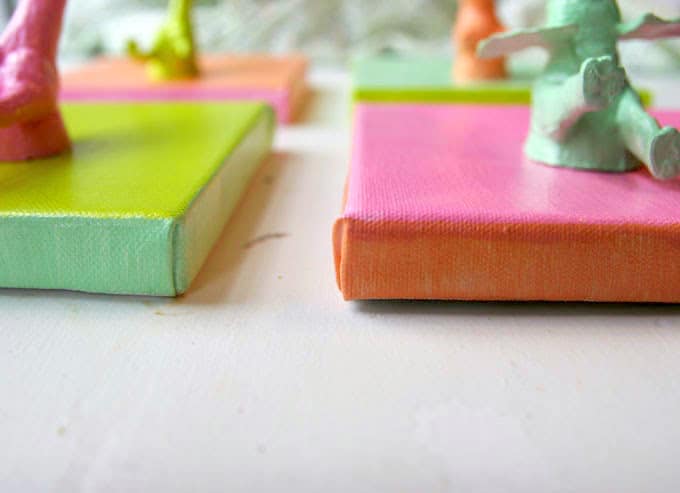
I painted the edges of the canvases in opposite (but coordinating) colors to make it even more interesting and fun!
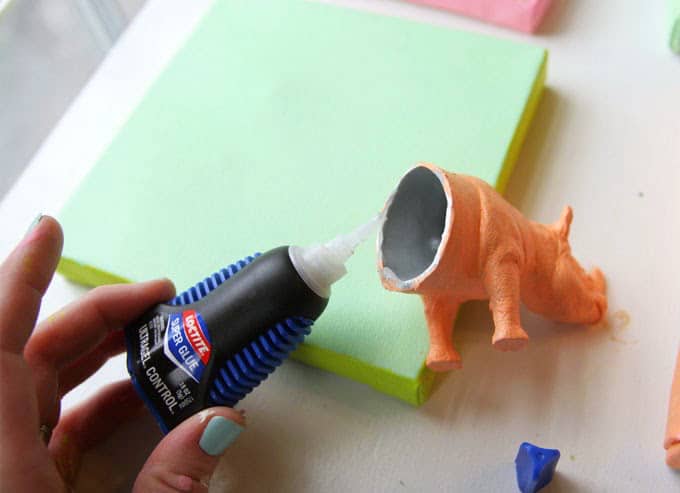
Step Four – Glue
Once everything is dry, use a small bead of super glue (or something else that provides a tight bond) to attach your plastic animals to the center of the canvases. I decided to give everything a coat of glossy Mod Podge so that the mini animals and canvases both had the same shiny finish.
You can skip this step, but it will seal the paint on the canvases, so I recommend it. If you don’t want the gloss look, feel free to go for matte or satin.
Step Five – Hang
Hang and enjoy! You can hang these with regular picture hooks, if you have the canvases that include the sawtooth hangers on the back (you can also put them on).
My personal choice for hanging is Command Picture Strips. Nothing shows, and then I can easily remove them from the wall at a later date if I want to change out the art.
I love how these animal canvases look in my daughter’s nursery. I’m considering using the back ends of the animals to add even more canvases.
I’m also glad that I painted the edges of my mini canvas art in different colors. It just adds a little something extra and looks fantastic in person.
I hope you will try out your own version of this DIY canvas art. What do you think – would you put mini animals on your wall? Let me know in the comments!

DIY Canvas Art
Equipment
- Heat Knife or Utility Knife
Materials
- Mod Podge Gloss
- Acrylic Paint white for priming; other colors of your choice for painting
- 4 Plastic Animals
- 4 Canvas(es) I used 5 x 5 inch ones
- Super Glue
Video
Instructions
- Begin by cutting the animals in half. To cut them in half, I used a heat knife. You can also use a utility knife or hacksaw.
- Paint a coat of white primer on the animals. Let dry.
- Paint the animals and canvases with acrylic paint. The animals required about three coats and the canvases needed about two coats. For interest, paint the edges of the canvas with different colors than the front. Let dry.
- Once everything is dry, use a small bead of super glue (or something else that provides a tight bond) to attach the plastic animals to the center of the canvases.
- Add a coat of Mod Podge in the finish that you like – Gloss, Matte, or Satin. Let dry.
- Hang and enjoy.
If you love this canvas art project, you might also love these other ideas for decorating your walls:


I like every project you demonstrate on the show. The way you look talk and work. I like the product I have used it . I want to bay if you sell it. Thank you for new ideas that we learn every time. See you more Good lock.
I think I will use this animal idea for bookends in my craft room.
I have use modgepodge on canvas many times, but never done this project. Can’t wait to do this one
recent days i search for Mod Podge and washi tape and today i found this website and i love this so much. I hv 1 year baby and i want to do some handmade things to decorate my room by pics of my baby. But i also found that these product is rather expensive and difficult to buy here in Vietnam. And i get stuck
I absolutely love this! I really need to do something like this for my home because its so fun!
These are so cute! I LOVE the idea of using the back ends too…the thought of playing a matching game with a little one is too sweet!