
Looking for a way to personalize children’s furniture? This kids decoupage chair is easy to make with your favorite colors of paint, paper and Mod Podge.
Confession. I love wood balls. Especially ones with polka dots. Before you start laughing, realize that I’m very serious – that is why I used them in copious amounts on this kids’ chair.
My friends Christopher and Holli have taught me a lot about “blinging” out projects, and they introduced me to wood balls.
I think one of my biggest challenges as a crafter has always been how to finish things, because my style always leans toward simple. Simple is good, but sometimes you need a little added flair.
And in comes this kids’ decoupage chair. Learn how to make this wood craft below.
PS – I know my name is on the chair, but don’t worry, I won’t sit on it. It’s a small chair and I don’t want splinters in my bum from breaking it!
Kids’ Decoupage Chair
Gather These Supplies
- Wood chair, unfinished – I got mine from Jo-Ann
- Scrapbook paper – three sheets (plus any embellishments)
- FolkArt Paint – Greenscape, Terra Cotta, Coffee Bean, Ivory White
- Mod Podge Hard Coat
- Wood balls, unfinished – two large and 18 small
- Craft Glue
- Paint brushes of various sizes
- X-Acto knife and mat
- Ruler
- Pen or pencil

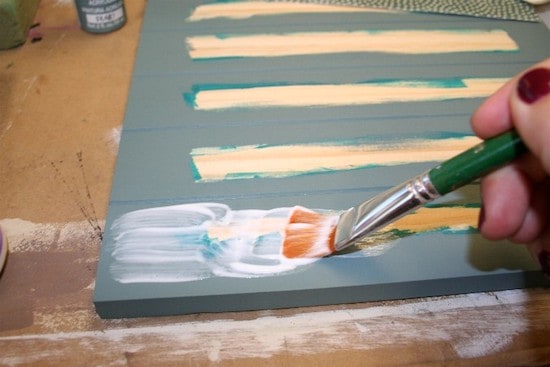
The first thing you should do is assemble your chair and paint it. I hope you aren’t like me, forgetting where you put the screws for the seat.
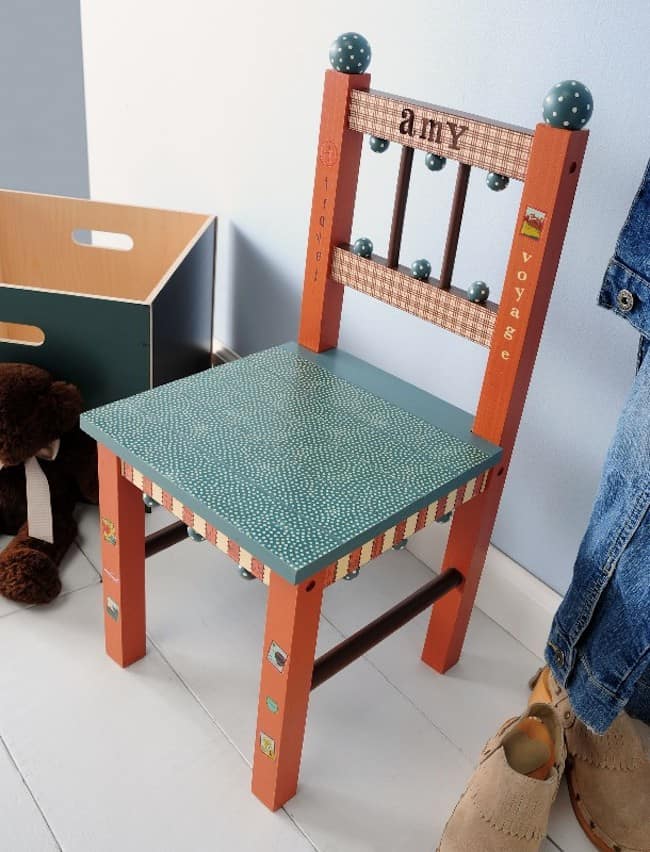
It’s okay – I was able to paint the seat separately. Paint the chair legs Terra Cotta, the crossbars Coffee Bean and the seat Greenscape. Check out the project photo for reference.
Your dogs might get bored waiting for you to finish painting. It’s a condition called “lack of snugglitis.”
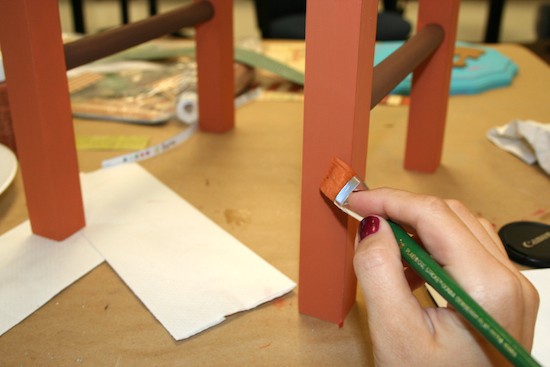
Remember to give your chair enough coats of paint. It took me two to cover the entire chair. Allow to dry.
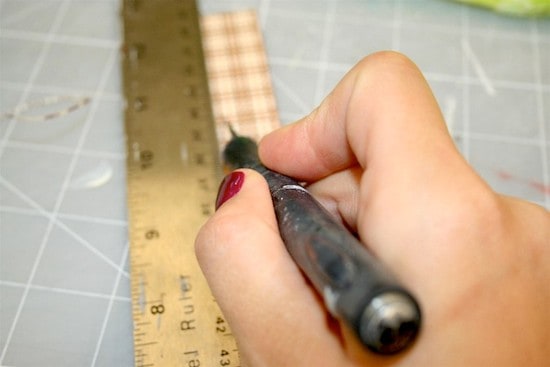
While you are waiting for the chair to dry, measure and cut out your papers. I didn’t use any templates, I simply measured the areas I wanted to cover with paper and cut to fit.
I covered the top and bottom slats on the chair back, the five seat slats and then the slats underneath the seat.
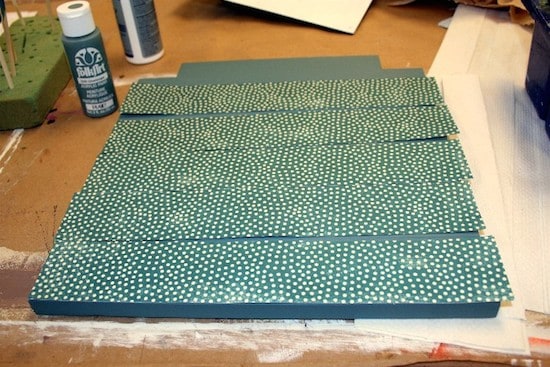
This is showing you how I laid out the papers to make sure that they would fit. Do any trimming that’s necessary.
Time for the Mod Podge action to begin! Working one piece at a time, spread a medium layer of Mod Podge over the slat of the chair seat.
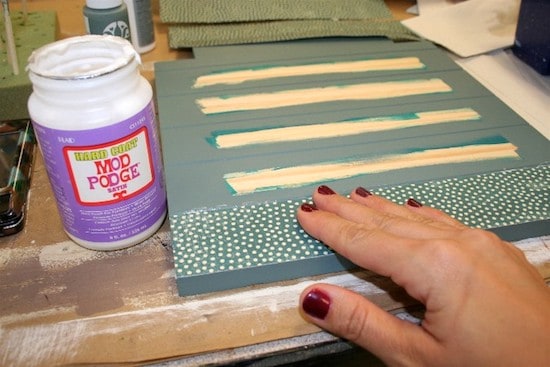
Smooth your paper down with your fingers – remember to smooth, smooth, smooth! Keep smoothing until all of the air bubbles are gone. If any Mod Podge comes out the sides, wipe it away with your brush.
It’s better to use too much Mod Podge rather than not enough. Repeat with every piece of paper that you cut. Allow everything to dry for at least 15 – 20 minutes.
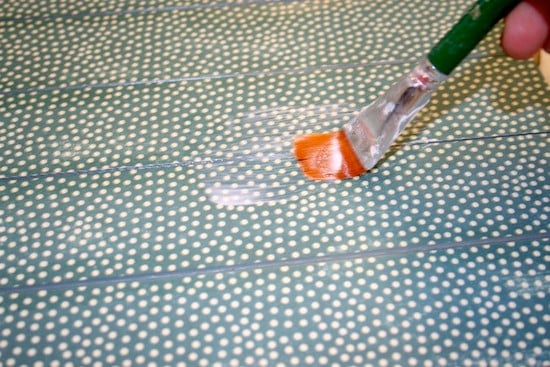
Go back and coat the top of your papers with Mod Podge. At this time you can coat the entire chair with Mod Podge.
I recommend working in stages, painting with Mod Podge and allowing to dry before you move onto another area. Coat the chair one complete time, allow to dry and then do it again.
At this stage you may be better off allowing it to dry overnight. It should at least be dry to the touch.
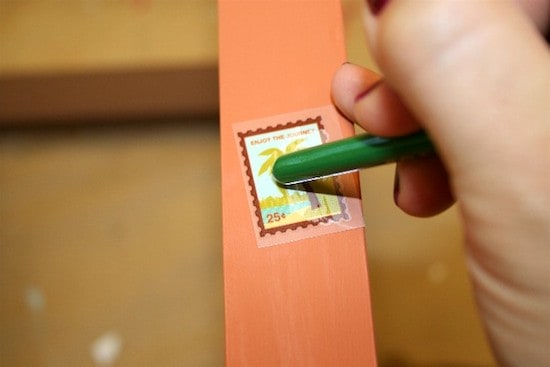
Apply rubons and stickers to your decoupage chair as desired. I added rubons to the front of my chair in a random pattern, as you can see in the finished photo.
Use the bottom of your paint brush to attach the rubons – it works well. I also attached stickers spelling my name on the chair back so you could see what they look like. I probably will change the name when I have a cute little child to give it to!
Give the rubons a coat of Mod Podge to seal them. You don’t want them to scrape off with handling. Allow to dry.

I realized I was almost done – but that the chair needed something. I know, I know. Polka spotted balls! What little child’s chair doesn’t need balls with polka dots? But you already knew that. It took me a moment to realize it.
I made this handy-dandy contraption for my ball painting. It’s a Styrofoam block with small dowels stuck into it. You can easily paint your wood balls without making a mess on your hands.
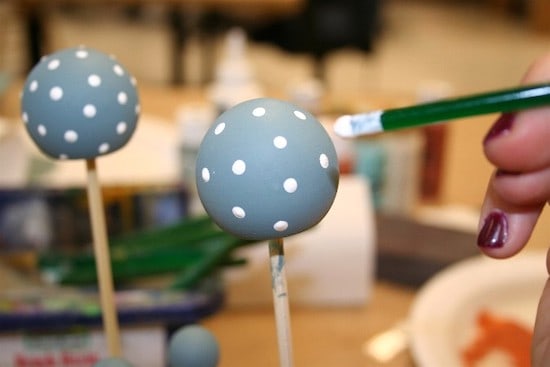
The polka dot part of the balls is so easy. Just use the end of your paint brush, dip it into the Ivory White and touch to the wood ball.
Repeat with all of the balls, making random polka dots here and there. Allow them to dry. Seal them with Mod Podge and allow to dry.
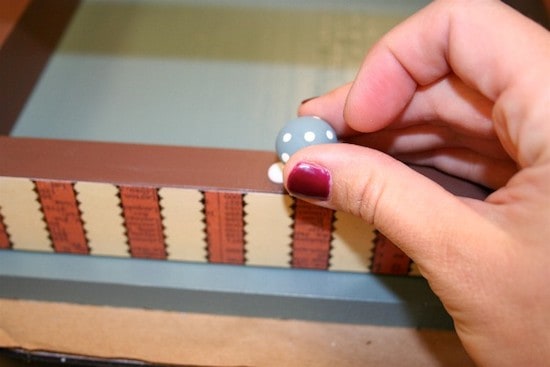
As you can see, I finally found the seat screws and attached it so that someone could sit in it. It is a chair, after all.
Glue the balls onto the chair – use the two large on the top back of the chair, six small on the chair back and then spread the other 12 around under the seat as shown. Allow your decoupage chair to sit for 24 hours by itself before using.
If you enjoyed this decoupage chair, I’d love for you to check out these other project ideas:


Great tutorial! thanks for sharing.
This is FABULOUS! As I search for the perfect table and chair set for my girls playroom I am inspired to do up the chairs now when I get some!
Oh! How cute!! Great job!! 🙂