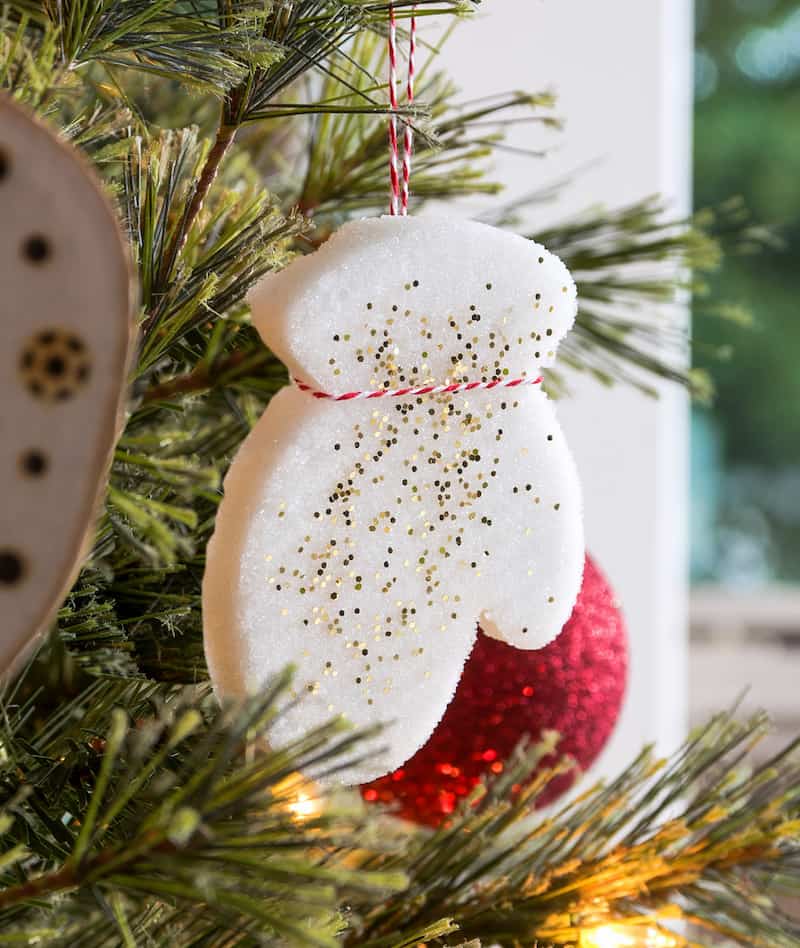
Learn how to make these sugar ornaments for Christmas – using things you already have on hand! Easy, inexpensive, and kids will love them.
It’s nearly winter break here, and that means kids will out of school for a few weeks to enjoy Christmas and the holidays around it.
My mom and I have been doing a lot of crafts with my niece trying to keep her busy. We’ve been making a lot of handmade Christmas ornaments so that she can decorate her tree at home (which apparently through the eyes of a five year old needs more ornaments).
One idea we tried recently uses a common household ingredient: sugar. This project is from Dixie Crystals Kids in the Kitchen and I have to admit, I was skeptical at first.
I didn’t think these sugar ornaments would hold together and look so cute. But boy, was I surprised! We had such fun making them and there’s really no limit to the shapes you can do (we chose a mitten as you can see).
I do have to answer one question you might have: where is the Mod Podge? You’re going to use your favorite Mod Podge formula to seal the ornaments.

That way the sugar doesn’t disintegrate and you can use them year after year! I recommend using the Gloss formula to coat these with the glitter – or try Mod Podge Sparkle if you want to give your project a seasonal flair. Learn how to make this Christmas craft for kids below!
Sugar Ornaments
Gather These Supplies
- 1 1/2 cups Dixie Crystals Extra Fine Granulated Sugar
- 3 teaspoons water
- Food coloring (if you want – otherwise they’ll be white like mine)
- Cookie cutters
- 2 tablespoons glitter
- Mod Podge Gloss or Sparkle
- Twine to hang the ornament

Pour the sugar into a large bowl. In a separate bowl, combine the water and food coloring (this step is optional).
Pour the mixture into the sugar bowl and mix until combined.

It should feel like wet sand. If it’s too dry, add 1/2 teaspoon of water at a time. If it’s too wet, add sugar by the tablespoon until the texture is right.
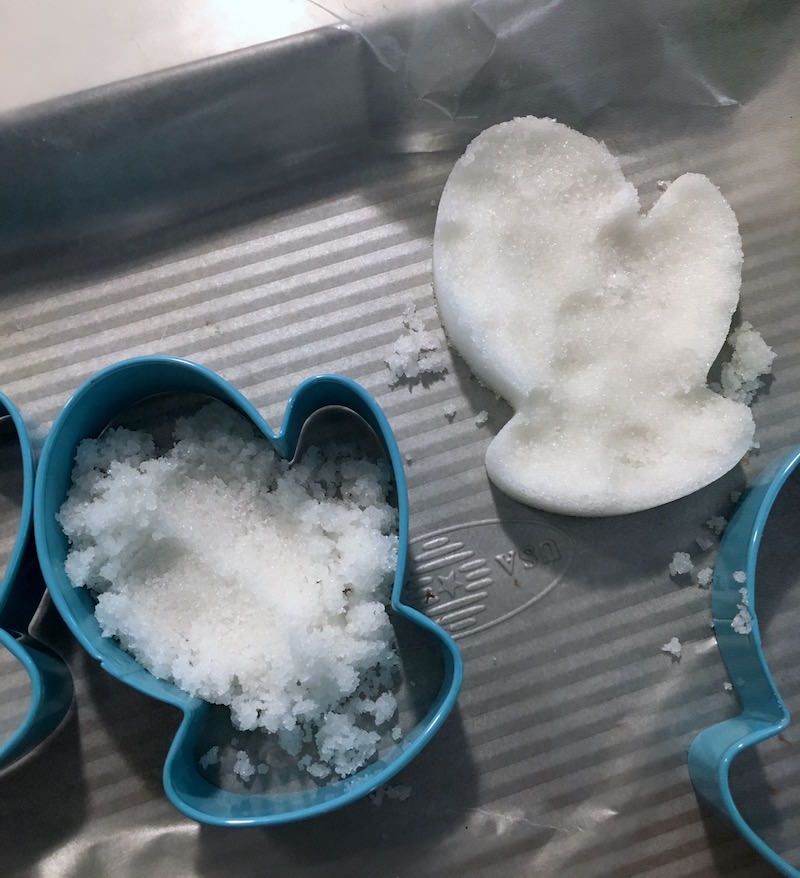
Lay out a piece of wax paper and pack the wet sugar mixture tightly into a cookie cutter.
Immediately push it out of the mold (carefully) onto the wax paper. Sprinkle glitter on top.
Let dry for about an hour before moving to a drying rack. Dry for about 24 hours, until completely dry.

Add ribbon to the top with a hot glue gun OR tie around the ornament as I did above (if you can). Then hang on your Christmas tree!
I recommend storing these sugar ornaments in a sealed plastic bag when not in use.
Looking for more fun kids’ Christmas ornaments to make? We have some cute fabric decoupage ornaments. I’d also love for you to try the following holiday projects!




What sweet idea! TFS!
This is adorable, I can’t wait to try it! 🙂