
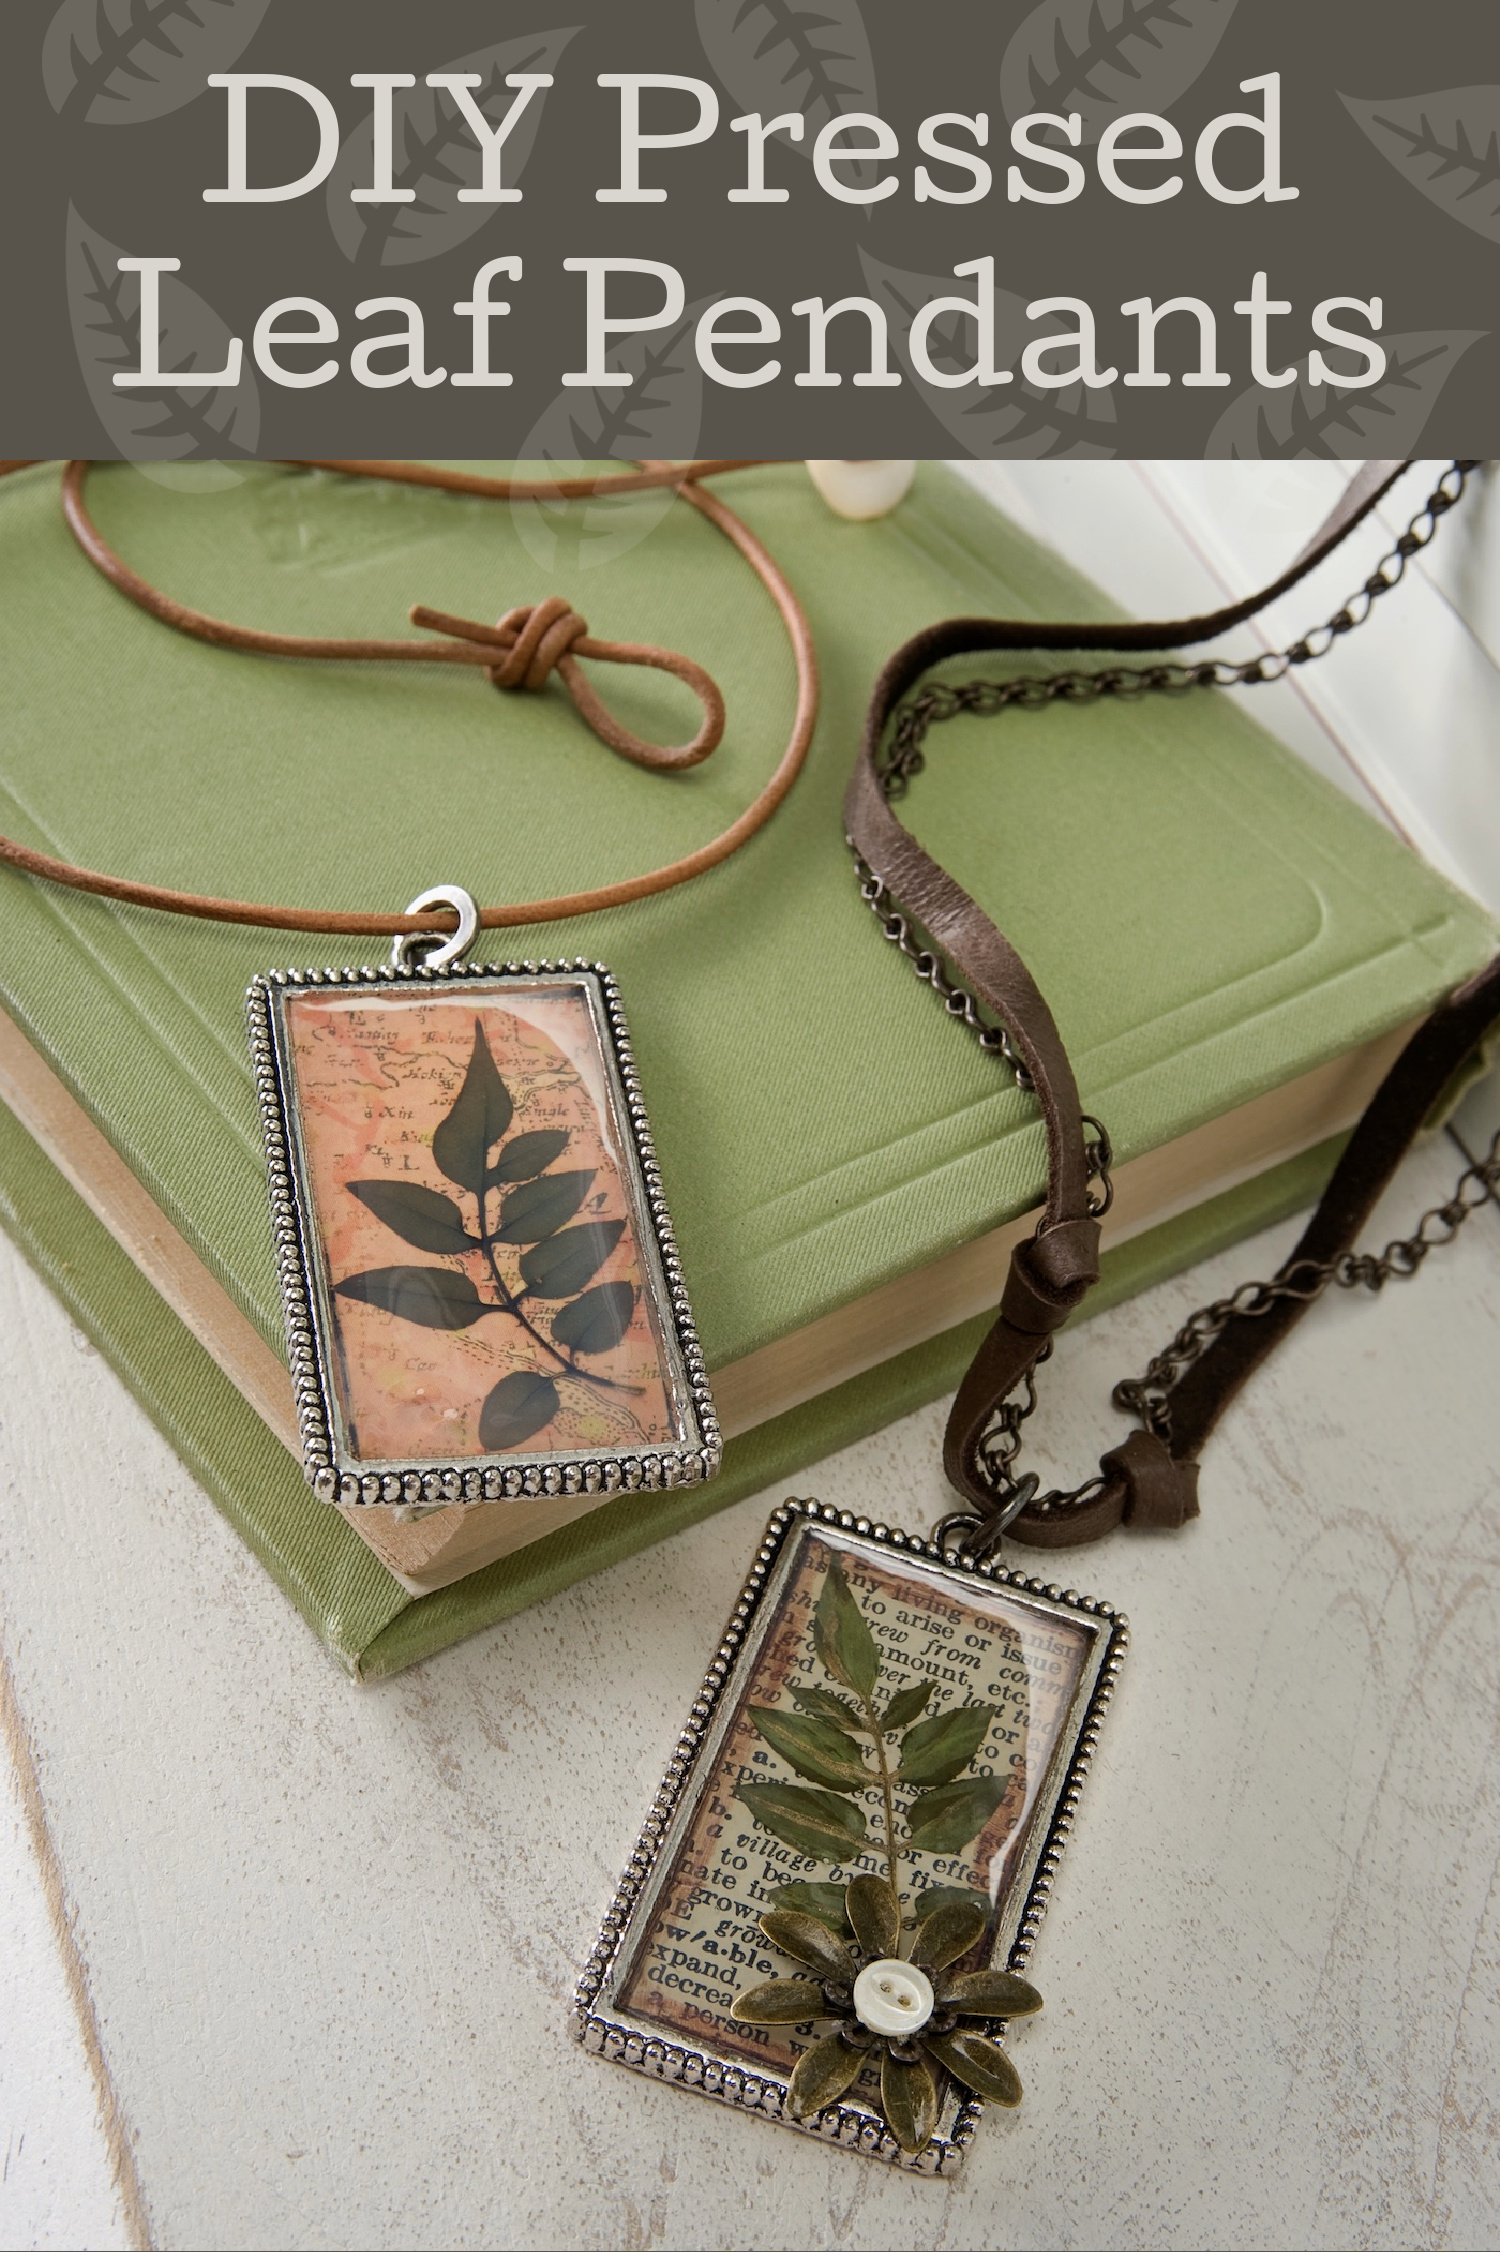
Learn how to make pressed leaf pendants with real dried leaves! You can make beautiful jewelry with this simple to follow tutorial.
A little known fact about me is that I went to forestry school. Yes, I got my undergraduate degree in Forest Conservation from University of Washington in the late 90s. Did I ever work in said field? Not for one day. I’m okay with it though . . . it led me to right where I am today, writing this blog post.
One thing I did enjoy about that time when I was deep in the forestry game is that I could identify every tree and all the leaves too, at least in the United States. My friends loved to give me a hard time on hikes and test my knowledge – and I could get it every time.
But that time is no more.
I remember some of the basics, but the rest went bye-bye from the memory banks a long time ago. However I will say this . . . I still love trees and leaves and natural materials, and I always will. And I love them in my crafts too.
Along those lines, have you ever tried pressed flowers or leaves in a craft project? The reason I ask is that Mod Podge goes really well with nature’s craft supplies like flowers, leaves, twigs, and even sand. Plus said supplies are typically free and easy to gather!

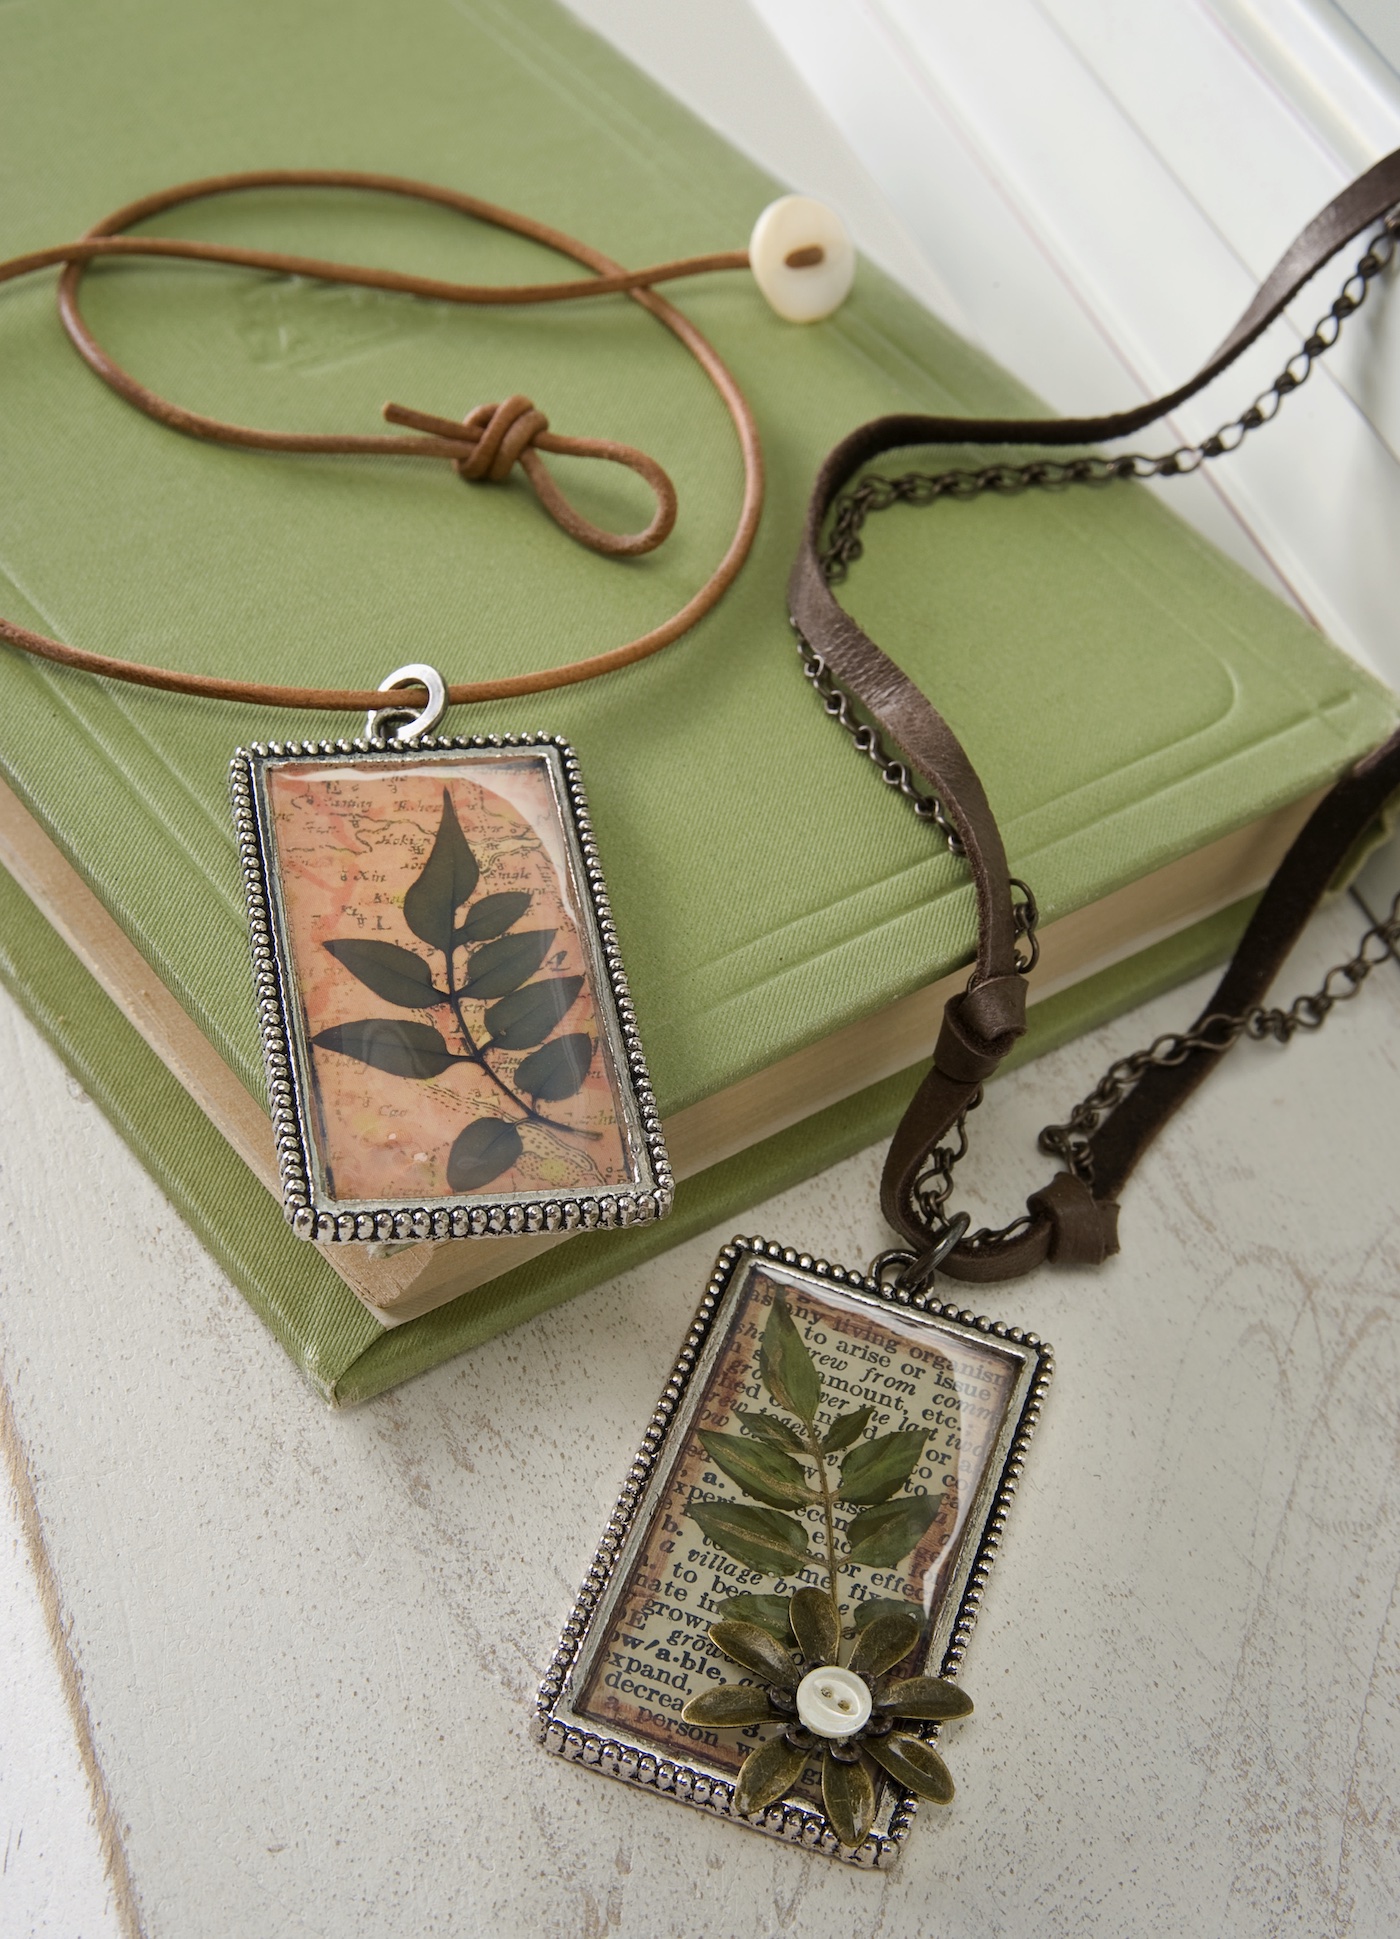
I’m excited to share with you today a Mod Podge jewelry idea that I believe Mother Nature herself would wear! You’ll get a chance to play with some dried leaves and Mod Podge to make beautiful leaf pendants.
These DIY necklaces are really easy to make – for yourself, or as cute gifts. These leaf pendants will be a huge hit with your nature loving friends! Here’s how to make them.
DIY Leaf Pendants
Gather These Supplies
- Bezel pendant
- Mod Podge Gloss
- Mod Podge Dimensional Magic
- Small leaves
- Scrapbook paper – two patterns
- Embellishments – like metal flowers, buttons, etc.
- Paintbrush
- Scissors
- Jewelry glue
- Small piece of tissue paper
- Pencil
- Tweezers (optional)
*For attaching the pendant to a cord, you’ll need some jump rings and basic jewelry tools.
Dry the Leaves
Clip leaves from small house or outdoor plants, and press them between the pages of a book in a paper towel. Let them sit for one to two weeks in the book pages until they are completely dried. You don’t want any moisture when you Mod Podge your leaves.
There are no guidelines to selecting the “right” leaves; just has to be small enough to fit inside the pendant!
Cut the scrapbook paper to fit inside the bezel frame. If you need to make a template, using the tissue paper or other thin paper and then a pencil to create a rubbing. THEN use that paper to cut out your scrapbook paper.
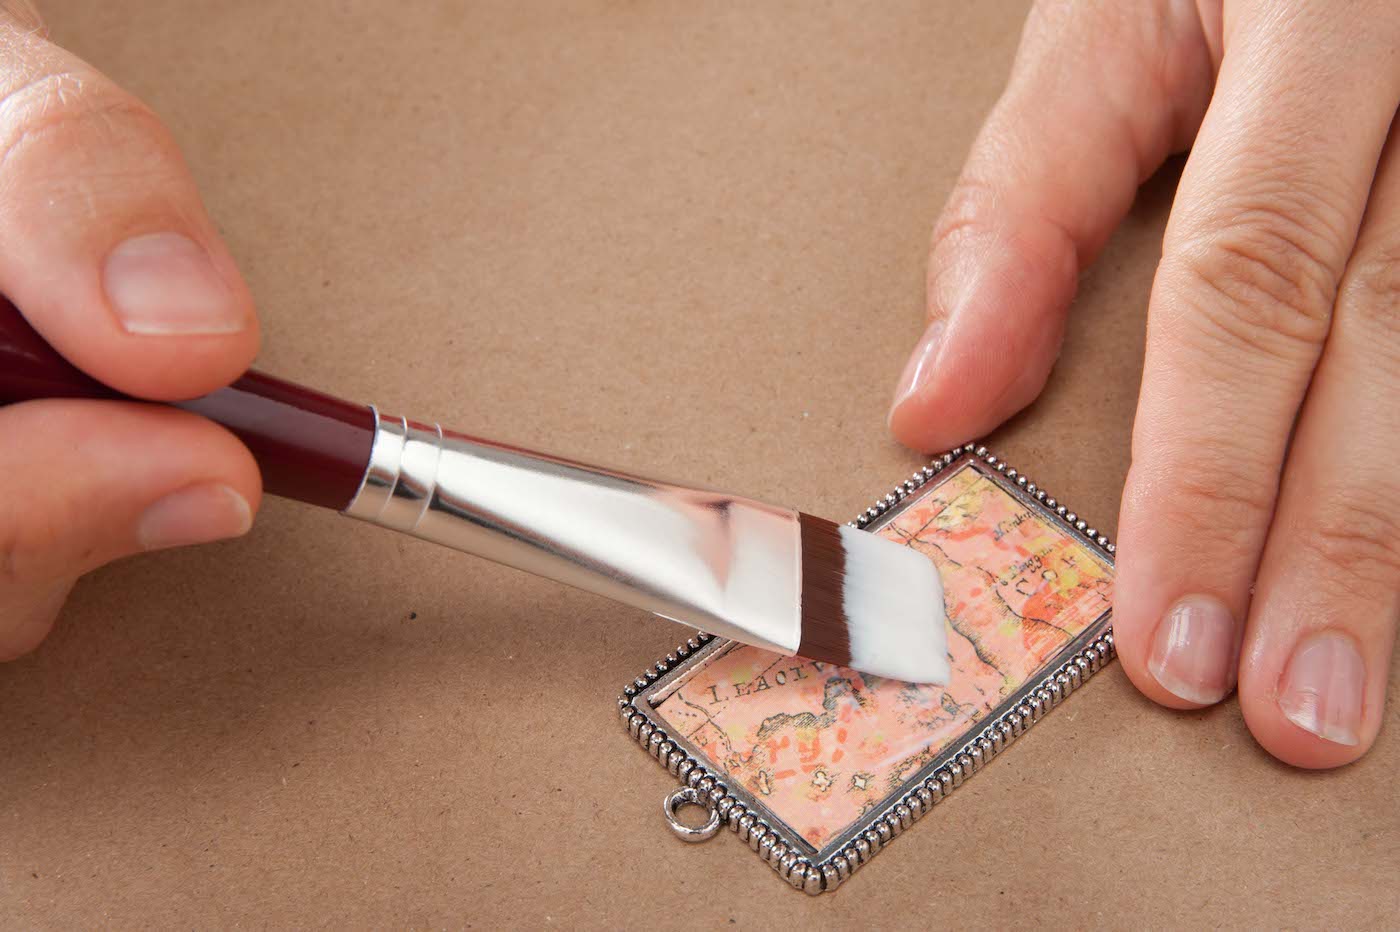
Add the Paper
Use the Gloss Mod Podge to adhere the paper to the inside of the bezel. Place Mod Podge on the bezel, smooth the paper down let dry 15 – 20 minutes (wipe away the excess). Then add a layer of Mod Podge on top and let dry.
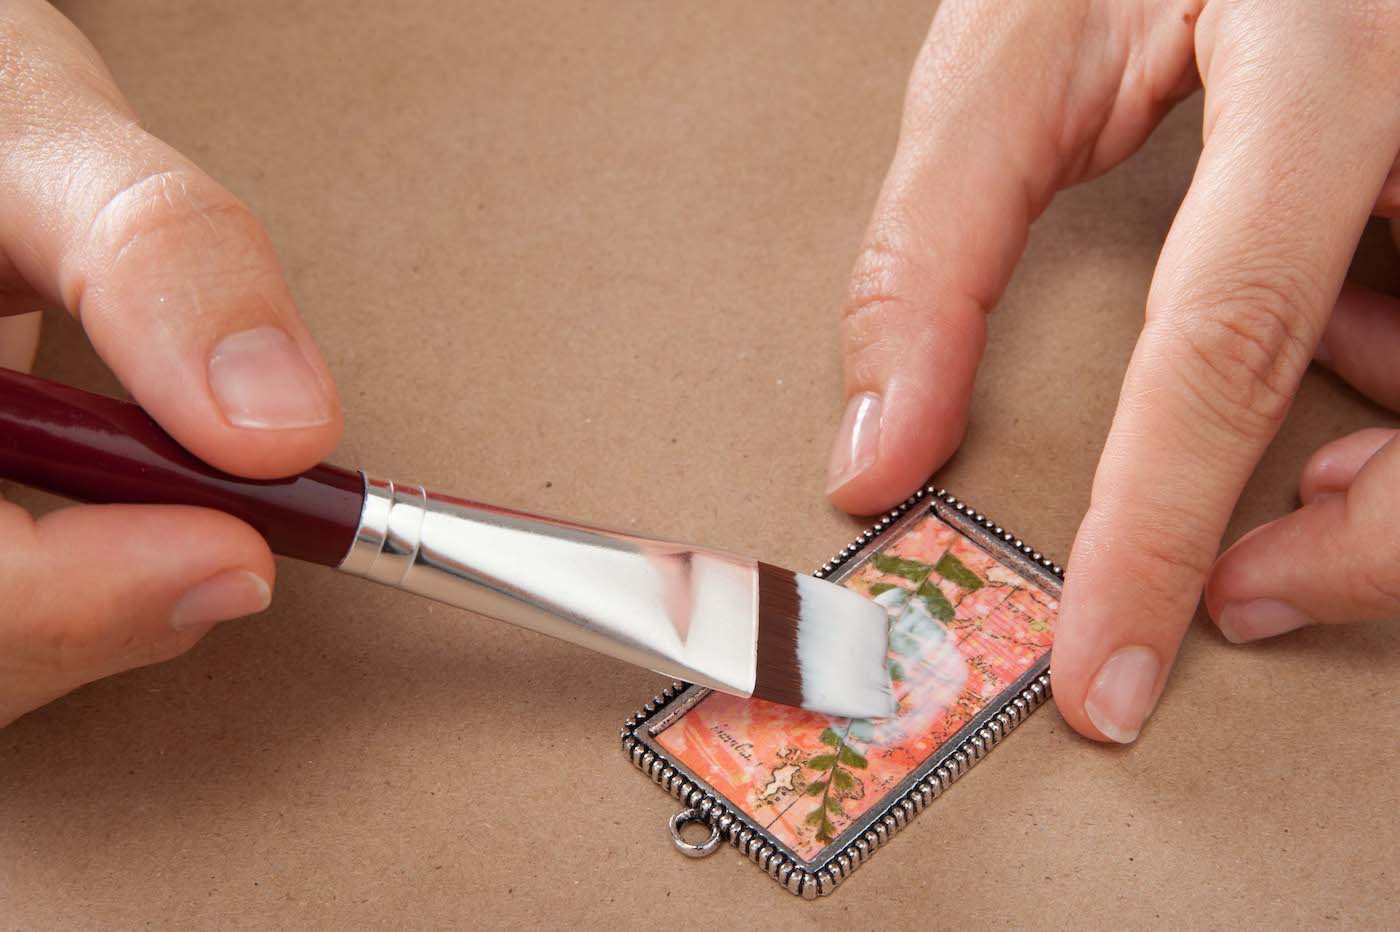
Decoupage the Leaves
Once your paper is dry, place the leaf into the center of the pendant. Very lightly brush Mod Podge over the top, being careful not to tear the leaves.
TIp: When working with small or delicate items such as leaves, it can help to place them with tweezers. The tweezers can also help you adjust the leaves if you brush them out of place.
At this point, let your pendant dry completely – even overnight. You want all the moisture to be gone before you apply the Dimensional Magic so clouding is prevented.
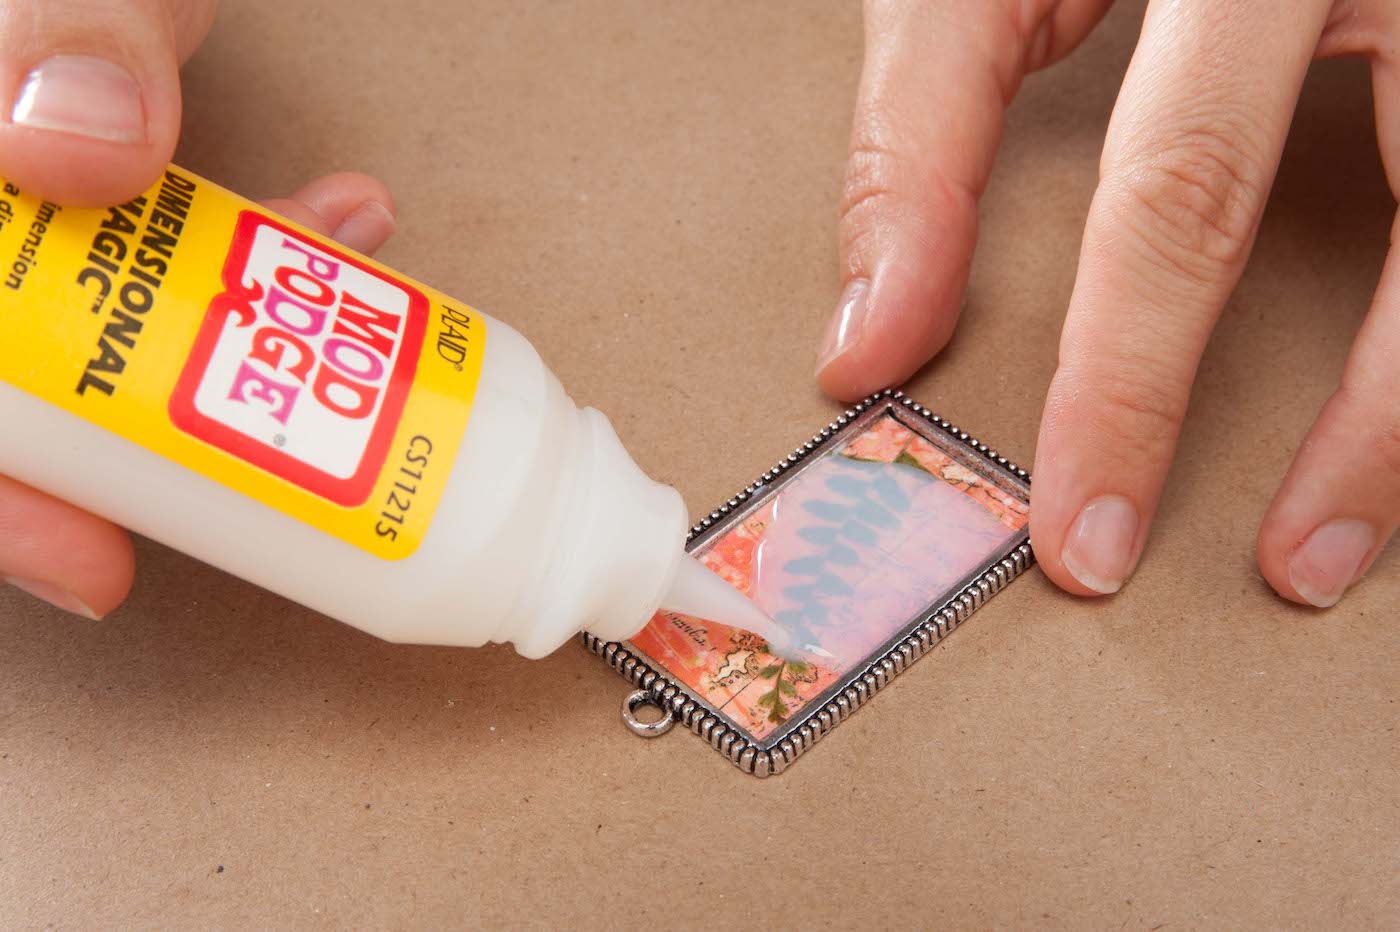
Apply Dimensional Magic
Fill the bezel with a layer of Dimensional Magic Mod Podge. Once this layer is dry (wait several hours), add a second layer of Dimensional Magic and leave to dry. Leave this overnight to dry – make sure not to put a fan on it, or it may crack.
You can embellish at this point (optional). Add small buttons, metal flowers, and other embellishments to the top layer of the pendant. Use a toothpick to apply jewelry glue to the backs of the embellishments – tweezers may come in handy here!
Finish the Necklace
Now you can attach ANY necklace chain or leather cord of your choice to your leaf pendants using jewelry tools! I’ll also show you how to make a button loop closure below with a button and some leather cord. That’s all you’ll need along with scissors.
String the pendant onto the cord. Determine the desired length of the necklace, and add approximately 1 inch (2.5 cm). Cut that length of leather cord.
String the button onto the cord so the cord goes through the backside of the button and down through the front. Make a knot at the end of the cord, and slide the button to the end.
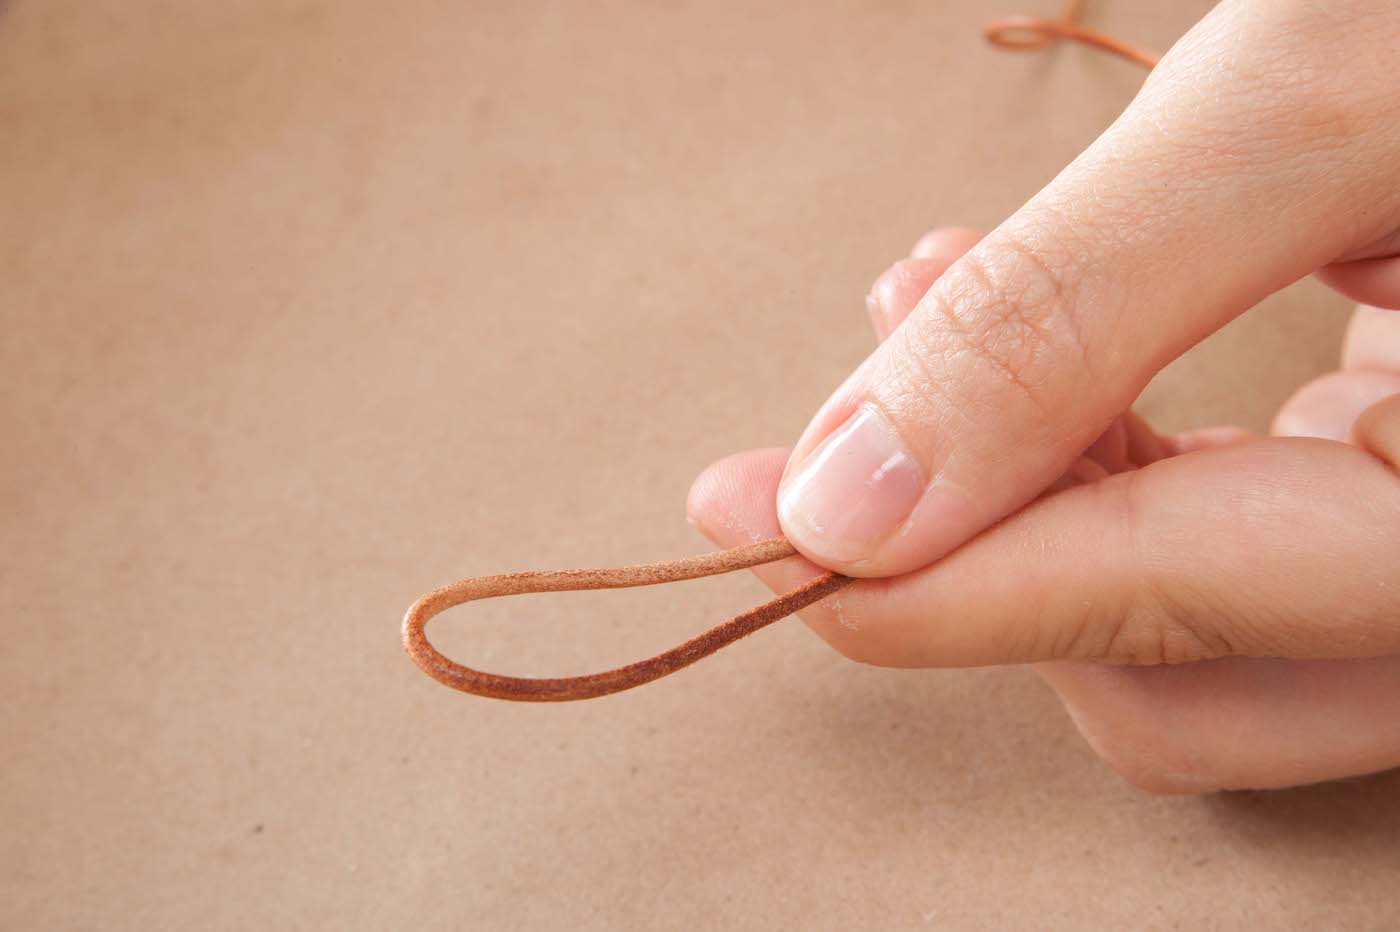
On the other end, make a loop as shown above.
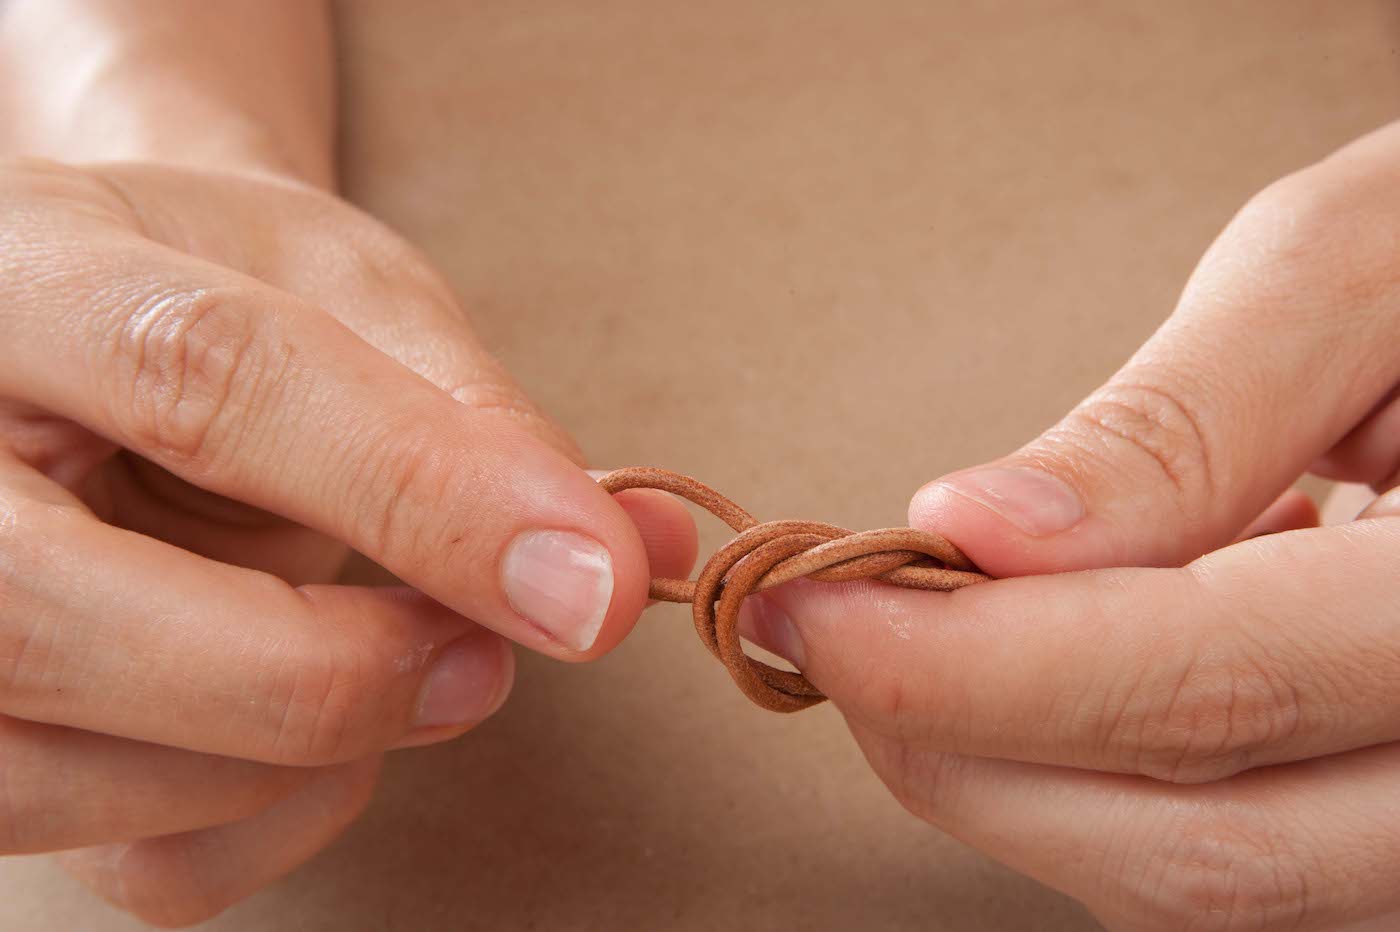
Tie this loop into a knot as shown above – leaving a small loop at the send that the button can secure into. You may need to work the loop a little bit to make it a little larger or smaller.
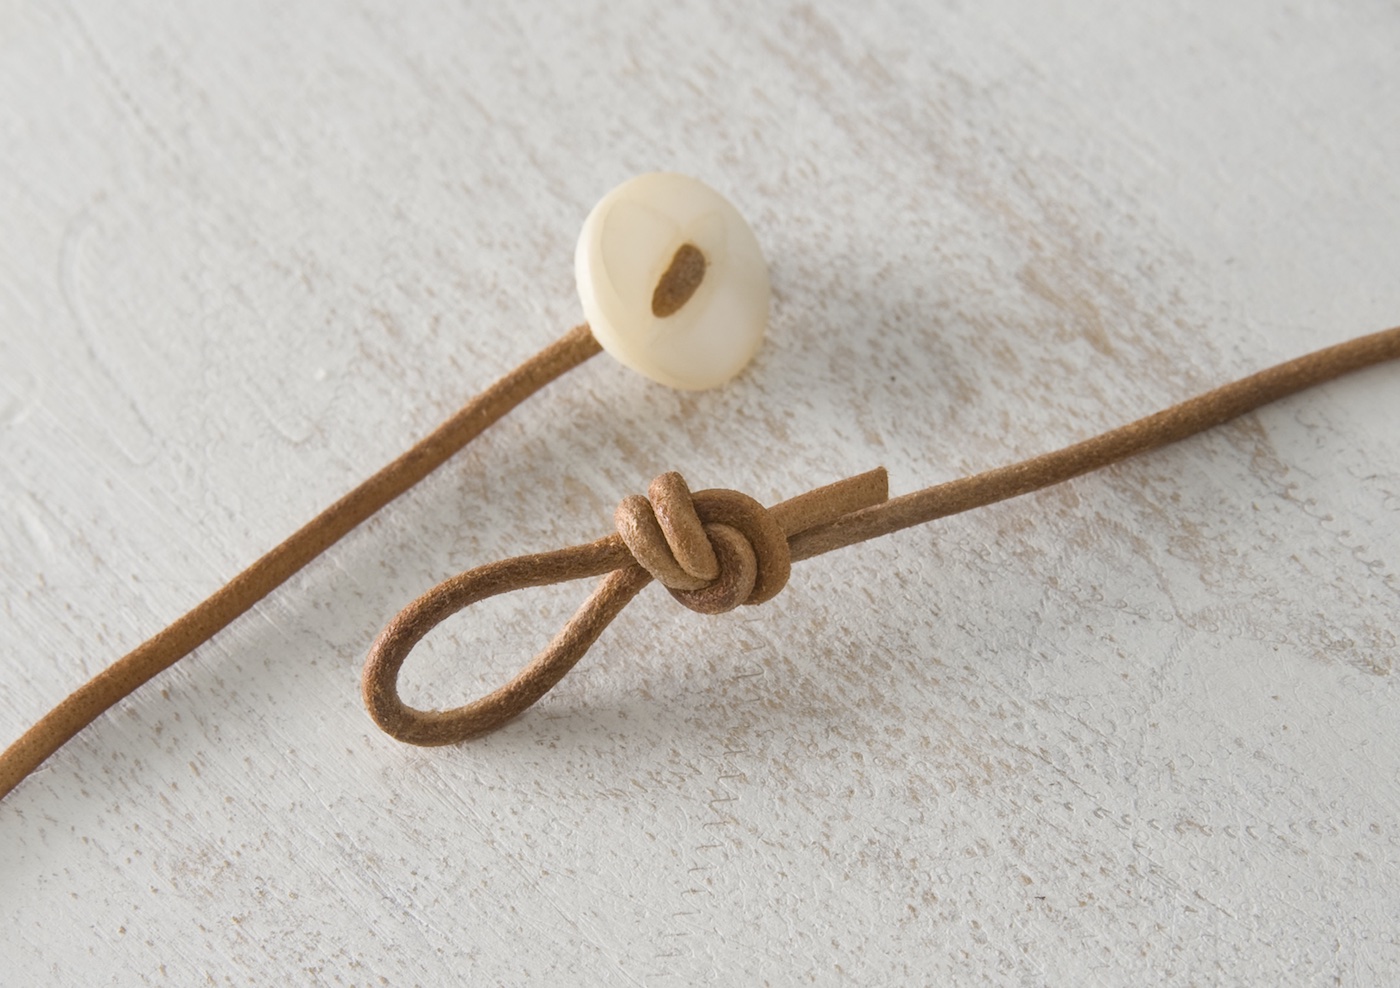
This will be the resulting loop for your leather cord, and you can unbutton and button around your neck as you need. No chain!
These leaf pendants were so fun to make, and I’m excited to find out if you’ve ever tried a project like this! Let me know what you think in the comments! I’d love to hear.
I’d also love for you to visit these other related craft ideas here on the blog:


Beautiful, I love using natural materials in crafting. I also thought about attending Forestry school at the University of Minnesota. I graduated HS in 1973 and wrote to the school of forestry for info, I received it but the cover letter also said, “Women are not encouraged to apply.” Can you believe that?????? I didn’t have enough drive to deal with that so went another direction.
Oh wow Terri! That is crazy! You will be pleased to know that by the time I went in the mid-90s, there were more women than men in my Conservation program. 🙂 But I don’t blame you for going in a different direction; that type of feedback is frustrating.