Want an easy craft idea? Grab an IKEA magazine holder and paint it as unique home decor or for a gift! Add your favorite Duck Tape – to personalize.
Skills Required: Beginner. This craft is very easy, even with little crafting experience. You’ll be painting, distressing (sanding), and applying Duck Tape.

With the holiday season upon us, it’s time to start thinking about handmade gifts! At least that’s what I’m doing these days, and I’m sure you are too. I went to IKEA to find a bunch of surfaces I could personalize and I happened up these wood magazine racks.
What I love about IKEA is they have tons of cool surfaces just itching to be decorated! These magazine holders were no exception.
I knew they needed some coats of paint and then of course, Duck Tape. I decided to use the Duck Chalkboard Tape this time, which I’ve never gotten a chance to use before.
And guess what? It WORKS! You can write on it! I was tickled. I was also tickled with how my magazine racks turned out. I realized they make a great craft for teens due to the fun colors and patterns, and would be perfect as gifts.
Here’s how I picture them as gifts. Decorate and personalize for the recipient, then give with a magazine gift subscription. Isn’t that fun?
It’s a great idea for those of us that are “old skool” and love having paper in our hands to read. Here’s how to make this wood craft!
IKEA Magazine Holder
Gather These Supplies
- Magazine holders – from IKEA (Wood or white would work)
- Mod Podge Satin (optional)
- Duck Tape – Chalkboard, Sugar Skulls, Tribal patterns
- Acrylic paint – colors of your choice
- Wax candle – white (for distressing)
- Sandpaper
- Scissors
- Paintbrush

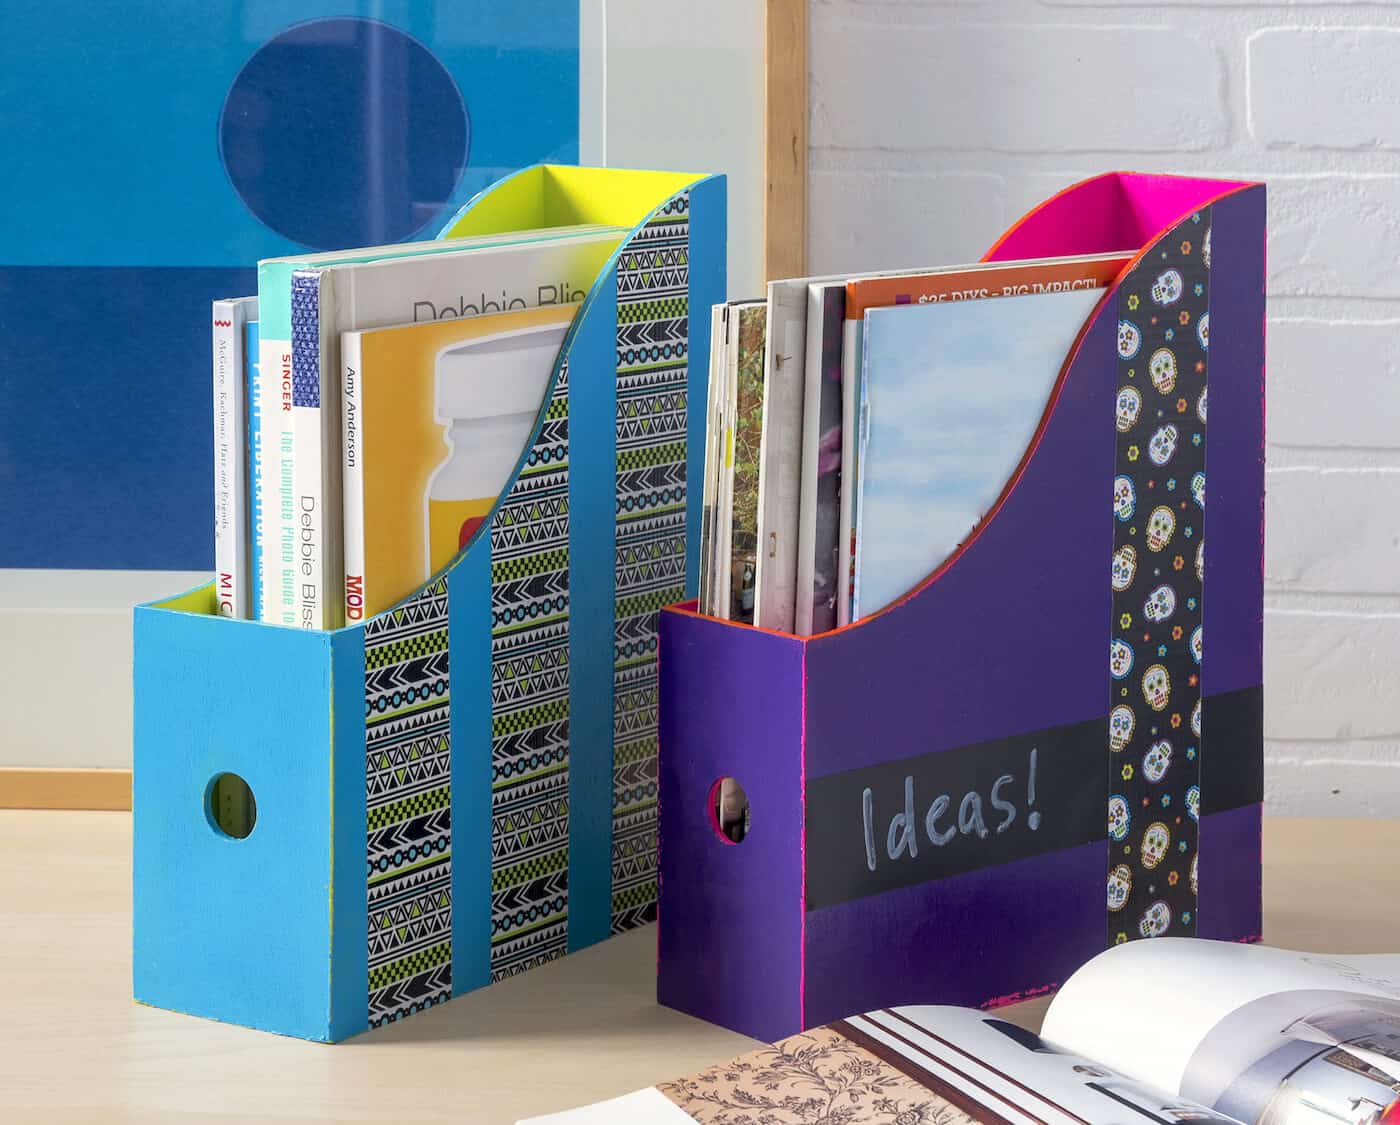
Here are the magazine holders I purchased, two for $10! Sand any imperfections and brush the dust away before getting started.

I decided to do some fun color combinations with my acrylic paint . . . to match my Duck Tape patterns! I painted the inside and edges one color, then let dry.

Then I added wax to the edges with my candle (I use a candle scrap) and painted over the top with another color . . . this time just the outside.
You’ll notice I had orange and painted purple over the top. You may change your mind which is exactly what I did – that’s okay!

Once you’re done, use sandpaper to lightly distress the edges. That let’s the color beneath show through a little bit. You don’t have to do it . . . but I love the added touch of interest!

It was after this that I added my Duck Tape. You can do it any way you like. In this example, I used my Sugar Skull tape vertically . . .

And a piece of chalkboard tape horizontally. I LOVE THIS DUCK CHALKBOARD TAPE. You can write on it with regular chalk, but it looks best when you draw on it with chalk markers. Make sure they are chalk markers as other types of markers are permanent!

For the tribal pattern, I just added three pieces vertically on each side.

Your magazine holders are done!

Like I said before – give with a gift subscription to a magazine – or maybe some favorite books inside?
Let us know how you would decorate wood magazine racks in the comments! I’d also love for you to check out these other crafts I made (I think you’re going to love them):


