
Learn how to make ocean resin art for beginners! Even if you don’t have experience you can make this beach resin art for your home.
Skills Required: Intermediate. I recommend having some experience with resin and paint because that is what you’ll be using for this project.

Are you a beach lover? Do you love beach decor? Then I’m excited to share with you another potential addition to your coastal home: ocean resin art.
I’ll be honest that when it comes to seaside decorating, I think this is one of the coolest techniques that you can DIY and display in your home. If you haven’t used resin before, it’s not as hard as you think (get resin crafts here).
There is some mixing involved, but I’m going to show you how to do everything! Couple this project with the beach letters, a beach fairy garden, or some sea glass jars and you’re set for your coastal crafts.
These are great beginner projects if you are just starting out with resin and/or beach art. The basic idea is that you will be painting a surface, then mixing resin (potentially with paint) and applying it to a canvas.
After that you’ll move it around to create the desired effect, and then add shells, sand, or other embellishments.
How do you make resin look like the ocean?
You’re going to tint resin with shades of blue paint or alcohol ink, and pour in layers on your surface. You can then apply resin mixed with white paint, and blow around with a hair dryer for unique sea and wave effects.
Are you ready to get started? Check out the below projects for simple instructions. There’s also a video in the post I hope you will enjoy.
PS – for ALL of these crafts, the recommended safety equipment is a respirator and gloves. Learn more about resin safety here.
Beach Canvas
Recreate your favorite beach destination! Easily embed sand, seashells, and more from the ocean to preserve your memories.
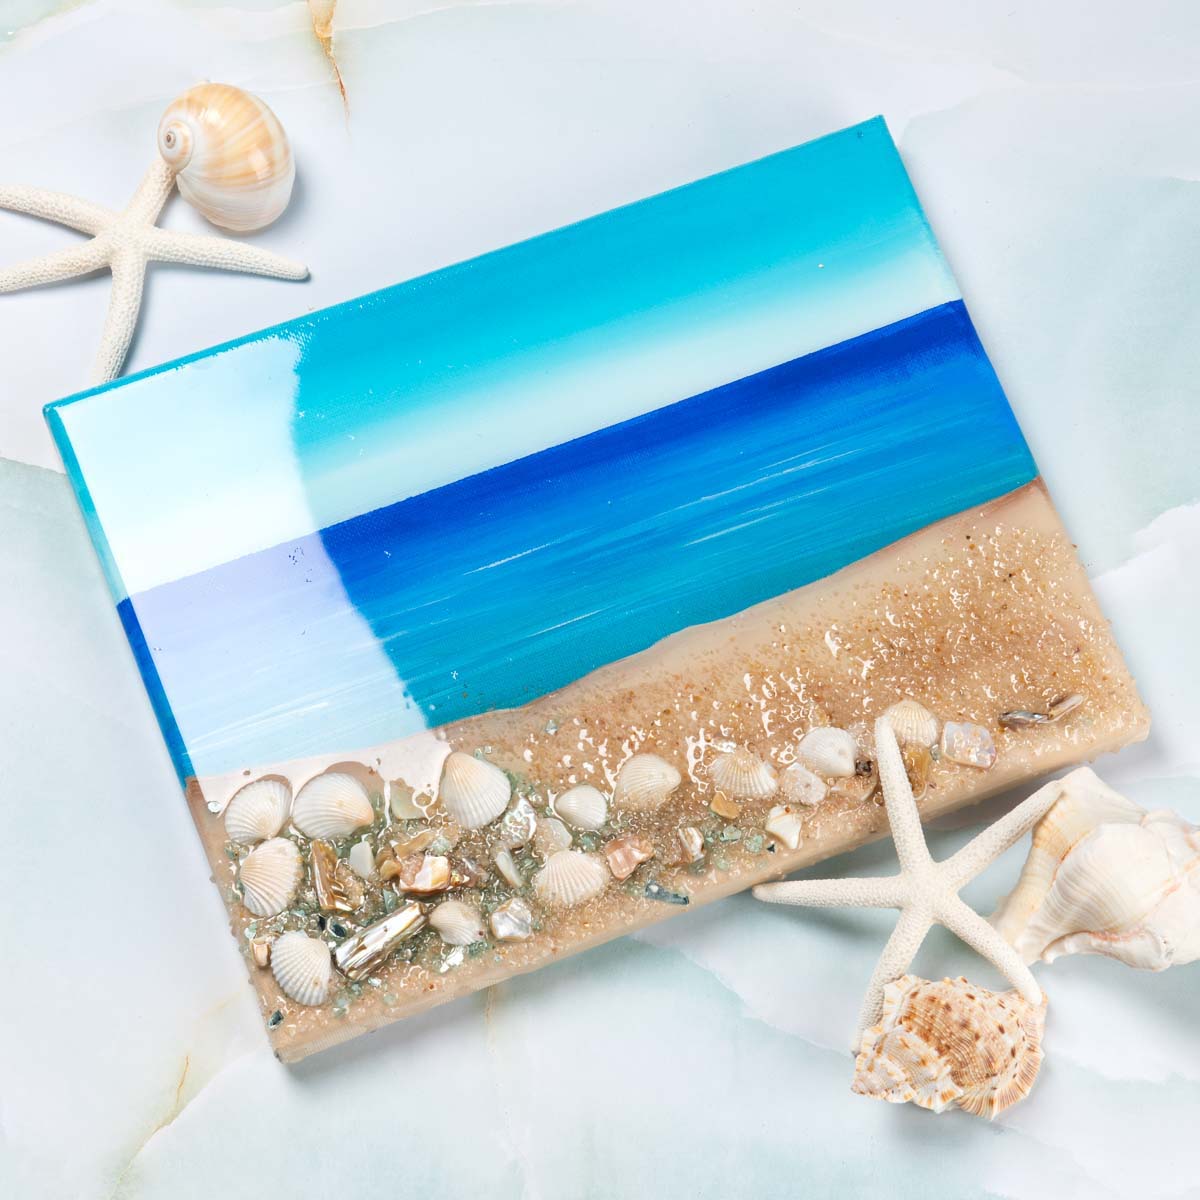
Gather These Supplies
- 8 x 10 canvas
- Mod Podge Resin – with cups and craft sticks
- Acrylic paint – Brilliant Ultramarine, Ocean Cruise, Wicker White, Linen
- Turquoise crushed glass
- Natural crushed shells
- Sand
- Seashells
- Stencil tape
- Paintbrushes
Instructions
1. Tape off the top third of the canvas using the stencil tape. Place a dollop of Wicker White into a paint tray.
2. Starting at the top of the tape, paint about an inch of Wicker White. Add some Ocean Cruise into the white and stir. Then paint a bit more of the canvas. Add even more Ocean Cruise and repeat to create a gradient effect on the top third. Let dry.
3. Once the sky has dried, tape off the bottom two thirds of the canvas. Place a dollop of Ultramarine Blue into a paint tray.
4. Starting at the bottom of the tape, paint about an inch of Ultramarine Blue. Add some Ocean Cruise and stir. Then paint a bit more of the canvas. Add even more Ocean Cruise and repeat to create a gradient effect on the middle third. Let dry.
5. Paint the sand area at the bottom as shown. Let dry.
6. Mix resin according to instructions on packaging. Pour over the sand area you painted. Immediately add glass, sand, seashells, and crushed shells to the wet resin. Let cure according to instructions, making sure to remove bubbles.
Resin Beach Painting
Make your project stand out with elements like sand, seashells, glass, and more to give your ocean art dimension.
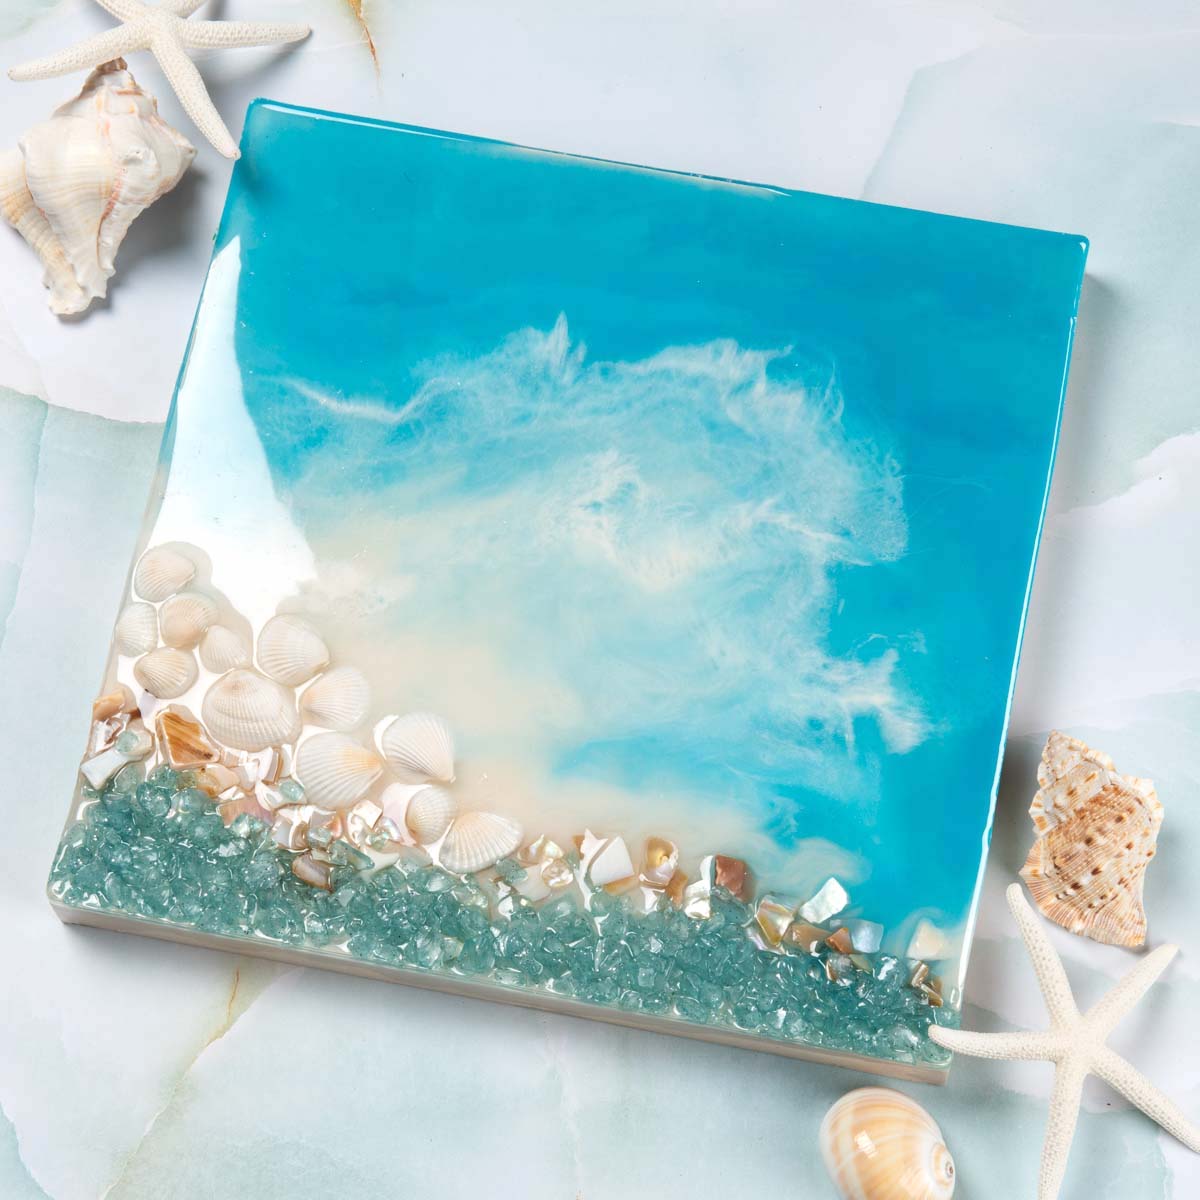
Gather These Supplies
- 10 x 10 wood canvas
- Resin kit – with cups and craft sticks
- Acrylic paint – Ocean Cruise, Wicker White
- Turquoise crushed glass
- Natural crushed shells
- Sand
- Stencil tape
Instructions
1. Tape all the way around the edge of the wood canvas using stencil tape. Smooth thoroughly (this will be your barrier so the resin doesn’t drip off the canvas.
2. Mix the resin according to instructions on packaging. In two separate cups, mix 1 – 3 drops of Ocean Cruise with resin and 1 – 3 drops Wicker White with resin.
3. Pour each of these mixes onto the canvas and move the resin around, either by tilting the canvas or using a hair dryer. You’ll want to cover the entire surface.
4. Add the sand, turquoise crushed glass, and natural crushed shell to the bottom of the canvas in whatever way you like.
5. Use a torch to remove bubbles and let cure completely before removing the tape.
Resin Beach Pouring Plaque
The unique wooden plaque allows you to fill the hollowed-out, river-shaped space with resin and color for a stunning flowing art piece.
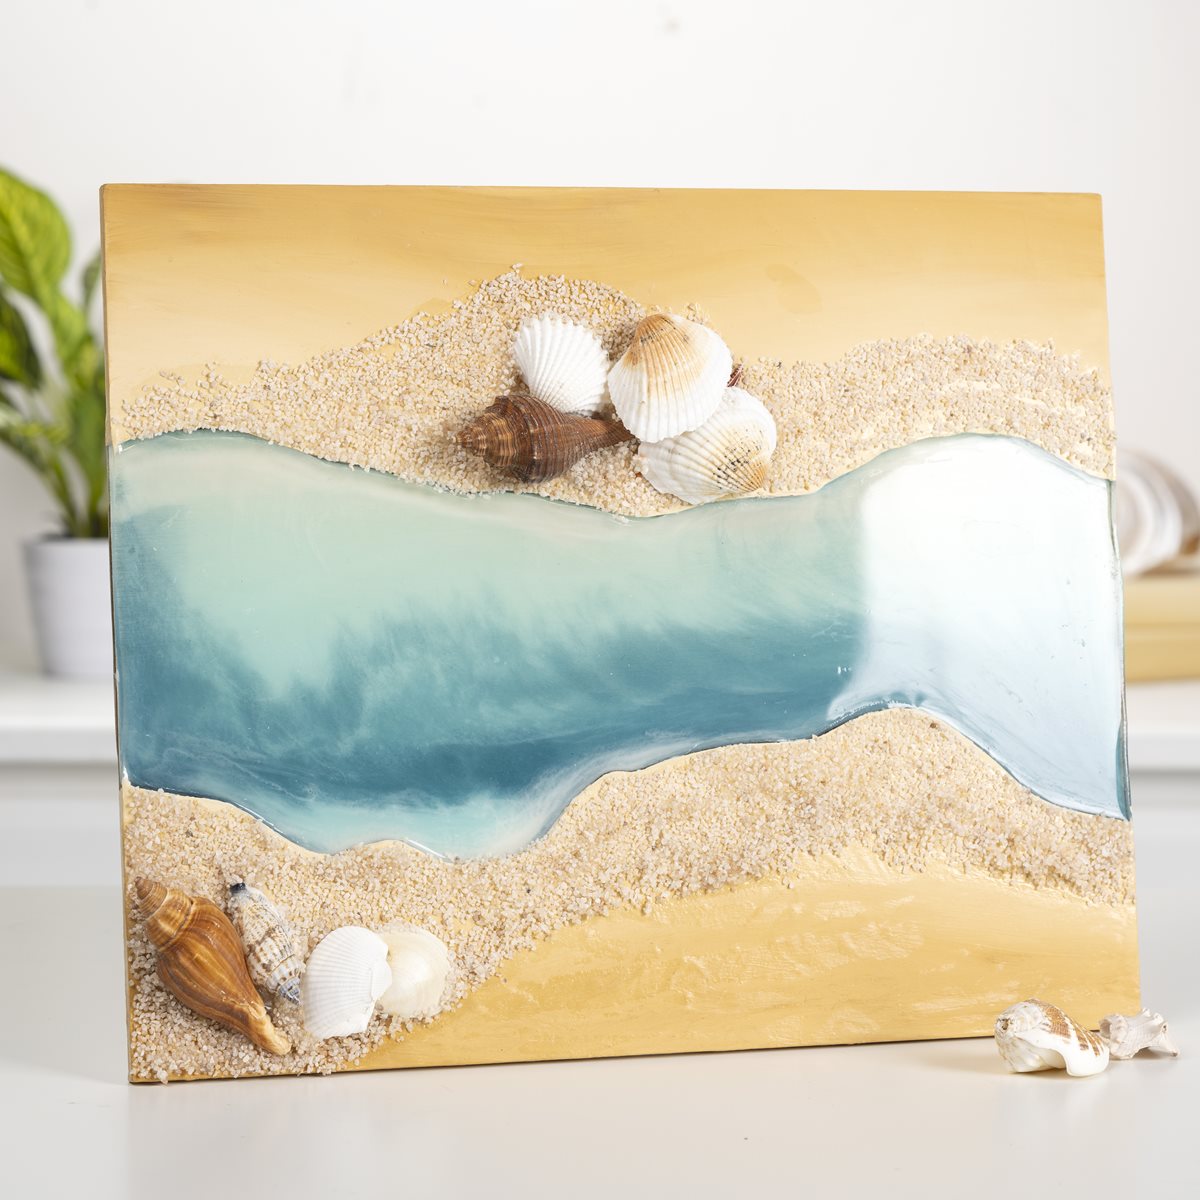
Gather These Supplies
- Resin pouring surface – River plaque
- Mod Podge Ultra
- Resin kit – with cups and craft sticks
- FolkArt acrylic paint – Calypso Sky, Cascade, Teal, Vintage White, Wicker White, Yellow Ochre
- Sand
- Seashells
- Painter’s tape
1. Paint the recess of the plaque with Wicker White.
2. Paint the raised area of the plaque with Yellow Ochre and Vintage White. Paint Yellow Ochre on the outer edges and blend into Vintage White towards the center. Let dry.
3. Spray the raised areas of the plaque with Mod Podge Ultra. Sprinkle sand and seashells where desired and allow to dry fully.
4. Tape off the open sides of the recessed area of the plaque. Mix the resin according to package instructions.
5. Separate the resin into three separate cups. In the first cup, add a drop of Calypso Sky. In the second cup, add a drop of Cascade. In the last cup, add a drop of Teal. Stir each cup until the paint is fully combined into the resin.
6. Pour the three colors in stripes into the recessed area. Use a craft stick to blend the colors together. Allow to cure for 24 hours before removing the tape.
If you enjoyed making this ocean resin art, I’d love for you to check out these other resin ideas:
Cutting Board • DIY Coasters • Geode Coasters • Gold Leaf • Keychains • Preserve Flowers • Resin Frame • Resin Jewelry Making • Wood Slice Coasters


These are so neat! I love the little scenes.
Thank you so much!