
Turn old cookie tins into stylish storage with this easy upcycling craft! Grab some fabric, Mod Podge, and give them a brand-new look. SO easy.
Skills Required: Beginner. If you have prior crafting experience, it will be easy for you to cut fabric and apply it with Mod Podge. The only challenge you might have is darting for containers that need it, but I have tips for you.

The holidays have come and gone, and now you’re left with a delicious dilemma: what to do with all those empty cookie tins?
You know the ones – the festive metal containers that once held homemade treats, store-bought goodies, or that random assortment of fancy nuts from your aunt who always insists everyone needs more protein.
Toss them? No way. These tins are way too nice to end up in the recycling bin. Instead, let’s give them a stylish second life with a little upcycling magic.
Plus the good news: it’s basically a free craft. Grab some leftover fabric, your trusty Mod Podge, and get ready to turn those tins into something fabulous.
But why stop at just making them pretty? These revamped tins are perfect for storing just about anything, from buttons, craft supplies and pet treats to secret snack stashes (because some things are too good to share).
Need a cute container for office supplies? Done. A unique gift box that’s way better than a basic gift bag? Absolutely.

So if you’re wondering how to recycle cookie tins into something actually useful, this is it. Let’s grab those Mod Podge bottles and get crafting!
Get the printable how to card below:

Recycle Cookie Tins
Equipment
- Scissors, craft knife or rotary cutter
Materials
- 3 Metal tins
- Fabric scraps larger enough to cover the containers
- Spray paint or craft paint, white
- Mod Podge Gloss
- Ribbon
- Buttons
- Craft glue
Video
Instructions
- If your fabric is thin, prepare the metal tins by paint them with white craft or spray paint. This is so the tin design doesn’t show through the fabric.
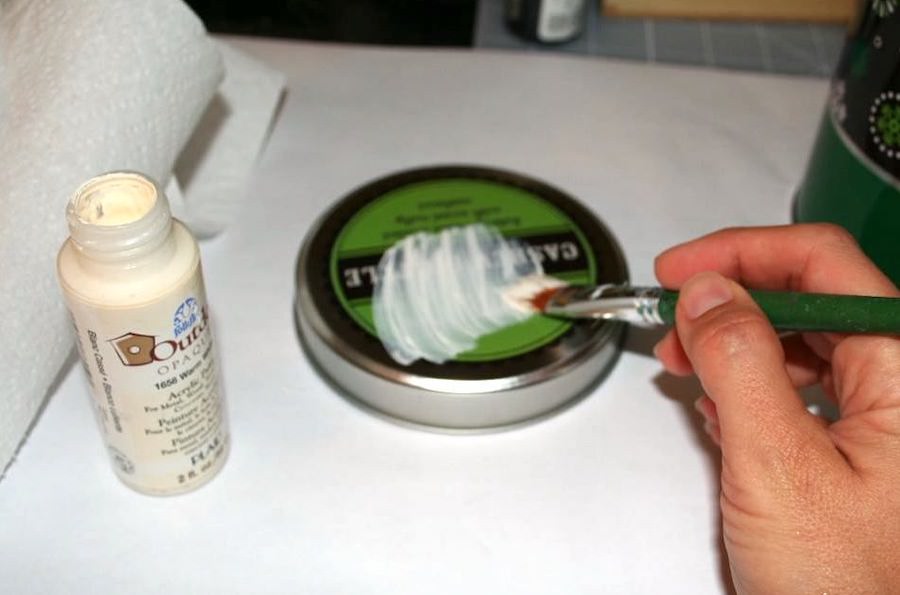
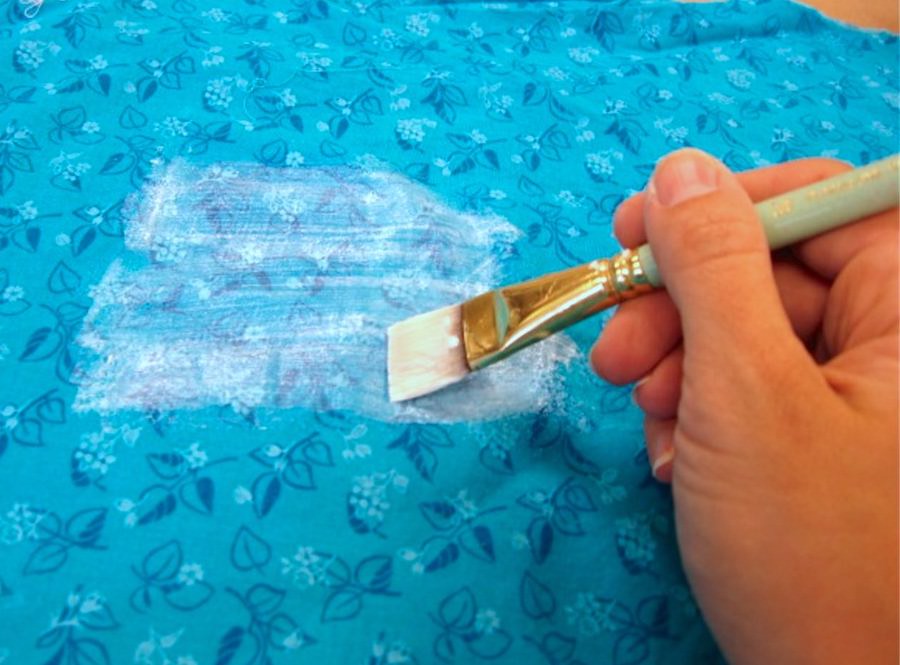
- Prepare your fabric with Mod Podge. This will make it easier to cut without fraying, and easier to apply to the container smoothly. Simply paint a medium coat of Mod Podge on the fabric and let dry.
- Once the fabric is dry, cut one edge to be straight. You will use this as your reference to line up with one edge of the container.
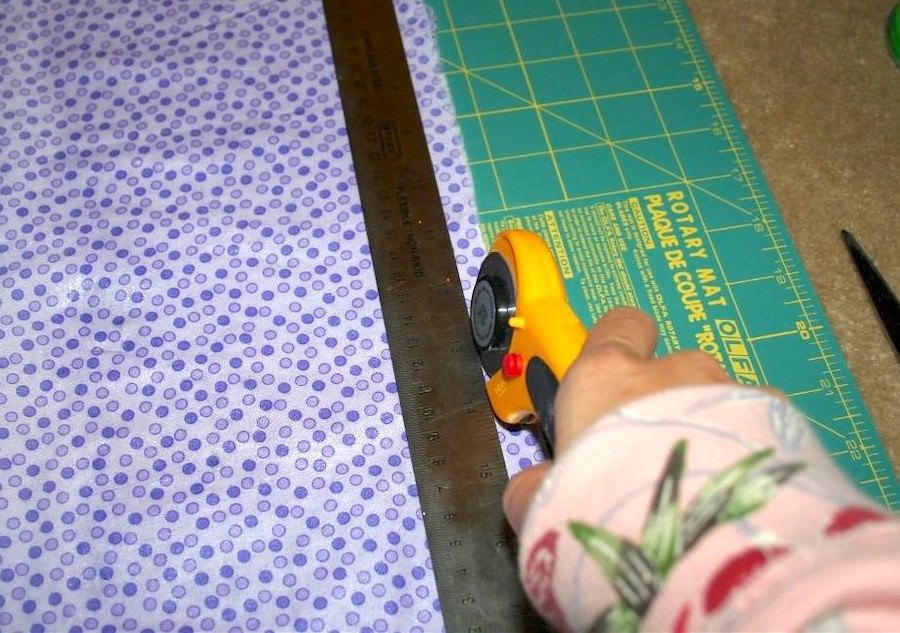
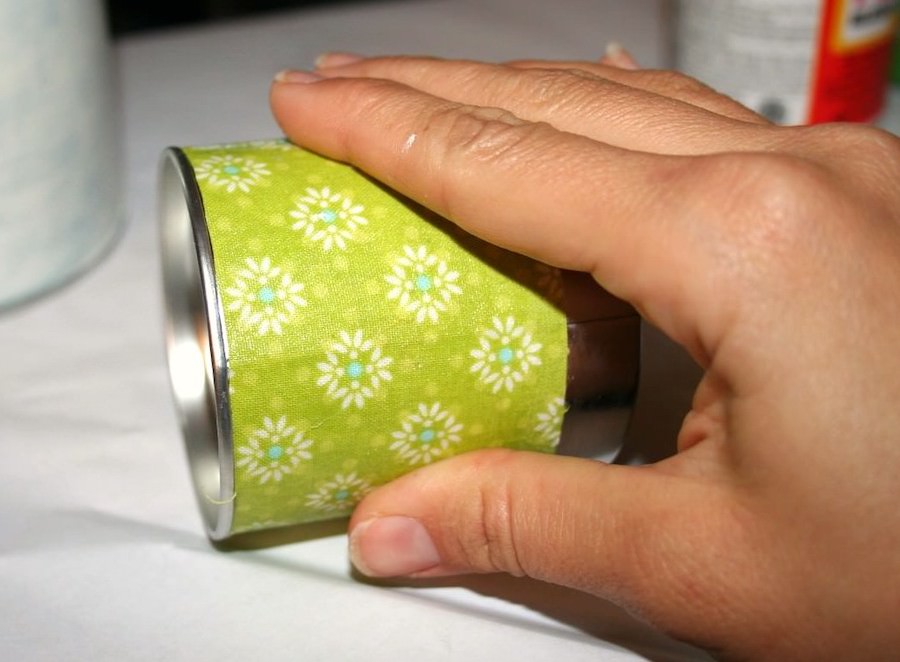
- Place your fabric on the cookie tin and measure where you need to cut at the top. Use a ruler if necessary. Cut the fabric to fit the container.
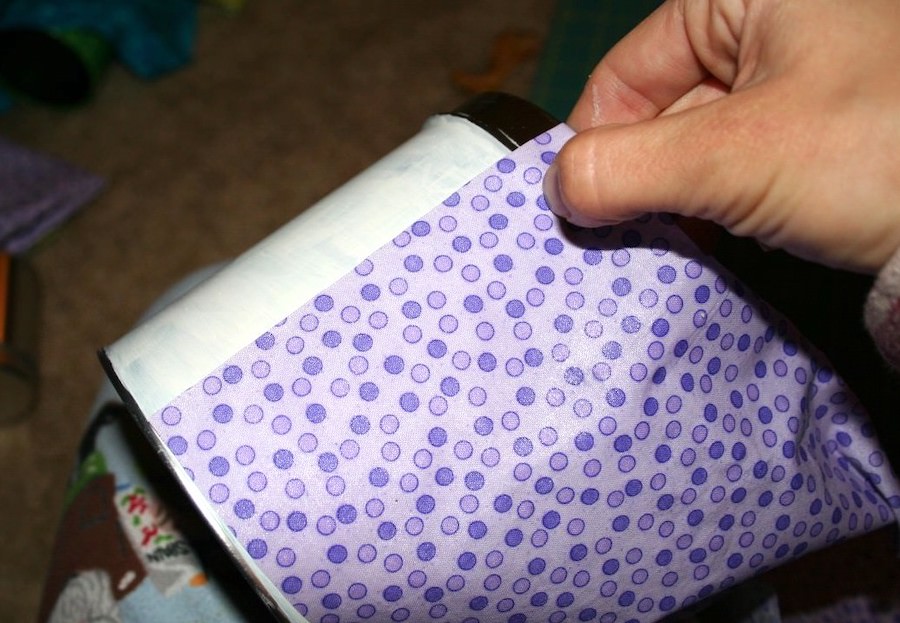
- Place a medium layer of Mod Podge on the container and then carefully wrap the fabric around, smoothing as you go. Let it dry for 15 – 20 minutes.
- Paint several coats on the outside of the tin to seal.
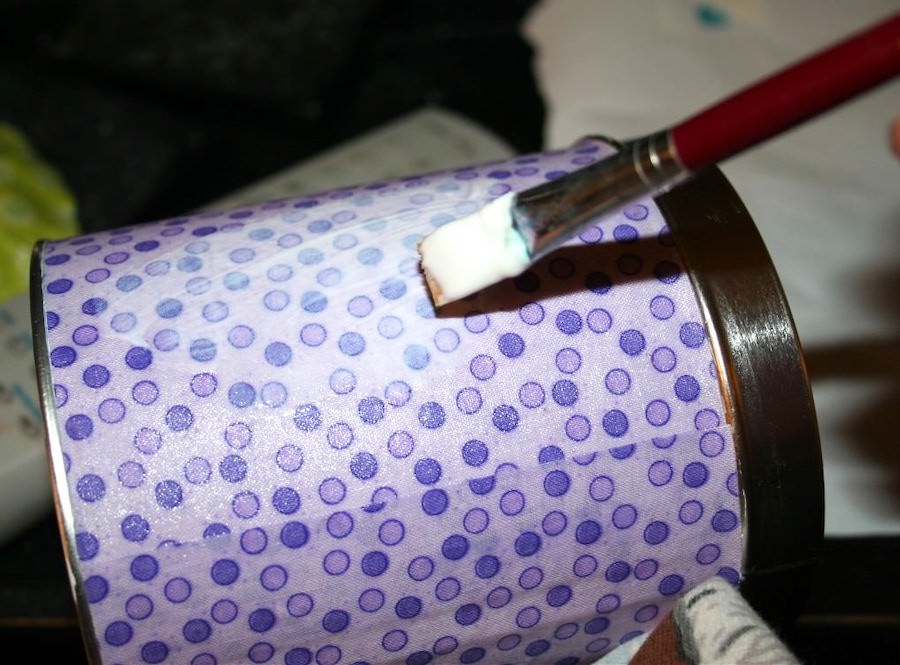
- Place the lid flat onto the back of the fabric and trace with a pencil. Now you have a circle on the fabric. Cut about 1/2" extra around the circle on the outside – so you are cutting a larger circle than you traced.
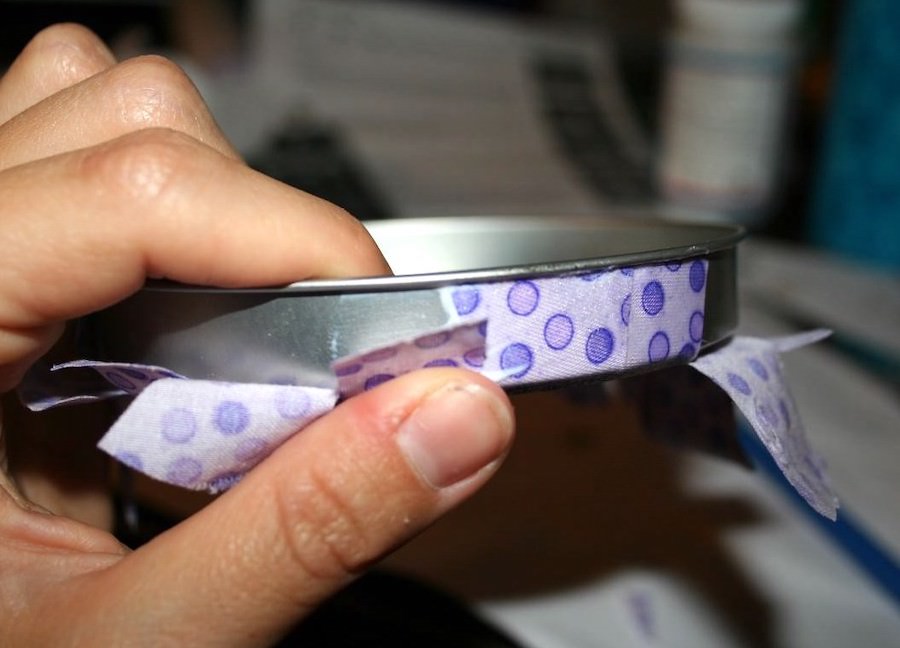
- Mod Podge the circle to the top. and then cut tabs into the overhanging fabric with scissors. Fold the tabs down and Mod Podge into place. Trim as needed.
- Add ribbon to the rims of the lids using craft glue. Add buttons as accents if you like. Let dry before using.

Notes
Are you wanting to recycle more items in your home using decoupage? Check out these other project ideas:
Altoid Tins • Book Safe • Bottle Cap Magnets • DIY Desk Organizer • DIY Photo Album • Junk Mail Art • Magazine Bowl • Mod Podge on Styrofoam • Mod Podge Cardboard Box • Paper Beads • Paper Mache Bowls • Pencil Holder from a Jar • Recycle Pill Bottles • Recycled Gift Boxes • Upcycled Glass Jars


Eeeeexcellent tutorial! Thanks esp. for the details about covering the lid – now I feel like I can do this!
These are super cute! i’m always looking for new organizational tools! These are great for “stuff”!
What a neat idea..I love recycling & I have upcycled many used tins,bottles,boxes etc..& its always good to make something beautiful from rough stuff *(*
Wow! Never knew about preparing the fabric with the MP first. So helpful! Thanks for posting!
Super Cool..thanks!
Excellent tutorial Amy! I especially love the small green tin that you used turquoise ribbon on – it really pops! I love reusing tins and things like that for storage – that way it’s totally unique! Just the way I like it. 🙂
Great project Amy, love upcycling tins, who could throw them out? And I even have some of that green fabric too….well maybe I had some, it was just a little fat quarter’s worth from JoAnnes. Thanks so much for sharing on Craft Schooling Sunday, great to see you!
How convenient! Great project!
Make the Scene Monday @ Alderberry Hill
Alderberryhill.blogspot.com
Great idea, I have some tins I want to reuse and was just going to cover them with fancy paper, I never thought about using fabric but I will use that instead now – thank you 🙂 It’s also a brilliant way to use up all the left over pieces I have lying around!
What a simple way to make something personalized! Thanks for the idea, I would love for you to share this at my link party!
Great idea! I am decorating a “new to me” house, and doing my master bath in zebra with red & turquoise accents. I also keep all my old tins and have used paper in the past, but this will work great! I also want to do the wall behind the garden tub with zebra…think I could mod podge it on the wall?
Hi Trea! You can definitely Mod Podge to the wall! Just treat it like you are Mod Podging to wood. Also, if it’s right behind the tub and could be exposed to water you will need a waterproof sealer to go on top. Good luck!
Great idea, thanks.
How do you recommend applying the layer of mod podge to the fabric prior to cutting? I did that and it stuck to the cardboard underneath and I was unable to use the fabric.
Hi Rachel! You can put wax paper underneath, or a silicone mat!