Use pretty fabric on these Mod Podge terra cotta pots for the perfect EASY spring craft project! Makes a great container garden – or gift idea.
Scroll down to the bottom of the post to get a bonus video of some additional clay pot crafts! You’ll find six ways to decorate your clay pots, including fabric. You’re going to love it.
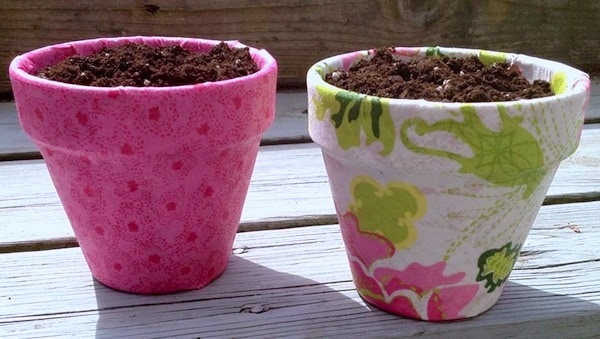
I love planting – I find it very therapeutic. I have no yard at my apartment, but I do love container gardens, so that is how I satisfy my green thumb urge! The nice thing about container gardens is that they are, well, contained.
The thing I don’t like is that sometimes the clay pots are boring, and the nicer looking pots can get pricey. So how do you remedy the situation? With Mod Podge terra cotta pots, of course! These are such a fun decoupage idea.
This pot decoration tutorial will show you how to make the cutest little planters ever. Not only that, but it’s a great way to present a plant gift to someone. Mother’s Day, anyone? Here’s how these Mod Podge flower pots were done.
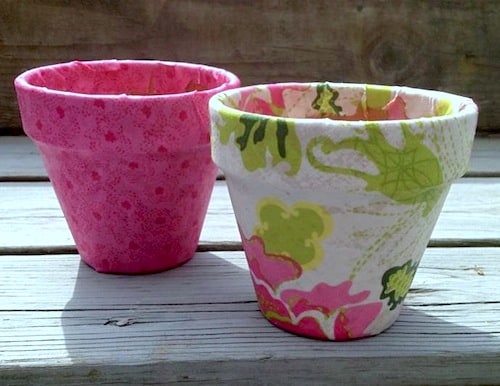
Mod Podge Flower Pots
Gather These Supplies
- 5-inch wide terra cotta pot (4.5 inches high)
- Fabric in the patterns of your choice
- Mod Podge Satin (or Mod Podge Outdoor if they are going to be exposed to the elements)
- Paintbrush or Sponge
- Scotch Tape
- Scissors
- Soil & Water
- 3 Ixia Bulbs (African Corn Lily)
NOTE: If you’re going to Mod Podge the outside of terra cotta pots, and actually put plants in the pots, you’ll probably want to seal the inside of the pots with a spray sealer. This is so the water doesn’t go right through the clay and to the Mod Podged surfaced.
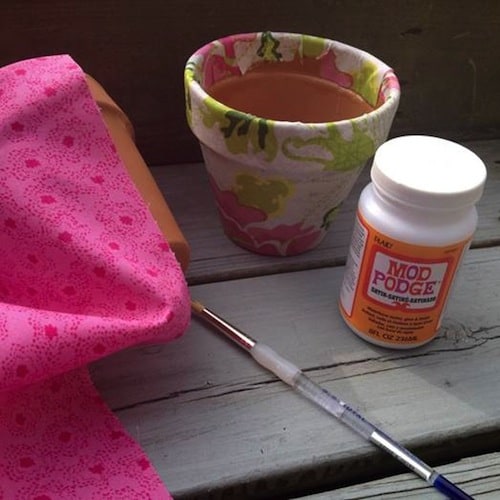
To start your Mod Podge terra cotta pots, make sure that you wipe off all the dirt. You can rinse with water if you need to and let dry.
Place a piece of Scotch Tape over the drainage hole to prevent soil from leaking while working.
Cut a length of fabric that will wrap around the pot completely. Leave extra room for folding the top and bottom.
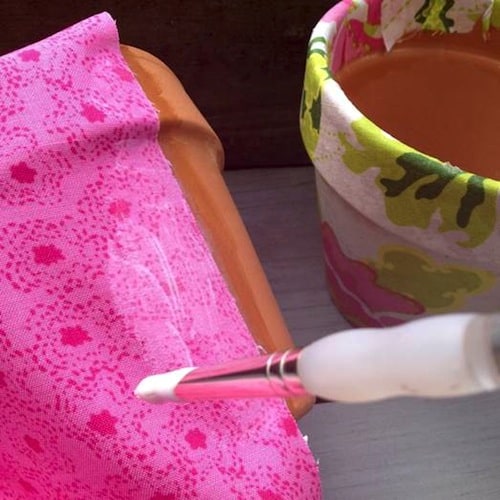
Dab a bit of Mod Podge onto the pot with a brush or sponge and adhere fabric edge. Lay the fabric onto the pot and continue covering the pot (with fabric) and coating with Mod Podge, all the way around the entire “body” of the pot.
Cut slits in the fabric on the top and bottom to prevent the fabric from overlapping. Trim the fabric on the top and bottom so that there is approximately 1 inch of extra fabric hanging over. At the top, fold the fabric into the pot.
Coat the fabric with Mod Podge so it stays in place. Continue to do so all around the top. Then follow with the same instructions on the bottom.
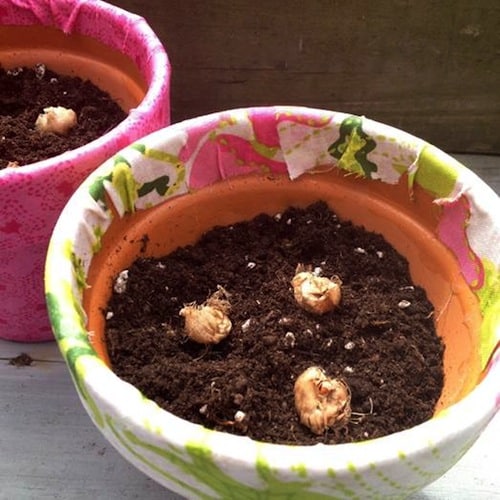
Let pot dry (approximately 15 minutes). Fill pot 2/3 full with potting soil; don’t pack too tightly.
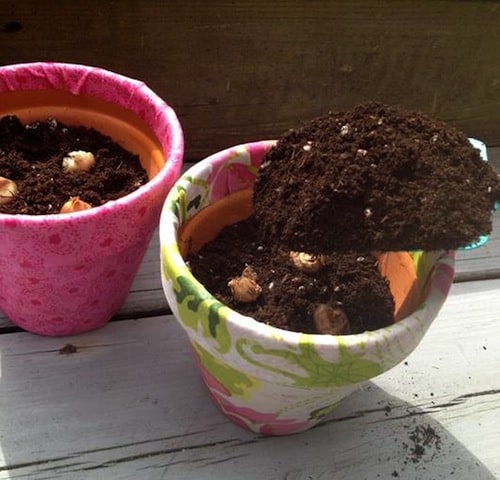
Plant Ixia bulbs two inches deep in your Mod Podge terra cotta pots and cover with soil. Water very sparingly (1/4 cup) until the pot is placed outside in a sunny location. Don’t forget to remove the scotch tape from the bottom of the pot for proper drainage!
Water throughout the flowering season, however, don’t overwater. Ixia like to be kept on the dry side.
Keep containers out of the rain, as the decoupage medium will wash off (unless you use Outdoor Mod Podge). Place under a covered location outside for best results.
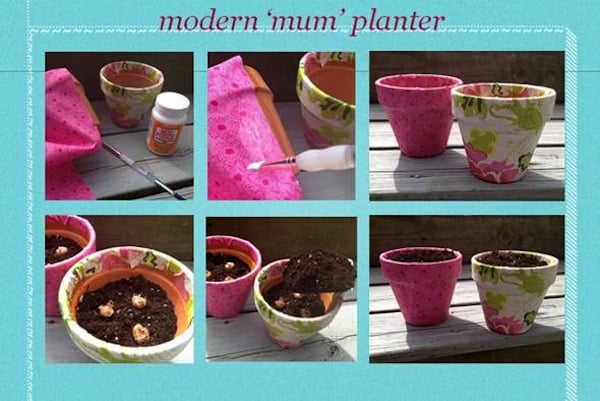
Mod Podge terra cotta pots tutorial courtesy of and images credited to Dig.Drop.Done.
Mod Podge Terra Cotta Pots
Equipment
Materials
- 2 Terra cotta pot(s) 5-inch
- Fabric to cover the pots
- Mod Podge Outdoor
- Scotch Tape
Video
Instructions
- Place a piece of tape over the drainage hole to prevent leaks while working.
- Cut a length of fabric that wraps around the pot completely. Leave extra length for folding the top and bottom.
- Paint Mod Podge onto the pot with the brush and adhere one edge of the fabric. Lay the fabric onto the pot; continue wrapping the fabric all the way around the entire “body” of the pot, adding Mod Podge as you go.
- Cut slits in the fabric on the top and bottom to prevent the fabric from overlapping. Trim the fabric on the top and bottom so that there is approximately one inch of extra fabric hanging over.
- At the top, fold the fabric into the pot. Coat the fabric with Mod Podge so it stays in place. Continue to do so all around the top. Repeat at the bottom.
- Let pot dry (approximately 15 minutes). Remove the tape.
- Fill pot 2/3 full with potting soil; don’t pack too tightly. Plant bulbs two inches deep and cover with soil. Water and place in the sun.
Are you ready to get your bonus spring craft?? Learn how to decorate terra cotta pots six ways using some cool ideas – just press “PLAY” in the center of the video in this post.
If you’re interested in decorating clay pots, you might also love these tutorials:





wont watering the plant cause problems to the fabric on the outside as terra cotta is pourous and the water will seep through the sides to the outside?
Hi Laura! A lot of clay pots are sealed or don’t seep. The ones I have here don’t leak through. Maybe it depends on what type you get? I haven’t had any problems with my plain clay pots leaking or the Mod Podged ones I’ve done getting wet.
I have had problems with clay pots. They have to be sealed first in order to ModPodge with fabric. I have made 5 now, and they are all molding from the inside. You also have to let the ModPodge cure for weeks before you can plant in them.
This comes directly from PLAID. I called them.
@Connie Krohn-pickrell, did you use a clay pot sealer after the modge lodge cured? Thanks for sharing! =)
Can you possibly post a video on how you male these?
Hi Heather! There is a great video here: https://www.youtube.com/watch?v=B1eMpQjB658
I would use a clay pot sealer, like when painting a pot… I was going to ask, since the clay is covered, how does that effect the plants that need it to dry out? Does anyone make any provisions?