Make your own DIY window clings with this easy tutorial. Fun, reusable, and perfect for decorating any space. Great for kids and holiday crafts. (See the end of this post for a video on how to make them using food coloring!)
Skills Required: None. You can make these with just a few supplies and no prior crafting knowledge.
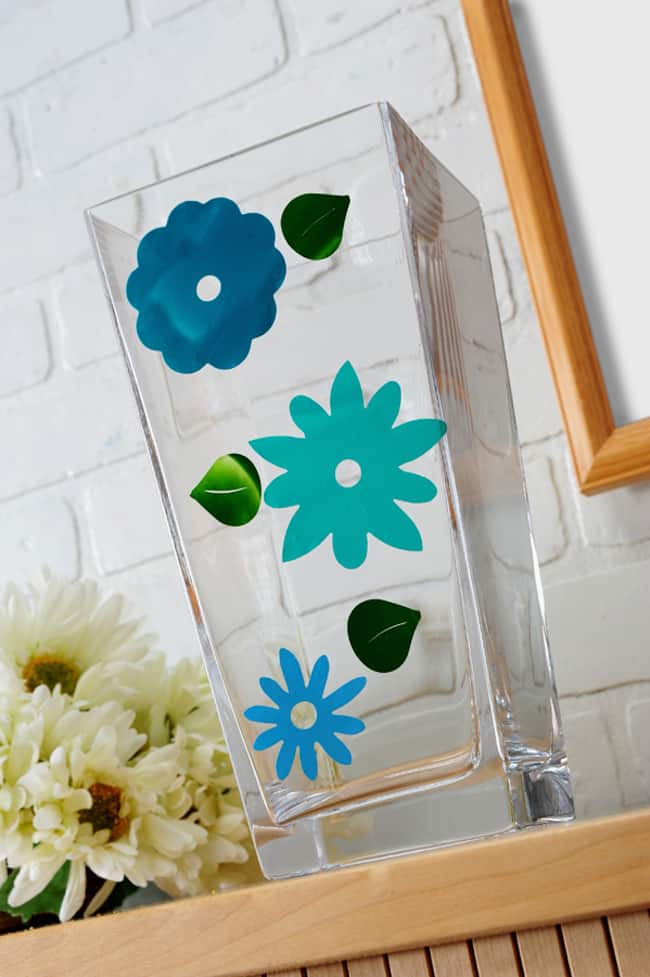
I really think you are going to like this post. I’m not just fancying myself, I really do. It was a fun to use Mod Podge for something other than gluing down items. This is one of those easy crafts for kids that adults are going to enjoy as well.
Instead I made DIY window clings that you can put on any vase or in any window! Since the time I originally did this post, I have made these over and over again with my nieces. We really enjoy it as a summer craft or boredom buster. They are a hit each and every time!
The biggest secret to these gel window clings is making sure that you have a non-stick surface to create them on. I used Gallery Glass leading blanks, but those aren’t necessarily easy to find.
I’ve also seen people use silicone mats, wax paper, and clear page protectors. You can try these window clings on a variety of non-stick surfaces and see if they work.
The supplies are so minimal, I had everything lying around the house. Can you say budget crafting at its finest? I hope you’ll make many and stick them all over everything. I highly recommend it.
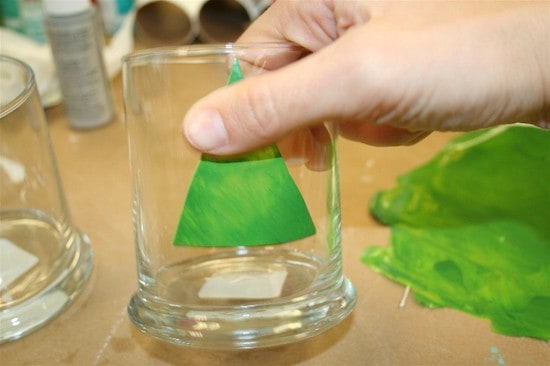
Check out the holiday clings I made – Christmas lights with snow, and then a Christmas tree with hole punched ornaments.
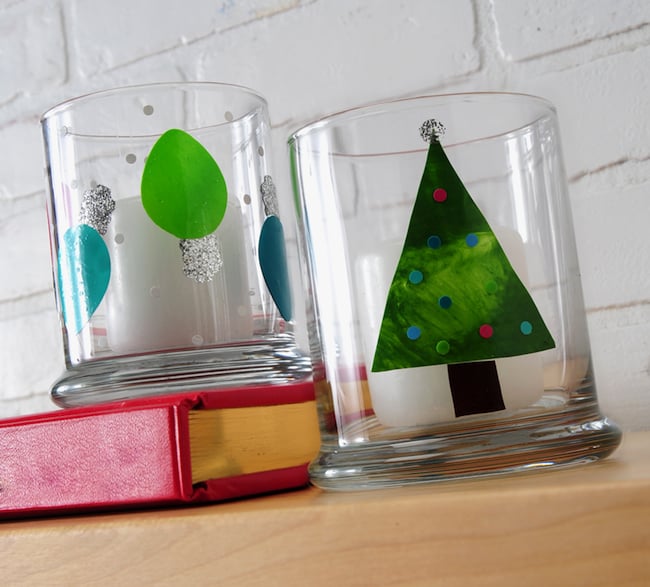
I’m picturing Mod Podge clings all over Mod Podge Command Central, so that it looks like a circus rather than a place to live. I had a blast doing it – what do you think?
Now for a video! Learn how to make clings with food coloring and a similar technique. Just press “PLAY” in the center of the video on this post.
Here’s how they are made.
DIY Window Clings
Equipment
- Hole punch, die cutter, cookie cutter, or craft knife something to cut shapes with
- Palette knife or spreader
- Scraper
Materials
- Mod Podge Gloss
- Apple Barrel paint in your choice of colors
- Gallery Glass Leading Blanks – or silicone mat non-stick surface
Video
Instructions
Method One
- Mix Mod Podge with a few drops of acrylic paint (in a container or on your mat) until desired color is achieved.

- Spread the Mod Podge mixture across the mat in a thin medium layer and allow to dry.
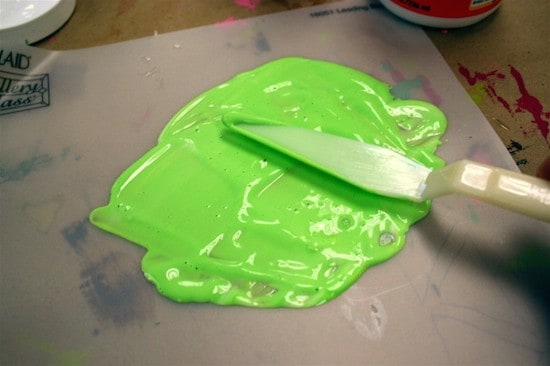
- Use a scraper to remove the thin, colored Mod Podge piece from the blank.

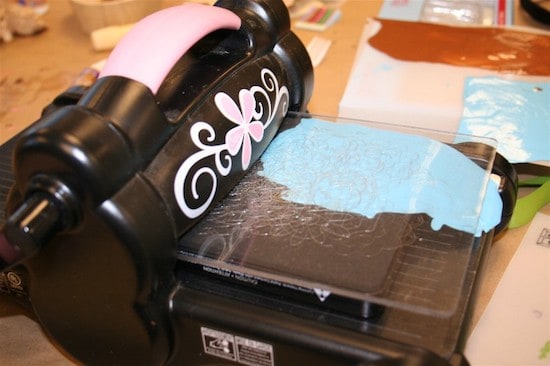
- Use a die cutter, scissors, or cookie cutters to cut out shapes from the Mod Podge material.
Method Two
- Mix Mod Podge with a few drops of food coloring in a bottle. Shake.
- Place cookie cutters on a silicone mat.
- Squeeze the Mod Podge mixture into the cookie cutters until you have a thin-medium layer across the bottom (completely filling the cookie cutters).
- Let dry on the mat for 24 hours. Do not remove the cookie cutters.
- Once the clings are dry, pop them out of the cookie cutters.
To Use
- For both methods: exhale on your clings or warm them in your hands and then stick to glass or mirrored surfaces.
Notes
If you enjoyed this project, let me know in the comments! I also hope you’ll check out these other ideas:
Backpack Charms • Birdhouse Craft • Cardboard Dollhouse • Crafts for Boys • Crafts for Girls • DIY Checkers • DIY Pins • Egg Carton Art • Insect ID Chart • Kids Art Coasters • Mason Jar Night Light • Mod Podge Crafts for Kids • Mod Podge Slime • Paper Plate Dragon



This is way cool. I wonder if it could cut with the cricut. Might have to try this. TFS
This. is. so. AWESOME!
It might be my favorite use of Mod Podge yet….
Amy- this is so very cool! I am Mod Podging candles as we speak- will send pix later 🙂 You have created a monster!
AMAZING!!! Thank you so much for sharing your talents! This is great!
Sheesh! My To Do List just keeps growing. I’m absolutely going to be doing this one!!
Oh, and I’m ready to run away and join the Mod Podge Circus. Any openings?
very smart idea..very cute creation…hmmm…
LOVE THIS!! Oooh I will have to try this soon 🙂
What a cool idea! Thanks for all the great tips for cutting. Genius, again!
awe.
some.
I think is just too cool. Thanks for yet another project to do with the grandkids.
Amy – I love the clings – great discovery – Thanks for sharing!
So cool!!! Wow what a quick way to make an extra prezzy for someone!!!
I thought that was a very neat idea. I think i will try this one.
Very neat idea! I must add this to my list of all the awesome ideas you have given me! I LOVE modge Podge!
Thisworks great with just paint itself, my mom did this a few years ago and decorated all her flower vases to match each of her rooms,she even did her kitchen window, and had all her friends wanting cute cling decorations theirselves. really cheap and fun too:):) gotta love paint!!!
You are BRILLIANT!!!!!
VERY clever! Thanks for sharing the idea and the extra tips. I can’t wait to give this a try!
I was just in a craft store the other day looking at seasonal window clings and getting sticker shock – even at half-price – and wishing there was a way to make my own. Wow. You’re awesome, Amy. I love these, and I love what you chose to do with them in your photos. I also just put up some gel clings that I actually did purchase (around the 4th of July) that say, “Celebrate!” in honor of DS’ birthday. It would be fun to spell out other words with this techniques. Thanks so much.
I just love this idea! Thanks for a great tutorial and tips.
What a great idea! I wonder if you could stamp an image in the goo when it is just dry enough to not blend back together? Have to try this next week.
Oh my goodness Amy!!! This is amazing!
This is genius.
Note to Darcy…
I found that if I make a puddle of hot melt glue, then ‘ink’ a rubber stamp with clear embossing ink, I can stamp it quite clearly into the hot melt glue as it starts to set up. Then I can paint or glaze it later to add color. I haven’t tried that w/ Mod Podge but I bet it would work.
This is so awesome Amy! Just featured it on Craft Gossip 🙂 https://homeandgarden.craftgossip.com/make-glass-clings-from-mod-podge/
I have done something similar with plain white glue, but have never thought to run it through a die cutter. Genius.
Fantastic!! Thank you!
I LOVE how you find new fun ways to use Mod Podge! Happy Holidays Amy!!
These are so cool, and who would have thought you could use a die cutter to cut mod podge? Love them. I featured you today on my favorite things 🙂
http://sunshineandchaucer.blogspot.com/2010/12/my-favorite-things_28.html
For those of us that don’t have a leading blank, would wax paper work?
I wish I had a reply, but I’d like to know the answer to that question, too–what can I use instead of a leading blank?
Silicone mats work perfectly. You can get them from the dollar store, Target, WM, etc. Good luck!
This is SO. COOL. I’m going to have to try this!!
I’d love for you to link this project up to my new linky party!
http://littleeme.blogspot.com/2010/12/ok-now-that-i-have-tuted-your-turn-to.html
Awesome! Just when I thought I knew everything I could do with ModPodge, you do this! So cool.
So Cool Amy!!Thanks for linking up! I featured your post today! Happy New Year!
Wow this is awesome! Thanks 🙂
Mod Podge does rock! Love this cling tutorial. I had no idea mod podge could do that!
p.s. i just read your post on ‘big girl panties’ over at crafterminds. great encouragement for newbies like me.
Wow! this is so awesome. My girls will love to do this! Great winter activity!!
WOW! You nailed it! I have been wondering for YEARS “when is someone going to come up with DIY window clings?” and here you are! YOU DONE IT!
Excellent stuff. Cant wait try it out!
Can anyone tell me what a leading blank is and what it’s used for? Is there any thing else I could use for this project instead?
Love it! I am dying to try this. How clever of you!
Hey Aubrey!
Leading blanks are plastic with a coating so you can peel off the Mod Podge. I’m guessing that wax paper would work, or any thicker plastic.
ooooh ahhhhh! This is great Amy!So many possibilities especially for those of us who don’t have access to decal vinyl! Thanks so much for sharing on Craft Schooling Sunday.xoxoxoSara
Wow, I love this! I’m wondering if you could use Mod Podge glitter to make those items look even more glitzy!
I have a REAL challenge for ya….HOW could I create a cling like these from a picture? Scanning, printing on something……….I have no knowledge, but I really want to do it…….oh, like a black outline, that I could paint in the colors on the flattened Mod Podge? Your expertise is needed here 🙂
Kate
Thanks everyone! Kate – I think you’ll like this tutorial. It’s pretty close to what you are talking about! I think. 😀
https://www.hugedomains.com/domain_profile.cfm?d=nonphotography&e=com
Gallery Glass Leading Blanks? Could I use a flexible cutting sheet like the ones you’d buy in the super stores 4 or 5 to a pack? Have some on hand for using with a craft knife in scrapbook kit and color coded in the kitchen for meats and veggies. JH
This is so awesome! Are they easy to remove and replace? Like traditional window clings?
Thanks everyone! Hi Danielle – yes they are easy to remove and replace. Although I have to worn you that the longer they are in the window with the sun blazing on them, the more brittle they get and you have to do a little more work to remove them. This is true for regular window clings as well. 😀 Thanks!
this looks neat might try this if ever I need special clings.
Hi Anonymous! Yes, you could use one of those – you just won’t want to cut directly on that mat with an X-Acto unless you don’t mind cutting it up. Otherwise, you can use those cutting sheets and then peel up the Mod Podge and cut with scissors – or even cut with an X-Acto on a piece of glass 😀
Now that is SO cool. I found ModPodge when it first came out. I had use Varathane previously and this was MUCH neater. However, I just found your post and am thrilled to see all the new items. I don’t know why I was so anaware! Anyway, I’ll try some of the clings. I’m loving crafting with what I have on hand!
Great idea, you’ve inspired me to dust off my Mod Podge that I bought years ago!
Hi . you’ve inspired me to dust off my container of Mod Podge that I’d bought years ago! Well done.
This is great! I have been wanting to figure out how to make my own Static Cling Shapes when I stumbled across this post. Thanks for sharing.
Jen
en somme si j’ai bien compris c’est pratiquement la même chose que d’utiliser les windows color – j’aime l’idée de la découpe à la big shot – et je vais tenter de mettre des paillettes pour
rajouter à une carte.. merci pour l’idée !
Can I use ModPodge to transfer a picture onto glass? is so which one of the line of MP and how would I go about doing it?
Thank you very much,
Ingrid
Could I run the acrylic dried mixture through my cricut expression? If so how?
looove this…planning what i can make for my grandchildren to play with on my patio door. they were thrilled with the Christmas ones i had, bought, taking them off and on and playing forever with them. shapes, letters, faces….oh the ideas!!!! thank you.
just found your site… loove
Could you just put the MP on wax paper? Would it peel off the same?
Hi Brittany! I’m not sure but it’s worth a try!
Hmm I would like to try using alcohol inks instead of paint. Since it is semitransparent maybe I could achieve a stained glass look.
Looks very fun! Are the clings removable or do they become permanent wherever you put them?
They are removable! Though if you leave them for a LONG time, they become dry and break when you pull them off.
I need the opposite! I have window clings that I have no idea what to do with but I love decoupage, scrapbooking, etc. I do not own a cricut but I do own a printer and a knife. I am going to attempt to modge podge over my window cling, first on a piece of glass then I will try wood. I have crayola cling art clear film, 7 sheets.
Hmmm . . . since window clings are plastic-y (and not made of Mod Podge and paint), it’s hard to say. You could give it a try and see how it works out! But I have never tried this particular art clear film.