
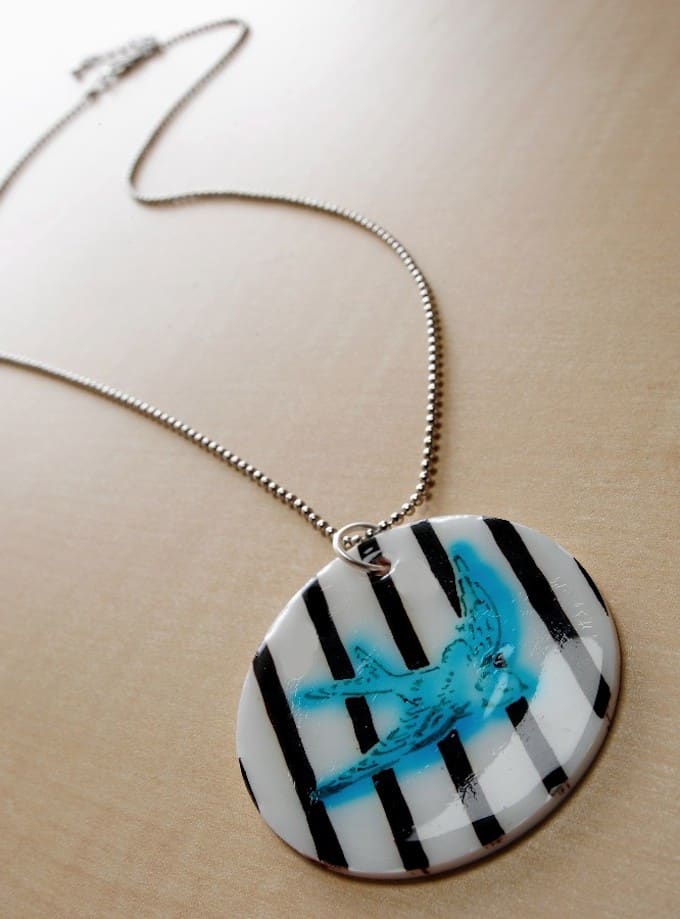
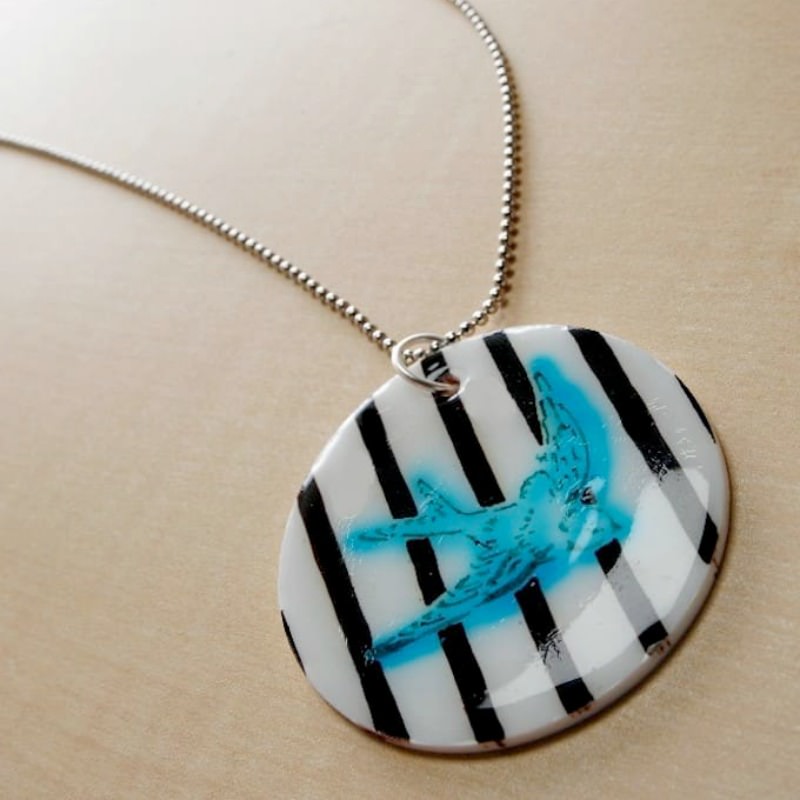
Do you love Shrinky Dinks? This Shrinky Dink necklace was so easy! If you love Shrinky Dink jewelry, this is a fun project to try with Sharpies and stencils.
I’ve been on a DIY jewelry kick for a while, and I’ve had some shrink plastic in my stash for about six months that has been begging to be turned into something.
Combine these two things with some Dimensional Magic and you have a Shrinky Dink necklace! If you like making DIY necklaces, you’re going to love trying this project.
This Shrinky Dink jewelry project is actually a little bit of a CraftFail because it didn’t go as planned, but it might be okay (the ink blurred a bit).
I’m wondering what you think and I want you to let me know in the comments!
Important Things to Remember
Shrinky Dinks shrink to about 1/3 of their original size and get nine times thicker. It’s magic, people. The nice thing about Shrinky Dinks is that even though they get smaller and thicker, they’re still very lightweight.
You also need to remember to punch your holes before baking your Dink. If you don’t, you’ll have a heck of a time trying to get them punched afterwards.
I’m pretty sure the only way it would happen is if you used a drill. I learned from experience and after throwing a few Dinks in the garbage!
Are you ready to give this project a try? Get the printable how to below:

Shrinky Dink Necklace
Materials
- Shrinky Dinks
- Sharpie(s) Dark Brown and Teal, or colored pencils
Video
Instructions
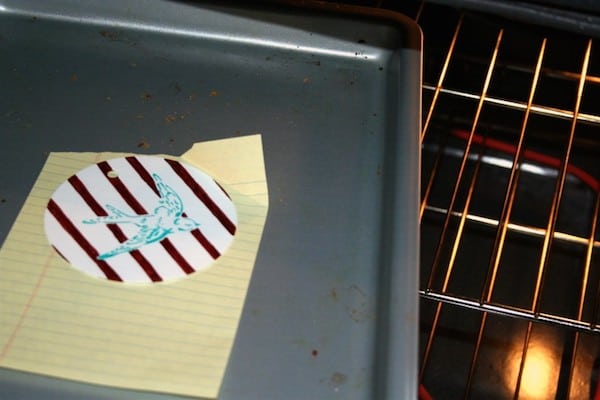
- You will first need to cut a circle shape out of your Shrinky Dink material. I used a circle cutter and did about a 3 3/8" circle (it was completely random, I just made sure my stencil fit), but you can also trace a shape and cut it with scissors.

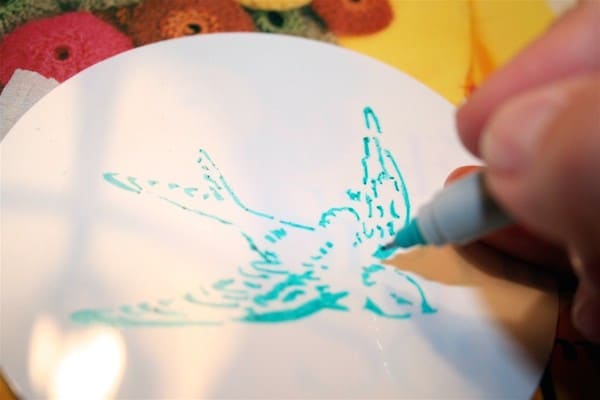
- Create your design on the Shrinky Dink material using Sharpies and stencils.
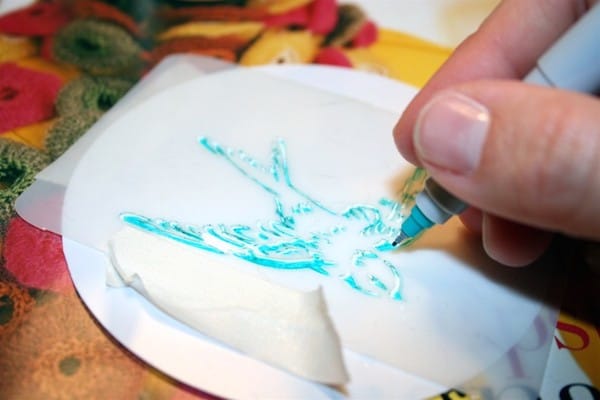
- After removing the stencil, go back and thicken any lines that might not have fully transferred with the stencil.
- Punch any holes BEFORE baking the Shrinky Dink sheet. Preheat the oven to 325 degrees Fahrenheit. Place the Shrinky Dink shape on a cookie sheet with aluminum foil.
- Put the cookie sheet in the oven for 1 – 3 minutes, watching the Dink shrink. If the item folds on itself, untwist it and flatten while still hot. Remove the cookie sheet from the oven and let your Shrinky Dinks cool before handling.
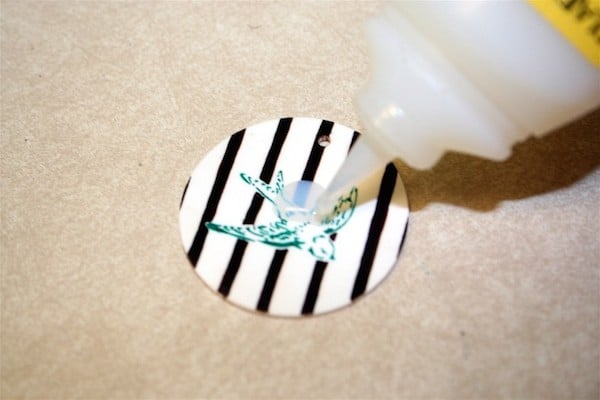
- Finish by putting Dimensional Magic on the pendant and allowing to dry.
Notes
- I’m wondering if I would’ve let the Sharpie dry a lot longer before baking if there would’ve been a difference in the blurring. Just thinking that maybe the Sharpie would’ve set more in the material somehow.
- It’s been recommended to me by several people that the Ruff n’ Ready sheets might help with the blurring. They are made to look frosted so have a textured side, which may take the ink better.
Also if you like handmade jewelry and accessories using Dinks, visit some projects from my friends below:


I use Glossy Accents by Ranger. Buy it from AC Moore. They have the best price. It has never blurred the Sharpie(on the shiny side) or Crayola oiled based pastels(on the scratchy side) on the Shrinky Dink Rough n Ready version. I put the Accents on front and back and it looks 3D. I also have used my diecut machine to cut and emboss the plastic. It’s amazing stuff!
Miriam
I love it. The blurring makes the bird look like its moving…really really cool!
Blessings, Joanne
I love it. even with the blurry bird!! I would wear it
I love how the bird glows! I clicked because I wanted to know how to make it do that. Best mistake ever!
Worth wearing! Love it
Found this looking for things to do with shrinky dinks. LOVE IT! I would have thought that was totally intentional!
This is really cool looking. And I think I like the washed out bird better. You can still see the lines, but it gives it a watercolor feel. Weird the brown didn’t bleed, but it looks great. WEAR.
I love the blurring better because it makes it stand out more. It pops. Really pretty. Never played with any modge podge before but I sure am seeing a lot of stuff with it now………… 😉
I love it! You can save money by using # 6 plastic that you probably already have in your kitchen to make your own shrinky dinks. Check clear food packages (grocery store muffins, salads and party trays) for the #6 recyclable symbol, then proceed with shrinky dink instructions.
I love the blurred bird! Wouldn’t have known it wasn’t intentional if you didn’t say. Keeper.