
Learn how to decoupage a table top in this unique upcycled furniture project! You can do it yourself with Mod Podge. So easy!
Skills Required: Beginner. It helps if you have experience with paint and Mod Podge, because that’s what you’ll be doing to complete this project.
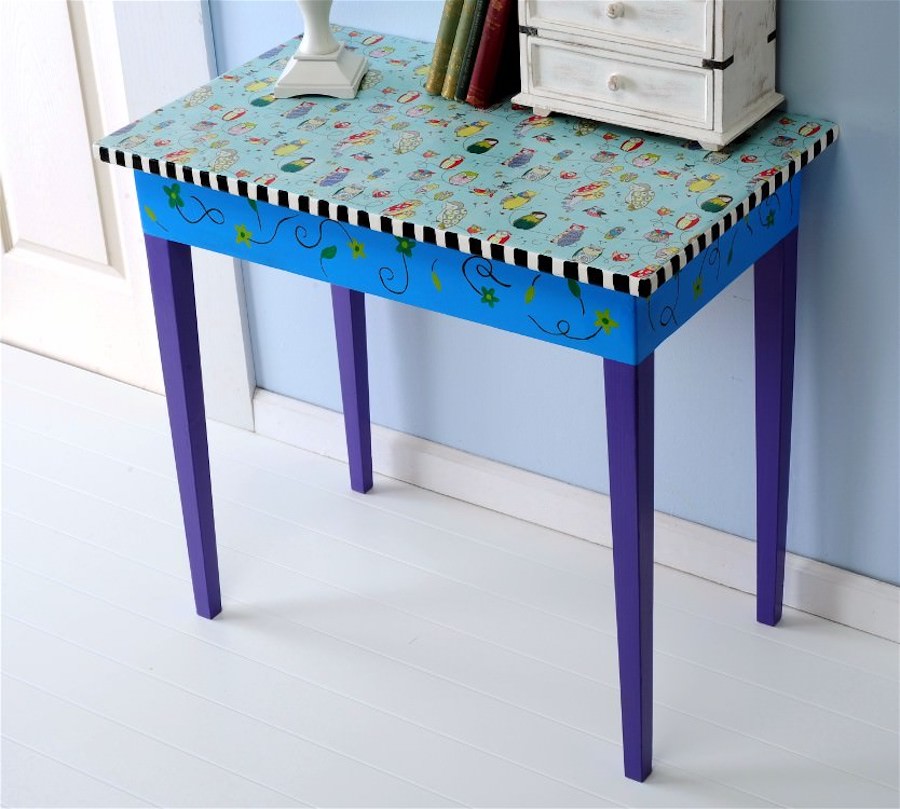
I love a good upcycled furniture project! I’m please to share the results of my “fabric table” makeover with you today. Call me the DIY queen! I’m kidding, but I am pleased with the results.
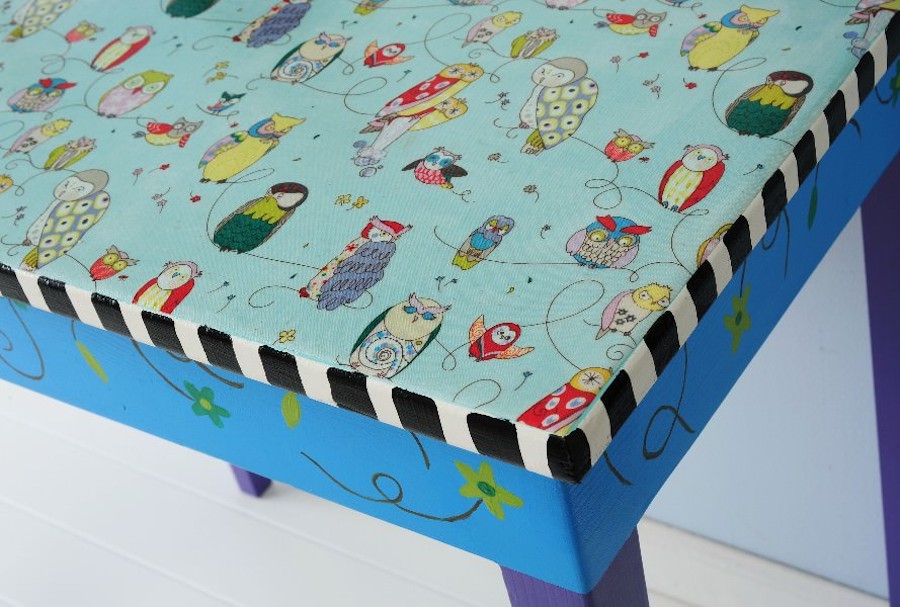
This decoupage tabletop is colorful like I am (kind way of saying goofball), and I absolutely love the owl fabric I Mod Podged to the top.
I’d like to walk you through this Mod Podge tabletop re-do because, if you are afraid of doing this to a piece on your own, you won’t be afraid after this upcycled furniture tutorial.
There are several steps, but if you have patience and give yourself the time to complete the project, you are going to have fun and love the results. As usual, let’s jump in.
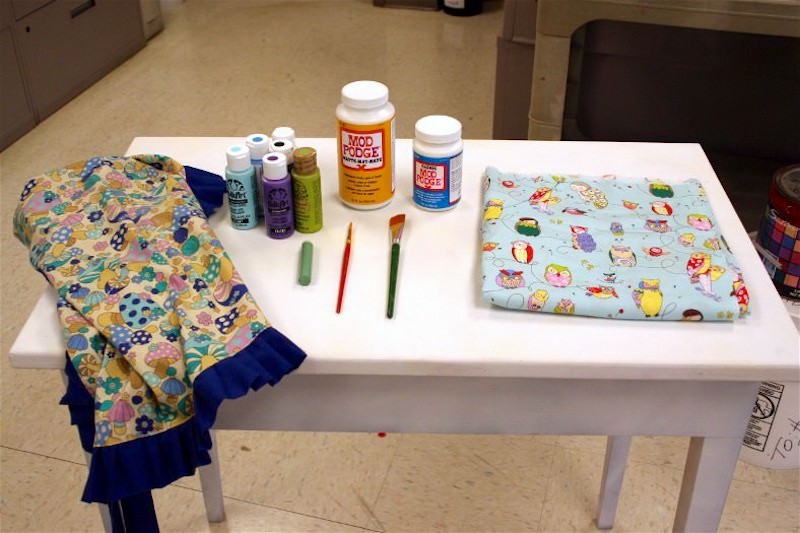
This little display shows you most of the goodies that I used for my decoupage tabletop. Here’s the full list of supplies:
- Wood table – mine is from the thrift store, sanded and spray painted white as a basecoat
- Mod Podge Fabric and Mod Podge Gloss
- FolkArt Paint – Asphaltum, Citrus Green, Jamaican Sea, Kelly Green, Lavender, Ocean Cruise, Pure Black, Titanium White (get the colors that coordinate with your fabric)
- Fabric, 1/2″ yard or enough to cover your tabletop. I used Alexander Henry Spotted Owl in Light Blue
- Paintbrushes, at least one large and one small, and a liner brush
- Scissors
- Stencil or painter’s tape (optional)
- Brayer (optional)
- Cute mushroom apron (optional)
If your table is going to get a lot of wear, I recommend using Hard Coat or Furniture Mod Podge. You can also use a clear acrylic sealer over regular Mod Podge. It just helps to have another layer of protection for heavy use.
Yes, you can clean the top with water. It’s not a table you want to spray with a lot of cleaners because you will eventually wear away the Mod Podge.
Get the printable how to card below:

Decoupage Tabletop
Equipment
- Paintbrush(es) at least one large and one small, and a liner brush
- Tape measure
Materials
- Wood table
- Fabric 1/2″ yard or enough to cover your tabletop
- Mod Podge Fabric
- Mod Podge Hard Coat
- Acrylic paint coordinating colors
- Spray primer optional
- Stencil or painter’s tape optional
Instructions
- Prepare the fabric by washing and drying it, then ironing flat. Cut to be slightly larger than the tabletop.
- Lay the fabric out on piece of wax paper and coat with a layer of Mod Podge Fabric. Let dry.

- Measure the tabletop and cut the fabric to fit using the scissors.
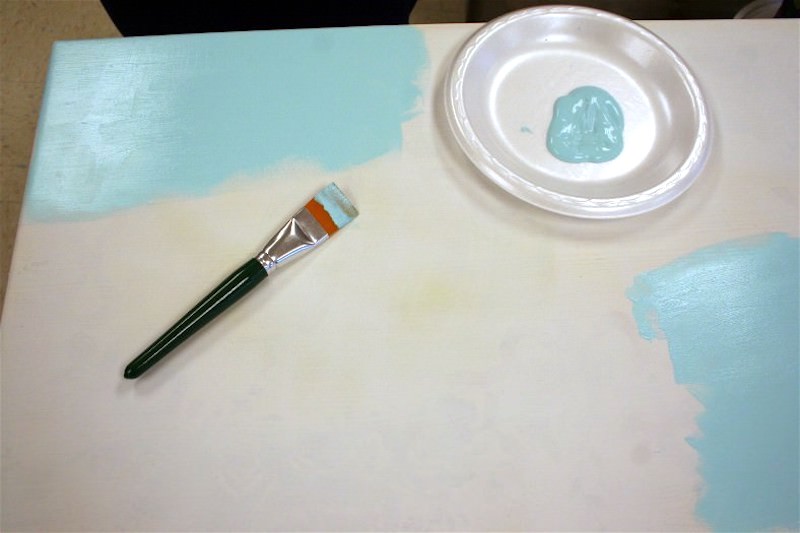
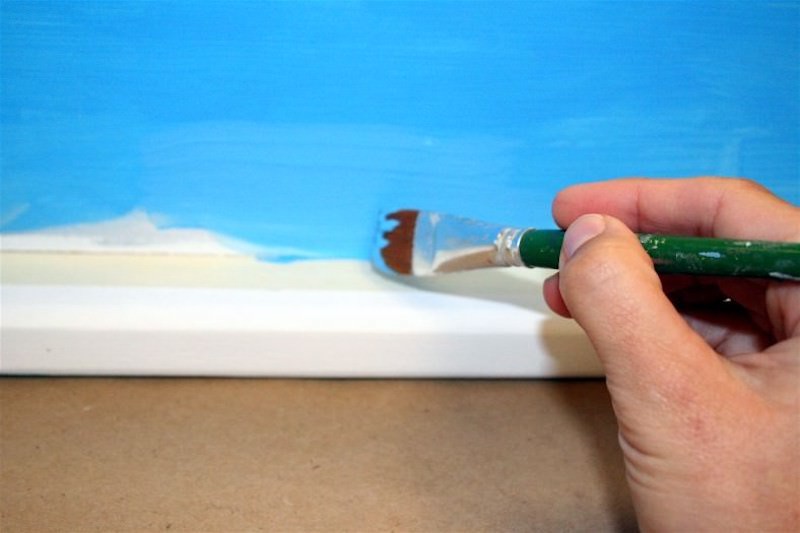
- Coat the tabletop with the acrylic paint color of your choice (match your fabric or use white). If you have a dark fabric with a light pattern, just stick with white as your background. Paint the entire tabletop and then let it dry. Clean up the edge if necessary.
- Paint the legs using the acrylic paint. Let dry.
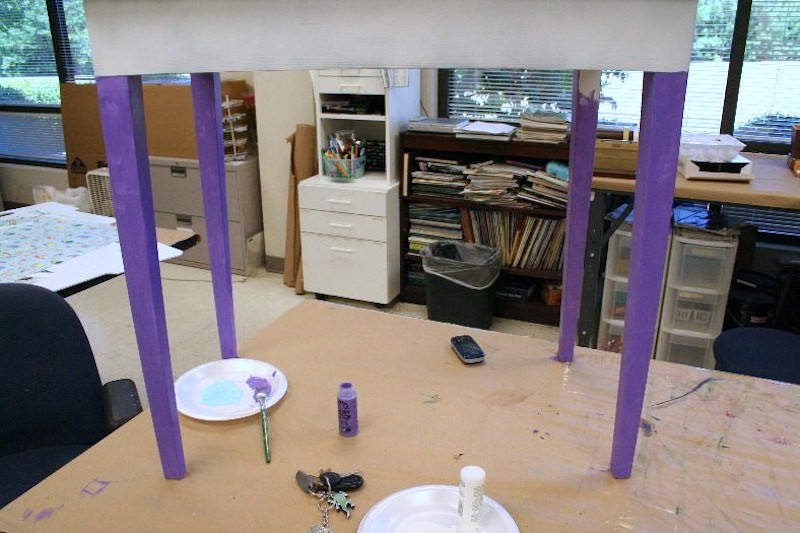
- Paint the side of the base of the table using the acrylic paint. Let dry.
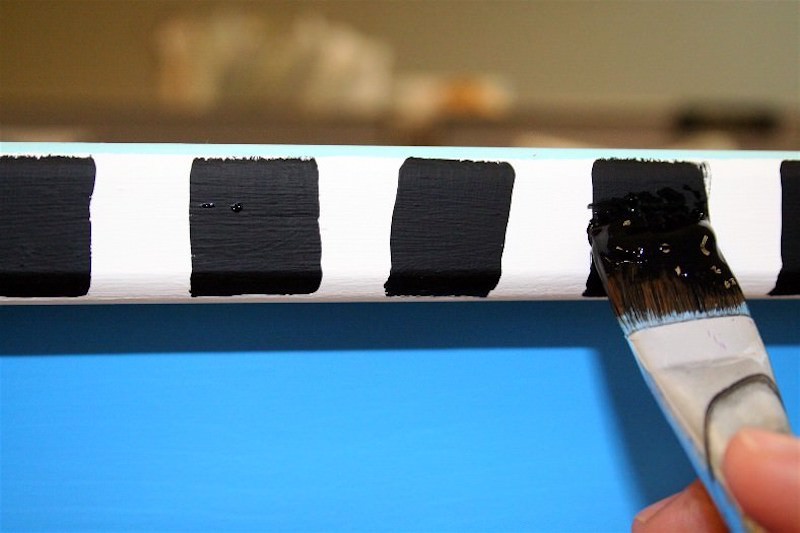
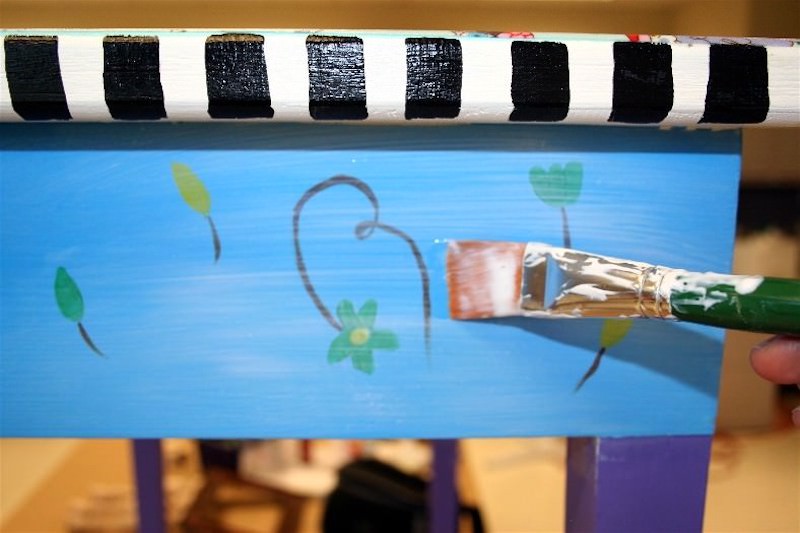
- Paint stripes around the edge of the top using acrylic paint (I used black). Use painter’s tape to make the lines straight if you choose. Let dry.
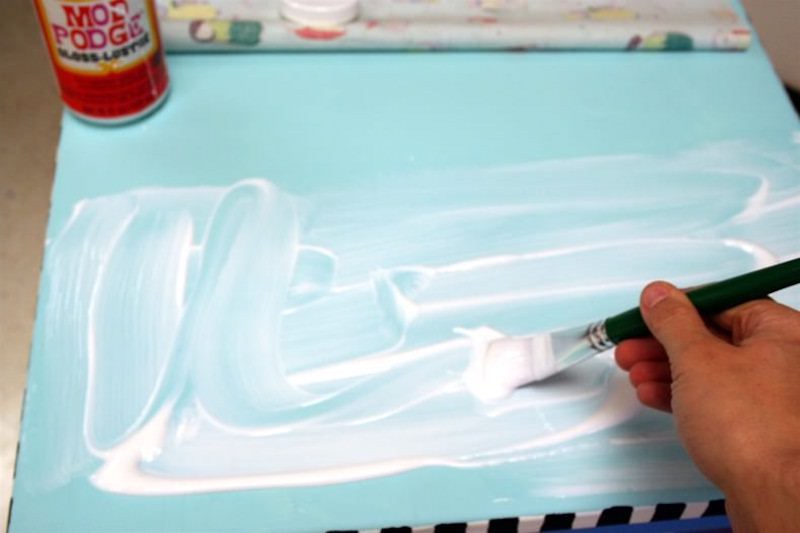
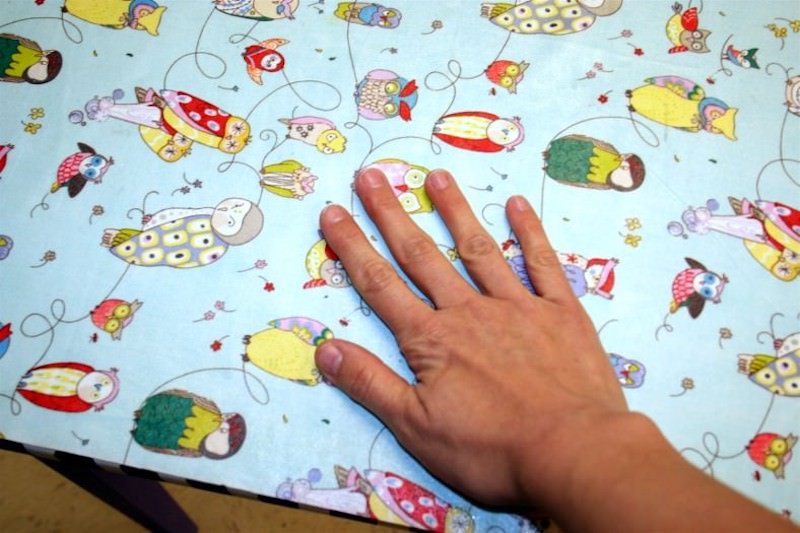
- Add a medium layer of Mod Podge to the top of the table. Place the fabric down and start smoothing. Work from the center out towards the edges. I did one half of the table, then the other half.
- Continue smoothing with your hands or a brayer. Wipe away any Mod Podge that squeezes out the edge. Let dry.
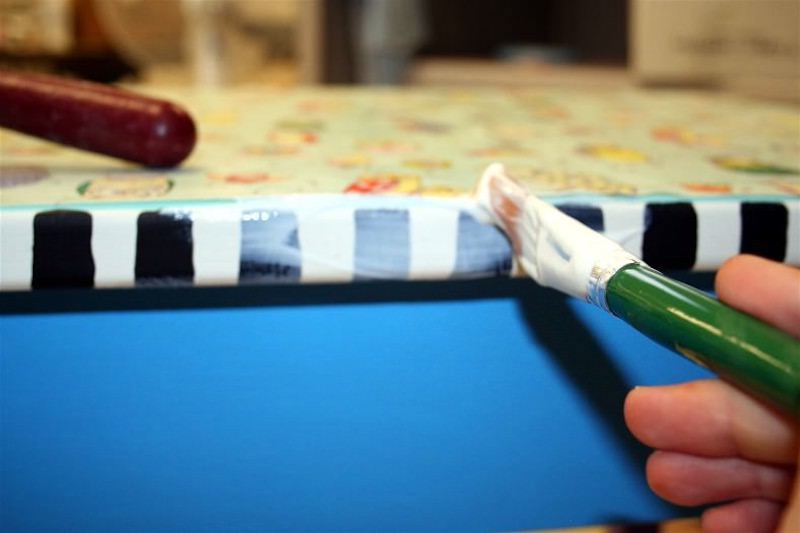
- Coat the entire tabletop with Mod Podge. Let dry.
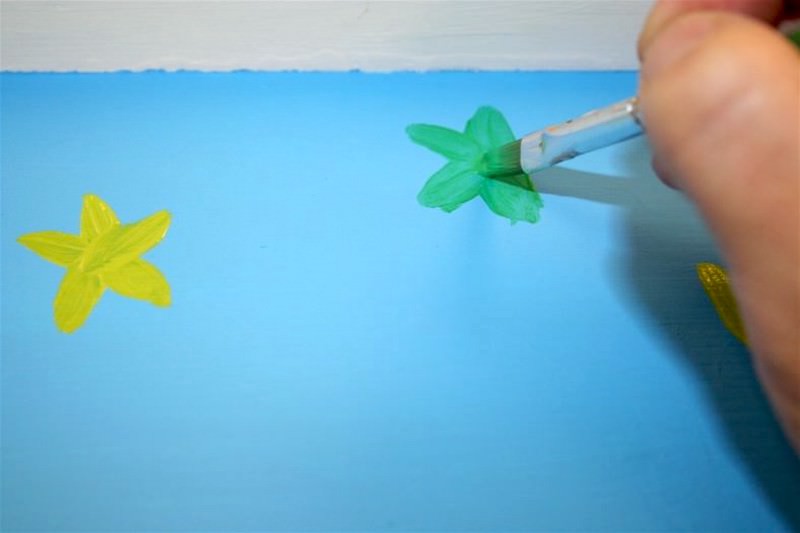
- Add acrylic paint decor (I did flowers) on the base of your table. Use the liner brush to add details. Let dry.
- Decoupage the entire table with a medium coat of Mod Podge – allow to dry and then repeat. Let dry for several hours before using.
Notes
I’m very pleased with my attempt at upcycled furniture, and the bright and cheery color palette makes me happy (it’s such a fun craft!). Are you ready to decoupage a tabletop of your own? Let me know in the comments!
If you enjoyed this decoupage furniture project, I’d love for you to check out these other ideas:


Your owl table is such a hoot! I like your whole art deco look. If you decide to give this beautiful table away, my daughter’s sorority’s mascot is….the owl! Thanks for your continued inspiration….
love it! that owl fabric is great!
LOOOOVE the owls Amy! nice!
I soooooooooooooooooo love this – I am looking at an ugly old high school desk and am thinking this is what I need to do to make it look nice.
Gail
The owl fabric is adorable. What a fun project, and you did an awesome job.
Great job, Amy! It turned out fabulous:) I’ve been wanting to try that fabric MP for a while now- maybe I’ll go out and get some- you are so inspiring!!
Fabulous piece. I love love love it. The colors, the creativity. Super job. 🙂
Totally Cute! I too love that owl fabric. I’ve been hanging on to it for the right project. I might have to copy your idea and use it for a table! As always, it’s a pleasure to read your blog!!!
I have yet to try MP with fabric. Why? I don’t know. But if the Queen of DIY does it, I, a lowly Mod Podge peasant can surely try! This turned out so great!
This is so awesome!!!