
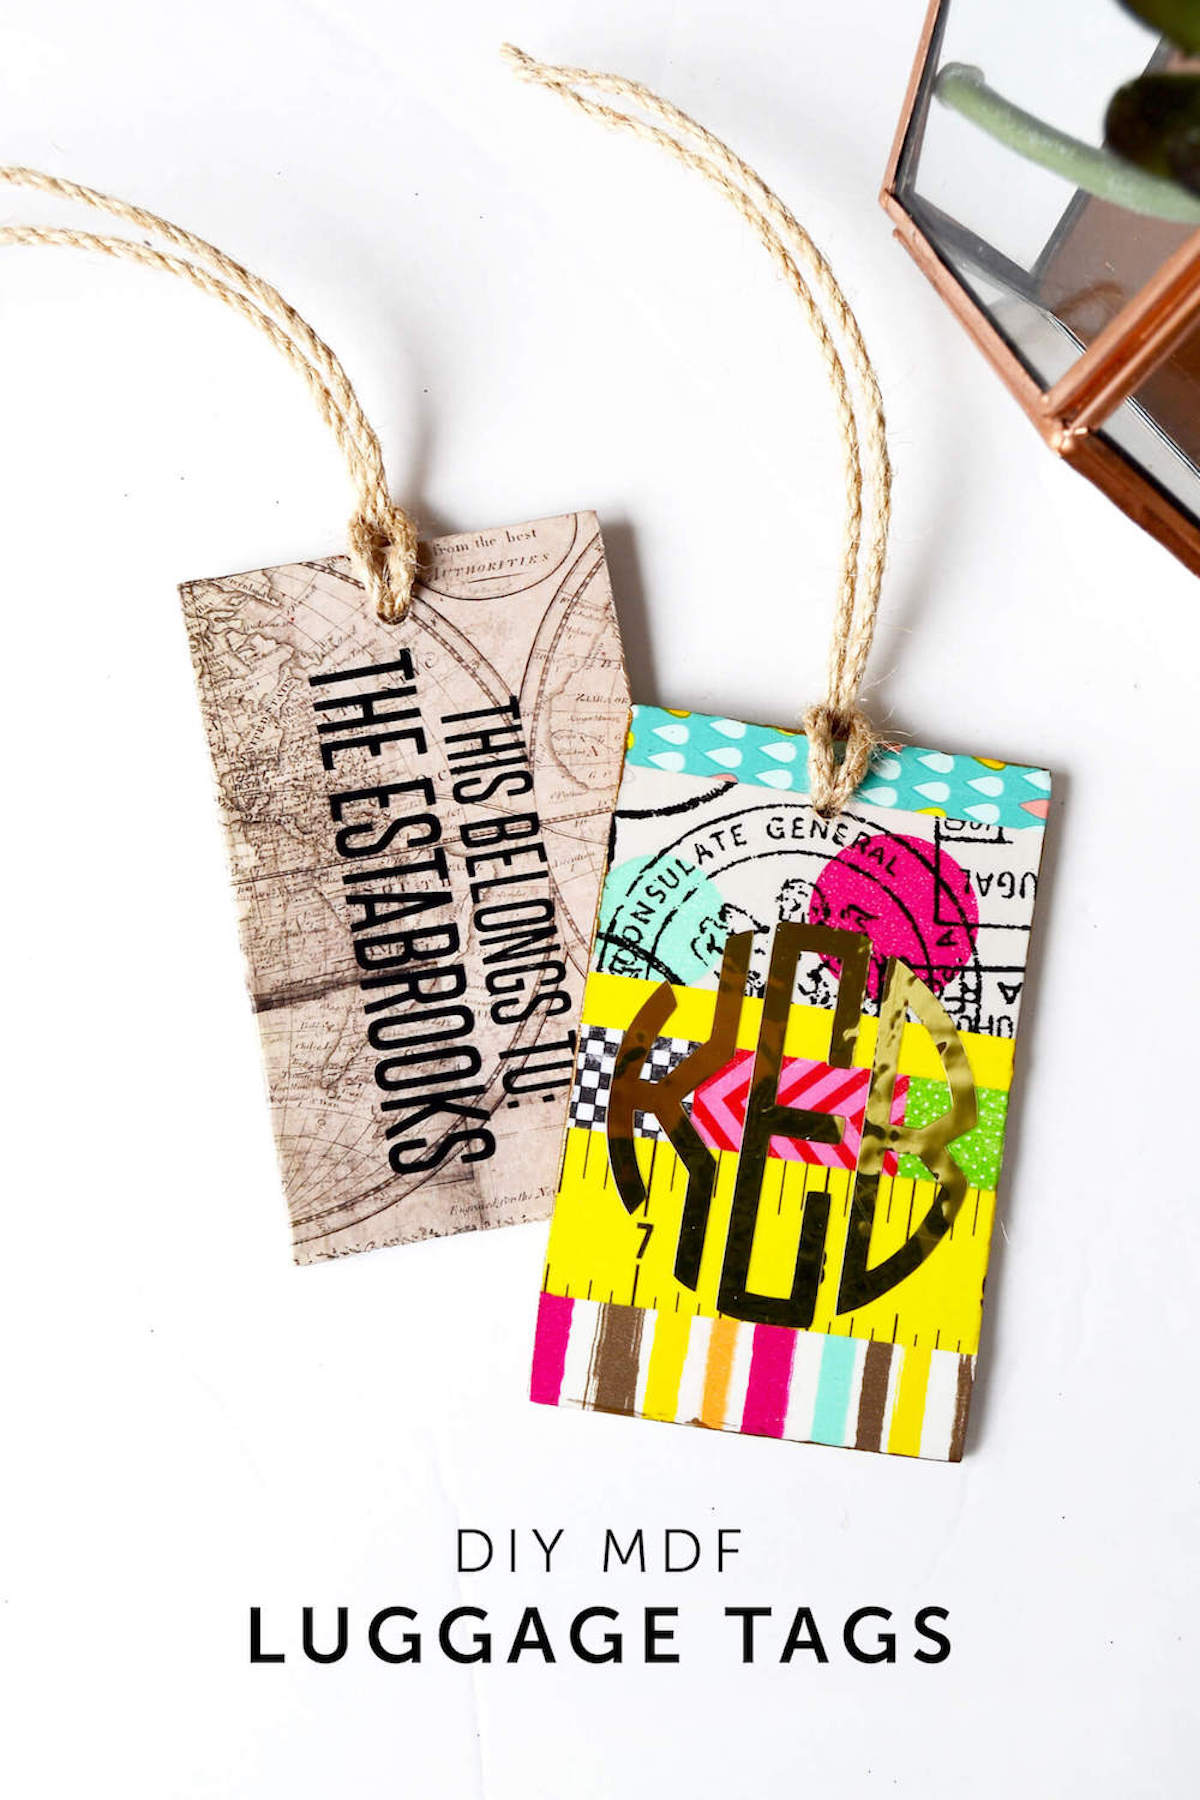
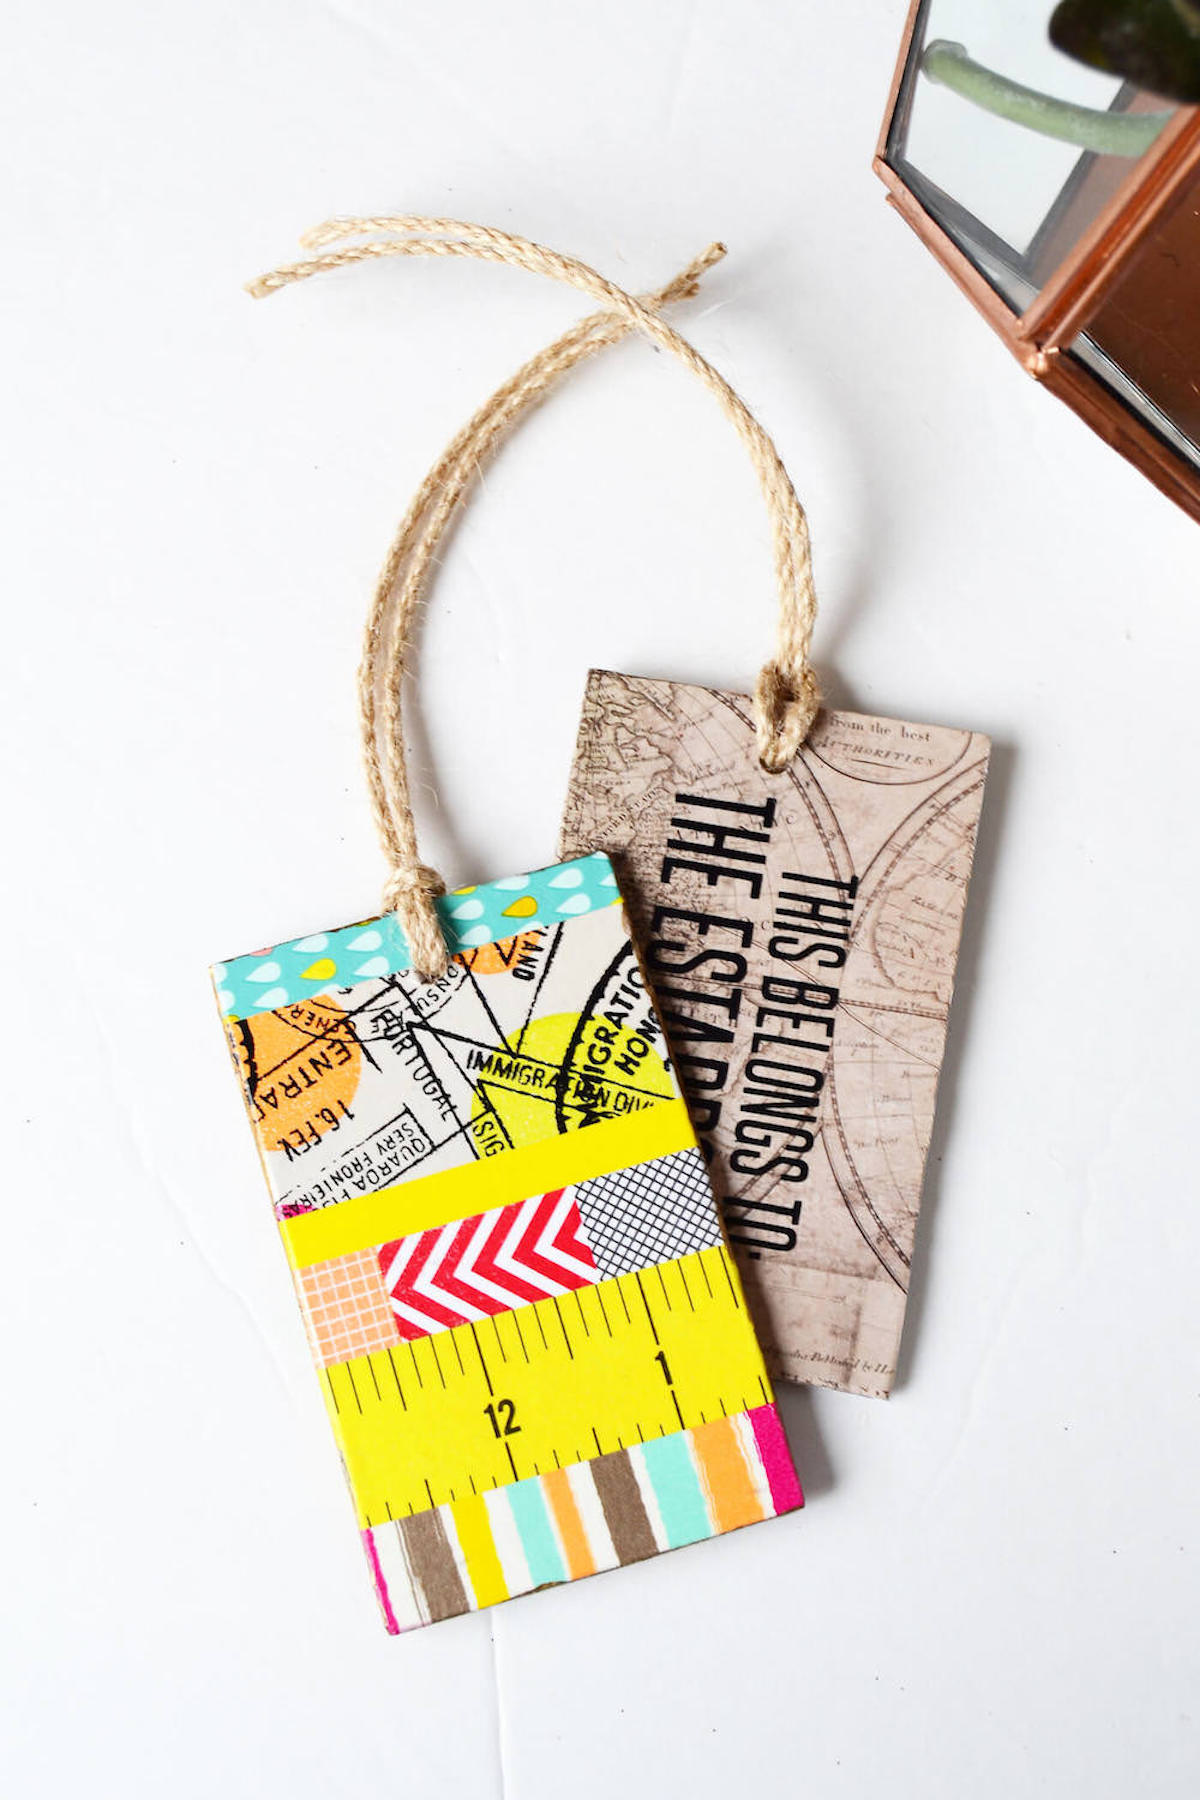
Make DIY luggage tags that make a statement! Customize these cute tags any way you like with Mod Podge and scrapbook paper.
Skills Required: Beginner. It helps to have used a paintbrush before to paint smaller areas or Mod Podge. Otherwise, you’ll be decoupaging small pieces of paper and applying washi tape. It’s pretty simple.
Vacations are a welcome break from winter, and I’m pretty sure a lot of you folks are planning one soon! My husband and I happen to be in the midst of that very thing right now.
I wanted to create a DIY luggage tag or two that would stand out from the normal tags that you see everywhere. You know, something cute. I created these out of MDF wood and they’re pretty easy to make (they make great crafts for traveling teens also). So let’s get started!
Gather These Supplies
- MDF wood sheet or tag
- Cardstock or scrapbook paper
- Mod Podge Matte
- Washi tape
- Liquid Leaf
- Jute twine or ribbon
- Paintbrushes
- Craft knife or box cutter
- Steel ruler
- Sandpaper
- Drill
- Craft paint (optional)
A few notes on this project:
- As a luggage tag, especially for a carry on, the MDF is pretty durable. But you can also use acrylic or another smooth surface.
- If you use a thinner paper, you’ll want to paint the MDF with white or a light craft paint. This is because a darker background will show through a thinner paper (and dull the look of the paper).
- As you smooth your paper, Mod Podge might squeeze out the sides. That’s okay – just wipe it away with a brush.
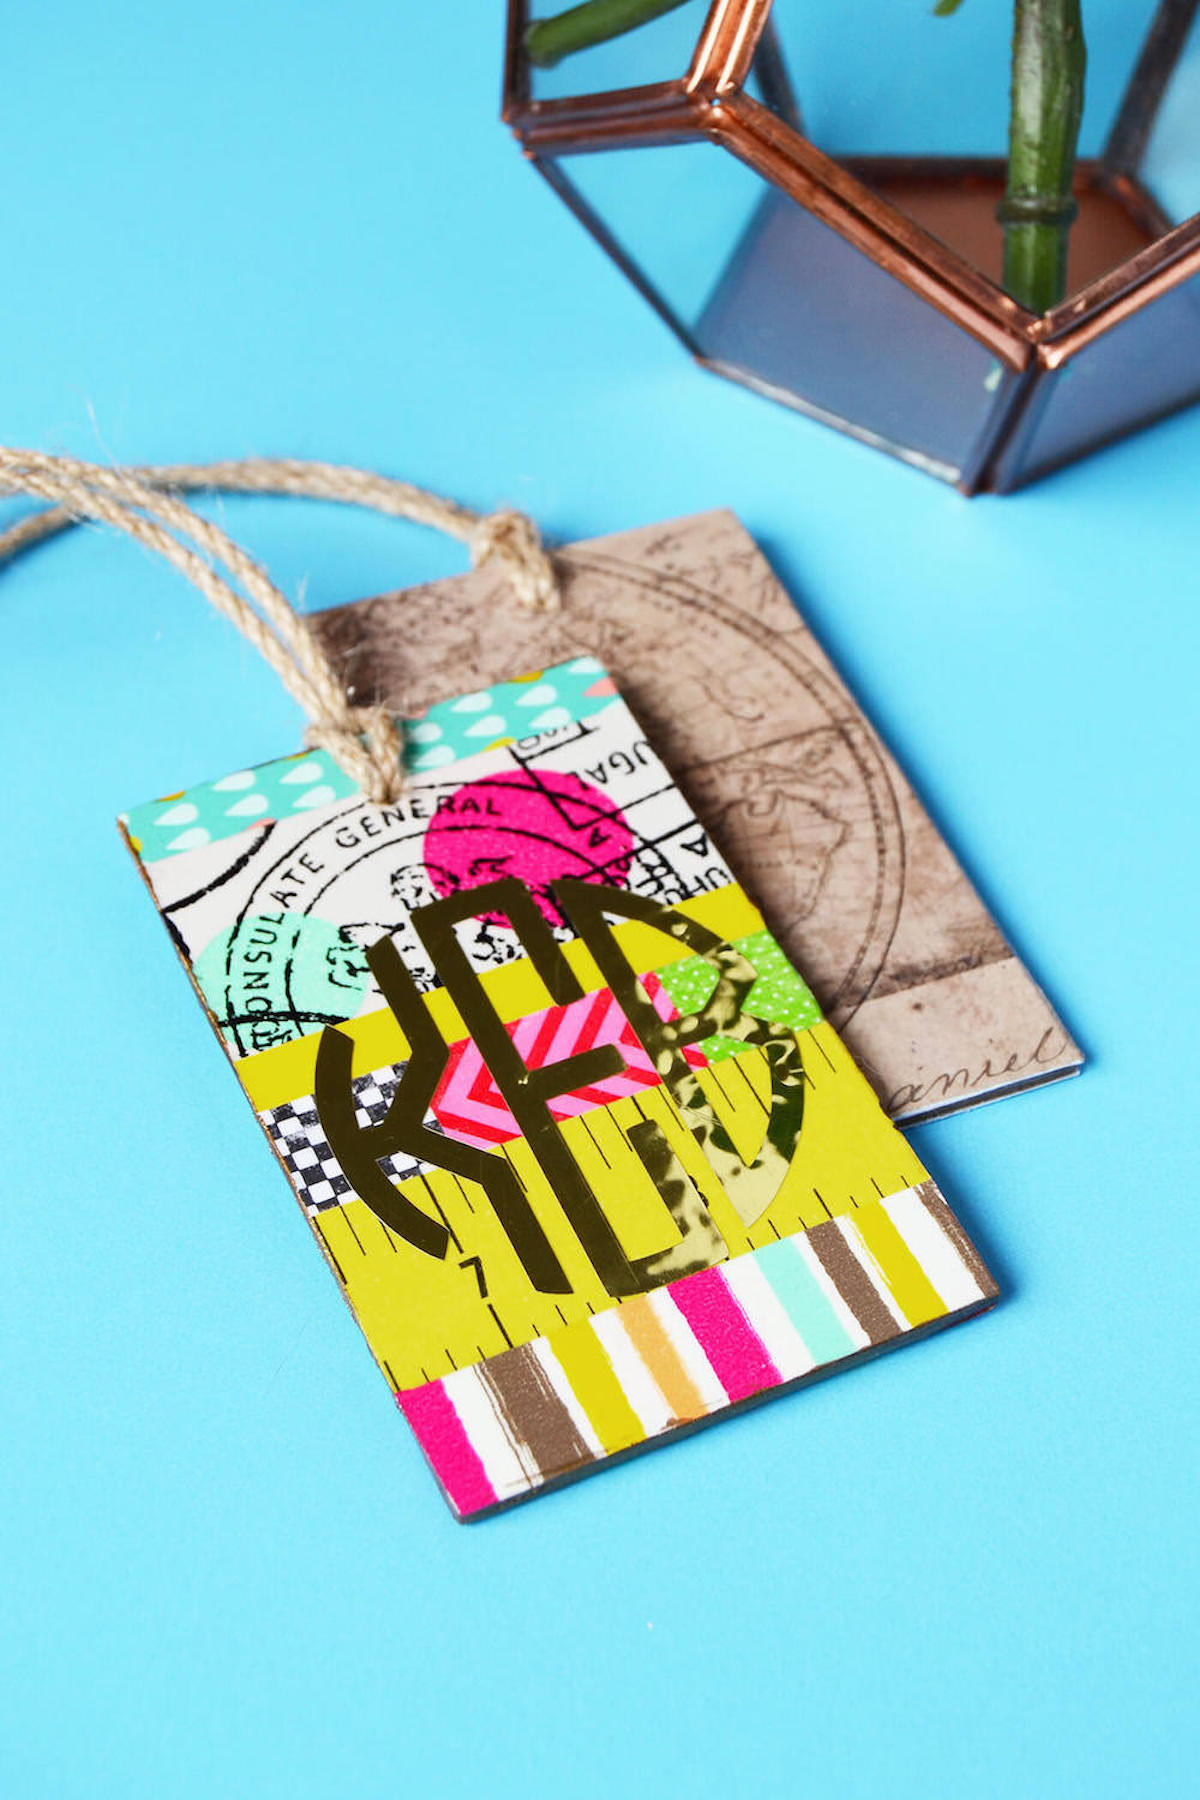
- Washi tape is such fun way to create a fun and colorful DIY luggage tag! If you are using washi, you may want to paint the MDF with white acrylic paint first (just like I mention above for thinner paper).
- You can use jute twine (which is really strong) to attach your tag. But you can also use ribbon, a shoelace, or anything else that can withstand a bit of pulling.
- On your finished tag, you can add decals, stickers, vinyl, or even a piece of paper with your address and other information. Here’s a post about Mod Podge and how it works with ink, etc.
You don’t have to do what I did to make your luggage tags – you can customize with any papers or designs you like! It’s very fun to experiment.
Get the printable how to card for this craft below!

DIY Luggage Tags
Equipment
- Craft knife or box cutter
- Steel ruler
Materials
- Thin MDF wood piece or tag
- Cardstock or scrapbook paper
- Mod Podge Matte
- Sandpaper
- Washi tape
- Liquid Leaf
- Jute twine
- Painter’s tape
- Acrylic paint optional
Instructions
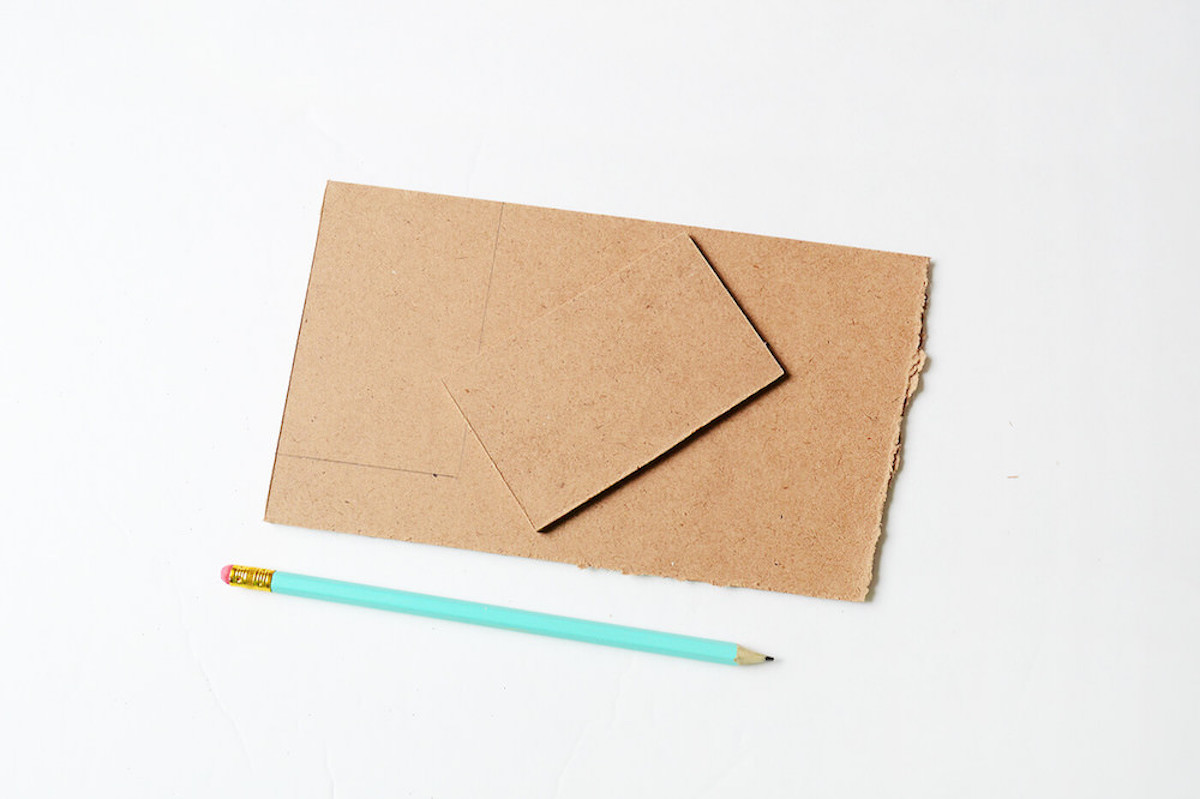
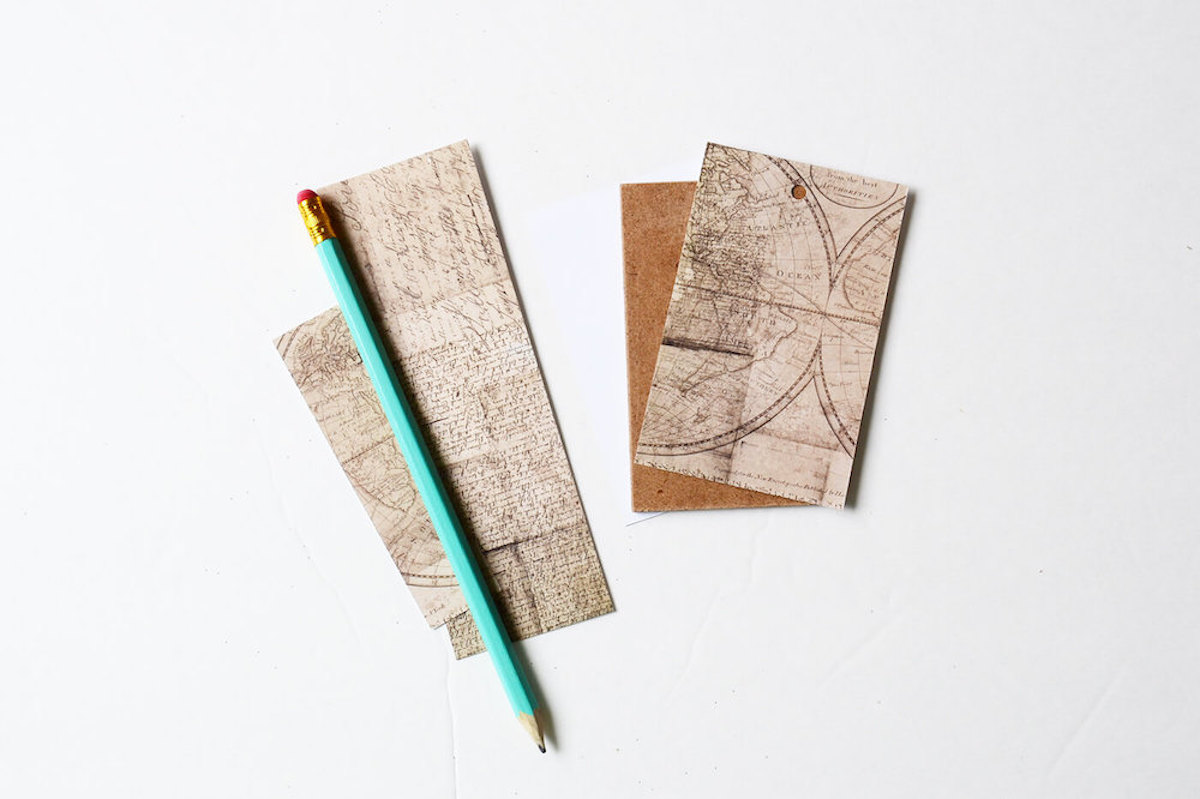
- Cut your MDF wood to 2.5" x 4", or the size of your choice. Use a cutter to score the back and the front (along the same line). Once it is scored, you can snap it pretty easily.
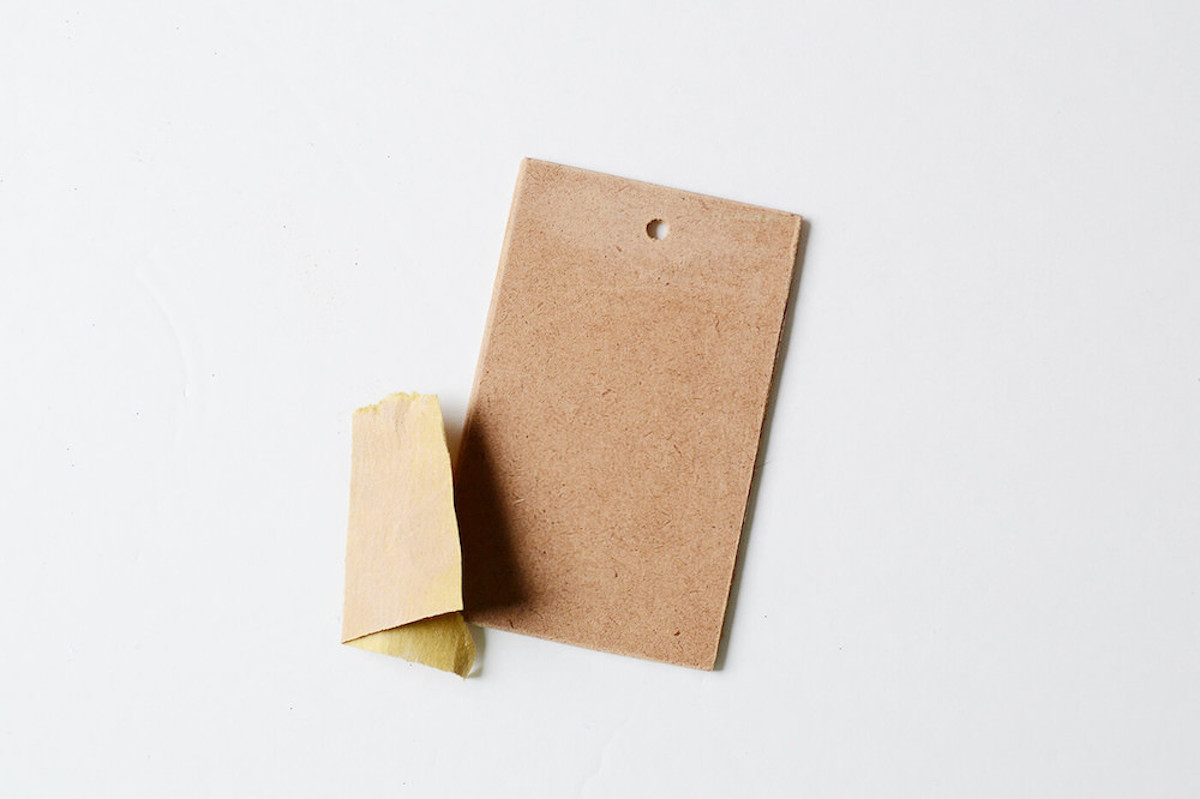
- [mv_schema_meta name=""]Sand the MDF wood tag and drill a hole on the top-center of the tag for the hanger. Place painter's tape on both sides before drilling so you don't split the wood. Remove the tape to sand.
- Cut out the cardstock or scrapbook paper to fit the tag. Cut both a front and back. Apply a medium layer of Mod Podge to one side of the tag and smooth the paper down thoroughly. Repeat on the other side and let dry for 15 – 20 minutes.
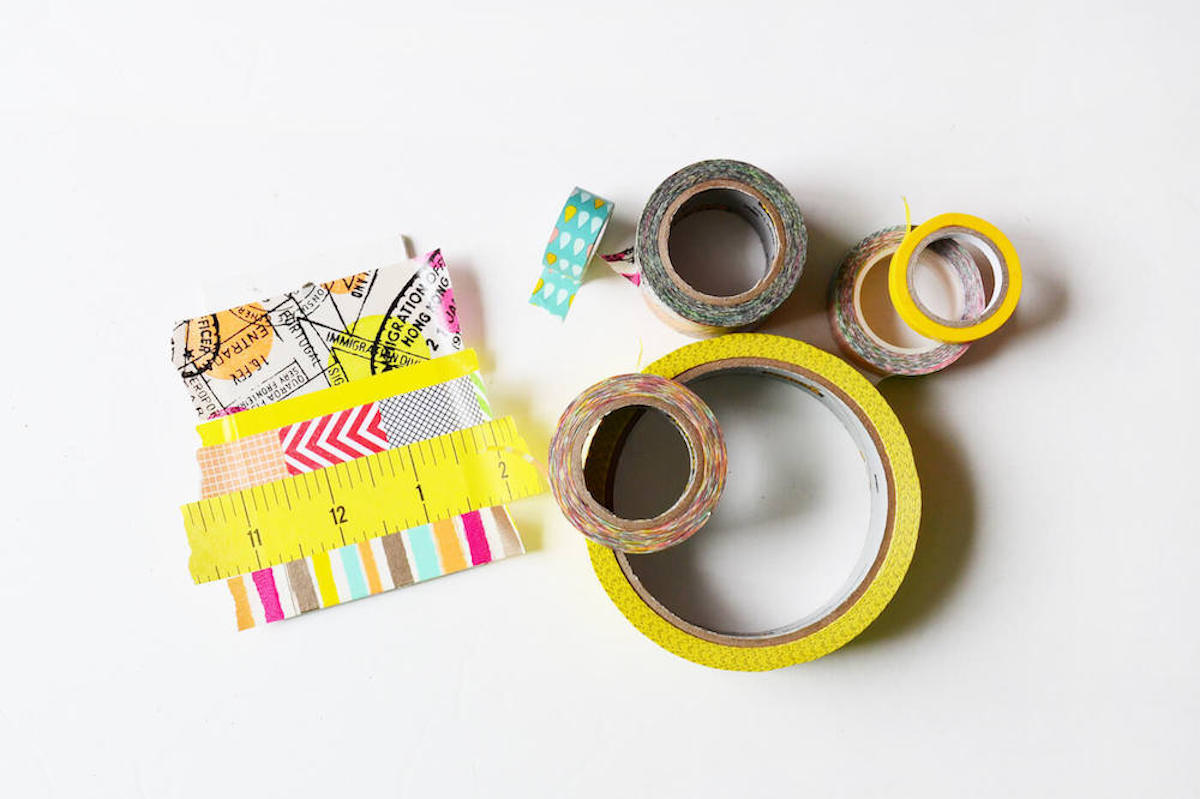
- On another wood tag, apply washi tape on both sides and trim with a craft knife.
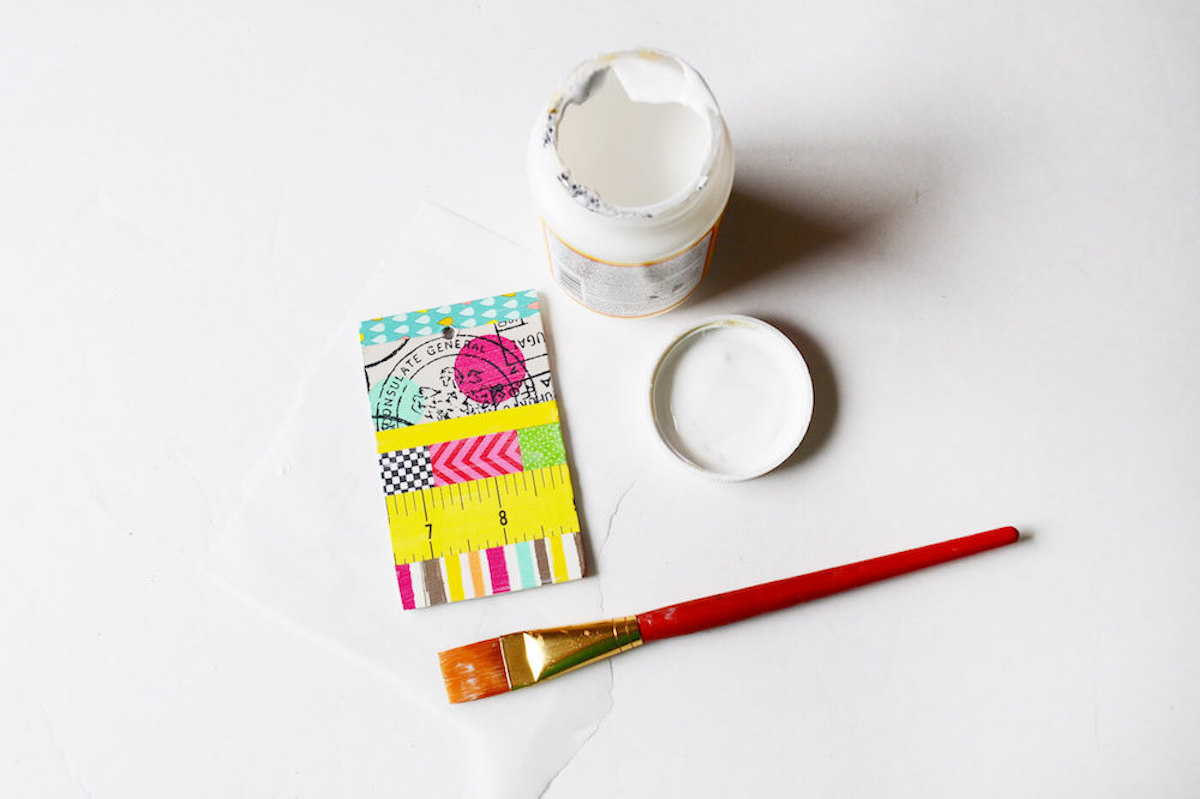
- Apply two layers of decoupage medium to the front and back of both tags to seal, and leave to dry (do one side and then the other).
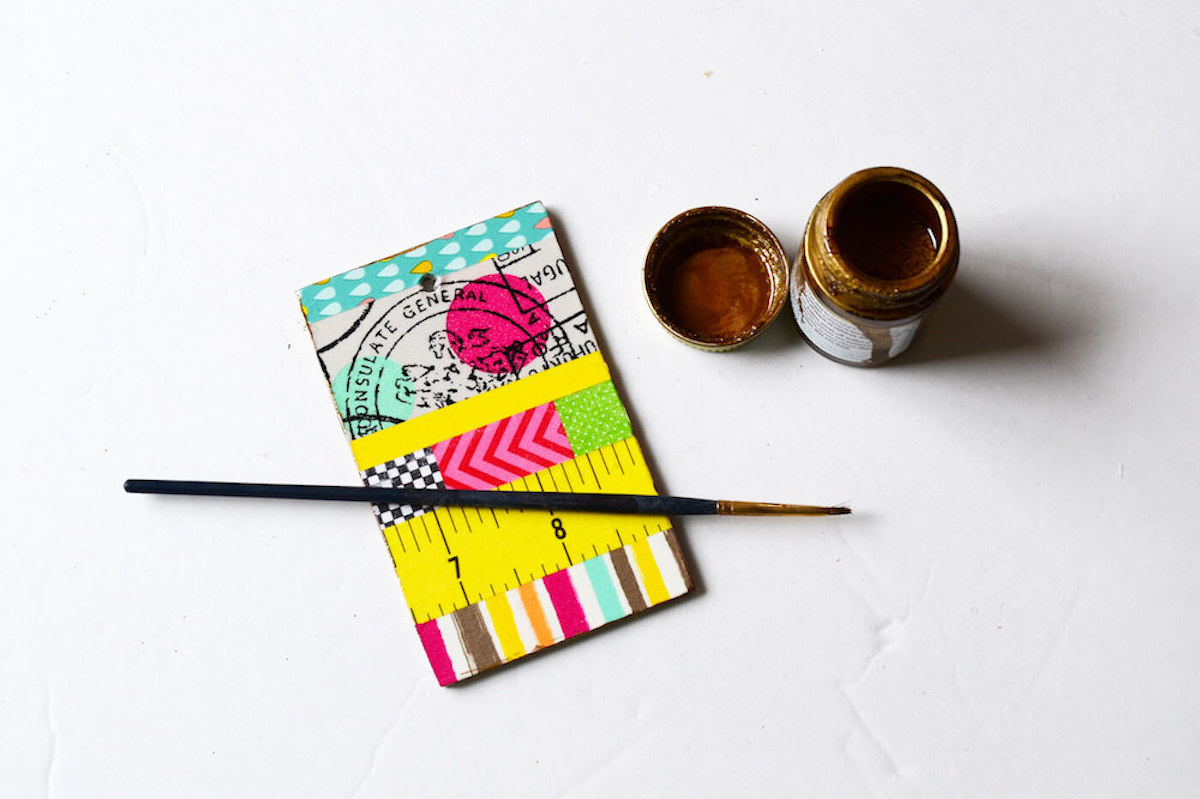
- If desired, add some liquid leaf on the edges of the tag to create a more finished look.
- Tie on the twine or ribbon that you will use to secure the tag.

- If desired, add decals or stickers to the tags (you can also add an address label).
And just because I’m curious: what place do you want to travel to with your tags? Let me know in the comments!
Have fun creating these tags – and check out these other posts I think you’re going to like:


Just a thought all travel outside United States uses metric system. Why not use a tape that shows inches and centimeters – it could also be used in a pinch as a measurement tool! I put a dual measuring tape in my suitcase . It really comes in handy
Michelle that is very smart! I love that idea!
I love this idea. One suggestion, tie a loop in the jute twine, then add a clip so it is easier to take the tag off easier to store the tag in the suitcase pocket. It will help sustain the life of the tag. 🙂
how can I print the instructions on one page or print at all?
Hi Joy! This website helps you: https://www.printfriendly.com/. Just enter the URL! You can delete any images by clicking on them.