
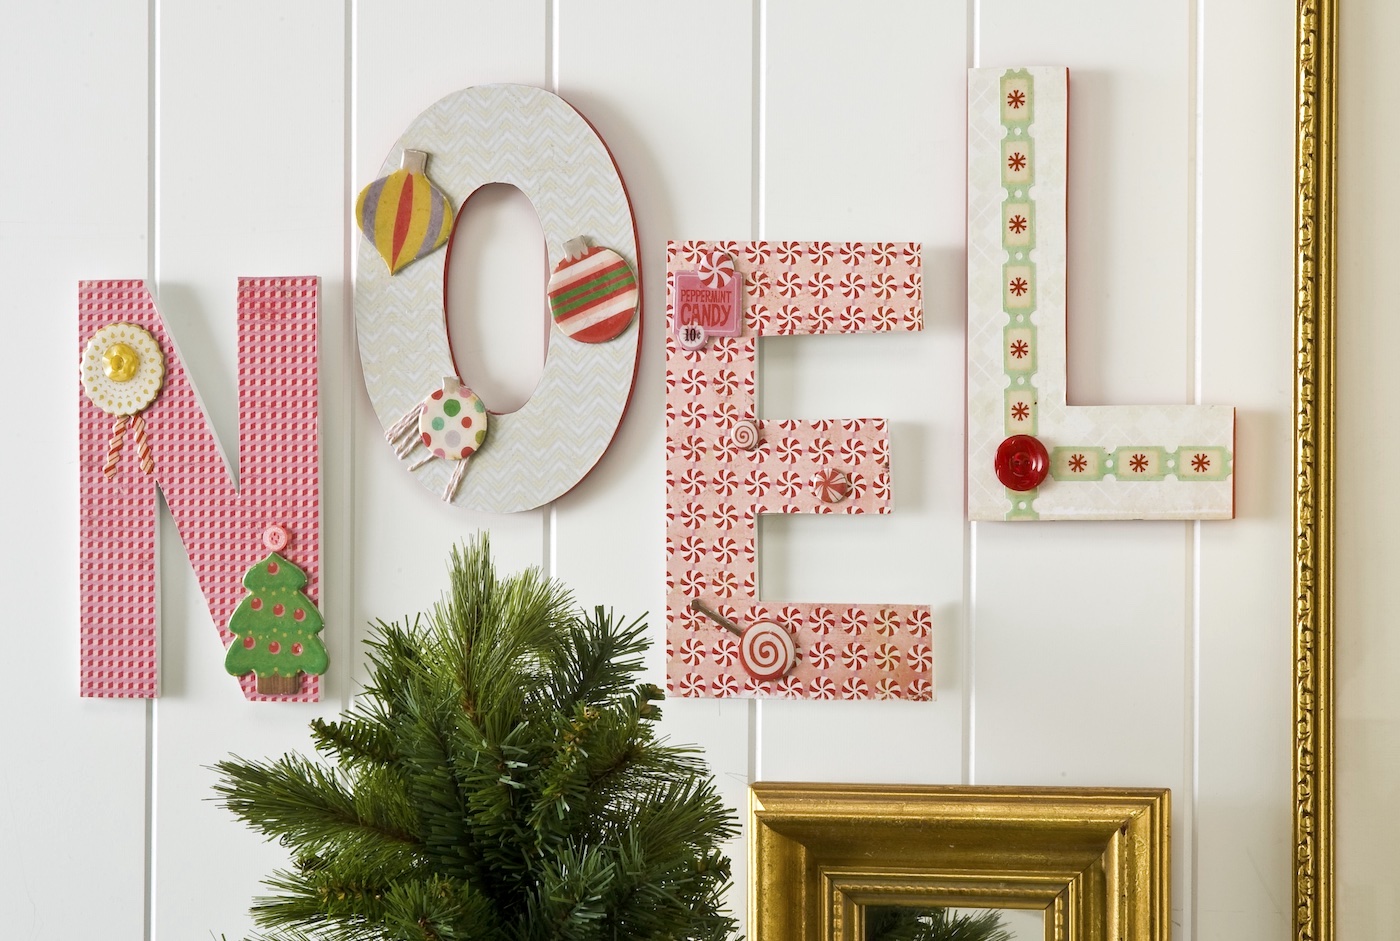
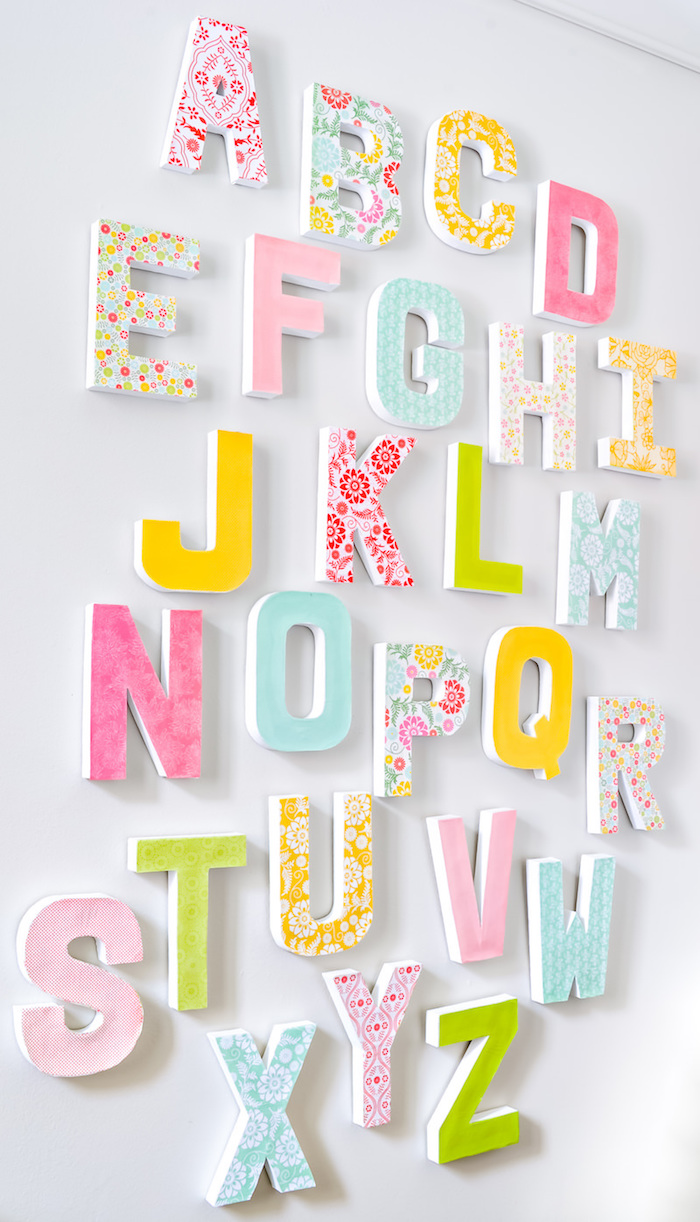
Use Mod Podge and cool Christmas scrapbook papers to decorate NOEL letters! Use wood letters from the craft store – this is SO easy and cute.
I don’t have a mantel. If you have a house, you probably do have one – but if you are like me and have an apartment, then mantel decor just isn’t going to happen.
So we apartment dwellers must find other ways of decorating . . . and I like wood letters. For my holiday Apartments.com challenge, I decided to tackle making some apartment friendly holiday wall decor.
I personally think wood letters are the bomb and perfect if you need some quick homemade decor on a budget – paper mache letters are also good.
You can fill up a wall in no time and make your apartment feel so cozy. Here’s how I made this wood Christmas craft.
Wooden Noel Letters
Gather These Supplies
- Wood letters spelling the holiday saying of your choice
- Mod Podge Matte
- Mod Podge Dimensional Magic
- Acrylic paint
- Holiday scrapbook paper and embellishments – I used the Peppermint collection from Crate Paper
- Other embellishments – ribbon, buttons, baker’s twine
- Scissors
- Craft glue
- Pencil

Here I am planning which holiday papers I am going to put on which letter. I used four different styles of paper just to mix it up a bit.
Once you have figured out which papers to use, flip the papers over and put the letters face down on the back of the paper. Trace and then cut out the paper – trim to fit.
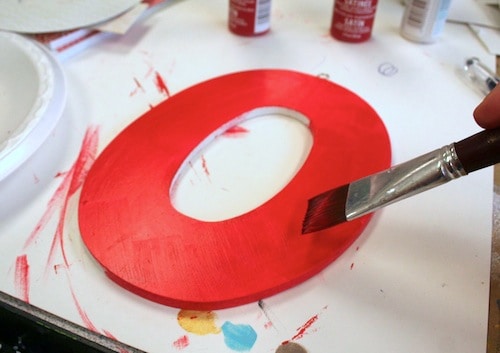
Just to spice things up a bit, I painted the backs and edges of the 2nd and 4th letters. You don’t have to do this, but you can see the edges so I thought it would be a little fun. Let dry.
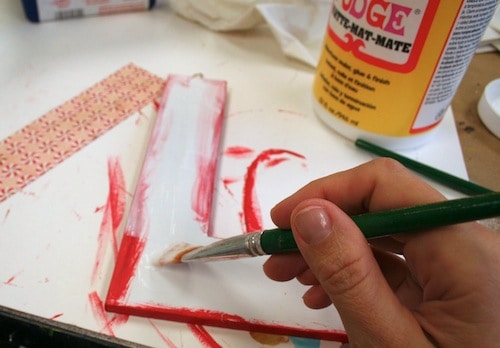
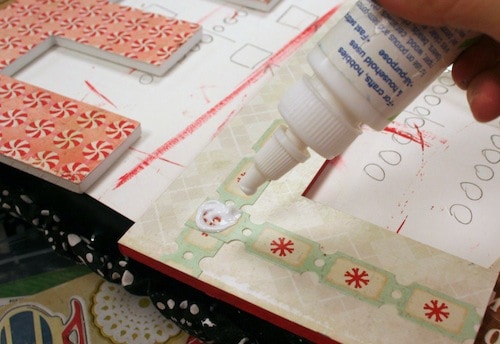
Time for the Podgin’! Put a medium coat of the Mod Podge down on the letter. Lay the paper down and smooth with your fingers (a brayer helps with the smoothing, too). Let dry for 15 – 20 minutes.
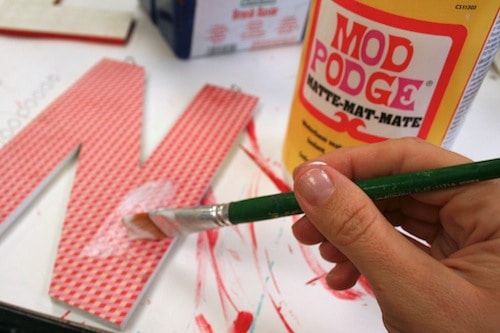
After they are dry, put a coat of Mod Podge over the top of all letters and set aside to dry. Wouldn’t it have been fun to use Sparkle Mod Podge?? I wish I had thought of it.
You can also (at this time) layer additional scrapbook papers or embellishments on top – for instance, I added some paper embellishments to the “L.”
When the decoupaging is dry, add embellishments like baker’s twine, buttons and stickers. I used craft glue to adhere the buttons. So fun!
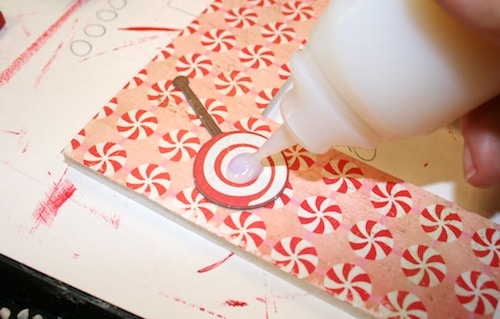
On some of the embellishments you can add Dimensional Magic just for a little added texture and shine. It looks so good. Let all that dry and hang the letters to the wall with something you can remove (like Command Strips).
This Noel letters project didn’t take me long at all – I worked on other things during drying, and it was less than a few hours total. AND I didn’t break the bank! Happy Holidays to me . . . and you too.
If you loved this project I’d love for you to check out these other Christmas decor ideas:

I love this idea. I did this for Halloween with letters. I used mod podge that time but the paper came up after the top coat of mod podge. I did some Christmas letters this past weekend and used spray adhesive instead to put the paper on the letters. I then did mod podge over top and the paper came up again – what am I doing wrong that the paper is coming up after the top coat of mod podge? Thanks for any suggestions!
Hi ALecia! If you are going to Mod Podge it, you’ll have to Mod Podge it down, too. I’m guessing that Mod Podging it on the top is doing something to the spray adhesive . . . or that the spray adhesive isn’t strong enough!