
Learn how to decorate a suitcase with printed photos! Use Mod Podge to transform an old luggage find into a personal photo gallery.
Skills Required: Intermediate Beginner. You should have experience using decoupage medium with paper, because the photos might wrinkle.
Have you ever found an old suitcase and thought, “This could use a makeover”? Well, you’re in the right place! Today, I’m excited to walk you through a super cool project where we’re going to decorate a suitcase with a bit of a twist.
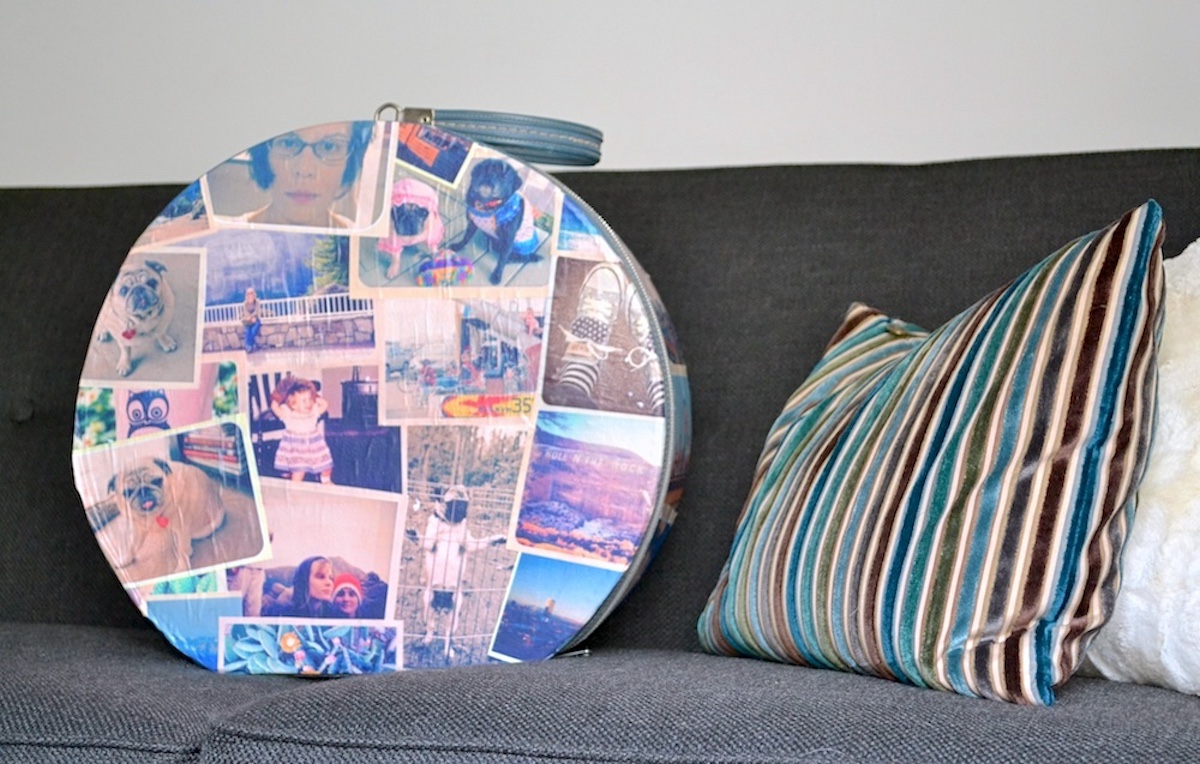
We’re turning a vintage suitcase into a personal photo album!
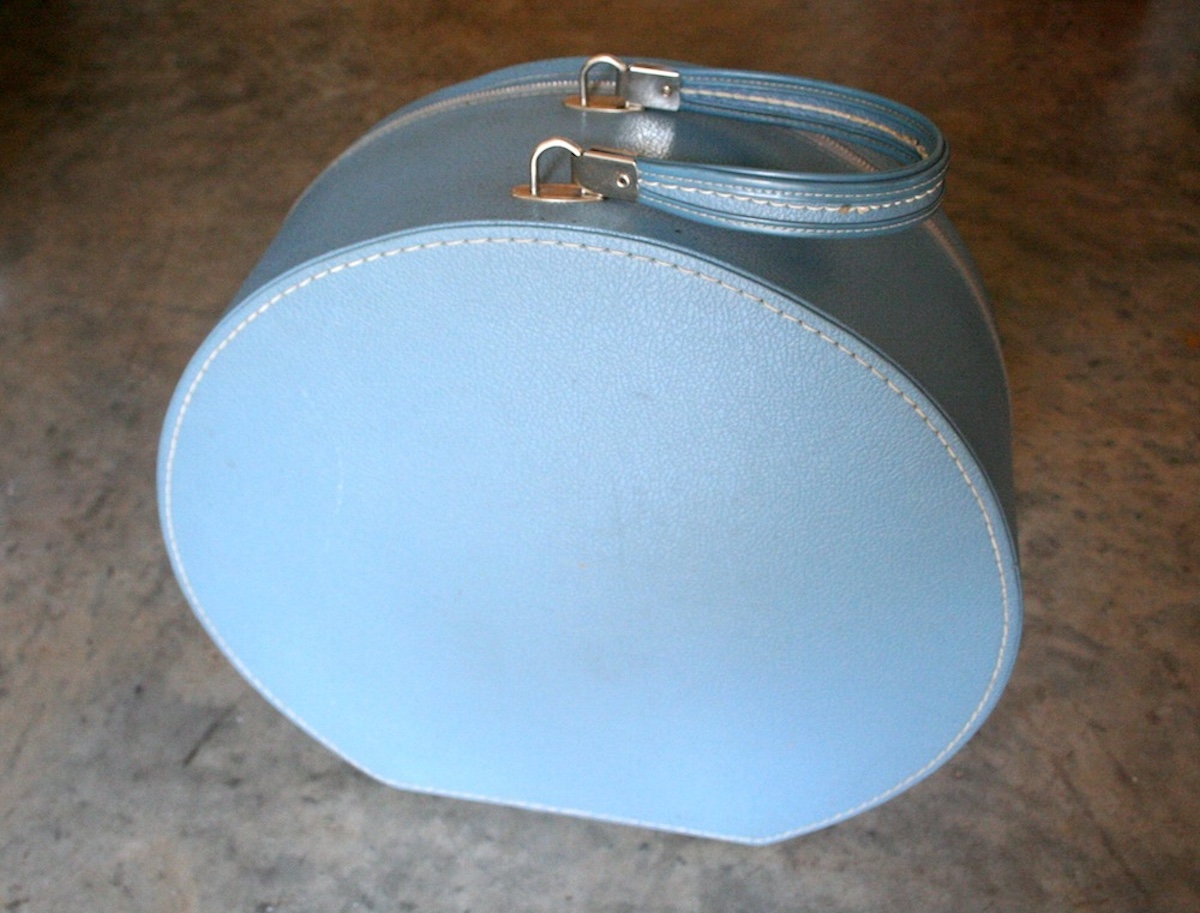
First you’ll need to grab an old suitcase, maybe from a thrift store or maybe it’s been hiding in your attic. It’s got a few miles on it, a few stories to tell.
What better way to give it a new lease on life than by decking it out with some of your favorite photos? This isn’t just slapping pictures on a box; it’s about making that suitcase tell your story.
Using Mod Podge to decoupage everything in place, we’ll transform this suitcase into something that’s not only functional but also full of personal history.
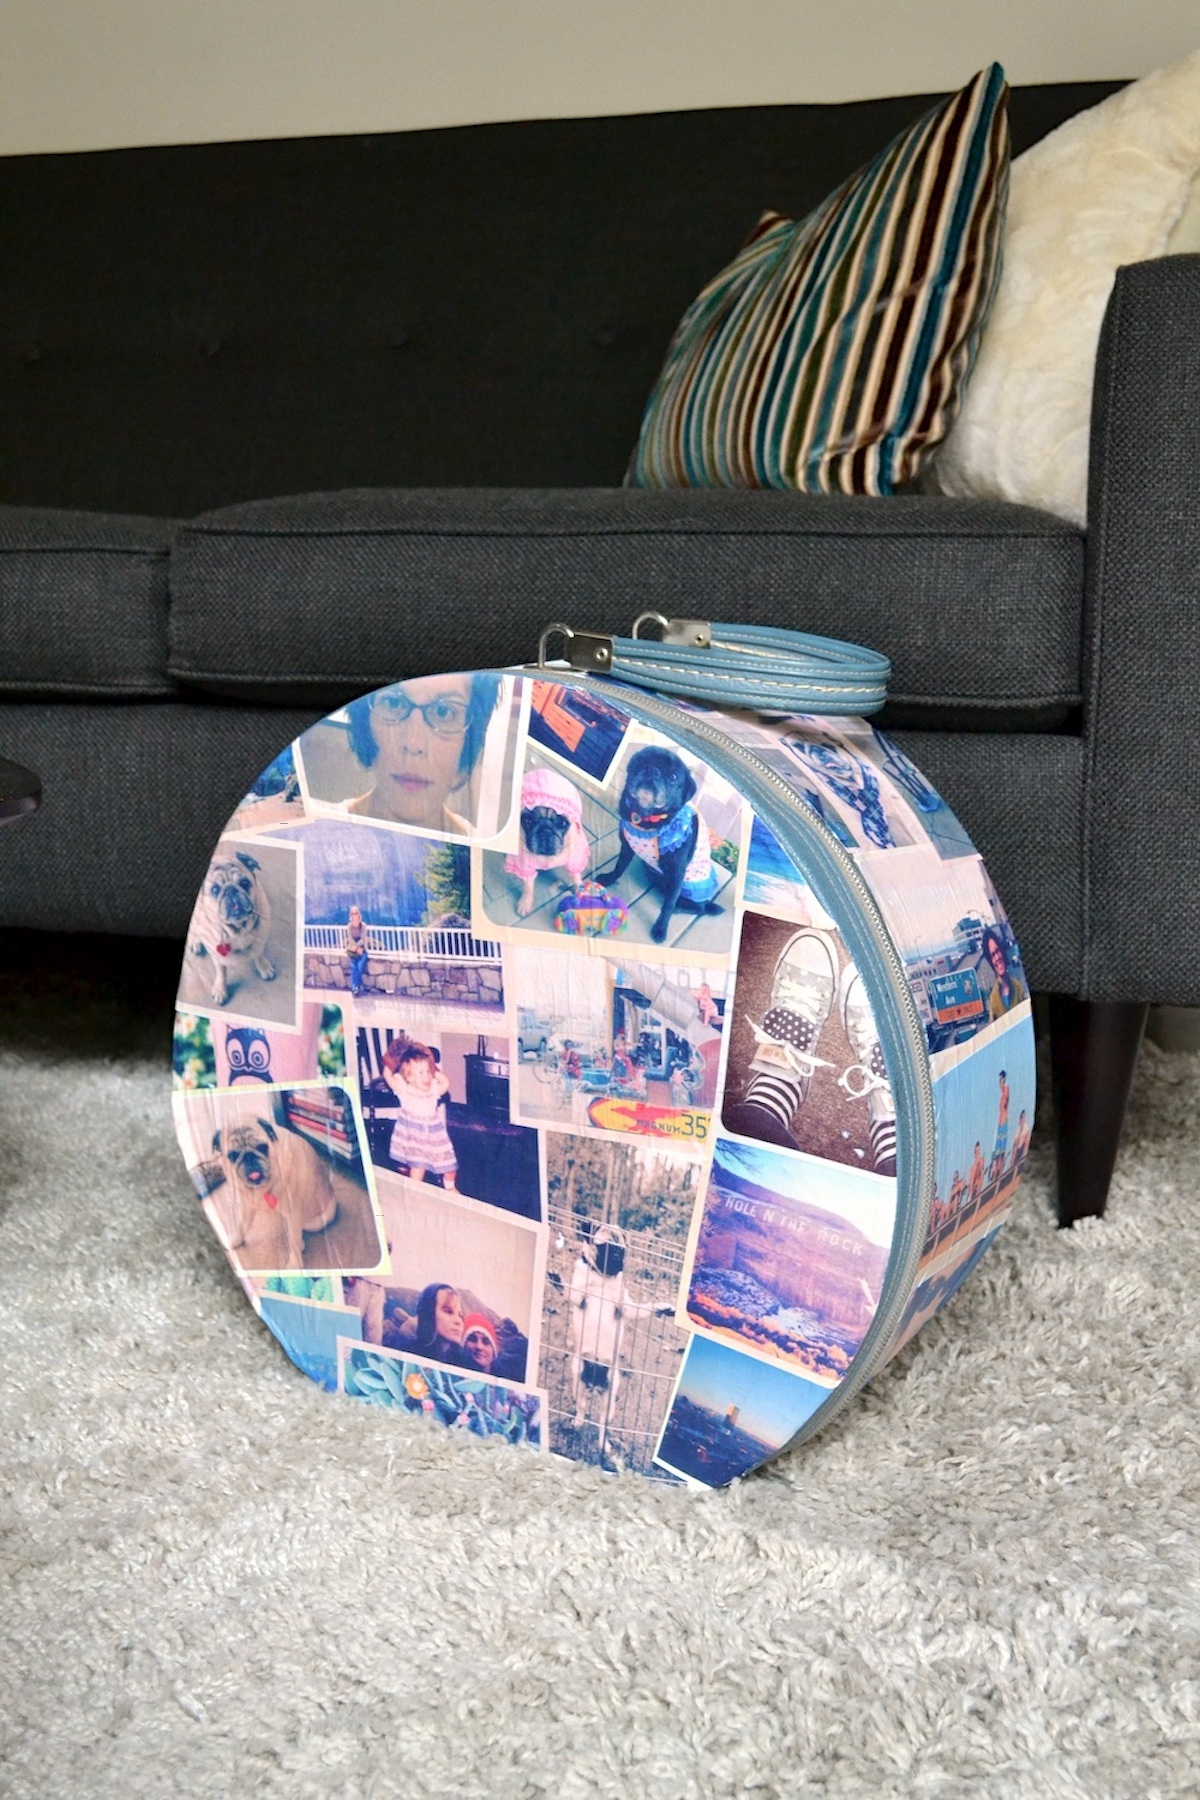
Think of it as crafting a portable gallery of your favorite moments. Whether it’s snapshots from your travels, family gatherings, or just cool shots you love, they’ll all find a home on this DIY suitcase.
You’ll need a bit of patience and some basic supplies, but I’ll guide you through every step. It’s easier than you might think to turn an old suitcase into a stunning piece of art that’s practical, too.
So, grab that old suitcase, gather up some cherished photos, and let’s get started. By the end of this, you’ll have a suitcase that’s not just carrying your things, but also carrying a piece of your heart. Let’s make this suitcase a small gallery of your adventures and memories—it’s going to be fun!
Gather these Supplies
- Suitcase – I got mine from Etsy
- Printer and regular paper – see below for printer tips
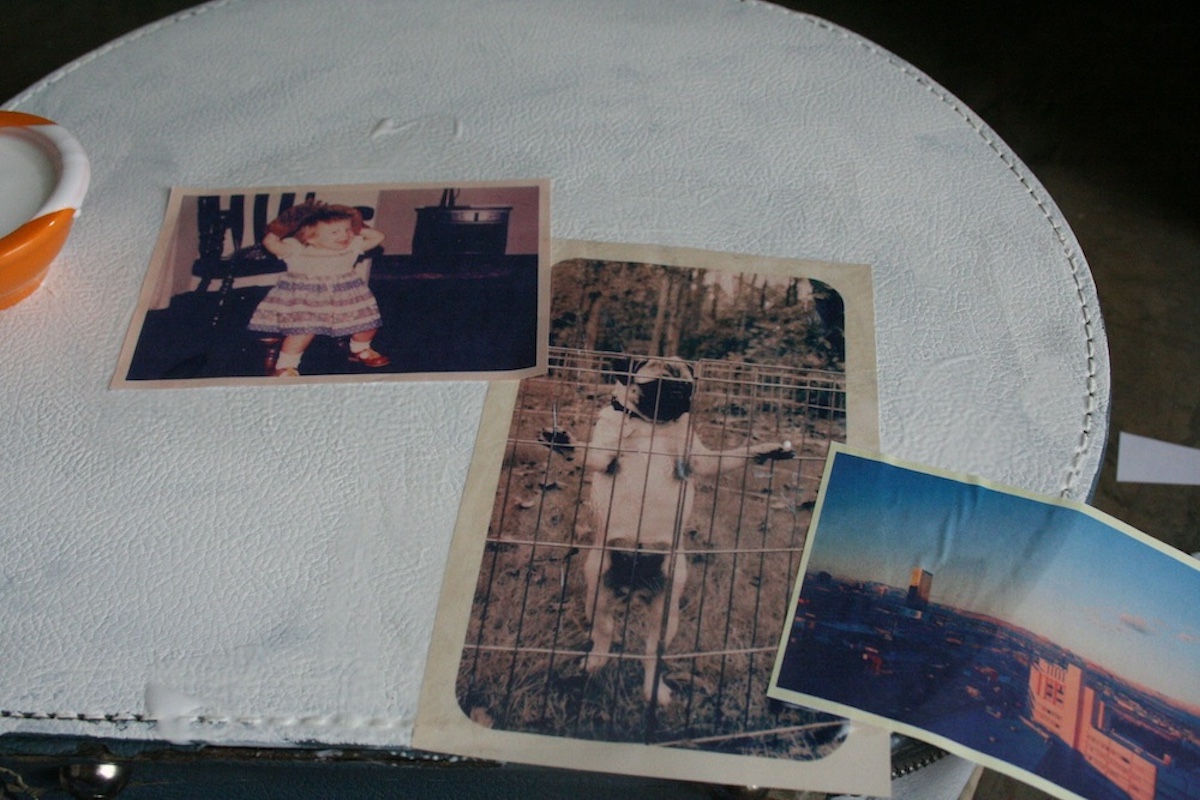
- Photos of your choice
- Photo editing tool like PicMonkey or Canva
- PowerPoint or Word
- Mod Podge Matte
- White acrylic paint
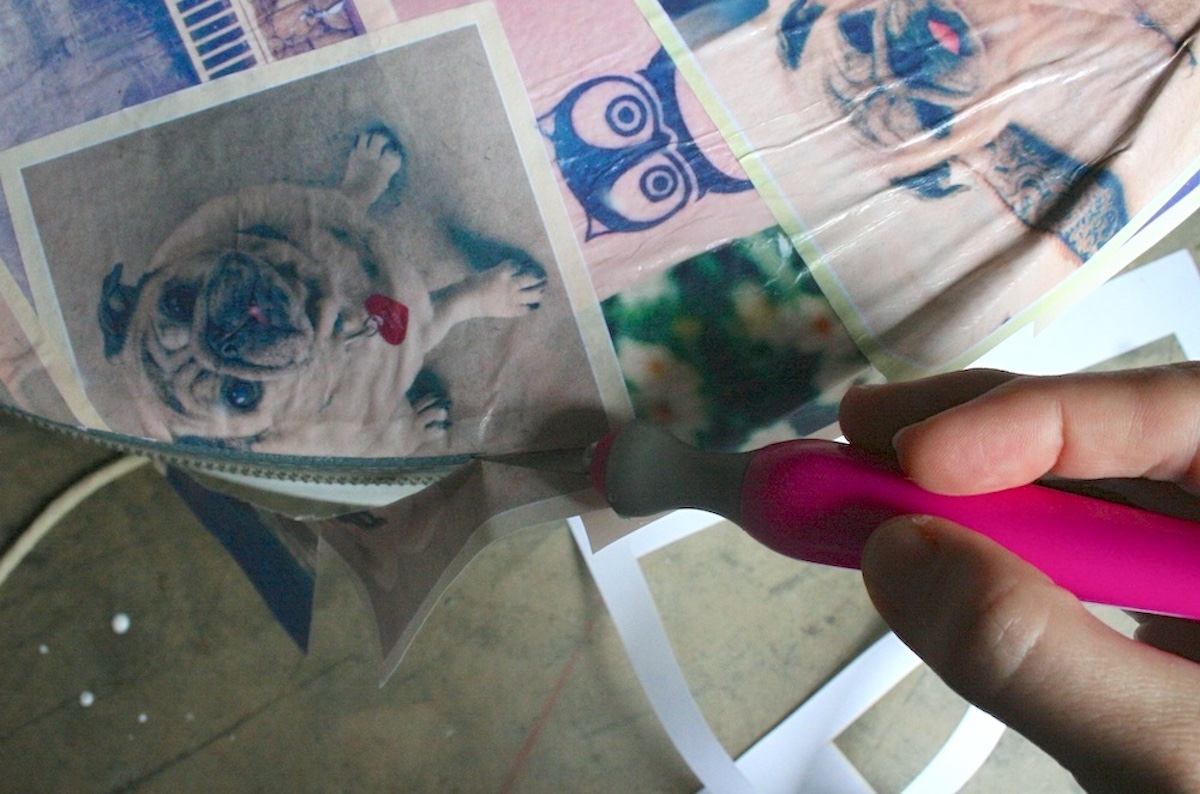
- Craft knife
- Scissors
- Paintbrush
If you are using an inkjet printer, you’ll want to follow instructions for decoupage on wood to seal the printouts. It will be the same on this suitcase.
If you are using thinner paper, I recommend misting the paper before decoupaging as I did with this floral coat rack. Don’t go crazy, just a little water is required to loosen the paper and keep it from wrinkling terribly.
I love that this suitcase has such an interesting shape! You can use any type of suitcase for this project – from larger suitcases to smaller trunks. You can use luggage with a fabric or vinyl exterior as well; if it’s a plastic suitcase, you’ll need to do a small test to make sure it works.
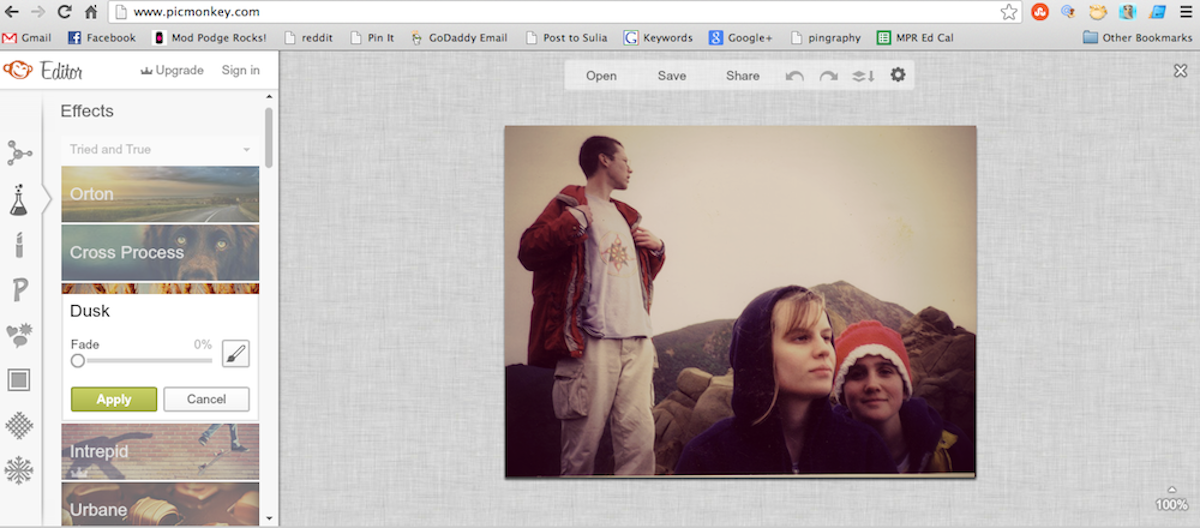
Give your photos a vintage touch by using filters in your favorite photo editing program. I gave my photos filters as well as added a light border in. I used picmonkey.com.
TIP: If you want your vintage suitcase decor to be extra durable, use a spray sealer when finished. Take the suitcase outside and give it 3 – 5 coats, letting it dry between coats.
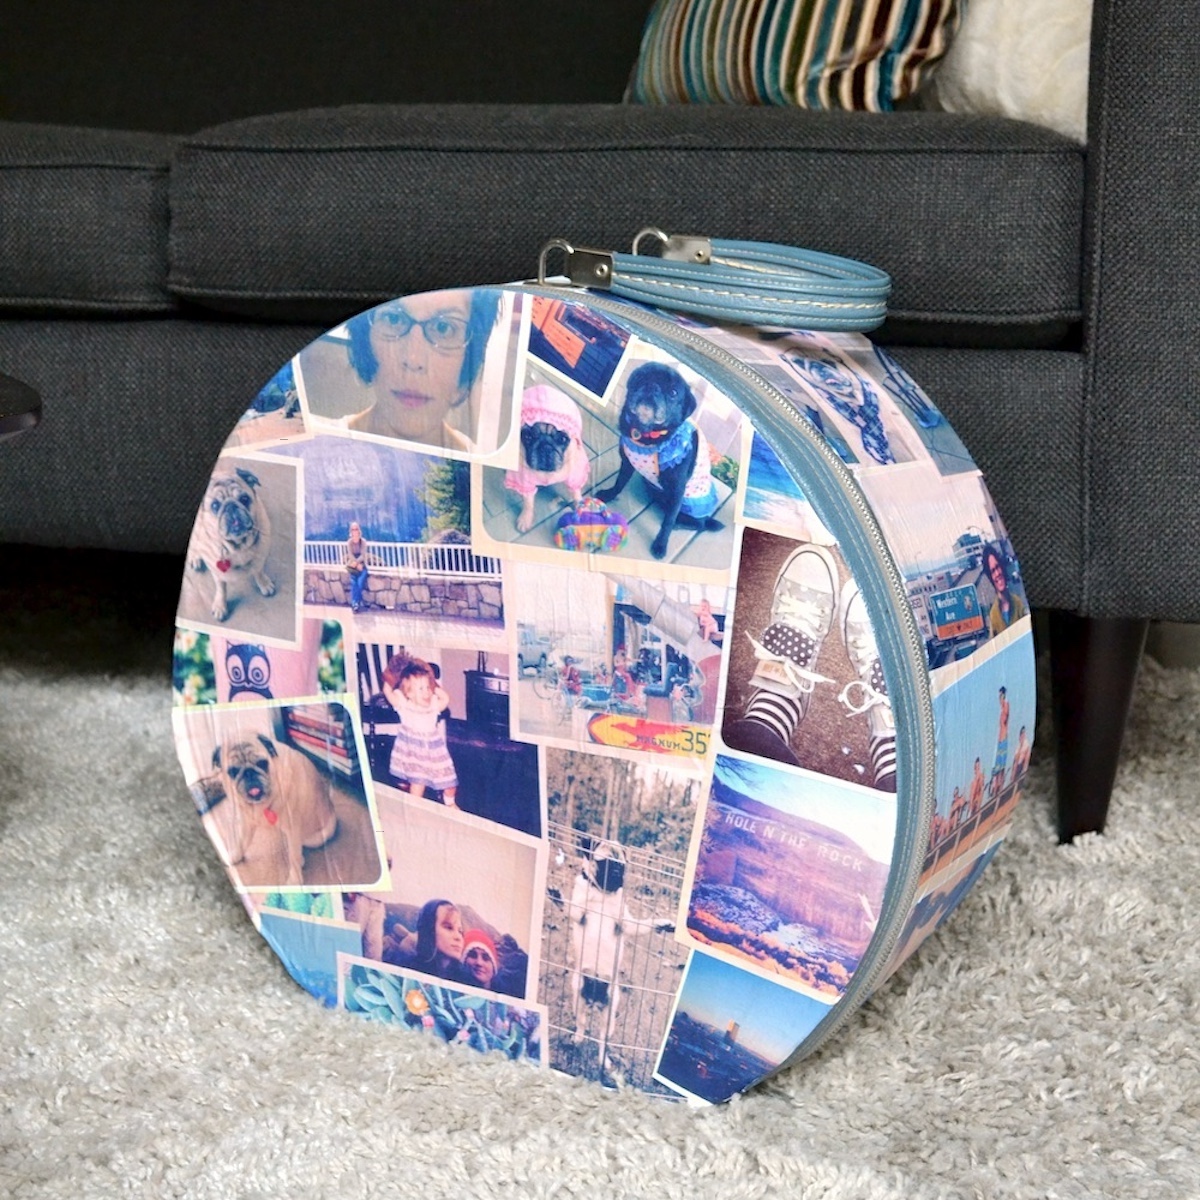
Enjoy your finished DIY suitcase! I have such fond memories of fun times whenever I look at it.

Decorate a Suitcase
Equipment
- Printer and paper
- Photo editing tool like PicMonkey or Canva
- PowerPoint or Word
Materials
- Suitcase I got mine from Etsy
- Photos of your choice, printed on laserjet
- Mod Podge Matte
- Craft paint white
Instructions
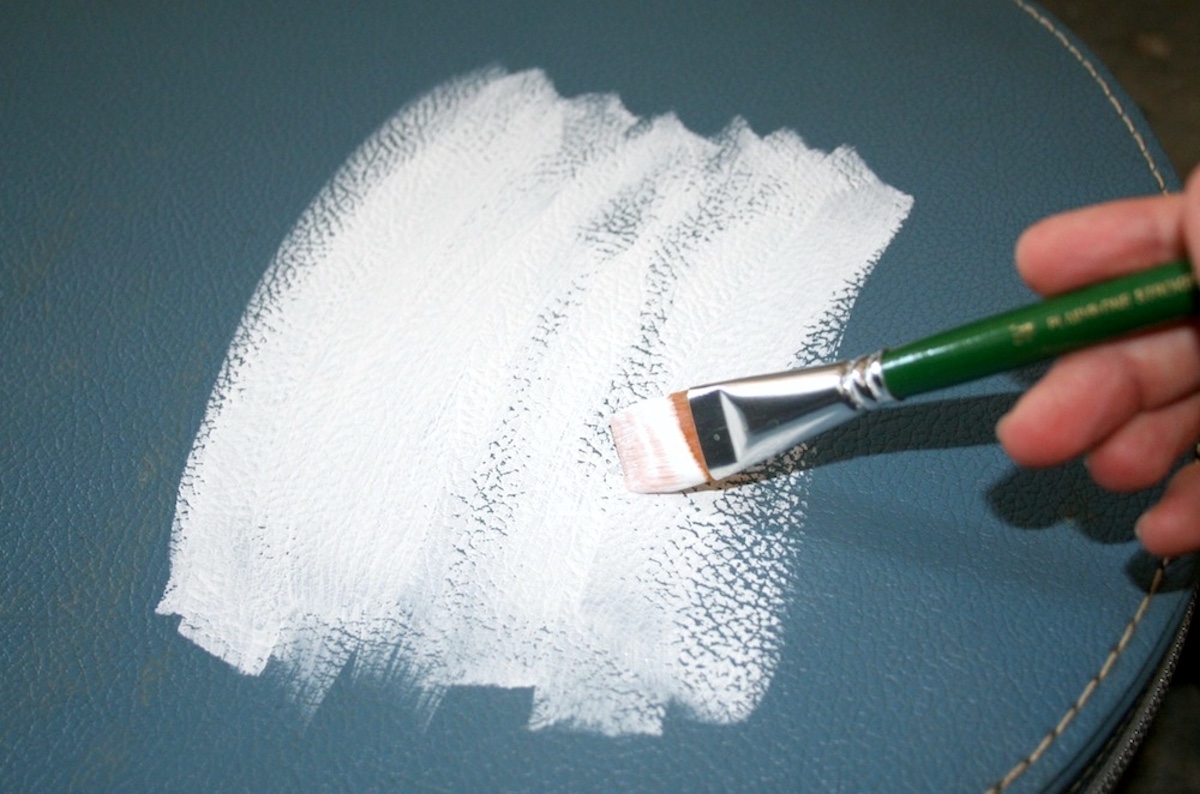
- If you have a darker suitcase, paint it with white acrylic paint before you add the photos so they “pop” off of the surface when you decoupage.
- Give the photos a vintage touch by using filters in your favorite photo editing program, if you like.
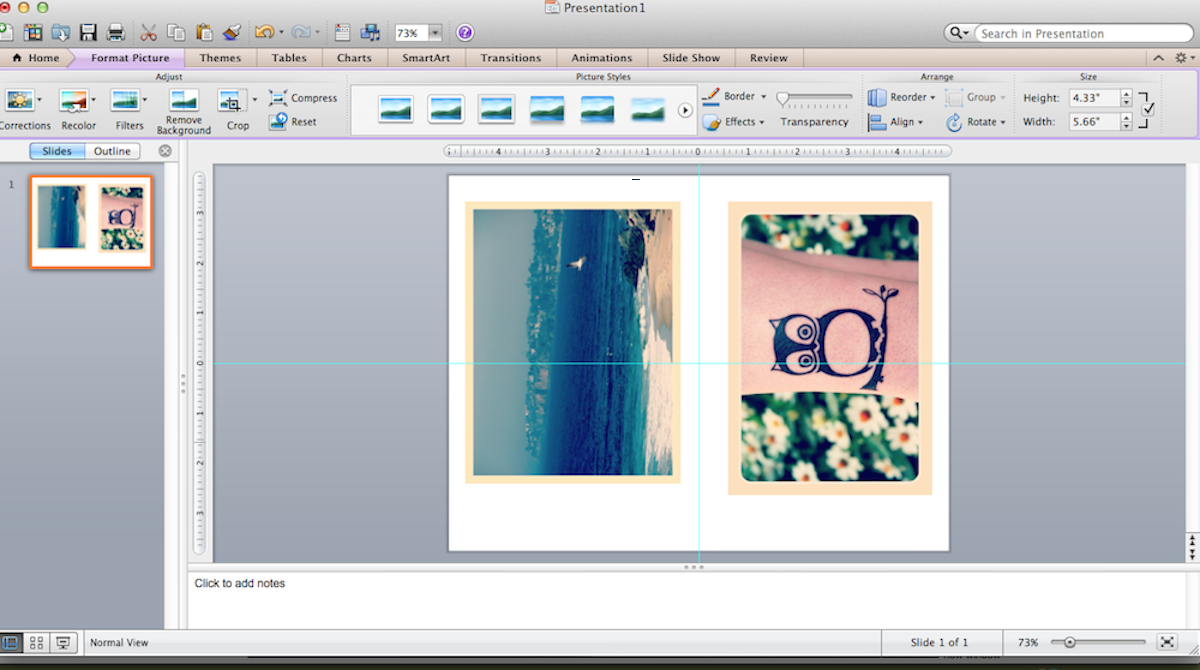
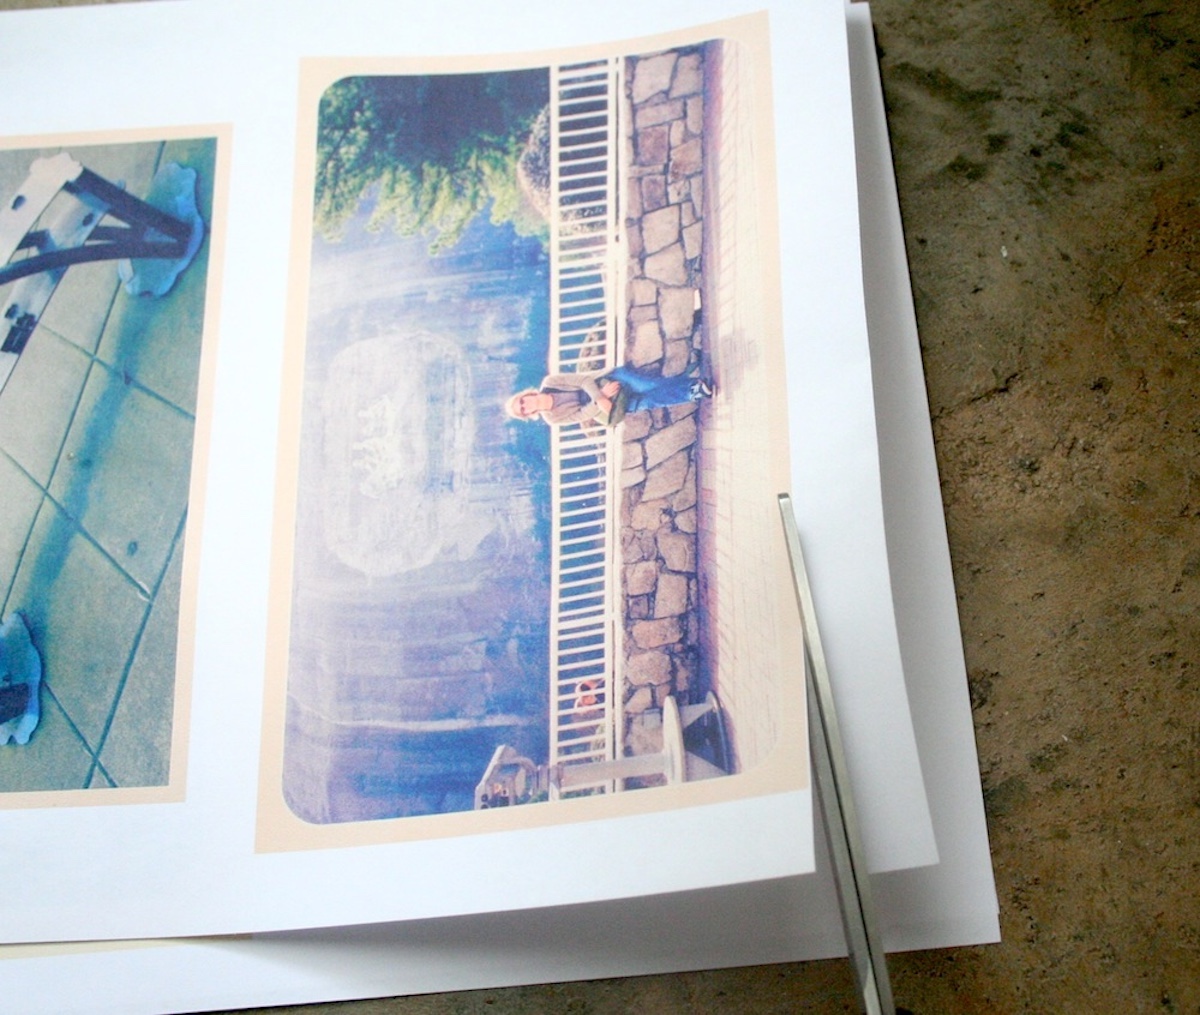
- Use PowerPoint or another program to size and print your photos.
- Cut all photos out with the scissors and set aside.
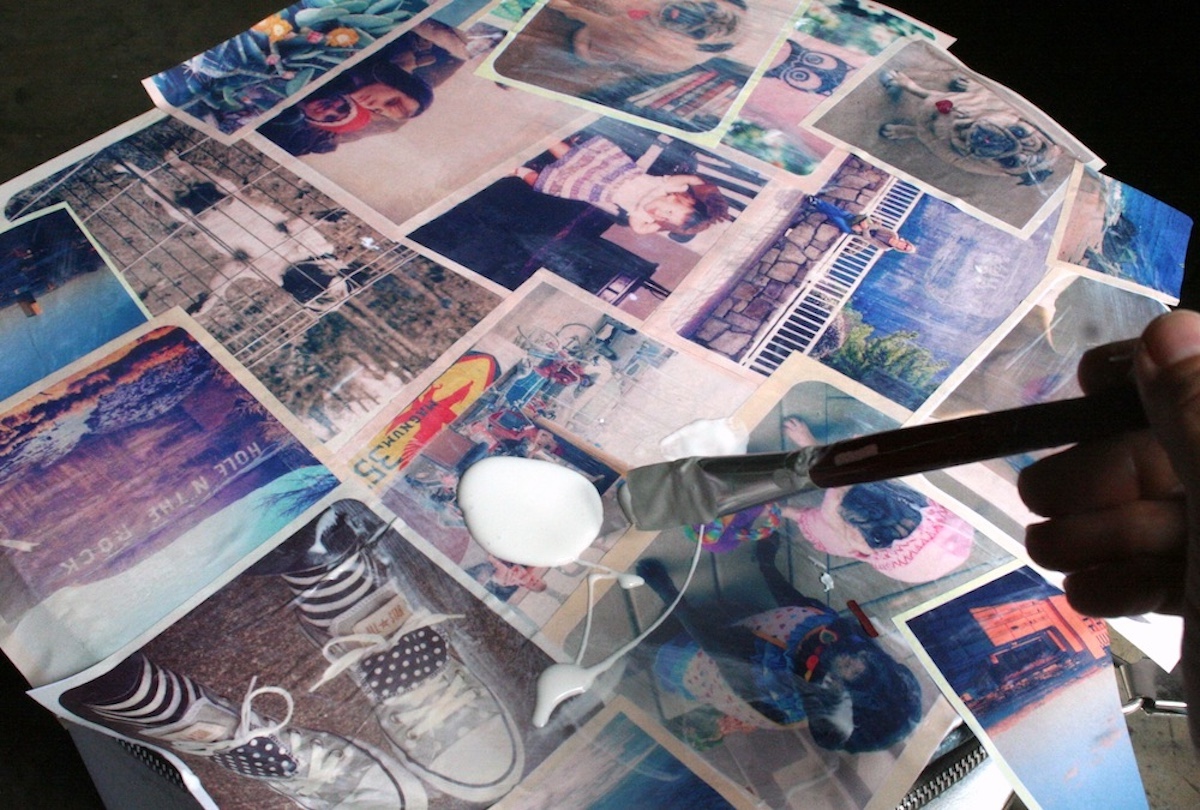
- Start attaching the photos to the front of your suitcase using Mod Podge. Paint a medium layer down and smooth the photo on top. Keep adding photos – overlap them and let some hang off of the side (you’ll trim later).
- Once all of the photos are on the front, let it dry for 15 – 20 minutes. Then paint the top with another coat of Mod Podge and let dry.
- When the top is dry, trim using a craft knife. Repeat the process with the rest of the suitcase.
Notes
If you like doing crafts with pictures, let me know in the comments. I’d also love for you to check out these other photo crafts:


I made 2 of these suitcases a long time ago. I put them in storage on top of each other ànd now they are stuck together. Any ideas on how to get them unstuck without damaging them? Please help. Thank you.
oooh . . . ugh. I would just slowly try to pull them apart. You can try to apply heat with a hair dryer or heat gun to the area to see if they will release. I’m worried they might be stuck but try it with the heat.
@Michelle, do you think water would ruin them?