Paint a wooden stool using a paper doily as a resist instead of a stencil! Incorporate your favorite paint colors, then seal with Mod Podge.
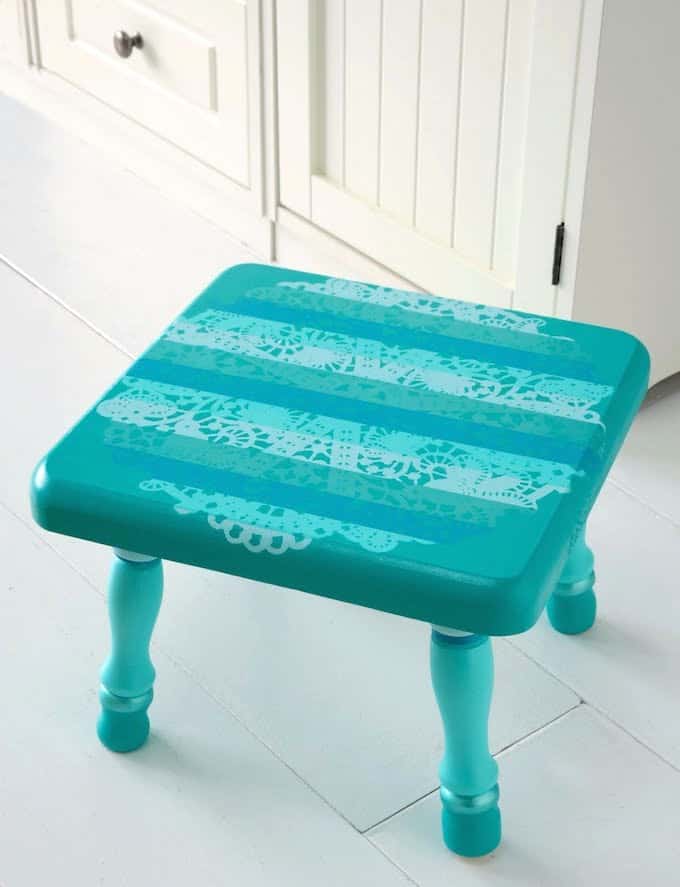
You may think me tricky – this is a painted wooden stool I did using a paper doily as a resist. “Ok Mod Podge lady,” you ask, “where is the Mod Podge?” I knew you were going to ask me that. It’s right here:
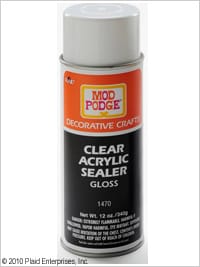
I used my spankin’ new Mod Podge BRAND acrylic sealer on it! Cool huh? I actually use this all the time to seal my Mod Podge projects, and I used it to seal this stool too. So it totally counts.
I wanted to make something with doilies, but I didn’t want to glue doilies on anything. So I had this great idea to use a doily as a paint resist, and I like this stool because the top was exactly the size I needed. Let me walk you through the steps to make my doily stool.
Painted Wooden Stool
Gather These Supplies
- Unfinished wood stool
- FolkArt Acrylic Paint: Patina, Aqua, Jamaican Sea, Metallic Aquamarine, Turquoise
- Mod Podge Acrylic Sealer, Gloss
- Paper doily
- Spray stencil adhesive
- Stencil or painter’s tape, 3/4″
- A few paintbrushes including a stencil brush
- Pen

Choose a color and paint your stool – but just the top. I used Jamaican Sea for my base color. I’m going to tell you right now that you are best off using the LIGHTEST color as the base from your stripes. You’ll see what I’m talking about in just a minute. Allow to dry.
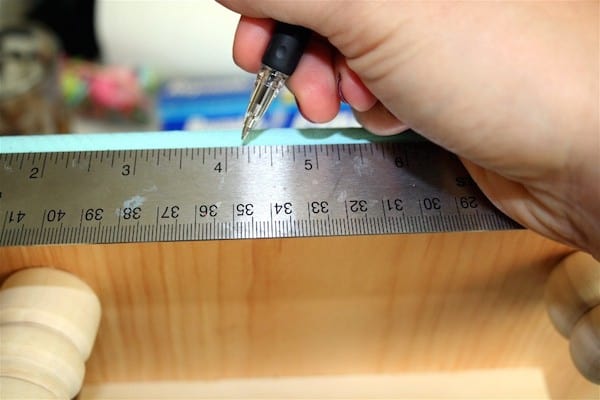
Measure your striping. I wanted to have four color striping, and my stool was 10.5″. I decided that I would have 12 stripes, each would be 7/8″ wide.
It’s called “mathmagic” my friends. Make tick marks where each stripe will go on BOTH sides of the stool. This will help with tape placement.
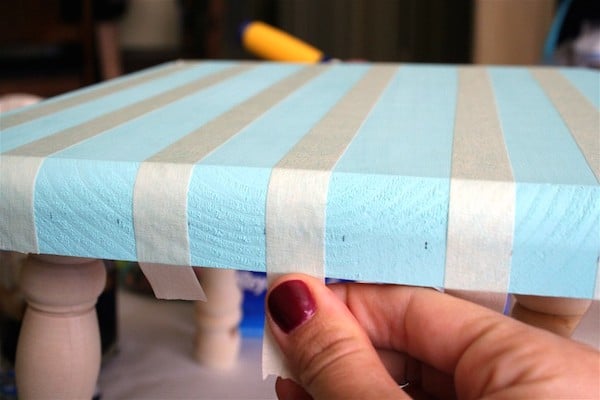
Use the stencil tape to make your stripes. Remember, if you use four colors like I did, and you want twelve stripes, you are only going to paint three of each color. Secure the tape . . . securely. Ha!

Paint your three stripes. You will probably have to do more than one coat. This is my Metallic Aquamarine striping.

Remove the tape immediately. Allow to dry completely, because you are about to put tape over the stripes again. You want the paint to be completely dry.
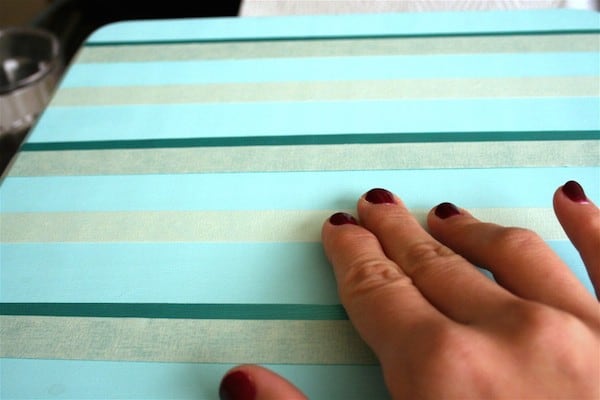
Next stripe – Aqua. Secure your tape down for your next three stripes. Remember to use your pen tick marks as your guide.

Paint your stripes, remove the tape and then repeat with your final color – mine was Patina. Remember that the first color you painted is your fourth stripe. That’s the reason you used the lightest color – because all the darker colors went over it.
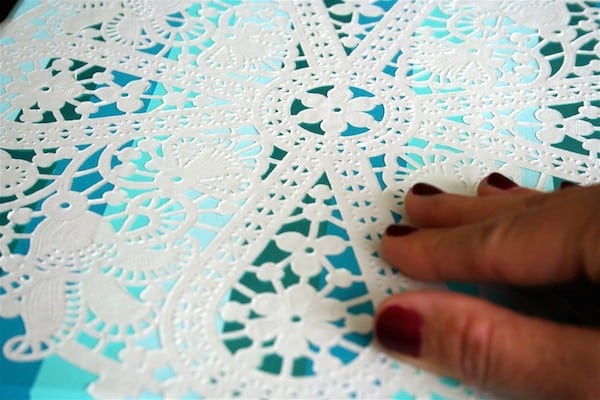
Spray your paper doily with stencil adhesive (follow the instructions on the bottle). Smooth it down to the top of the stool.
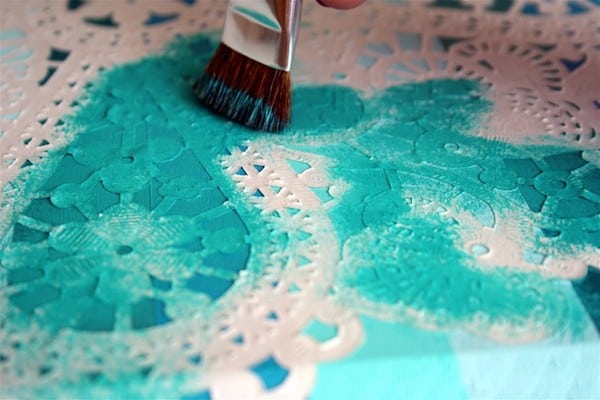
Use your fifth and final color to paint the doily. I chose Turquoise. Don’t load your brush with too much paint – you want your brush to have very little paint on it while you are stenciling.
It will take some time, but it’s worth the wait. Remember to also paint around the edge of your doily. You’ll see why . . .

Peel the doily off and check it out! Cool, huh? Now fill around the edges with Turquoise, or whatever your fifth and final color was. You just want the stripes to show through the doily impression, not around the edges. Allow to dry.
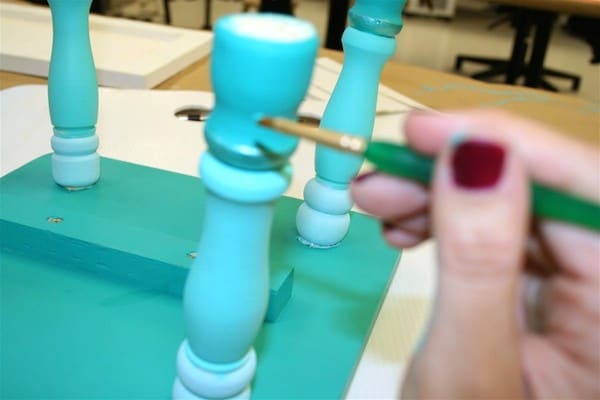
Paint the bottom of the top of the stool with Turquoise. Use your five colors to decorate the legs of the stool in whatever way you would like. Check out my gel manicure – didn’t it hold up nicely during this process?
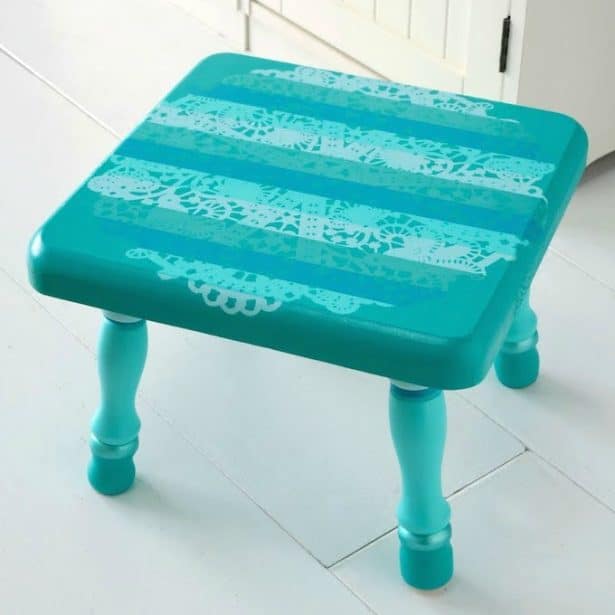
Once you are done with the painted wooden stool, spray it several times with your Mod Podge Gloss sealer to finish. You’ve now fully contributed to the doily trend, and you can be proud.
What else can you do with doilies? Find out here: 25+ doily craft ideas! I’d also love for you to check out these other project ideas:


Nice! The stool looks great, I love the colors!
I love it! Gorgeous colors and the doily look is so so pretty.
Very well done, Amy. Great color choice, too. Ahhh, Mod Podge Jedi, you are.
This is fantastic! Thanks for posting… I just got a new corner desk that is pine and needs some paint… I just didn’y want to paint it plain… Thanks so much!
Great idea! Like it. Thanks!!
This comment has been removed by the author.
this stool ROCKS for sure! 🙂
I love this look and so want to try it in other ways. Like in my journal or for a piece of wall art. And speaking of stools this would be great in shades of pink for a little girls bathroom stool (to reach the sink). Loved your tutorial. Now to find that spray sealer in my area.
Tess
very cool idea!
This is GORGEOUS! Love it! 🙂
That is totally slick. I can’t use the same colors, but the idea is perfect for an small old desk I have in the bedroom!
This is SO CUTE Amy!! I love the doily impression you were able to maintain! The turquoise is also to die for.
I like this idea.
That stool is so adorable!
This looks totally amazing!! Thanks so much for the tutorial too.
Wow, this stool is just too cute, what a great idea using the doily.
I wonder if there’s anything one can’t do with Mod Podge. Great tips.
Thanks for visiting my project:-)
That is beautiful! What a fun technique! Thanks so much for sharing, I’ll be linking to this.
The stool looks adorable even without the doily, but with it it’s so unique and fun!
This is a great tutorial..thanks for sharing!:)
This is fabulous! I was working with some doilies and having a hard time…duh…never even thought about the paper ones..brilliant!
What a great idea! Super cute.
I love this idea the stool would be a great addition to my daughters room. I would love to make it in shades of pink. http://asouthernladysramblings.blogspot.com
hi Amy, love your doily stool, I love doilies too and the colors you choose are perfect! thanks so much for sharing on Craft Schooling Sunday! xoxoxox Sara
Way cute! Love the colors and doily pattern.
This is such a cute idea! I love it!
This is wayyyy cooler than cool.. ahhh… so exciting watching you create!
Just beautiful! I absolutely love it. I’m archiving this one for a future project. Thanks for posting it.
This is gorgeous!!
am gonna be on the lookout for this product when we get our Hobby Lobby open…I may try this on a smaller scale first though (like a cigar box) 🙂
This is fun! I love the colors & doilies are awesome. 🙂 p.s. I need you to do a color picks post for me at DSC – Halloween colors?
great idea, I love how this stool turned out!
Gorgeous!! Mod Podge rocks! 😉
We featured this, today, as one of {Our Favorite Thingz}!
I just wanted to stop by and let you know that I linked to this post today from the Home & Garden channel at Craft Gossip. 🙂
Your feature will appear in the main Craft Gossip RSS feed, on the main home page and can be found directly here
https://homeandgarden.craftgossip.com/4-fun-mod-podge-projects/
If you would like a “featured by” button, you can grab one here!
I would love to try this on something bigger, any suggestions? I have a large square cocktail table that I need to refurbish. I don’t want to decoupage because we use it in our homeschool for group stuff like maps ect… I need the surface to be pretty smooth. Thanks 🙂
http://www.notyouraveragehomeschoolmom.blogspot.com
~Angela D
Hi Angela! If you do something bigger, like a coffee (or cocktail) table, I would user much larger stripes. You can get wider painter’s tape at a home improvement store. If you would like to do doilies, you need to do them one at a time, because the spray adhesive will stick to the surface if it’s left on too long. E-mail me if you need more tips – but I think striping is going to be awesome for your table!
I am looking for doilies like this and can only seem to find ones that just have lace around the edges, not ones that are the lace all over like this one. Where did you get this doily from?
Hi Anonymous! I believe these doilies are from Hobby Lobby. You can also search for them in party supply stores or online. Good luck!
I love the idea of using the doilies for the pattern!! So cute!!
Hey Mod Podge Lady, this is awesome! From the stripes to the colors to the doily design. Now I can’t wait to try the sealant!
Um, excuse me . . . Ms. Anderson? You can’t be the same Ms. Anderson who just told me, in essence, that she had no painting skillz. Surely I am mistaken and you are a different Ms. Anderson because this stool is fantabulous. (The only F word I could use on your blog 😉
Love this idea. It really is beautiful. Thanks.