Use Mod Podge and fabric to make these decorative light switch covers, turning them from boring to fun in just a few minutes.
Skills Required: None. Even if you’ve never crafted before, you’ll be able to do this project. You will apply fabric to a very small surface with Mod Podge.
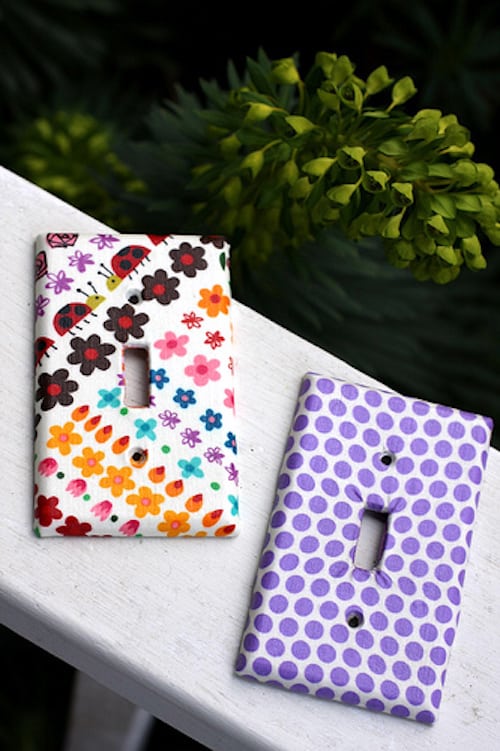
I haven’t posted switchplates in quite awhile, and I get asked about how to make decorative light switch covers all the time. Kathy from Pink Chalk Studio posted her fabric switchplates, and she outlines a pretty great process for making them.
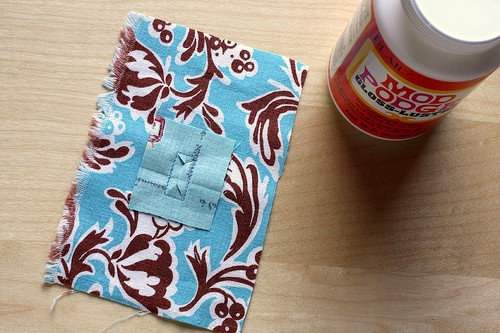
One thing she noticed was that standard way of cutting a slit for the switch and folding back wasn’t working for her . . . so instead she sewed on a facing that she pushed through the hole.
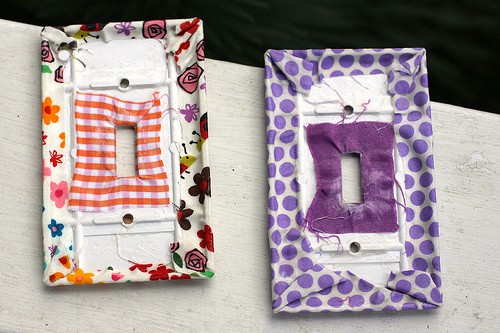
This gave her an extra piece on the finished back that you see above. It’s a nice little touch that covers all surfaces with fabric and makes the project look tidy and nice.
If you have sewing skills, you might choose to finish the same way that she did! But you definitely don’t have to do any sewing, and can make the project look pretty dang good without getting fussy.
If you are a beginner looking for a home decor idea (AND you want to cute-ify your home) then this is your project. It’s also a great stash buster for paper or fabric. You could even use napkins or tissue paper. Learn how to make this fun craft below!
Decorative Light Switch Covers
Equipment
- Sharp scissors
- Water-soluble pen
Materials
- Light plate & outlet covers
- Mod Podge Matte
- Fabric
- Wood clothespins
- Wax paper
- Rubbing alcohol
Video
Instructions
- Clean your light plate covers with rubbing alcohol. Set the screws aside.
- Trace your outlet and/or light switch cover onto the wrong side of your fabric.
- Cut out each tracing with an additional half inch of space between the outer edge of each tracing and the edge of your fabric piece. Also cut out tiny holes for the screws, switches and electrical outlets.
- Rinse off the pen lines in the sink and pat your fabric dry.
- Paint a layer of Mod Podge on your plate covers. Line up your fabric cutouts and place wrong side down.. Be careful to get the screw holes just right.
- Add Mod Podge on the edges and fold the fabric over. Trim the fabric with scissors if necessary.
- While the edges were drying, apply a generous layer of Mod Podge over the outside of the front of the plate cover.
- Use clothespins to hold the fabric in places on the edges if needed. Remove the clothespins before the Mod Podge dries, after the fabric has settled. Let the plates dry completely.
- Replace the outlet covers with the screws.
Notes
We also have a complete tutorial for making your own decorative light switch covers. Check out these Mod Podged switch plates here.
Here are some other crafts to make at home you might also be interested in!


Happy Easter Amy – I follow all Atlanta Bloggers – but I am number little old 4958!
Anyhow – I hope to meet you in May.
sandie
The title of this post caused me to do a double take because I originally read it as “Mod Podge switchBLADES.” I was like WHA?? Glad to see I was mistaken.
Very cute, something I have never thought about….I can see some coming together for me to sell at market. Thanks for sharing. 🙂
I just bought some switch plates to embellish a few weeks ago!! Love these!! 🙂
I want to “dress up” my craft storage bins with an idea I found on Pinterst. They used paper, but I would like to use fabric to line the inside front of each bin. Will using fabric mod podge make a big difference? And what will that difference be?
Thanks,
Debbie
Hi Deb! Check out my FAQ – I address that (search for “fabric”). Thanks!
https://modpodgerocksblog.com/learn-how-to-mod-podge/