
Learn how to make coasters with Mod Podge and dollar bin supplies! These DIY coasters are great for beginners, and also make great gifts.
Skills Required: Beginner. I’m very close to saying that you don’t need any prior crafting skills to make these homemade coasters – they’re pretty easy. However just practice with Mod Podge a little bit before trying, if you can, to make sure you have the hang of decoupage first.
I’m always perusing those bins at the front of Target where things are $1 – and I know I’m not the only one. I can spend $50 easily at “Tar-jhay,” just from shopping those bins. How about you?
Awhile back I found coasters in those bins, and decided that I needed some coasters for my place . . . but I didn’t like the pattern that the surface came with (I don’t use hairspray, but I do drink coffee! You’ll see what that means in a minute).
How to Make Coasters
Learn how to make coasters using my method below. You can use this method to decorate surfaces that are wood or tile – or even thick cardboard like mine. Mod Podge works with them all. This is one of those easy crafts for adults that’s going to get you hooked!
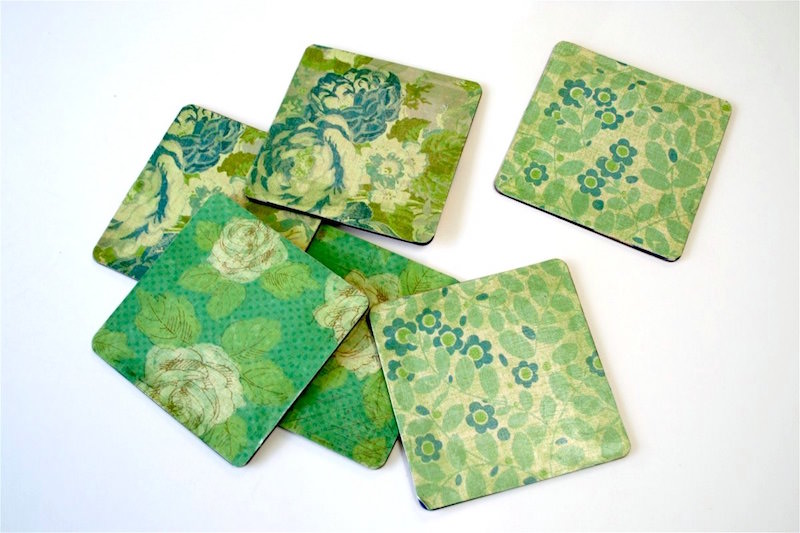
In addition to the surface, you’re going to need some paper or fabric with a pretty design. I recommend using a thicker paper or fabric, especially since the surface is thick cardboard. You want to add as much rigidity as possible.
Let’s dig into the project!
Gather These Supplies
- $1 coasters
- Mod Podge Outdoor
- Scrapbook paper – one or two sheets in your favorite patterns
- Clear sealer (like Minwax Polycrylic or Engine Enamel)
- Sandpaper or emery board
- Paintbrush
- Pencil
- Alcohol ink and paper towel (optional)
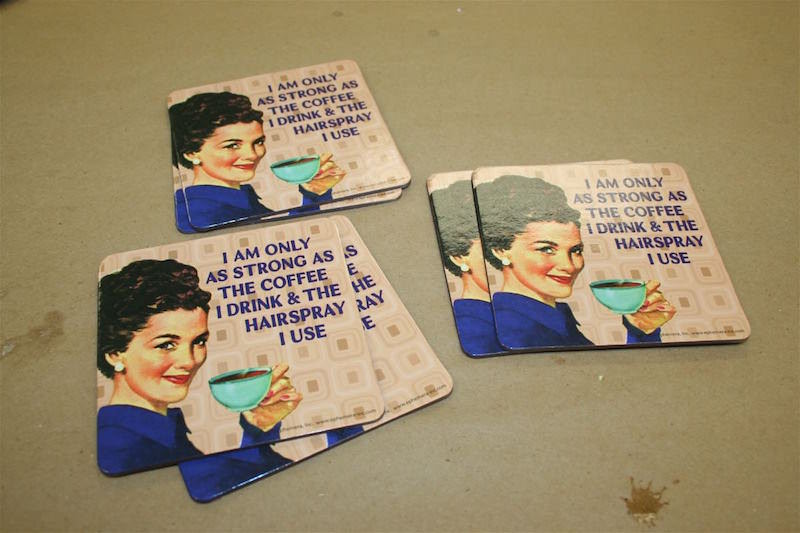
Here are the base coasters that I started with – cute, funny even, but not really my style.
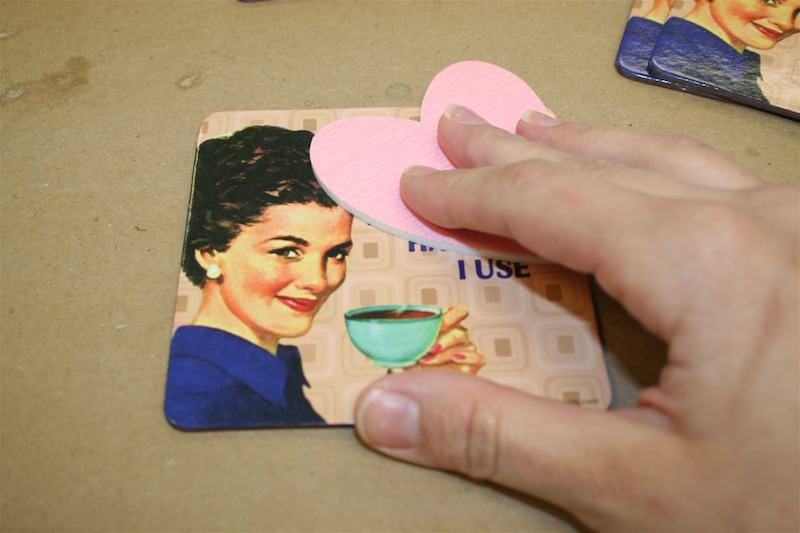
Whatever machine made these coasters put a plastic-y coating on the top of them. I sanded it off so that the paper and Mod Podge would stick better. If you use wood, do the same. If you use tile, try to get the tiles without the clear coat on the top.
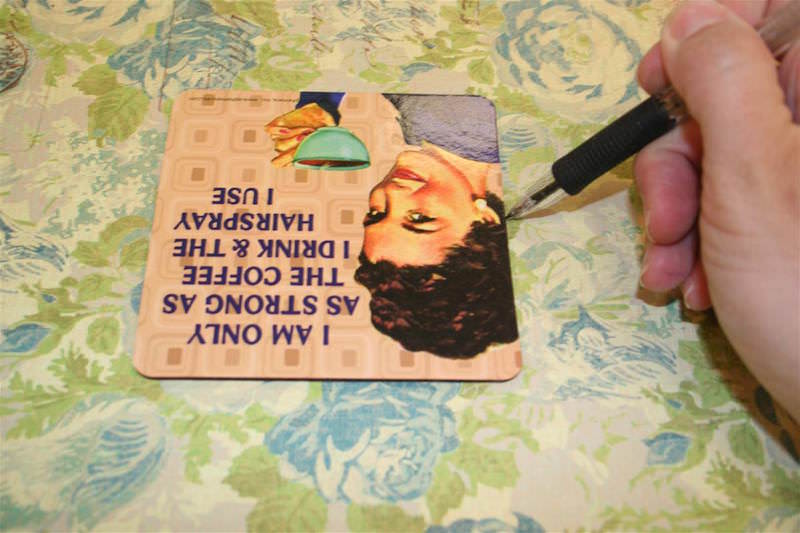
Trace your coasters with the pencil directly onto the paper and cut just inside the line.
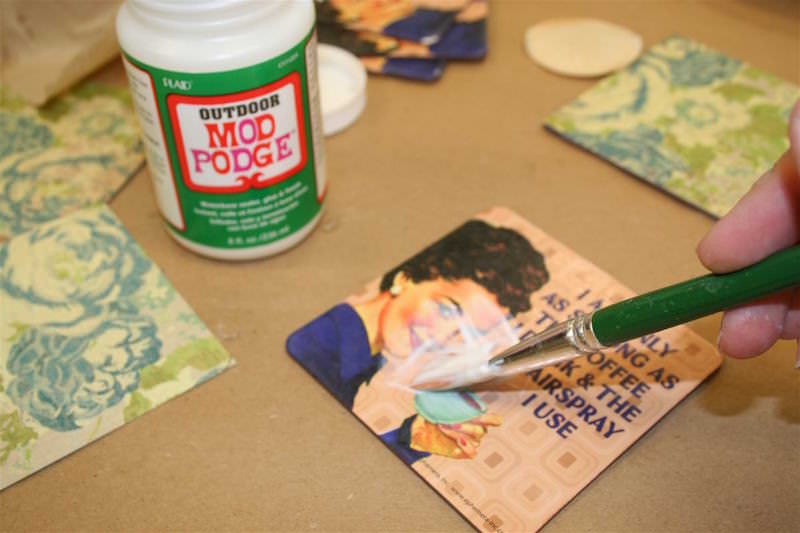
Add a medium layer of Mod Podge to the coaster and then lay the paper down and smooth, smooth, smooth. Keep smoothing until all of the bubbles are removed and let dry for 15 – 20 minutes.
You don’t have to use Outdoor Mod Podge. The reason I did is because my coasters are thick cardboard and I wanted them to be more protected.
We’re going to waterproof the DIY coasters in this tutorial, so if you are using wood or tile, you can use regular Mod Podge (or your favorite formula).
Update: this post was created before Dishwasher Safe Mod Podge was developed. You can now use Dishwasher Safe Mod Podge on this project (you won’t be able to wash these since they’re cardboard, but it will provide more protection). Learn more about Dishwasher Safe Mod Podge here.
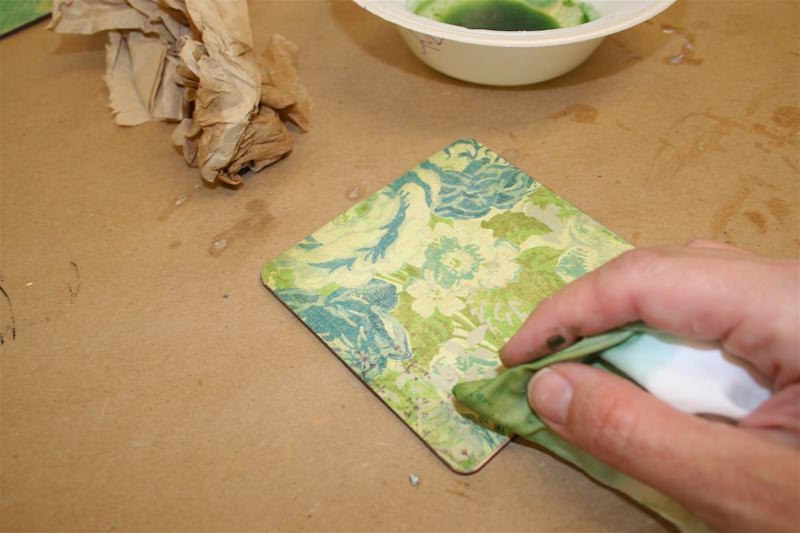
At this point dipped a paper towel into some green alcohol ink and darkened the edges to add a little flair. It’s up to you. You can paint on them now or add additional papers on the top too!
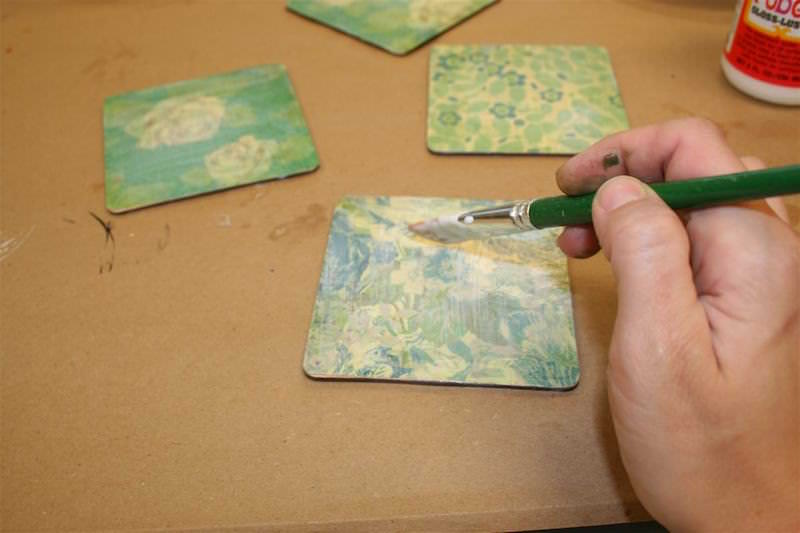
Once the coasters were dry, I rounded the edges using the scissors – then I painted a coat of Mod Podge over the top of the paper. Let dry and give another coat.
To finish your DIY coasters (if you didn’t use Dishwasher Safe Mod Podge), you must add a brush-on waterproof sealer (or spray, but I find the brush-on works best for coasters). You can also use Engine Enamel spray.
That way drinks that sweat won’t make the coasters stick to your glass. Then you’re done! Coasters for $1? Yes, please.

DIY Coasters
Equipment
- Scissors or craft knife and mat
Materials
- $1 coasters
- Mod Podge Outdoor
- Scrapbook paper one or two sheets in your favorite patterns
- Clear acrylic spray sealer like Minwax Polycrylic or Engine Enamel
- Sandpaper or emery board
- Pencil
- Alcohol ink and paper towel optional
Video
Instructions
- Trace the coasters with the pencil directly onto the paper and cut just inside the line.
- Add a medium layer of Mod Podge to the coaster and then lay the paper down and smooth. Keep smoothing until all of the bubbles are removed. Let dry for 15 – 20 minutes.
- Once the coasters are dry, trim any excess paper around the edges with the craft knife or scissors.
- Paint a coat of Mod Podge over the top of the paper. Let dry and give another coat. Let dry.
- To finish your coasters, add a brush-on waterproof sealer. You can also use Engine Enamel spray. Let dry 24 hours before using.
If you like these DIY coasters, here are some other options you should check out!


I like the idea and might try it sometime
I’m wondering if a moving box/old printer paper box would work well. Then I save the dollar to use toward supplies.
I’m guessing it would work
… after all Modge Podge rules!
Very easy craft to do with a group or even kids
I must try this soon. Thank you for showing us how to make them. Next is photos!! Lol
Great idea for unique coasters to suit your own decor.
this looks nice and easy & could make a great gift you could personlise
simple and easy directions
A good way to try Mod Podge & also create something beautiful!
I want to try this myself!
DIY Coasters
Both of these DIYs so easy and
cost effective can’t wait to start just have to get the dishwasher safe mode podge thanks so much