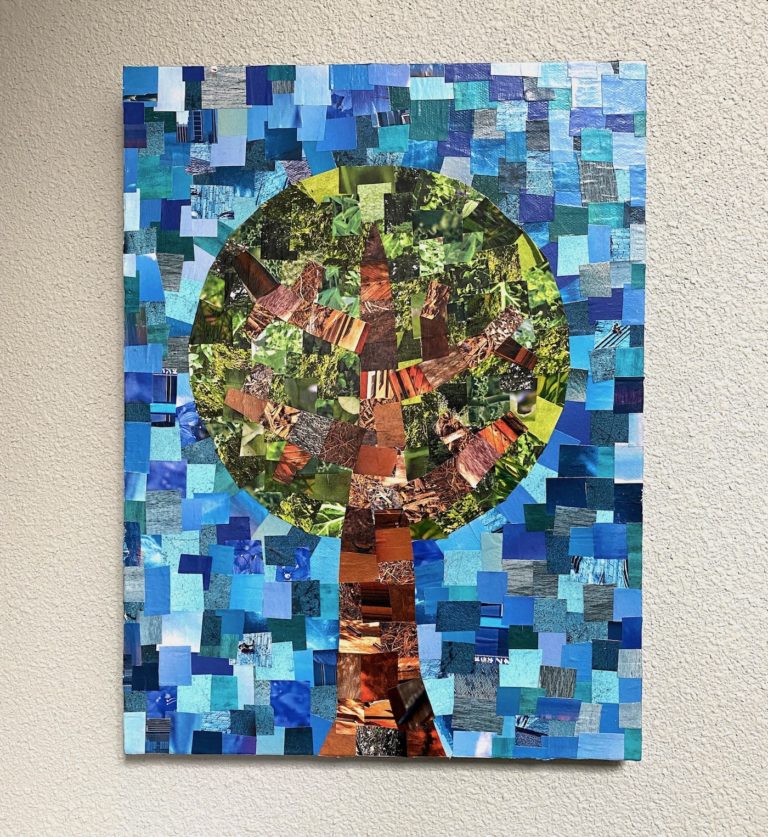
Learn how to make a mixed media canvas with scrapbook paper and Mod Podge! This was a fun experiment with cute chipboard accents. So easy!
Skills Required: None. That’s the best part about a mixed media canvas. You can wing it, and if you mess up, no one will notice. You can do this project even if you’ve never crafted before!
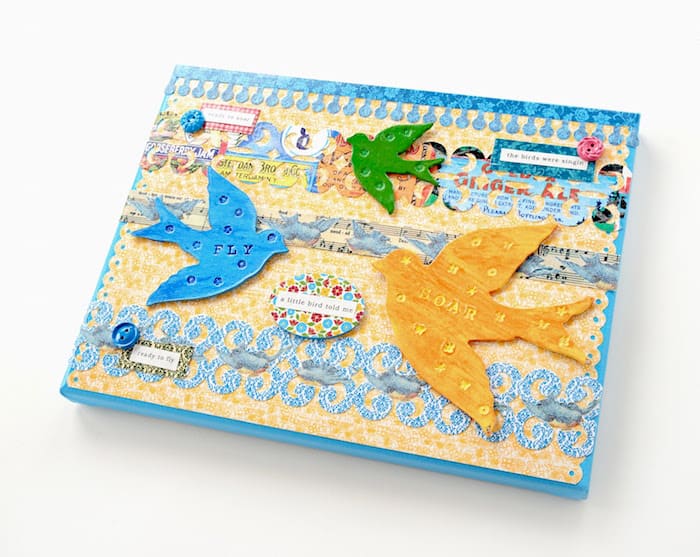
I’m happy to be celebrating week two with Melody Ross’s great products from GCD Studios – available at Artsy Findings! This week I used her Artsy Urban line as well as the Chip Art.
Oh my gosh, I cannot rave enough about Melody’s Chip Art! It is one of the most fun things I’ve EVER done in my years of crafting. I love banging with a mallet!
This tool set is all about embossing chipboard, and rather than listening to me go on and on, you should watch this video that explains everything.
Once I learned about this set, I had to create something with it, so here’s my first attempt at a mixed media canvas using the Chip Art as well as Artsy Urban.
Now here’s how I did it.
DIY Mixed Media Canvas Art
Gather These Supplies
- Canvas – 9″ x 12″
- FolkArt Acrylic Paint – Coastal Blue, Brilliant Blue, Medium Orange, Sunny Yellow, Bright Green,
- Green
- Mod Podge Gloss
- Chip Art Tools
- Chip Art
- Artsy Urban Paper and Embellishments – I used one large sheet of 12″ x 12″, small pieces of two other 12″ x 12″ sheets, four borders and three buttons
- Fiskars Edger
- Flat Paintbrush
- Craft Knife and Mat
- Craft Glue

I always get my paper ready to Mod Podge first – call me neurotic; that’s okay! I cut a 12″ x 12″ sheet to fit my canvas.
Then I used my Fiskars edging punch to make a pattern down both side of the paper. It’s the little decorative touches, my friends. Once your paper is ready, set it aside.

Paint the edge of your canvas with a base color – mine is Coastal Blue. You don’t have to paint the center (as long as your papers are thick enough, which these are) because it won’t be seen. Make sure you cover the edges well and set aside to dry.

Now to the mallet! Used the birds chipboard pieces and then the mini shapes – I also put “Fly” and “Soar” in the middle of the two larger birds with the uppercase Sparrow font.
As I said before, you are going to want to watch this video to learn the entire process. Then you can play like I did!
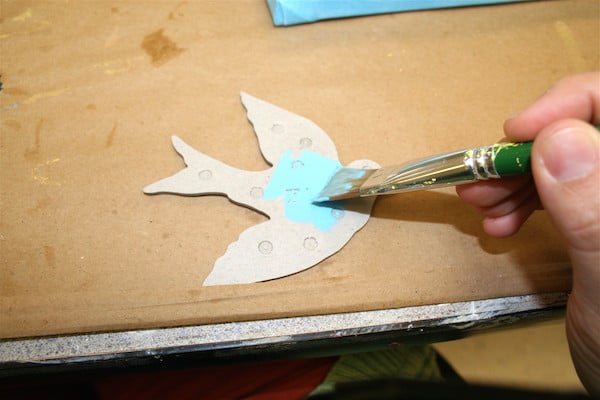
To get the fun distressed effect that I did, choose a color to basecoat your bird and let dry.
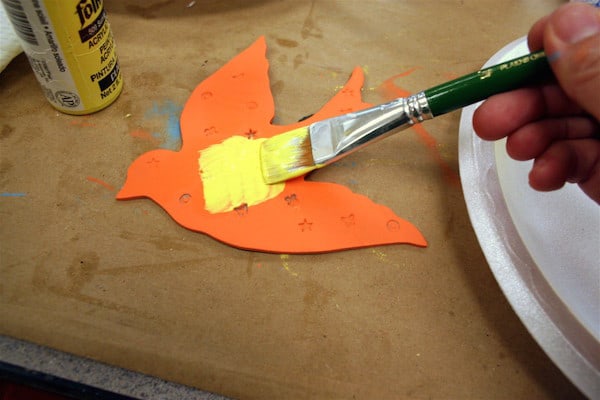
Mix your second color with some Mod Podge and paint over the top, making sure to really get that second color into the grooves (you want it to stick around).
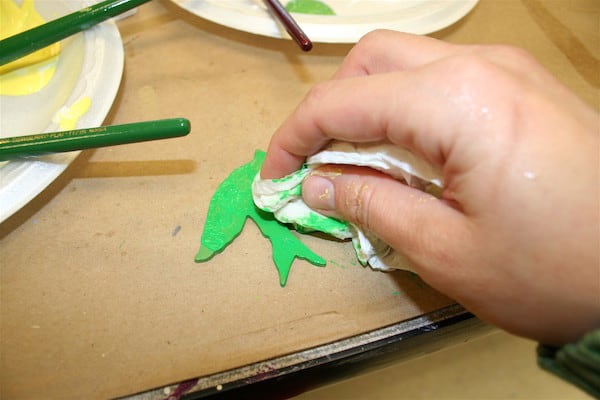
Before that second layer is dry, wipe it away. I didn’t wipe it away completely, just enough to leave a faint layer and to get into the grooves. Set aside your chipboard embellishments to dry.
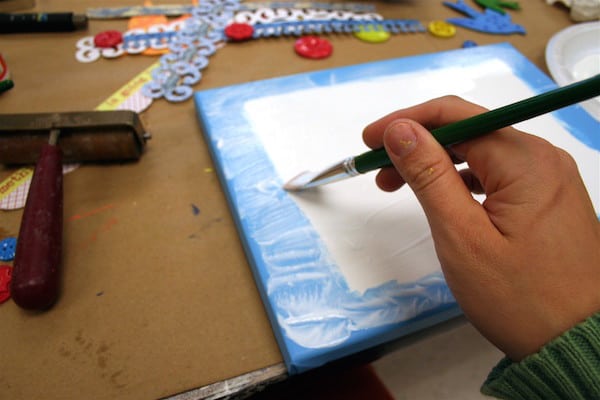
Back to the canvas! It should be fully dry. Time to Mod Podge on the background paper. Spread a medium layer of Mod Podge over the entire front of the canvas.
Lay your paper down and SMOOTH thoroughly. Wipe away any Mod Podge that comes out the sides with your brush. Allow to dry for 15 – 20 minutes.
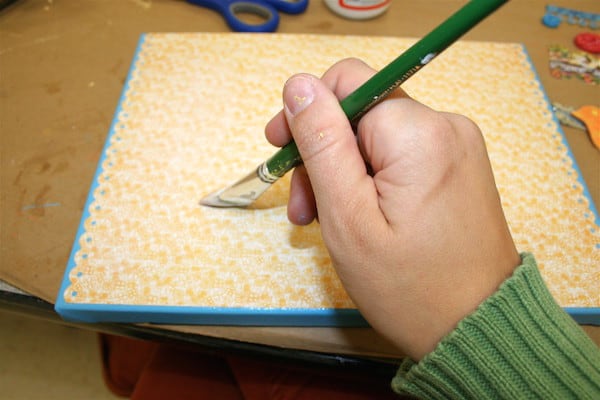
Cover the top of your paper with a medium coat of Mod Podge. Cover the sides of the canvas, too. Allow to dry.
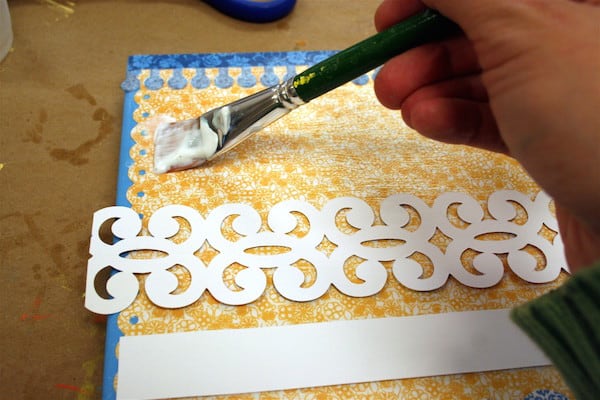
I didn’t want to bore you with tons of pictures of the embellishment process, so just know that I trimmed my borders, adhered those with Mod Podge and then allowed them to dry.
Then I sealed them over the top with Mod Podge. I glued my birds down with craft glue, and then I added some words cut out of another sheet of paper, a chipboard piece in the center and some buttons. It took me awhile to like my mixed media canvas, but I really do. It’s bright and make me happy!

Love this mixed media canvas! What do you think? Will you give the products a try?
If you enjoyed this idea, I’d love for you to check out these other projects:



Beautiful collage!
sdsunshine@sio.midco.net
SWEET project! I like the birdies.:)
elizabead@gmail.com
What a gorgeous project. I would love to try my hand at making something similar.
The Artsy Urban line makes me drool 🙂
YAY for creativity and MOD-PODGE!
I love the yellows and blues together.
You are SO crafty.
Melody Ross ChipArt+Mod Podge=heaven! Your collage rocks!
I just love your use of birds in that project! omydarlingblog(at)gmail(dot)com
oh boy! I want! I want!
THIS is super FAB! Love this collage! Thanks for the chance to win!
So beautiful! I would love to try my hand at some chipboard/Mod Podge goodness!
jnf130@psu.edu
Cute! I like it!
Ooh! This is super cool! I’ve been wanting to try crafting with canvas. 🙂
This project is absolutely stunning! TFS!
sooo need something to cheer me up…
I just love it all. I love chipboard anyway I can get it the Chip Art Tools is a plus to giving flat surface character. Mod Podge it ROCKS when it comes to mixing paint with it. Gives the paint such a shiny finished look. Love the project you did. Simply a wonderful idea all around.
Lovely project, and that chip board looks like fun!
I’ve been so anxious to try Melody Ross’ new line. This Artsy Urban line is so cool! I love what you did with it! Love the blues and yellows.
Cute! Thanks for offering the contest!!
backporchpoet77 at gmail dot com
Can I come and play with you? That looks like so much fun!
oh, i would love to win this! love the collage! lollie.lucy@hotmail.com
I like it! 🙂 Would love to try my hand at this – hope I win!
charlsmith at comcast dot net
Oh my gosh, that really does look fun! I could pretend that I actually can use tools :).
Beautiful!
chinlai@bellsouth.net
Thanks for the tips, and the great contest!
six_one_nine_girlie86 (at) yahoo (dot) com
Really love you mixed media piece. Thank you for the step by step instructions. Really love the chip art tools and accessories. I have been drooling over this product since I first saw it’s video tutorial in CHA. Awesome product and giveaway!Thankyou!!!
syeda
syeda_lubabah@hotmail.com
That looks like so much fun! =)
maparker64 (at) yahoo (dot) com
This is awesome!
Trudy
onlyjustine at yahoo dot com
I love this project, it is now in my file to reproduce one day:) I was inspired by collage at BGC and can’t wait till the time when I actually am able to do some collaging. I also got to play with Melody’s products at BGC and it too is on my wish list. Love it!!
dawnblackstead@blackstead.com
Your blog has turned me into a Mod Podge addict! I had one bottle sitting in my craft closet FOREVER but now….. I have tons and go through tons!
very pretty! i love this project! jen t.
mjk02(at)comcast.net
This turned out absolutely gorgeous! Hope I win the contest, too! 😉
april_vereb@yahoo.com
How creative and inspiring!
jadedsabre at gmail
My daughter loves arts and crafts-she would enjoy the prize
aunteegem@yahoo.com
I LOVE LOVE LOVE Melody’s products! Thanks for the chance to win!
This is the coolest thing ever! Great way to distress! Love, love your collage, especially the words on the birds and all the designer papers are wonderful!
vicmeier@hotmail.com
Love it. Love the color combination, so ALIVE!!!!
Sharrtist@hotmail.com
I love your project. Melody’s new stuff reminds me of leather working (back in the day). I have not seen any in stores near me, but I would love to try some!
Great project. I’d love to win this for sure.
-Angi_
cokiepop(at)yahoo(dot)com
Mod Podge really does rock!! Fun giveaway!! This is right up my alley. 🙂 sngodown@gmail.com
What a beautiful project – I love the idea of putting the pattern onto the birds – neat use of supplies!
bleamoonspirit(at)gmail(dot)com
My girls love when we get out the ModPodge for yet another art project!
Don’t you love when you find a new toy to play with an it turns into something Fantastic? Great Job Love It!
that project is so amazing! i just adore the colors and the paper you used! hugs!
Very creative!
breath4soul_79 @ yahoo.com
Cool project. I would love to win
jonilynntaylor at gmail dot com
Your project turned out beautifully! I’d love to win! Thanks for the chance!
Sarah
untenuredteacher at yahoo dot com
OMG! I LOOOVVVEEE this! Must “borrow” idea!!! TY for the cahnce to win too!!!!!!!!!!!!
ms(dot)verymarried(at)gmail(dot)com
looks like fun – enter me!!
I really like that idea. I could make artwork for my house for WAY cheaper than purchasing it. I love it!
lauren.m.gibson AT gmail DOT com
I have several blank canvases and some Modge Podge-I’m going to give something like this a try.
whatever you like.
Cute! Cute! Cute!
I’m always looking for a new craft and I love this!
Micahrissa@gmail.com
this is so beautiful! I love it!
what a lovely project! thank you for showing us such detailed directions too!
marie
mea57_98@yahoo.com
Love, love, love everything about this!!
soveryjessica@gmail.com
Love this! So cute and looks like it was fun to do 🙂
Erinhcollins@gmail.com
i would love some new craft supplies, thanks for the chance
nannypanpan at sbcglobal.net
Adorable! You have a gift! What a cool new technique!
joslynranae@yahoo.com
looks like fun, thanks
Now that is my kind of art! Beautiful and the video was great.
Love it a lot!
What a great idea! Lot’s of fun ideas on this site! Love it!!
oh my goodness, just fell in love with your site, I’m a crafter working on my first large decoupage project.
I love all the colors in this project. It is very beautiful. Thanks for sharing!
saulpaugh.chelsea(at)gmail(dot)com
I am just so in love with Melody Ross and Christy Tomlinson’s art right now. They are great! This means too, I should take out stock options on Mod Podge!
bryantkm@hotmail.com