
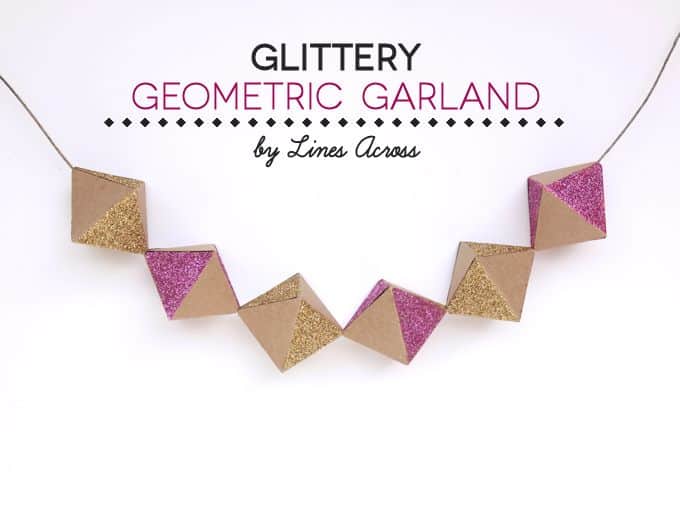
Do you want some fun and simple decor for your next party? Learn how to make this easy DIY paper garland in a few steps (with a template!)
Skills Required: None. Even if you’ve never crafted before, you can easily make this garland. You’re going to be cutting with scissors, applying Mod Podge, glittering, and stringing. It’s very simple, even for kids.
Hi, my name is Rachel from Lines Across, and I’m happy to be contributing here at Mod Podge Rocks! I’m a little obsessed with geometric shapes and bright colors, and often share free printable gift boxes.
Today I’m sharing how to make a paper garland. If you like glitter crafts that are easy to make and you like party crafts, you’re going to enjoy this.
I’ve had this project in mind since I created some diamond shaped gift boxes. I knew I wanted to make a smaller version that could be strung together into a fun garland for a celebration.
This paper garland project was pretty easy, but it took a little longer than I thought. It would be perfect as a project for a craft night with a few friends, as a part of a handmade wedding, or as something to make while watching TV.
Learn how to make this project in a few simple steps below!
Gather These Supplies
- Cardstock – any color
- FREE TEMPLATE
- Scissors
- Mod Podge Gloss
- Paintbrush
- Glitter
- Twine
- Craft glue
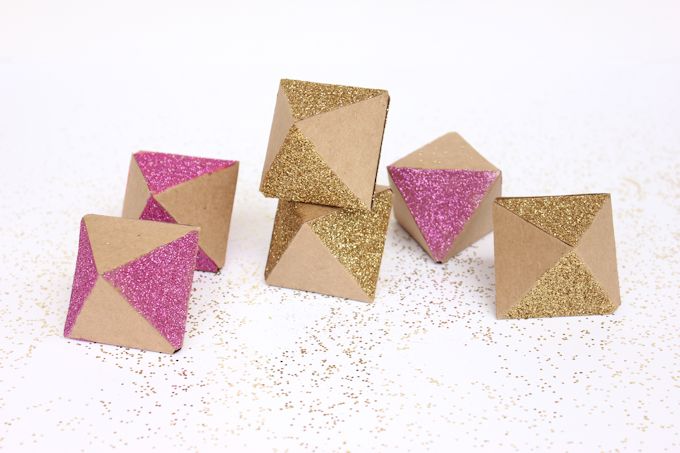
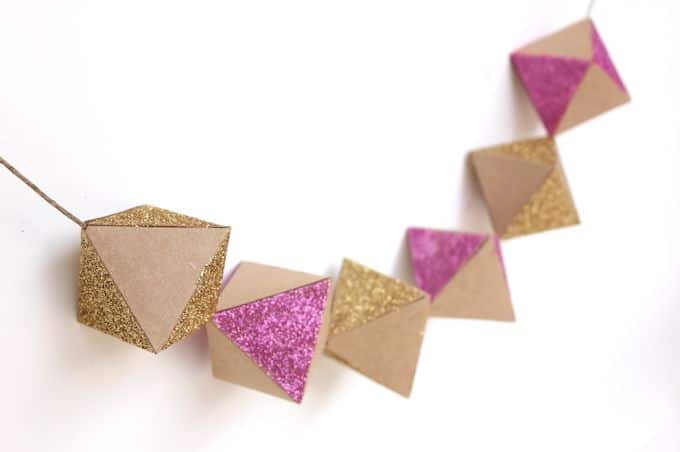
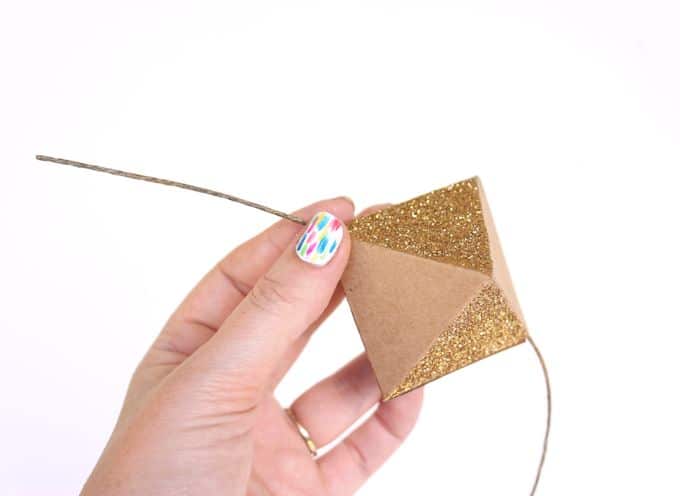
I just love the way the glittery pink and gold look next to the plain kraft paper. What color combos would you love?
Get the printable how to card for this craft below:

Make a Paper Garland
Equipment
Materials
- Garland template
- Cardstock or stiffer paper that will hold the shape
- Mod Podge
- Glitter colors of your choice
- Twine
- Craft glue
Instructions
- Print out the template. Each template makes two octahedrons. Cut out as many as you like, depending on the length you'd like your garland to be.
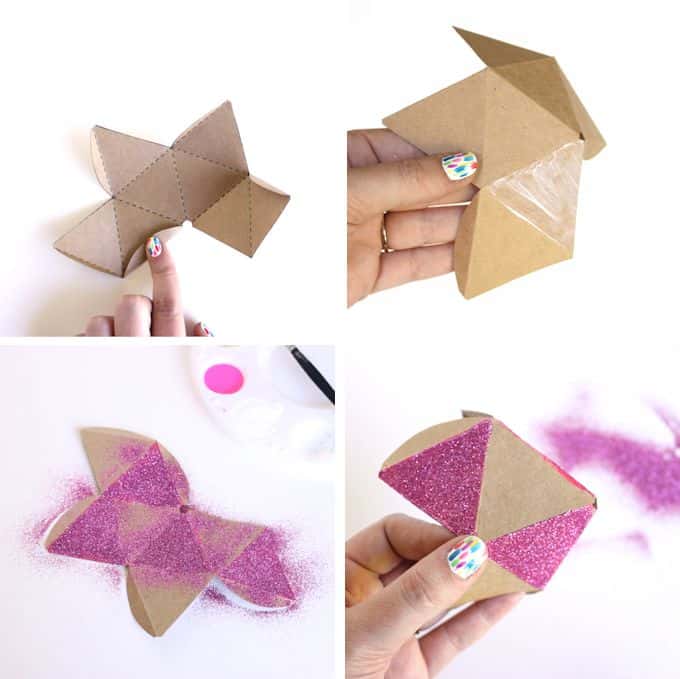
- Fold each octahedron on the dotted lines. I found it easier to score first.
- Flip over the paper so that the printed lines are on the bottom. These will become the inside of each paper shape. Carefully paint a medium coat of Mod Podge over every other triangle (4 total).

- Sprinkle each Mod Podged area with glitter and shake off the excess. Let dry.
- Use the craft glue to assemble each octahedron. Let dry.

- Thread all your glittered paper shapes onto the twine to create the garland. Spread out and hang.


Notes
Thanks Amy, for having me here today! Be sure to stop by Lines Across and say hi! If you enjoyed this DIY paper garland, I hope you’ll check out these other project ideas too:


This is very cute. 🙂