
This Halloween piñata costume for a dog was so easy to create! It was made with a pet shirt and felt. Simple and unique!
Skills Required: None. You don’t need any prior crafting skills to do this project – but, you should probably like glitter.

This dog Halloween costume has been a long time coming! Two things were instrumental in the formation of this idea: 1) this costume and then 2) a little sombrero hat:

I have NO idea where I got this sombrero hat. I’ve had it for so long in my craft stash. At one point it was on a headband and in a drawer of mine; when I moved into this new studio I ripped it off of the headband (who knows why?) and placed it on the top of one of my craft supply racks.
I bought the sombrero because it made me smile, and so there it was for months. I always wanted to take a picture of it on my pug Roxie’s head, but never got around to it.
It wasn’t until I was brainstorming dog Halloween costumes and saw Alana’s tutorial for the piñata costume that I got inspired to make my own.
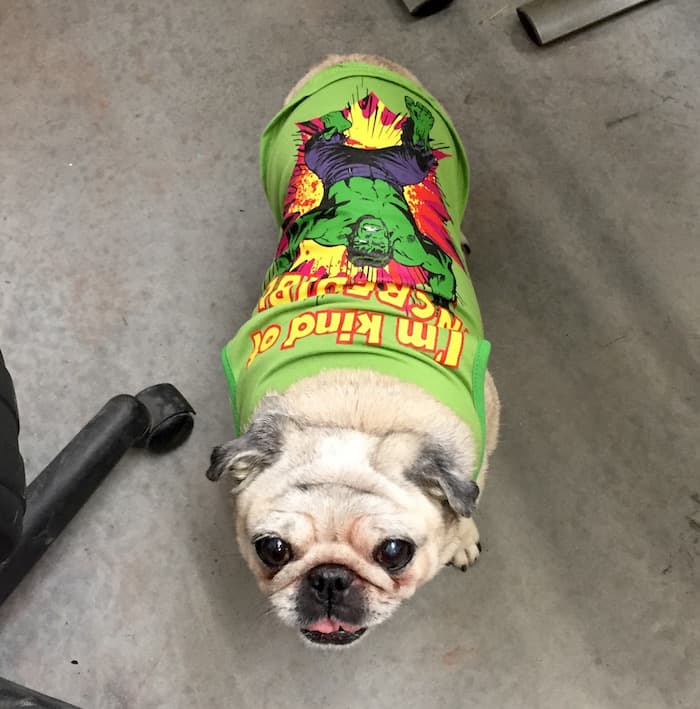
I grabbed one of Roxie’s old doggy tees and then headed to Michaels to get my craft supplies. Here’s how it all came together!
Gather These Supplies
- Dog t-shirt – it can have a graphic on the top as long as it’s small enough to cover up
- Mini sombrero hat
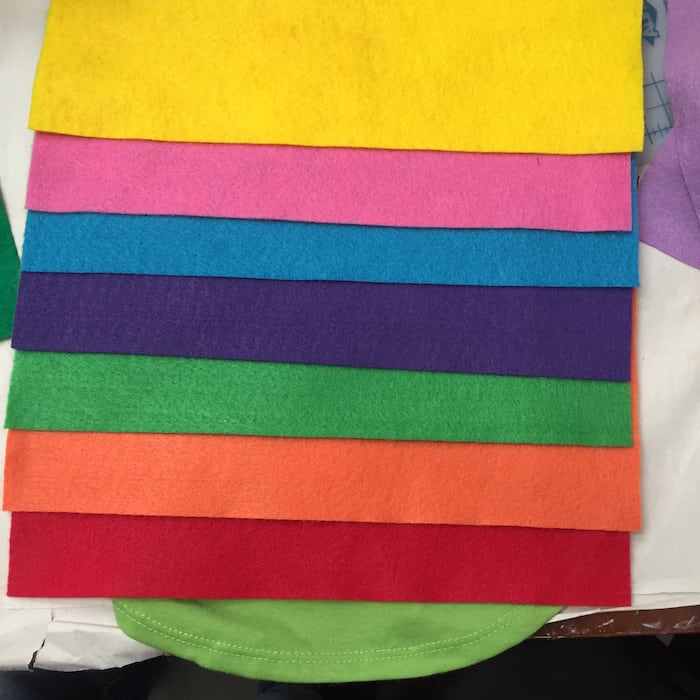
- Rainbow felt – I used 8 sheets of the Creatology brand at Michaels; the amount you use will depend on your dog’s size
- Gold glitter – Martha Stewart brand at Michaels
- Mod Podge Gloss
- Scissors
- Hot glue gun and glue sticks
- Ribbon – about 12″ or enough to wrap around your dog’s head and tie underneath
- Ruler (optional)

Get the printable how to card below:

Dog Pinata Costume
Materials
- Dog t-shirt
- Mini sombrero hat
- Felt various colors – enough to cover the shirt
- Glitter gold
- Mod Podge Gloss
- Ribbon about 12" or enough to wrap around your dog's head and tie underneath
Video
Instructions
- Select a cotton t-shirt to fit your pooch. You can use one with a graphic as long as it can be covered up. Lay the t-shirt on your work surface.
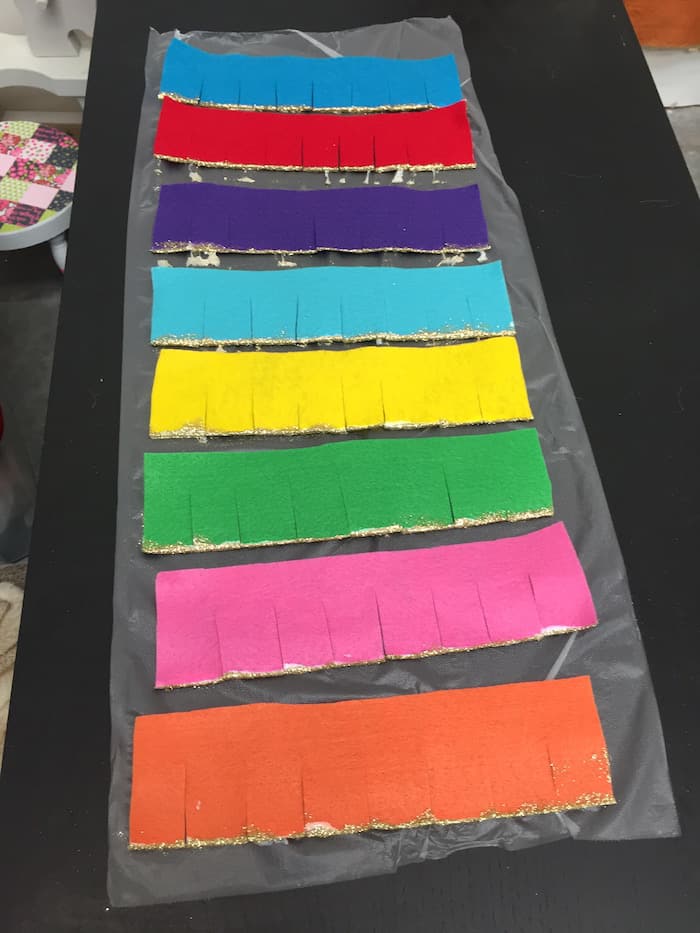
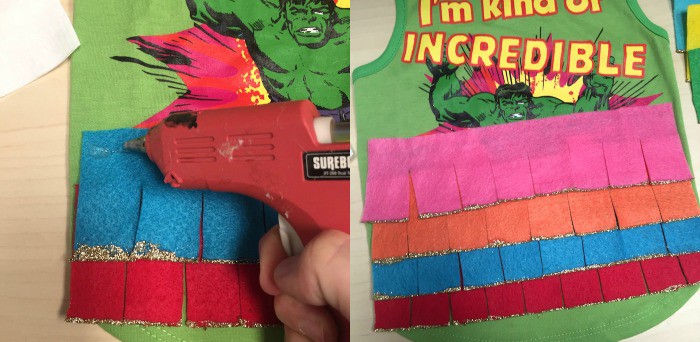
- Lay out the felt in rows to cover the shirt. I ended up using eight pieces; you may need more depending on the size of the shirt.
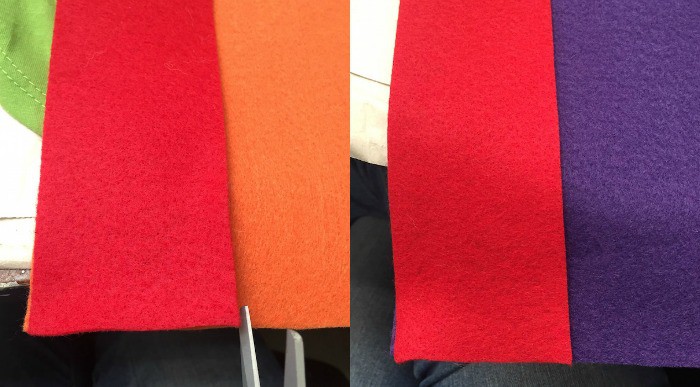
- Start with your bottom piece(s). Cut it to fit the width of the shirt.
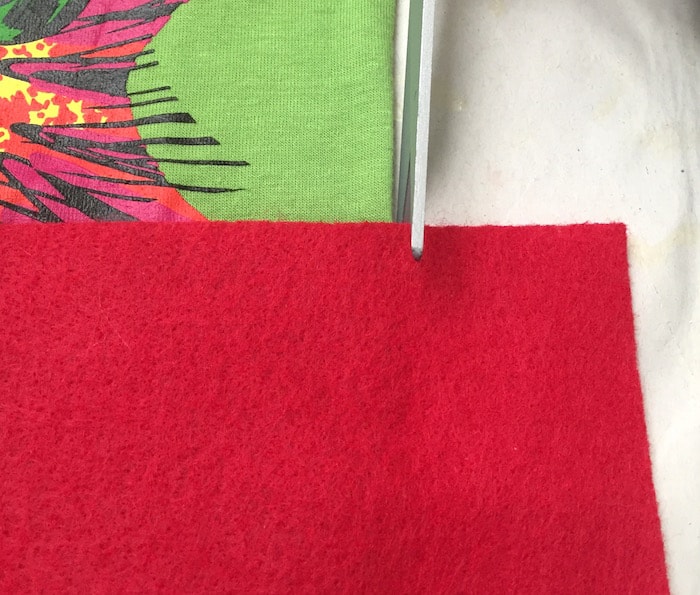
- Decide how long you want the strips vertically – I chose about 2 1/2" long. Trim the felt down to size with scissors or a craft knife.
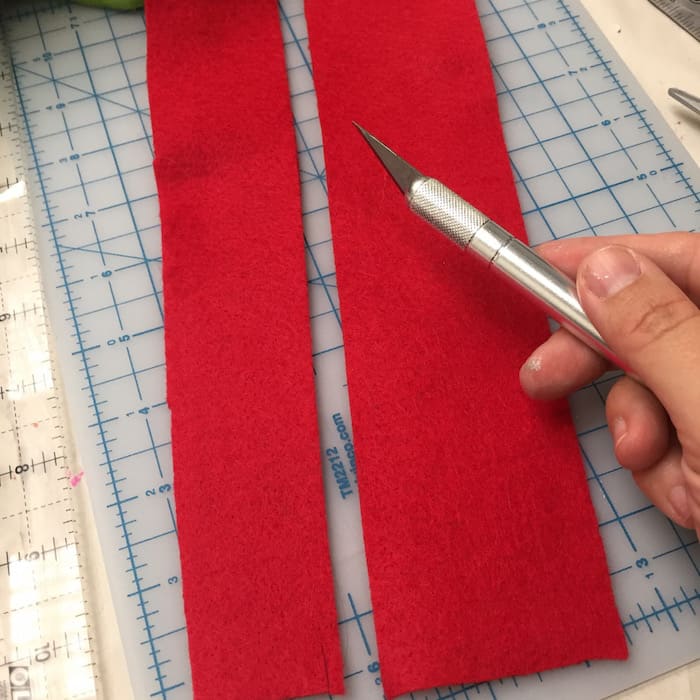
- Once the bottom piece is cut to your specifications, use it as a template to cut the same sized pieces from the other colors.
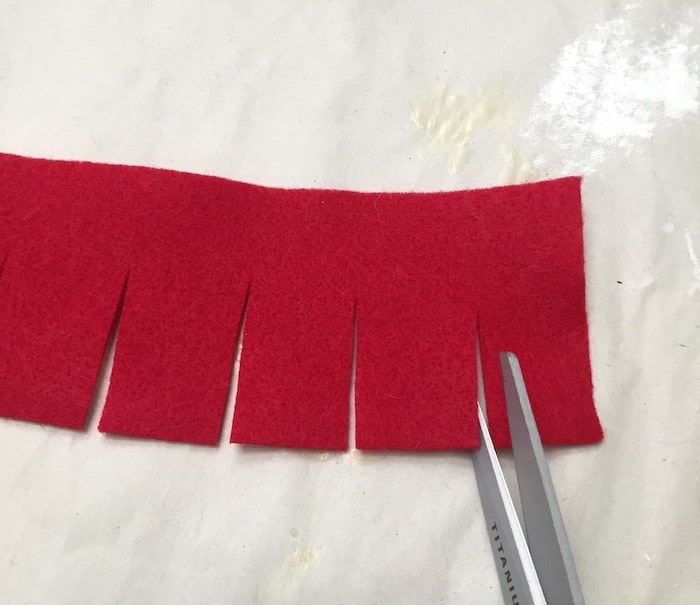
- Cut fringe in all of your felt pieces. Cut slightly more than halfway up the felt, and try to eyeball equal sections of fringe. They don’t have to be exact, but as close as possible.
- Add sparkle to the edges of the fringe. Either paint or dip the edges of the fringe in Mod Podge, then dip in glitter. Place on a piece of wax paper to dry.
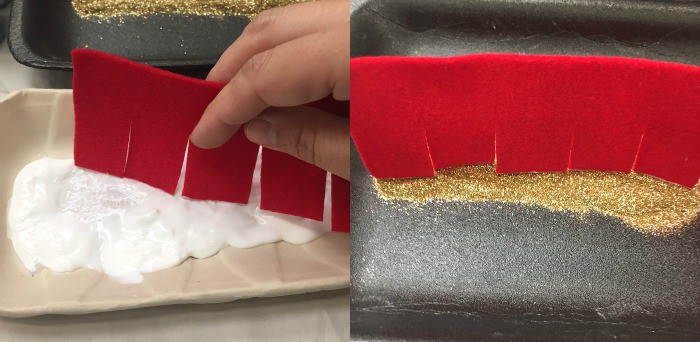
- Once the fringe is dry, take it outside and shake the excess off of every piece.
- You’re ready to hot glue! Start at the bottom of your shirt. Run a line of hot glue across the top of the strip, turn over quickly and press down on the shirt. Repeat until the shirt is covered.
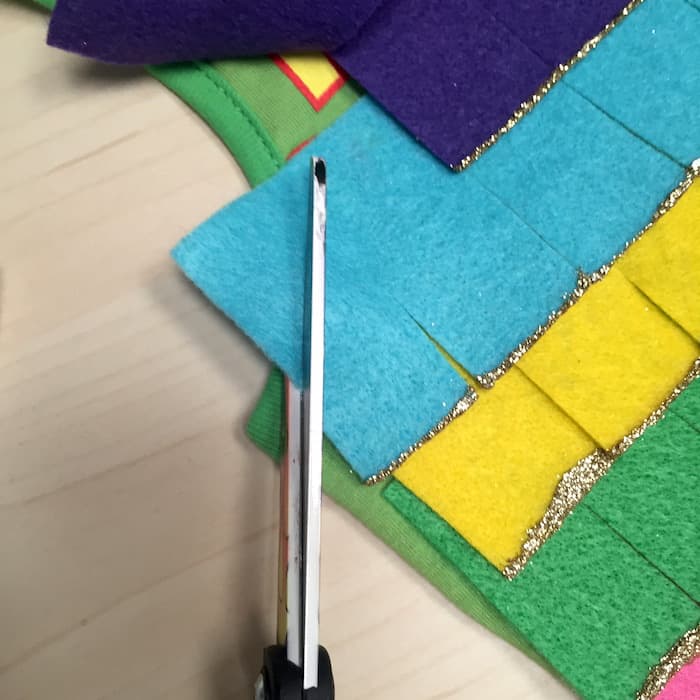
- Trim the felt to fit around the armhole with scissors.
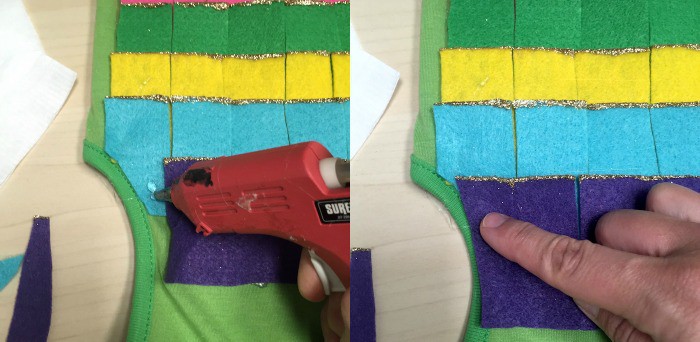
- Use hot glue to apply glue in the areas to secure the felt that has just been cut. Do this on both sides and let your shirt cool.
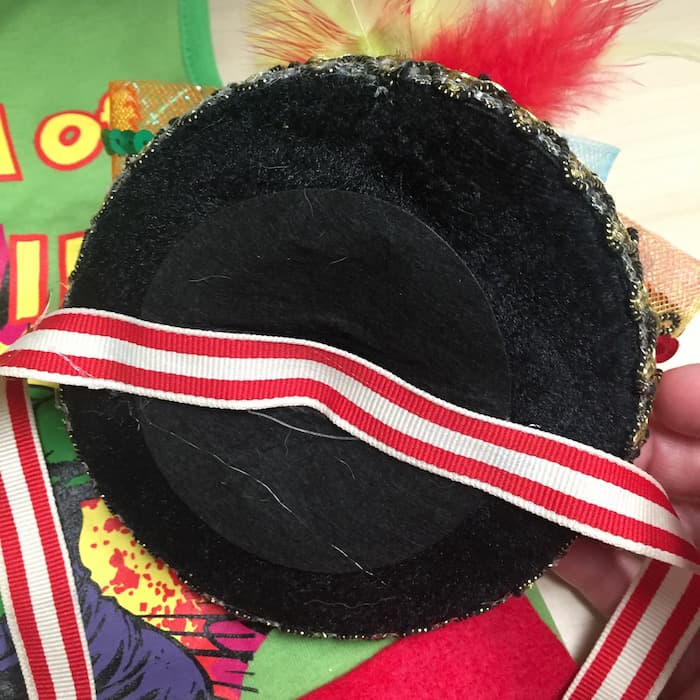
- Glue a ribbon to the mini sombrero so you can tie it around your dog’s head.
Then, sit back and enjoy the hilariousness that will ensue from this piñata costume. What do you think of my Halloween pug-yata? Cute, right?! Happy Holidays!


Awwwwww! The costume is almost as cute as that face!
This is so cute! You did an amazing job!
Paige
https://www.thehappyflammily.com/