
Learn how to Mod Podge photos onto flower pots in this sweet project. This is a great Mother’s Day gift for moms and grandparents alike – and would also make a great table centerpiece!
Skills Required: Beginner. I recommend having prior crafting experience before attempting this project, but it doesn’t have to be much. You’re going to be Mod Podging paper to terra cotta, which is relatively easy. Learn more here.
Looking for a creative and meaningful way to display your favorite memories? This DIY photo flower pot is the perfect project!
Whether you’re making a heartfelt Mother’s Day gift, a charming Easter centerpiece, or just adding a personal touch to your home decor, this decoupage craft is as fun as it is sentimental.
With just a few supplies – Mod Podge, a flower pot, and your favorite photos – you can transform an ordinary planter into a keepsake that brings joy year-round.
This project is great for crafters of all skill levels, and it’s a fantastic way to give a personalized gift that feels extra special.
Imagine gifting a pot filled with fresh blooms and adorned with treasured family snapshots. It’s a thoughtful and unique surprise for moms, grandparents, teachers, or anyone who loves a handmade touch.
Not only is this craft easy to make, but it also allows for plenty of creativity. Choose black-and-white photos for a timeless look, add decorative paper for extra flair, or even experiment with different finishes to match your style.
No matter how you customize it, this Mod Podge flower pot is sure to brighten up any space! I do want to give you two notes before you begin that are important:
- Ideally you print the images on laserjet. If you print the images on inkjet, you’ll need to follow the instructions to seal the images so they don’t bleed.
- If you want to use this pot for real plants, you need to seal the inside with 2-3 coats of non toxic acrylic sealer (let dry between each coat). This is so the water that goes to the plant does bleed through the back of the pot and ruin the Mod Podge from the inside.
Ready to get started? Keep reading for step-by-step instructions below:

DIY Flower Pots with Photos
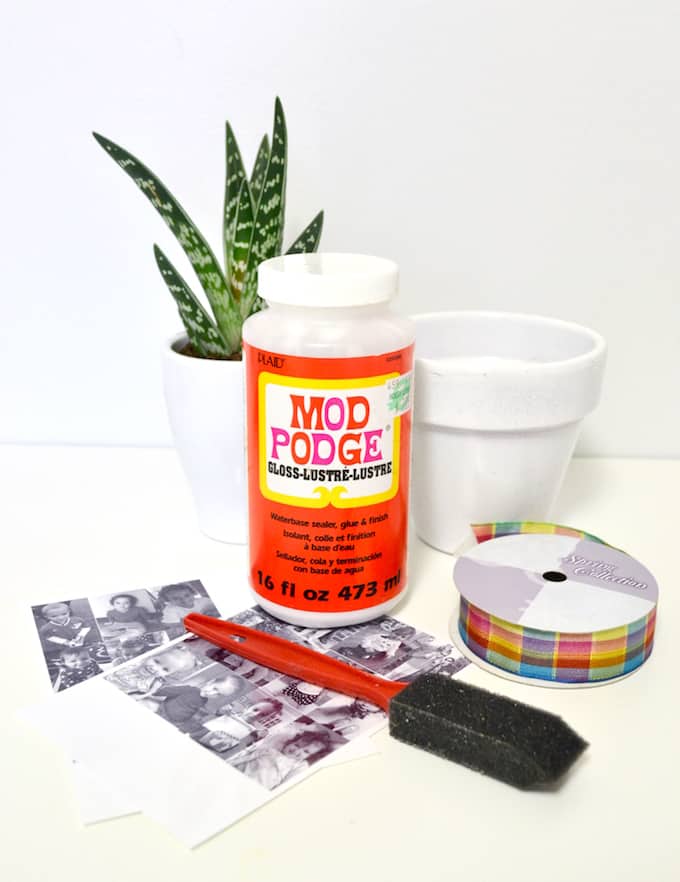
Materials
- Terra cotta pot(s)
- Mod Podge Gloss
- Photos printed with a laserjet printer
- Ribbon
- Spray primer optional
Video
Instructions
- Spray paint the planter white (optional). Let dry.
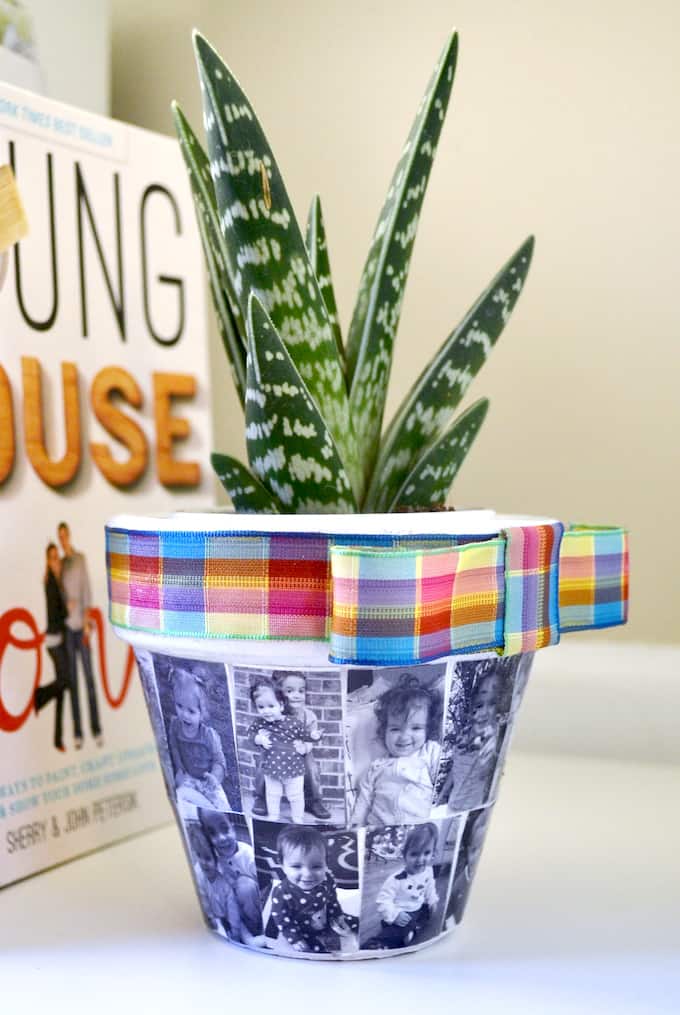
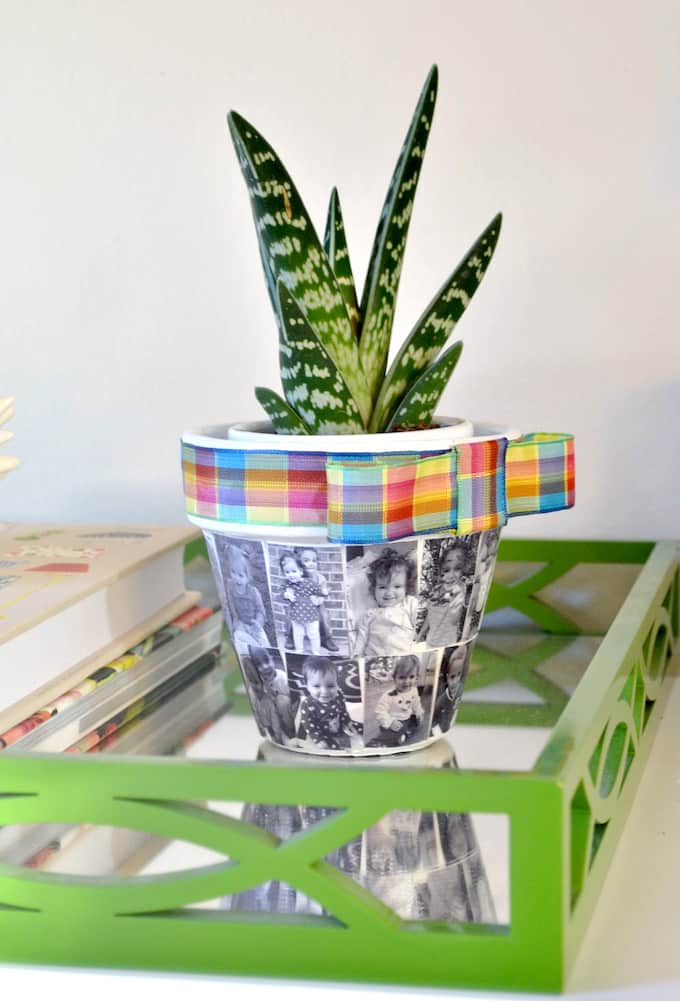
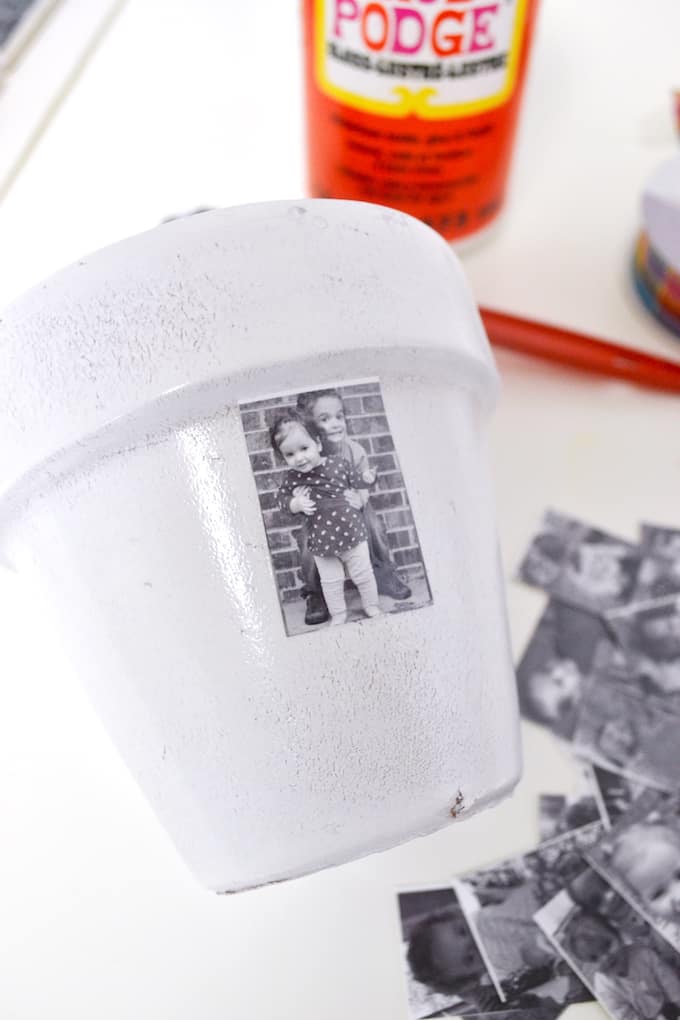
- Select photos for the project. Turn the photos to black and white and resize. I measured 3" from the bottom rim of my planter to the base, so I did two rows of photos that were 1.5" tall. Print out on laserjet.
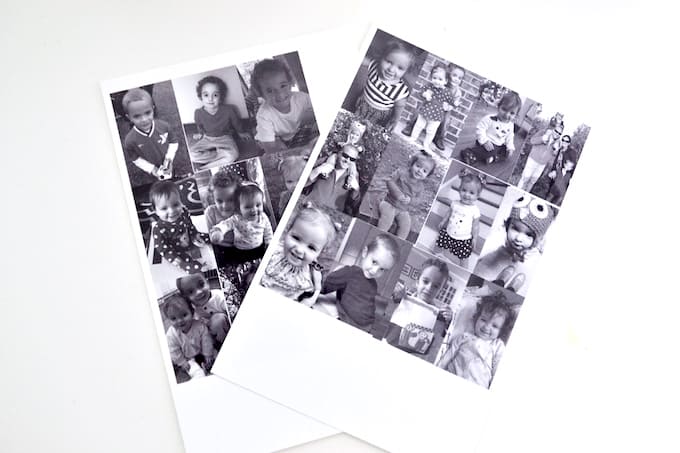
- Cut the photos out of the paper with the scissors and set aside.
- Add a layer of Mod Podge to the planter. Choose one photo and smooth it down.
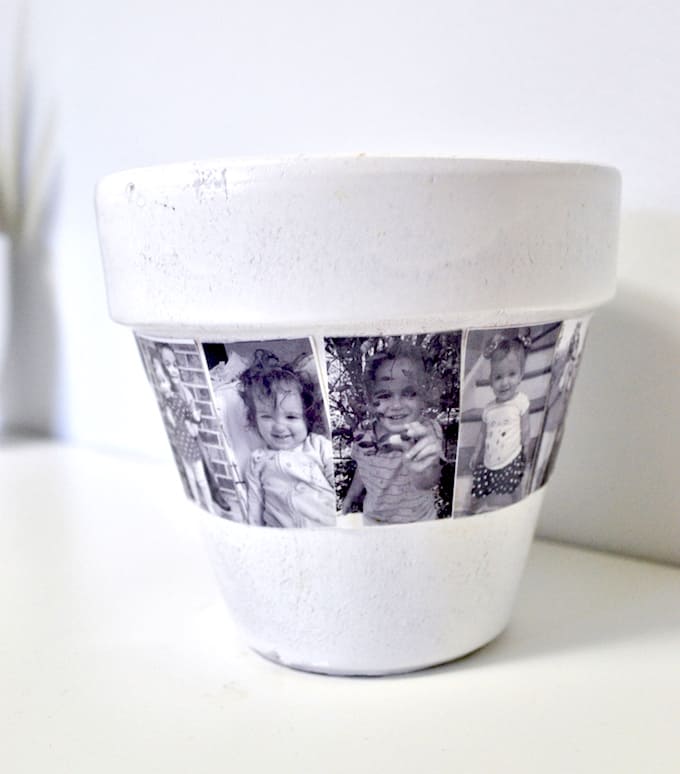
- Keep adding Mod Podge and photos until the planter is covered. Smooth thoroughly to remove bubbles. Let dry for 15 – 20 minutes. Seal with three thin coats of Mod Podge, letting dry between coats.
- Use Mod Podge or hot glue to affix a length of ribbon around the rim of your planter.

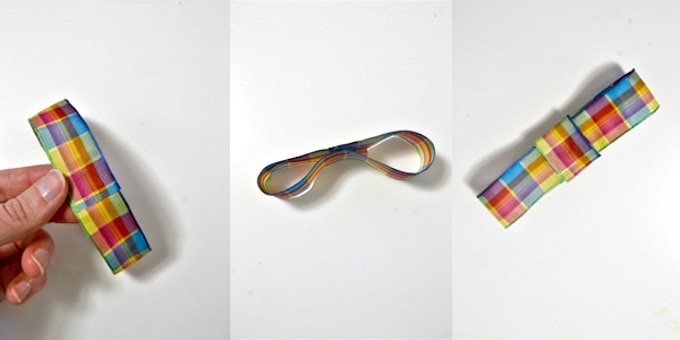
- For a finishing touch, add a bow to the planter. Take a length of ribbon and hot glue the two ends together. Press the middle of the ribbon together in the center, and attach with another drop of glue. Take a smaller length of ribbon, wrap it around the middle, and hot glue it in place. Attach this bow to the planter and let cool/dry completely before using.
Notes
What other crafts can you do with clay pots? Just click one of these links below to find out!


What a great idea! This would make a fun gift especially for grandparents. Or maybe a party centerpiece? Plenty of ideas. Thanks for sharing!