Learn how to make simple, no sew, DIY fabric coasters with a vintage scarf and decoupage medium. These are so easy and make a great gift!
Skills Required: None. Even if you’ve never crafted before, these coasters are very easy to make. If you can use glue, you can achieve success.
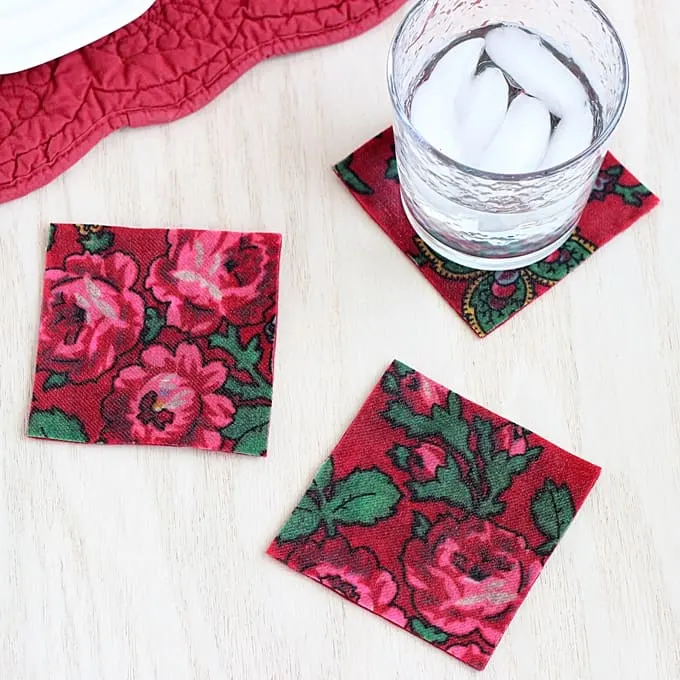
Hi there! It’s Shannon from Rosyscription again. I think I’ve shared this with you before, but I have a THING for vintage floral fabrics. I can’t help it. Every time I’m in a thrift store or antique shop, I head right for the scarves, linens, and handkerchiefs. I love it when I find a great print!
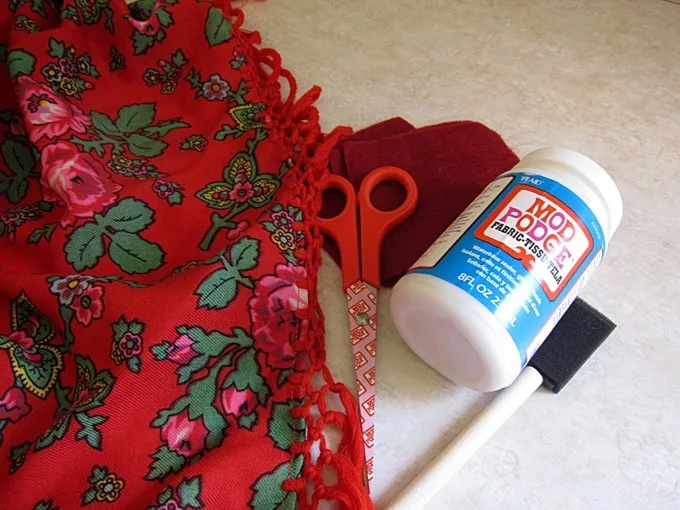
I’ve had this old red and pink floral scarf for ages. It was a hand-me-down from my husband’s aunt. We can never have enough coasters in our house, so I thought it would be fun to make a set of DIY coasters with the fabric.
What makes these quick and easy fabric coasters no sew? Why, Fabric Mod Podge of course. Instead of using a sewing machine to attach the fabric pieces together, you’ll use decoupage medium.
Yes, the coasters can still be washed, even when you use Mod Podge. If you can, hand wash and dry. But if you want to throw them in the wash, use a cold cycle. Then let them air dry so you can flatten them.
Ready to start? Here’s what you’re going to need.
Gather These Supplies
- Decorative fabric – decor weight
- Felt
- Mod Podge Fabric
- Paintbrush
- Ruler
- Scissors and/or rotary cutter
- Craft knife
As far as the cotton batting normally seen with fabric coasters, you can still include that in the middle. Just cut that piece a little bit smaller so that it doesn’t poke out the edges.
Are you ready to try this fabric craft? Grab your decoupage medium and make your own coasters today by following these simple steps.
DIY Fabric and Felt Coasters
Equipment
- Scissors and/or rotary cutter
Materials
- Decorative fabric at least a 10" x 10" square
- Felt at least a 10" x 10" square
- Mod Podge Fabric
Instructions
- Using a ruler and a craft knife, cut out 4” x 4” squares of felt.
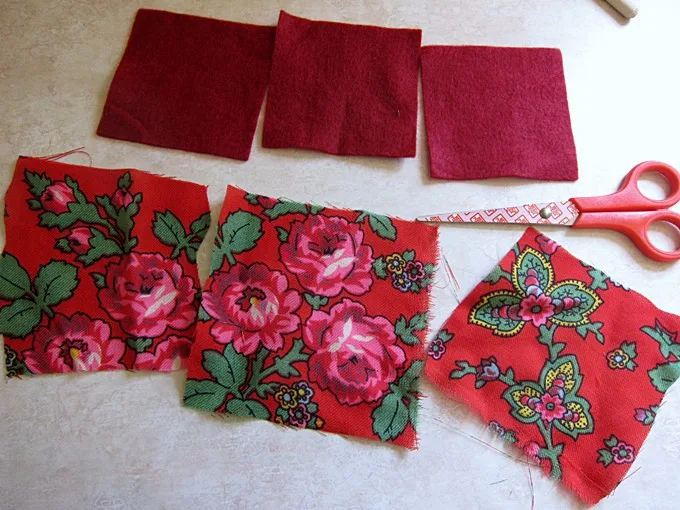
- Cut out swatches of your decorative fabric that are closer to 5” x 5” in shape (you do not need to be exact with the decorative fabric).
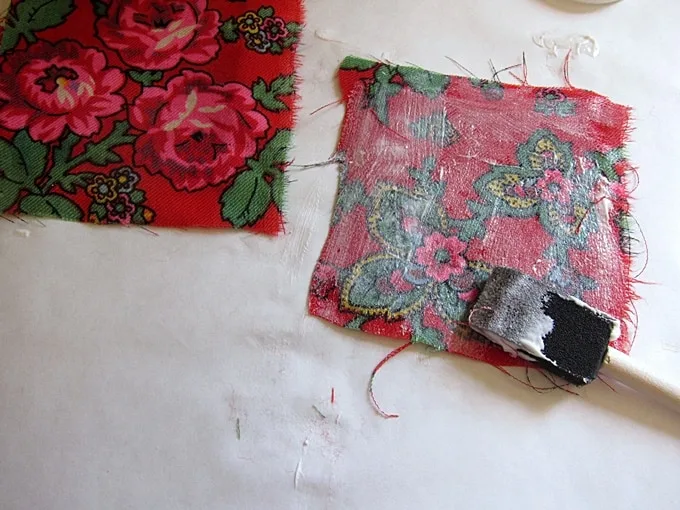
- Apply a medium coat of decoupage medium over the felt square. Firmly press the decorative fabric over the glue and felt, smoothing out any bubbles. Repeat with the other felt squares and fabric.
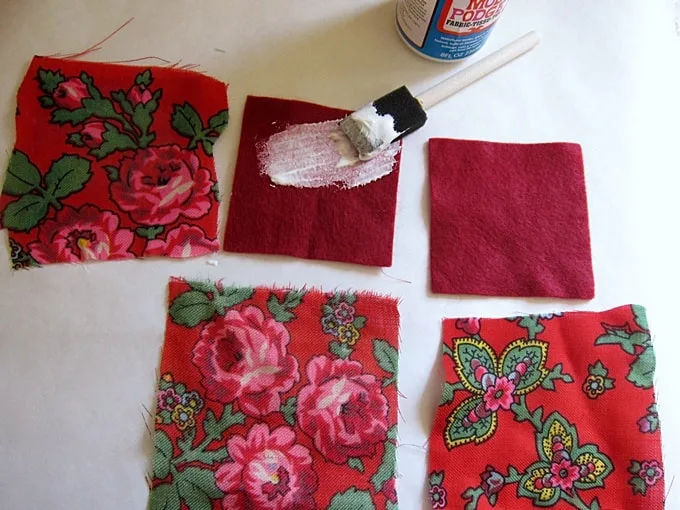
- Brush a thin coat of decoupage over the top of the decorative fabric. Make sure to cover fabric that extends out beyond the felt square.
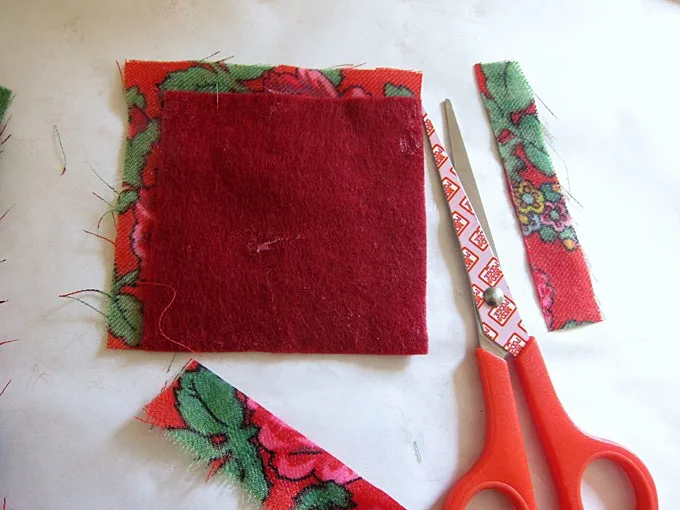
- Once the decoupage is dry, carefully trim the excess decorative fabric away from the felt square. Since the fabric has a coating of decoupage on it, it should cut without fraying. You can use your coasters with glasses immediately.
These simple coasters would make great gifts. I love that you can customize them for the season or holiday, too! I’d love to know what you think in the comments! Here are some other budget friendly things to make at home:


Amy Moret
Friday 14th of January 2022
Hello!! I just made some of these coasters with the mod podge fabric… They have been drying for a few days but they feel sticky.. Is this normal?
Amy
Monday 17th of January 2022
Hi Amy - I'm wondering if the fabric was thin and the Mod Podge seeped through? In the original project, a thicker fabric was used and a thin layer of Mod Podge, so the Mod Podge didn't come through. Do you have a clear brush on sealer or a spray sealer? That will get rid of the tackiness: https://modpodgerocksblog.com/why-is-mod-podge-sticky/
Pamela H.
Monday 21st of June 2021
Is modpodge water repellent after it dries? I would think that condensation would affect these?
Amy
Monday 21st of June 2021
It is water repellent, though not waterproof. It doesn't really affect them because the fabric is pretty thick, and the Podge is sandwiched between. It would be fine but I like the way you're thinking :)
walt
Saturday 28th of February 2015
could one do the same thing as a place mat. could they be washed or simply wiped off after a meal
The CraftStar
Tuesday 24th of February 2015
what a great idea. I have to share a story with you, my boss cut her finger with a pair of scissors, and she didn't have any skin glue, so she used her mod podge. The next morning, the cut was healing nicely. lol
Amy
Tuesday 24th of February 2015
Oh wow, that's kind of amazing! Who knew?? :D