
This colorful end table makeover is one that you MUST try! It’s so easy and completely changes a room with little effort.
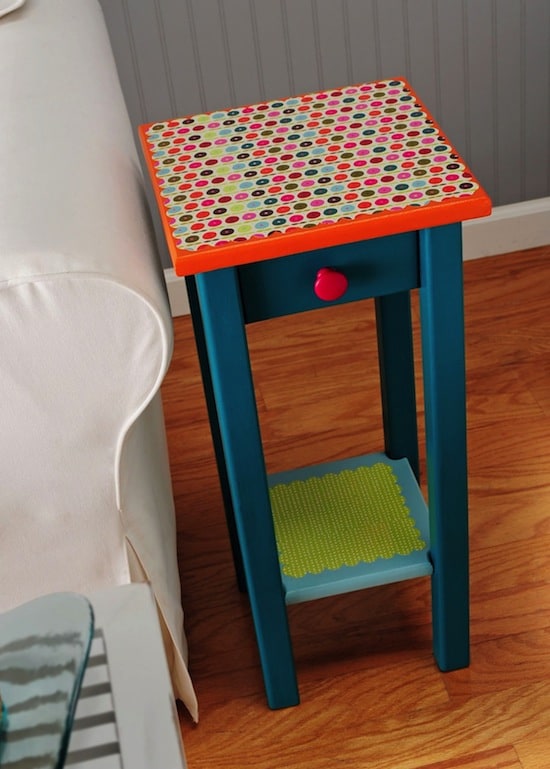
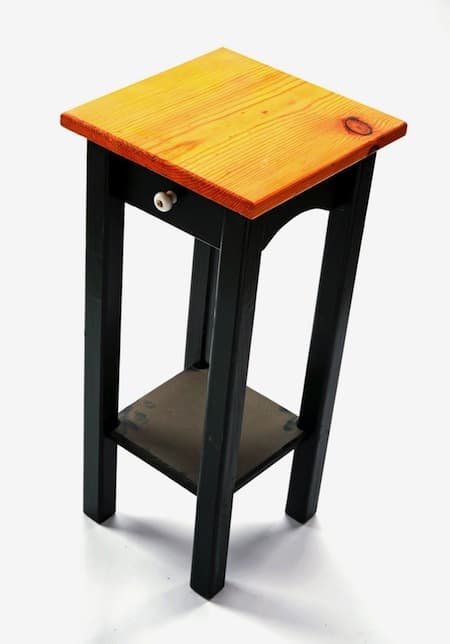
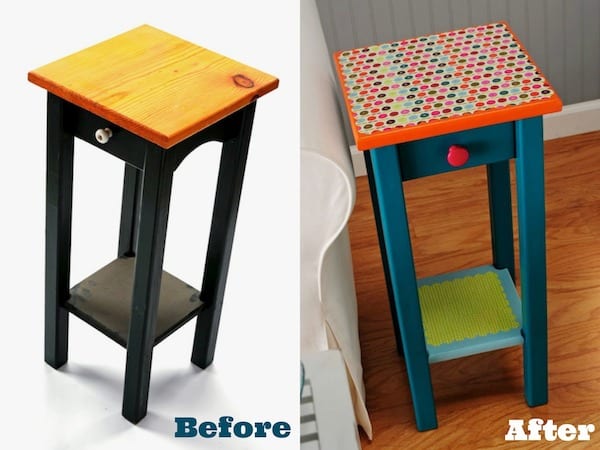
I always get the funny tingles when I get to share a decoupage furniture project that I did with you. It makes me so happy! Here’s one of my latest decoupage ideas – a Mod Podge table. I found the end table above and took a before picture – dusty, kind of boring.
The first photo is what I did to it! I hope you like it. Below are the instructions for my colorful end table makeover. I’d love to see any of your Mod Podge table re-dos, by the way. You know how I love them!
Colorful End Table Revamp
Gather These Supplies
- FolkArt Acrylic Paint – Teal, Glazed Carrots, Magenta, Sky Blue
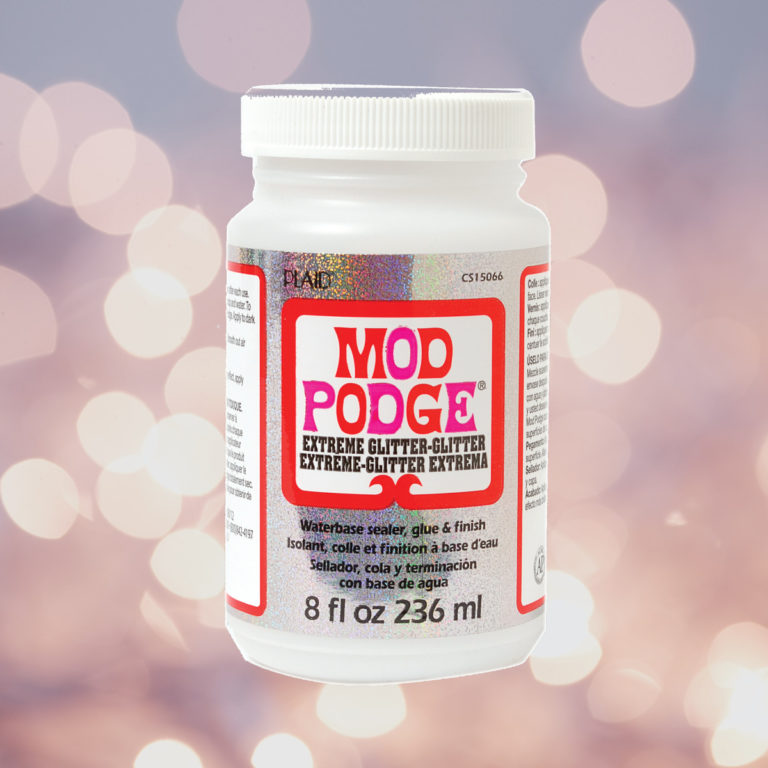
- Mod Podge Hard Coat
- Scrapbook paper of your choice – 2 sheets (I used Carolyn Gavin Greenhouse papers from K and Company)
- 1” Flat paintbrush
- Craft glue
- Scalloped Edge Scissors
- Pencil
- Ruler
- 1 ½” wood knob
Note: Correspond the paint colors to your scrapbooking papers, like I did! Also, if your table starts out really dark and you are painting with light colors, I suggest basecoating with White to limit the number of coats you have to paint.
- Using the paint brush, basecoat the top of the table Glazed Carrots, the sides and legs of the table Teal and the bottom shelf Sky Blue. You will need several coats of all colors. Allow to dry.
- While the table is drying, select two pieces of scrapbooking paper and measure the size you will need. Cut the correct shape and size out of two different (but coordinating) sheets of paper with the scalloped edge scissors. Set aside.
- Glue the papers down to the table (top and shelf) using Mod Podge. Allow to dry at least 15 – 20 minutes.
- While the paper is drying, paint the knob Magenta. Allow to dry and glue to the front of the table using craft glue. Allow knob to dry.
Coat the entire table with at least two coats of Mod Podge. Allow to dry for at least 48 hours before using your decoupage furniture.
If you enjoyed making this table, I’d love for you to check out these other posts:


Hi, I have a question for you, but first I want to tell you how much I have enjoyed and learned from you and how beautiful your projects turn out. I can’t say the same for mine. So my question is after you have applied your paper (picture) and have applied a coat of the mod podge I find that when I run my hand over the picture I can fill the edges. Is this normal or am I suppose to sand them down a little to that they won’t lift up. I don’t think they will lift up but I don’t like that you can feel the edges. Is this normal? If not how do I get rid of that? Please advise.
Thank you
Debra
daubin56@yahoo.com
I have a Littke bedside table that I was just going to paint for my niece’s room. After seeing yours, I went and got all the supplies and now I’m going to paint and MP the top and the shelf. Can’t wait! Thanks for the inspiration!
Love that.. Doing my first MP project next week. I bought a metal and wook cheap table and chairs at a yard sale. MP the top and spray painting the metal parts. Cant wait to get started. You have been a great help getting me started.
Oh Amy, this is so cute and wrinkle free! I mod-podged 2 little tables this week with the hard coat formula and they look like they’ve got loose saran wrap over the top of them! I followed all your instructions – I even watched your videos – twice! The good news is that this time I didn’t have the same problem I typically do, which is that sticky tackiness after the project dries, so thank you for that. I’m really hoping I don’t have to redo this project!
Hi Coco! The two most important things:
1) Use enough MP – more is better than not enough (make sure you can see the surface is white).
2) wait the 15 minutes to dry.
Other than that, what kind of paper did you use (or fabric?). Not all paper can be Mod Podged 😀
Hi again!
Well, I hadn’t thought of the problem being the paper! It has kind of a thicker, almost handmade quality – got it at World Market. It SAYS it’s wrapping paper, but idk, I think it seems more like shelf liner or something…
It’s flattened out a little bit over the last couple of weeks, but still has some little wrinkles. SIGH…not sure what to do.
Thanks for your help. You have an awesome blog!
ok that table turned out so stinkin cute! I LOVE the colors too!
Turning an old and dreary piece of furniture into something bright and cheery. Love it.
Amazing what can be done with old furniture. Well done!