
These personalized sunglasses are so cool! You’ll use two methods – one with glitter and the other with paper and Dimensional Magic.
Skills Required: None. You don’t need prior experience with Mod Podge, or even Dimensional Magic. The area you’ll be applying glue to is quite small.
I have to use prescription sunglasses, which is one of the downfalls of being a glasses gal. It sucks because I love those cheap-y pairs that are big and cute, and I want like 500 pairs of them.
Shannon from Rosyscription is a sunglasses collector, and she’s figured out two options for personalized sunglasses – on the cheap! Here’s her summer craft tutorial so that you can customize your sunglasses, too. This is such a simple fashion craft! I think teens in particular would love it . . . or any discerning fashionista. See her tutorial below.
Cheap Cute Sunglasses
I’m a big fan of cheap-o sunglasses! I own lots of them. Why do I have so many? Well, it is partly because I like choices… but primarily it is because I have a reputation for breaking or losing my sunglasses.
For that reason, I often check out the sunglasses rack when I’m at the dollar store. The selection is OK and I occasionally find a pair or two that fit me. I have to admit that the styles there are usually pretty basic. But for a dollar, I can’t complain!
But recently I thought, “Why not jazz up the glasses with something to make them look a little more customized?” The side temples of the sunglasses seemed to be begging for embellishment. Mod Podge comes to the rescue, again!
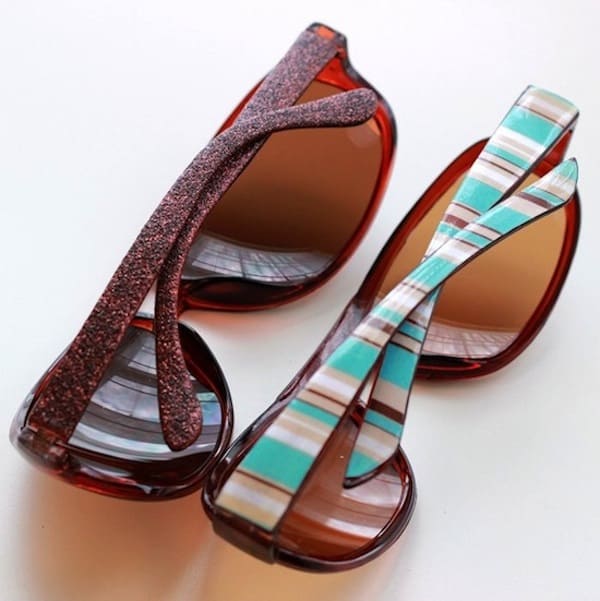
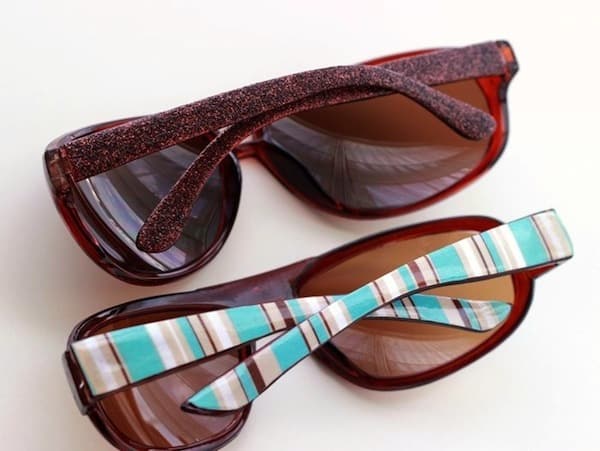
So, I want to show you how I crafted two pairs of personalized sunglasses, two ways.

One pair is made with fun striped scrapbook paper. The other was given a heavy dose of glitter! Let me show you how I made them . . .
Striped Custom Sunglasses
To make the striped pair of decoupaged sunglasses:

Step one: Gather a few supplies. You will need: a piece of scrapbook paper, a pencil, a pair of scissors (or craft knife), a foam brush and some Mod Podge Satin and Dimensional Magic.
Step two: Cut out paper to cover the temples. Trace the shape of the temples and then carefully cut out the paper with scissors. You may need to go back and trim and shape the paper a little so each one fits neatly on each side.
Step three: Adhere the paper to the sides. Brush a coat of Mod Podge Satin onto the outside of each temple. Press and smooth the paper down on top. Allow the glue to dry thoroughly.
Step four: Cover with Dimensional Magic (DM). Bend one of the temples horizontally so it rests as level as possible. Place a piece of scrap paper underneath it to catch any drips.
Starting at one end, slowly and carefully cover the paper with Dimensional Magic and avoid bubbles. Use a rag to wipe up any glue that spills over the edges. Allow the DM to dry completely (typically overnight) and repeat on the other side.
TIP: If you haven’t worked with DM – you should know that it is a cloudy glue that dries crystal clear. It is VERY thick and can be applied on surfaces to add dimension and a resin-like finish.
I do suggest practicing on a test surface so you can get the feel for how the material spreads and coats things before attempting a project like this one.
DIY Glitter Sunglasses
To craft the glittered sunglasses:
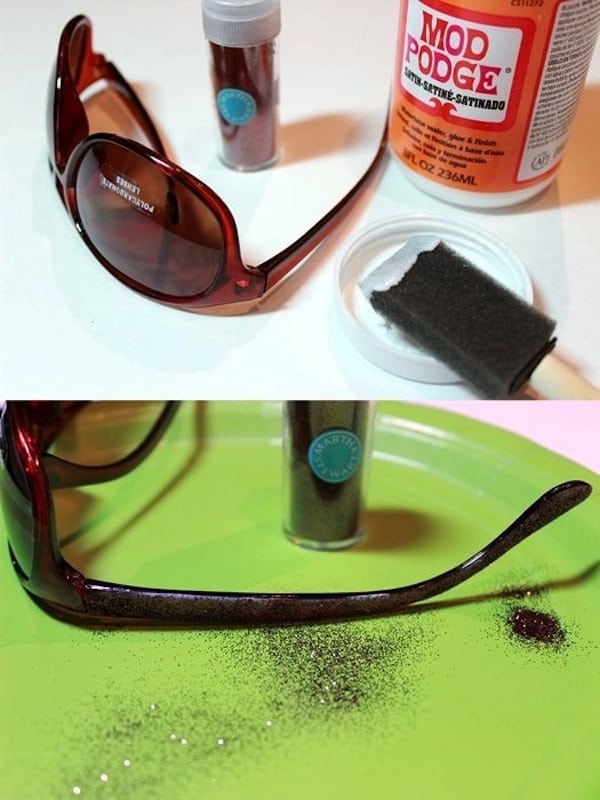
Step one: Gather supplies. You will need: Mod Podge (i.e. Satin formula), a foam brush and fine brown glitter. (I received this glitter as a part of a recent sponsored crafty challenge and had it left over . . . I love Martha Stewart glitter!)
Step two: Glue down the glitter. Spread a coat of Mod Podge onto just the temples of the sunglasses. Liberally sprinkle your glitter to cover the sides. Allow the glue to dry and shake off any excess sparkle.
Step three: Add a couple protective coats of decoupage. Brush at least 1-2 more coats of Mod Podge over top of the glitter (allowing each coat to dry in-between).
This will protect the glitter and keep it from spreading all over you. (I like sparkle… but not in my make-up!)
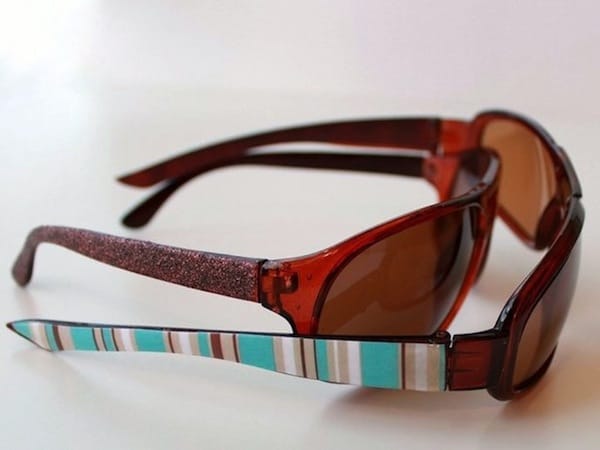
And there you have it . . . two dollar store personalized sunglasses customized with a little decoupage magic! I think the decorated side panels add ‘just enough’ cute detail to the sunglasses. The creative options with colored paper or glitter are endless!
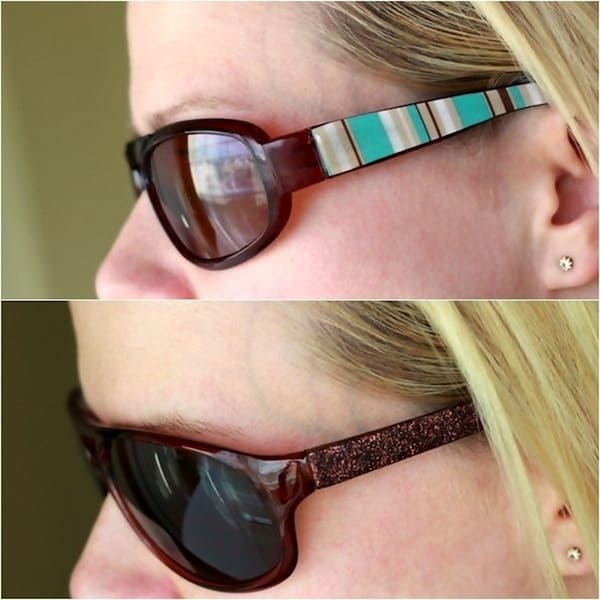
It’s been fun wearing my personalized sunglasses this spring. People don’t believe I only paid a dollar for each pair!
So, if you are like me and often break stuff and can appreciate the need for lots of fun sunglasses . . . be sure to pick up inexpensive ones and craft your own custom pair of sunnies!

Personalized Sunglasses
Materials
Instructions
- Gather your supplies.
- Cut out the paper to cover the temple pieces of your glasses. Trace the shape first and cut out with scissors. Trim down until the paper fits.
- Adhere the paper to the sides. Brush a coat of Mod Podge onto each temple piece. Press and smooth the paper down; let dry.
- Cover one of the temple pieces with Dimensional Magic. Make sure it’s horizontal (as level as possible). Slowly cover the paper with Dimensional Magic. Allow to dry for 12 hours. The repeat with the other side. Let dry completely before wearing.
- For the glitter sunglasses, spread Mod Podge Satin onto one temple piece. Sprinkle on glitter and let dry. Repeat until entirely covered.
- Repeat with the other temple piece. Let dry completely before wearing.
If you like this project, be sure to check out these other related DIYs you might be interested in:


I collect sunglasses (cheap ones) and this seems like a great project for me with some of my plain frames that I don’t like as much. Trying one or both of these methonds asap.