This simple Easter garland is the perfect holiday craft! Make the yarn eggs with Mod Podge and your favorite color of string. The kids will love helping too!
Skills Required: Beginner. These string Easter eggs are easy to make, even if you don’t have prior crafting skills. You might want to try a few first if you do this activity with a group, so that you can get the hang of it.
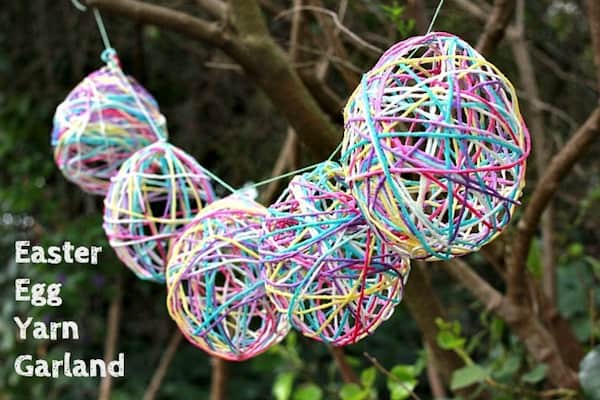
Hi I’m Justine from Sew Country Chick with a fun, messy and easy Easter craft today. I had seen a string covered round light fixture made from a balloon and thought to myself, “If I only blow up the balloon a little, maybe it will look like an egg and I can make yarn covered Easter eggs!”
Always thinking practically, that’s me.
Well, my Easter garland experiment worked, and today I am sharing my Mod Podged yarn Easter egg tutorial with y’all here on Mod Podge Rocks. Would you like to get your hands dirty with some Mod Podge? And don’t your kids want to try a cool Easter craft? Of course you do!
String Easter Eggs
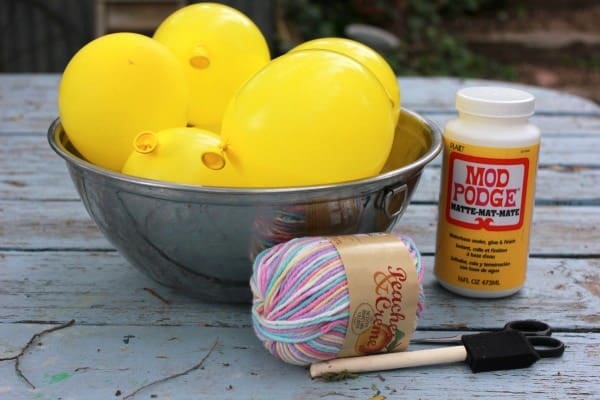
Here is what you will need to make the yarn garland.
- Mod Podge Matte
- 12-inch balloons, 7 – 8
- Multi-colored pastel yarn
- Sponge paintbrush
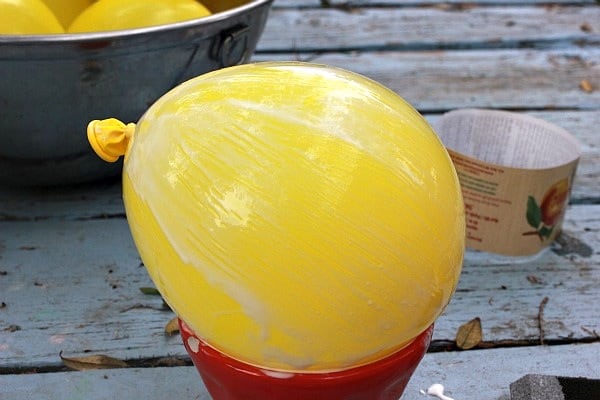
Blow up your balloons until they are about 6 inches tall. Because you haven’t filled them, they will have a slight egg shape.
Cover the balloon with the Mod Podge using your sponge brush.
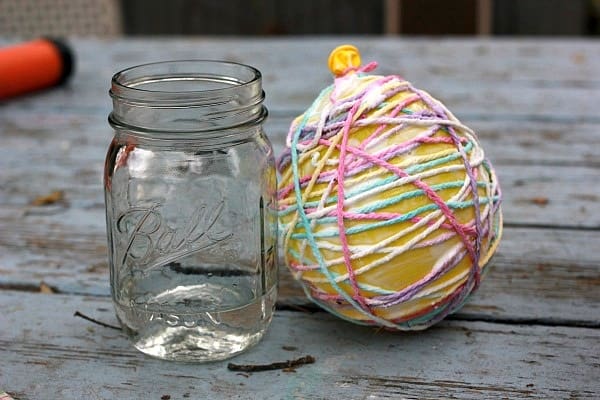
Use the yarn straight off the roll and tie a little bit to the balloon knot on top to anchor it. Wrap the yarn all around the balloon making any design you like.
When you feel you have wrapped it enough, cut the end of the string and wrap it under another piece.
At some point in wrapping your balloon it will probably look like a big mess and you will wonder what you got yourself into . . . but don’t worry, once it dries it looks pretty cool!
Now dip your sponge in the Mod Podge and generously dab it all over the string, making sure you cover it really well. Soak it.

Let it dry for about 24 hours. It needs to be REALLY DRY when you pop the balloons or the yarn will lose its egg shape.
Now comes the fun part . . . pop the balloon with a pin and fish out the deflated mess carefully from your hollow yarn egg. And if you have a little helper, they will love doing this job!
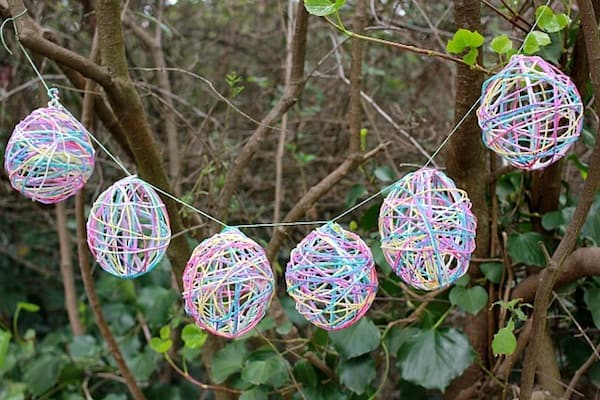
Weave some string though your garland and hang it up and enjoy! These string Easter eggs are such an easy holiday craft that translates to any time of year with different colors of yarn.
String Easter Eggs
Equipment
Materials
- Mod Podge Matte
- 8 balloons 12"
- Multi-colored pastel yarn
Video
Instructions
- Blow up your balloons until they are about 6 inches tall. Because you haven’t filled them, they will have a slight egg shape.
- Cover the balloon with the Mod Podge using the sponge brush.
- Use the yarn straight off the roll and tie a little bit to the balloon knot on top to anchor it. Wrap the yarn all around the balloon, making any design you like.
- When you feel you have wrapped it enough, cut the end of the string and wrap it under another piece. It will look very messy – this is normal.
- Dip the sponge in the Mod Podge and generously dab it all over the string, making sure to cover it really well. Soak it.
- Let dry for about 24 hours. It needs to be REALLY DRY when you pop the balloons or the yarn will lose its egg shape.
- Pop each balloon using a pin. Remove the pieces from the egg.
- Tie each egg to a long piece of the yarn to make a garland. Hang.
If you enjoyed this simple Easter craft idea, I’d love for you to check out these other projects:





What a cute idea! I am pinning this and hope to make these soon, but with an all-round year theme for my girls bedroom. Thanks for the inspiration! New follower here on pinterest:)
Visiting from Pint-sized Treasures
Love this so much! Going to try them at home tonight for work decorations!
I would love to do this as a library craft. Would it be o.k. with you if I borrow your instructions and give your blog credit?
Of course, thank you Joy!
@Amy, Mine did not turn out as well as you did. My balloons didn’t really making a popping noise more a like a fizz. I guess I didn’t put enough glue on all the yarn either. But I am doing a program with a link to your blog. Thanks for the inspiration going to try this again.
Interesting . . . . let me know how the second time works out! You can also try Mod Podge Stiffy; it helps the yarn be a little bit more stiff and easy to separate from the balloons. I feel like some balloons are easier to separate than others to be honest!
Hello, quick question. I’ve never used mod podge so I’m a newbie. Would these be waterproof? Just wondering if they would survive outside if it were to rain. Thanks!
Hi Lauren! Unfortunately no they would ruin if they were left outside. Mod Podge isn’t waterproof, though you can make it waterproof – but these are somewhat fragile when exposed to water.
@Amy, thank you
Would the kids washable mod podge (light green label) work as well?
Hi Abby! It should work just fine!
Just wondering if anyone tried spraying with spray adhesive after completed to allow them to be weather/rain resistant
Hi Diane – you could definitely try a waterproof spray which would probably help if it were light rain or misting. If it’s a heavy pour I’m not sure what would happen!
When you pop the balloon, is there a problem with the balloon latex sticking to the yarn? thanks!
Hi Laura! Sometimes yes, depending on the balloon. The way to combat it is with cooking spray or plastic wrap over the balloon.
Could I maybe use a blow dryer to speed up drying? Need it to be less than 24hr if possible
It *should* work. I might spray the balloons with cooking spray though to make sure the release will still be easy. See if you have any problems wrapping the balloons with cooking spray on them. I just want to make sure that they come off the balloon to fully cure.
About how long would you say each strand of yarn is for the balloons? I’m trying this with my daughter’s first grade class so I was just thinking about precutting them…
Hard to say Brittany but here’s what I would do . . . find an item in your home about the right size and just wrap and cut it yourself. Maybe in the 6 – 10 feet range?
is this balloon craft can you hang outside
Only if it’s not raining 🙂 If it rains on fabric stiffener that isn’t sealed with an outdoor varnish, it will dissolve. Also this is somewhat fragile to take the weather.