
Paint strawberry rocks with this easy and fun garden craft tutorial. Add colorful charm to pots, pathways, and flower beds.
Confession time. I do not garden. I dabble. I buy a basil plant in June and watch it shrivel by July. But you know what never dies no matter how black your thumb is?
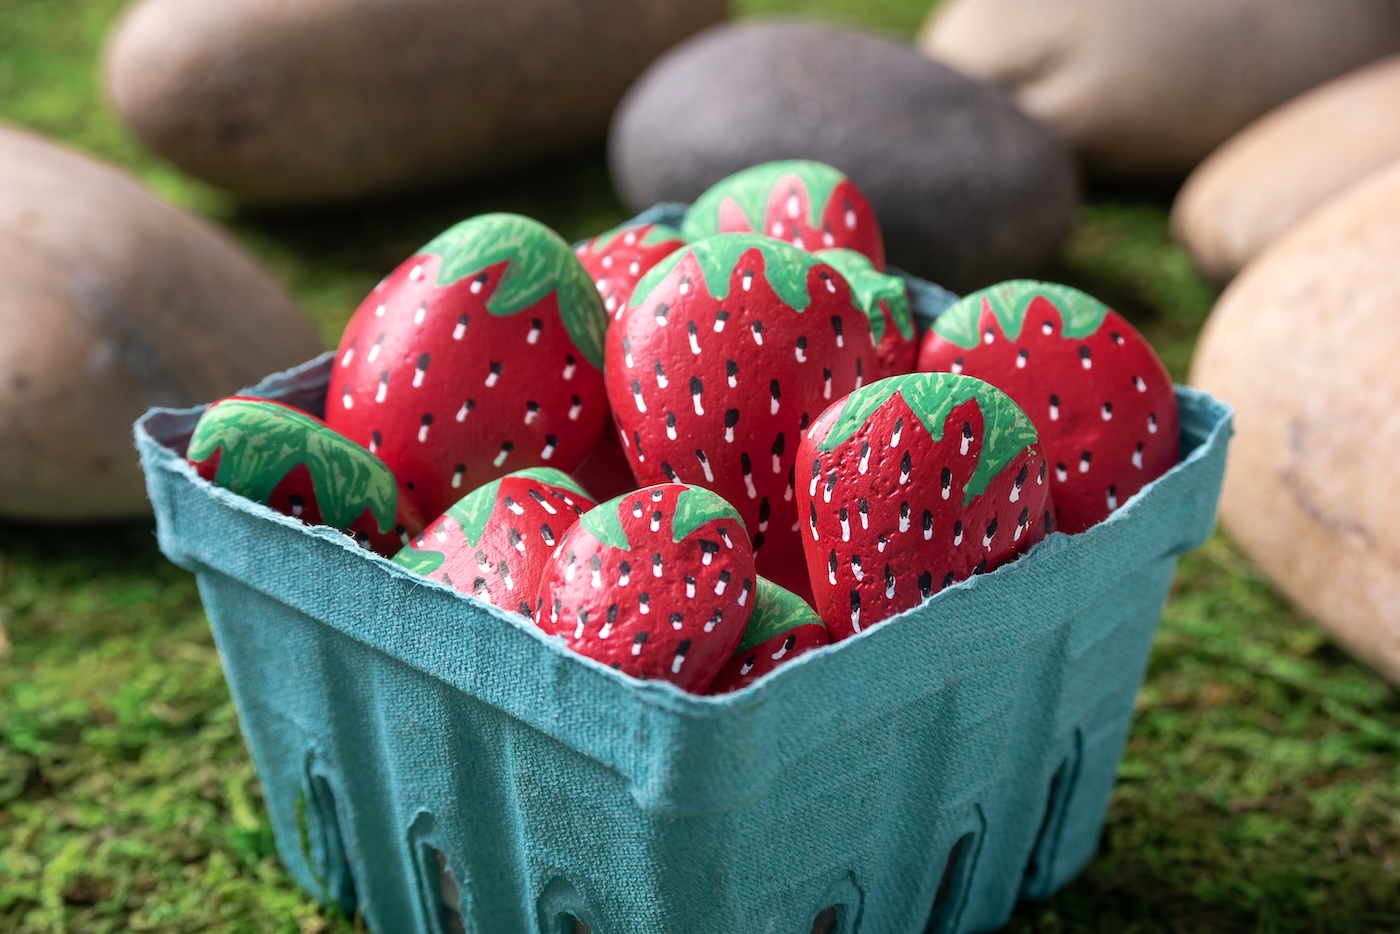
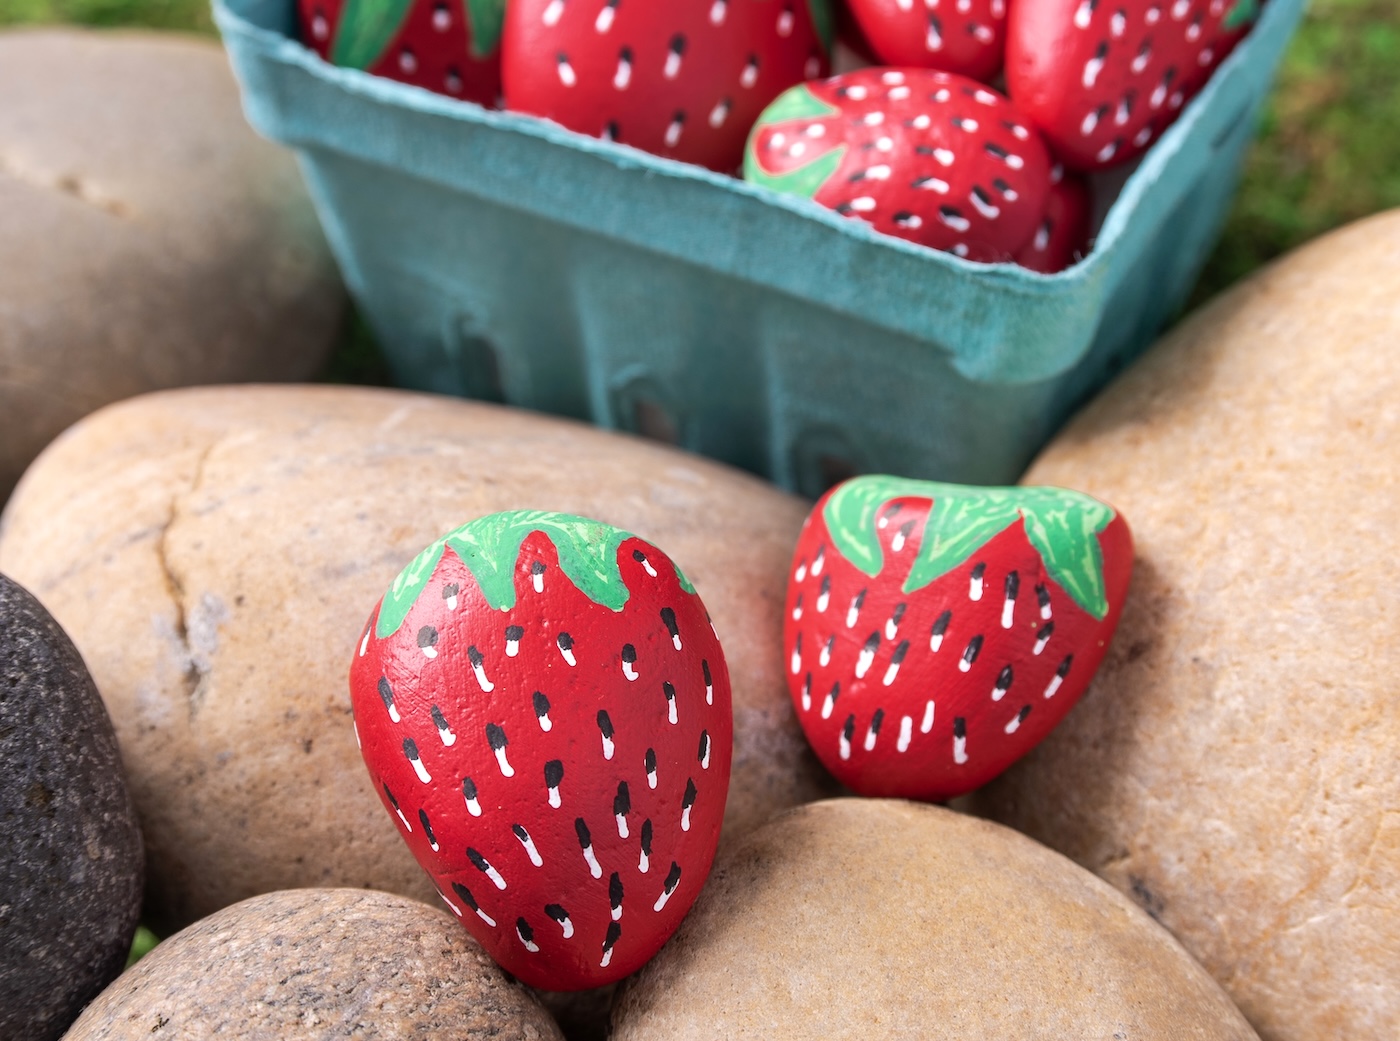
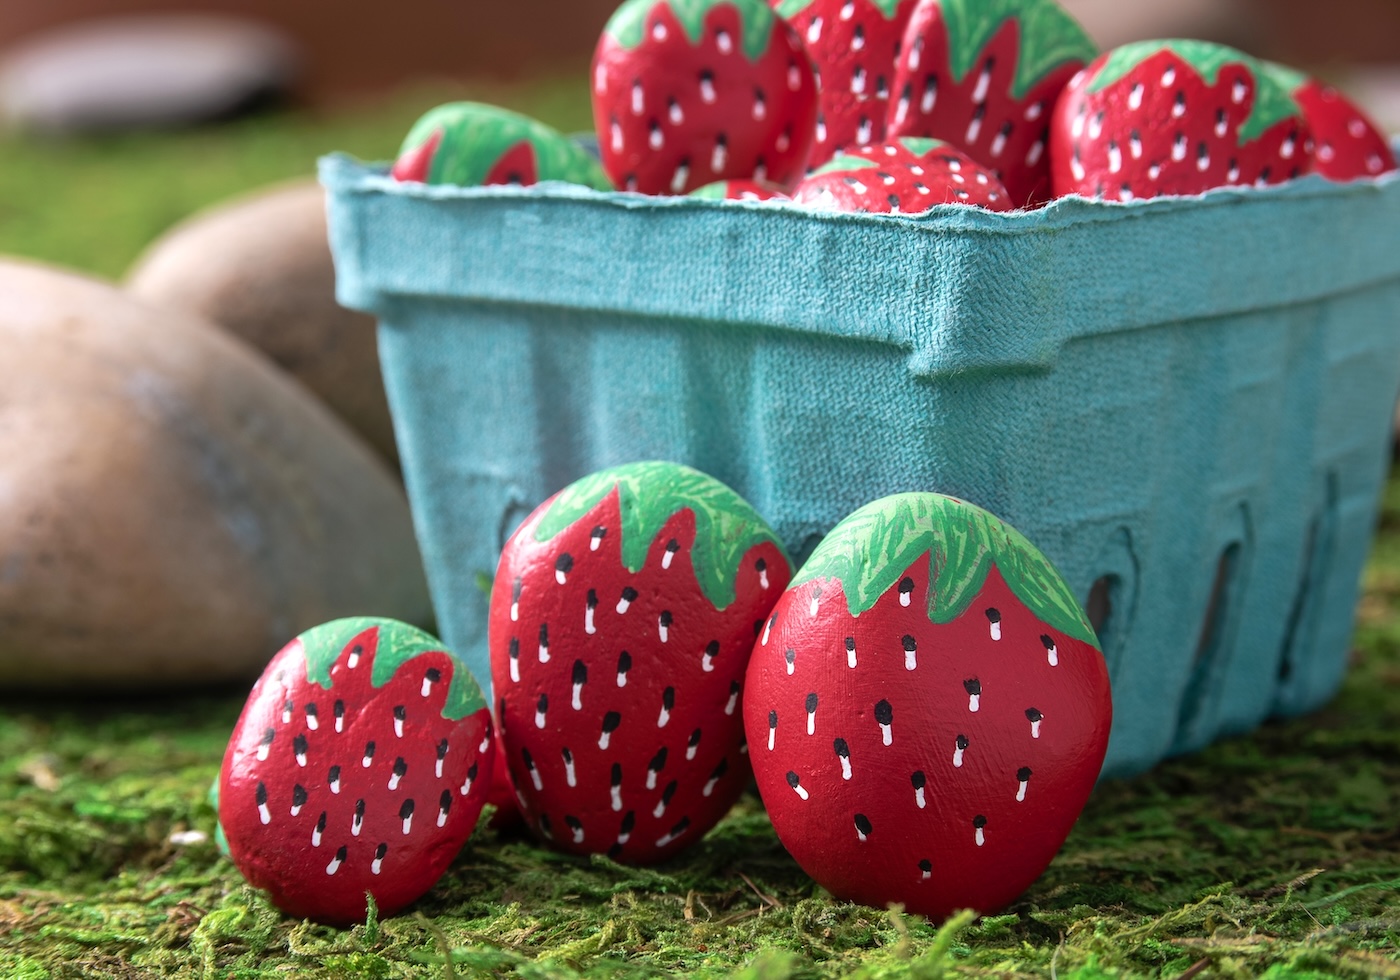
Strawberry rocks.
These cheerful little painted stones sit there in your garden like tiny juicy guardians. They do not care about sunlight. They do not need water.
And some people even say they keep the birds from eating your real strawberries. The science is… questionable. But the cuteness is undeniable.
Here’s how you can paint your own strawberry rocks and claim to be the kind of person who “gardens” without actually having to grow anything.
Ingredients
Because if we call them “ingredients” it sounds fancier.
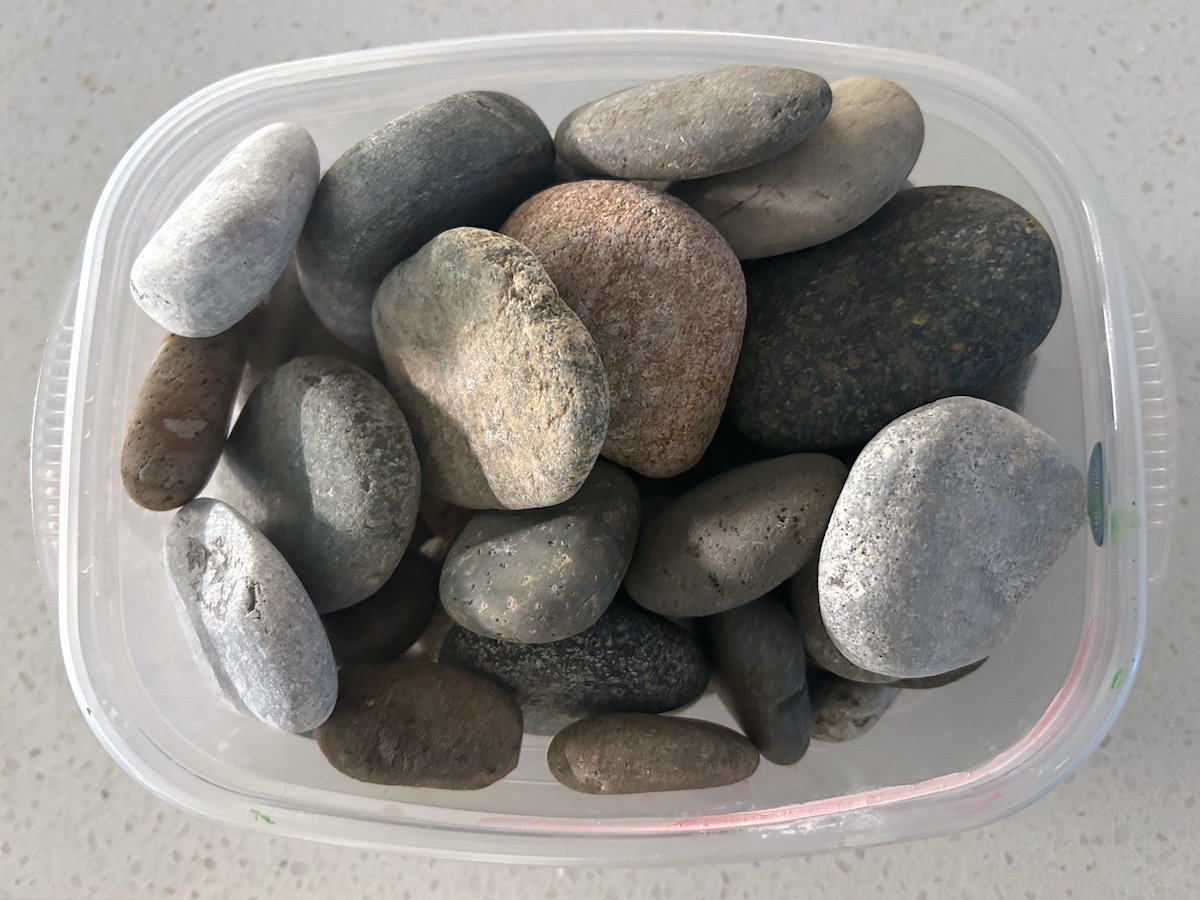
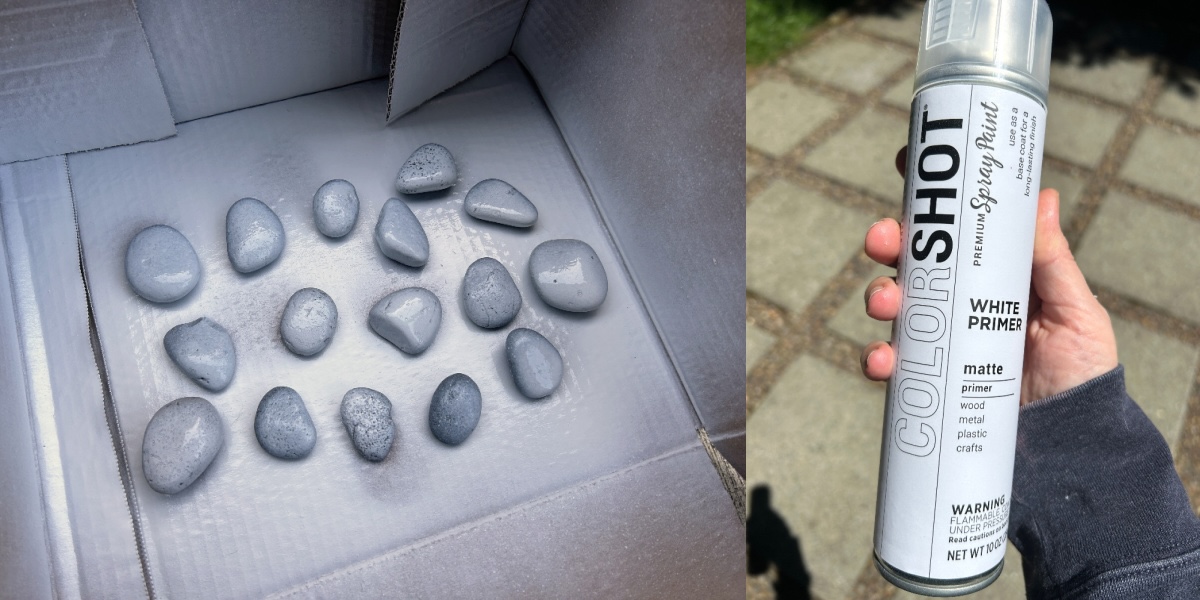
• Rocks that are small, smooth, and round or egg shaped. Not too big. Not too lumpy. Think plump strawberry vibes.
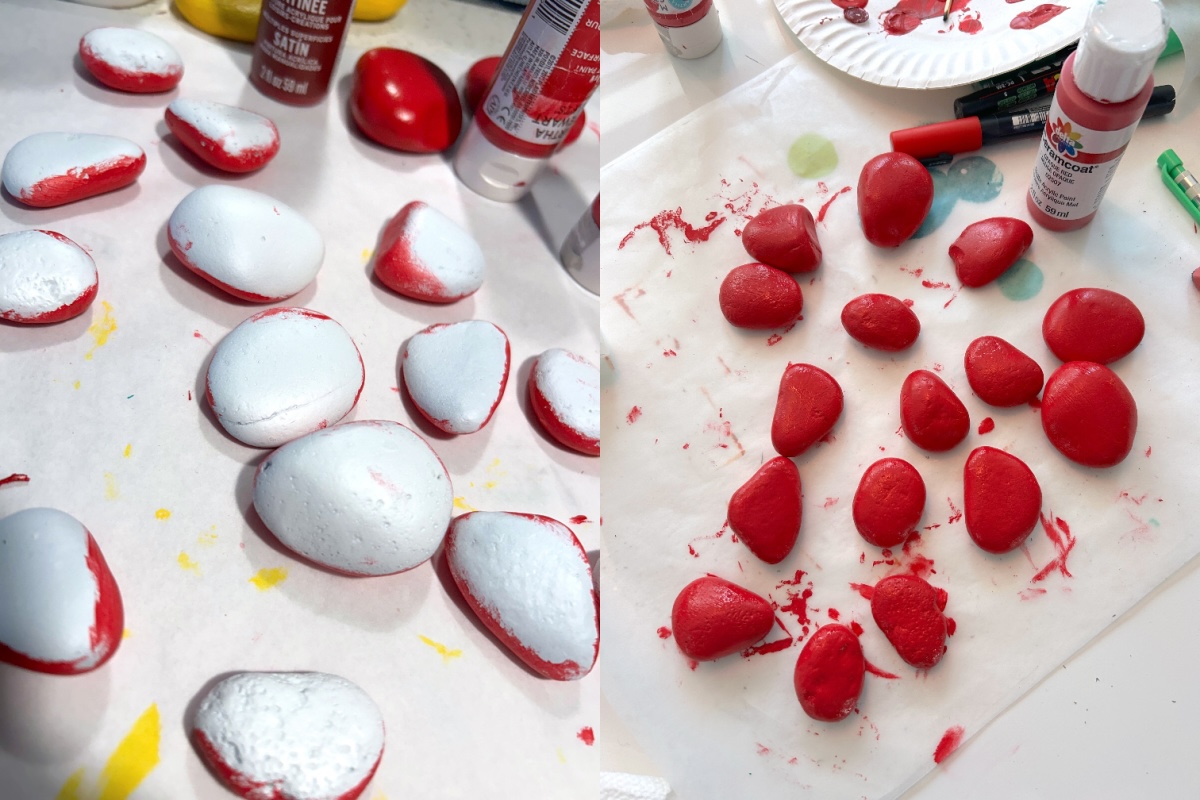
• Acrylic craft paint in various shades of red. What I did was use a bunch of shades that I had leftover from other projects.
• Paint pens in two shades of green, white, and black.
• A clear sealer. Like Mod Podge Outdoor if you need UV protection, and are planning to keep these outside. Otherwise you can use Gloss, Matte, or Satin.
• A glass of iced tea or wine to drink while everything is drying, because you deserve it.
FAQ (Because People Will Ask You Things)
Do these really keep birds away?
Sometimes. Birds peck the rocks then realize it is a rock and not a berry and fly off in a huff. At least for a while.
What kind of paint works best?
Multisurface craft paint. If it is good enough for an elementary school art teacher, it is good enough for you.
Do I need to seal them?
Yes. Unless you want them to fade and flake faster than my basil plant.
Where do I put them?
Anywhere you want! Tuck them into flower beds or pots or even scatter them around the yard so your neighbors realize how creative you are.
Why You Should Make These Immediately
• They make your garden look like you know what you are doing
• They confuse birds and entertain squirrels
• They are cheaper than therapy
• They never rot no matter how hot it gets outside
So grab your rocks, grab your paint, and make the fruitiest little garden buddies you have ever seen. Just do not eat them. Get the how to card below:

Painted Rock Strawberries
Equipment
Materials
- 1 can Spray primer white
- Acrylic paint various shades of red
- Paint pen(s) black, green, white
- 16 Rocks small
Instructions
- Wash the rocks using mild soap and water to remove dirt. Let dry.
- Spray paint the rocks with white spray primer. Give several coats and let dry.
- Paint the rocks with a coat of red and let dry. Don't forget to get the sides a little.
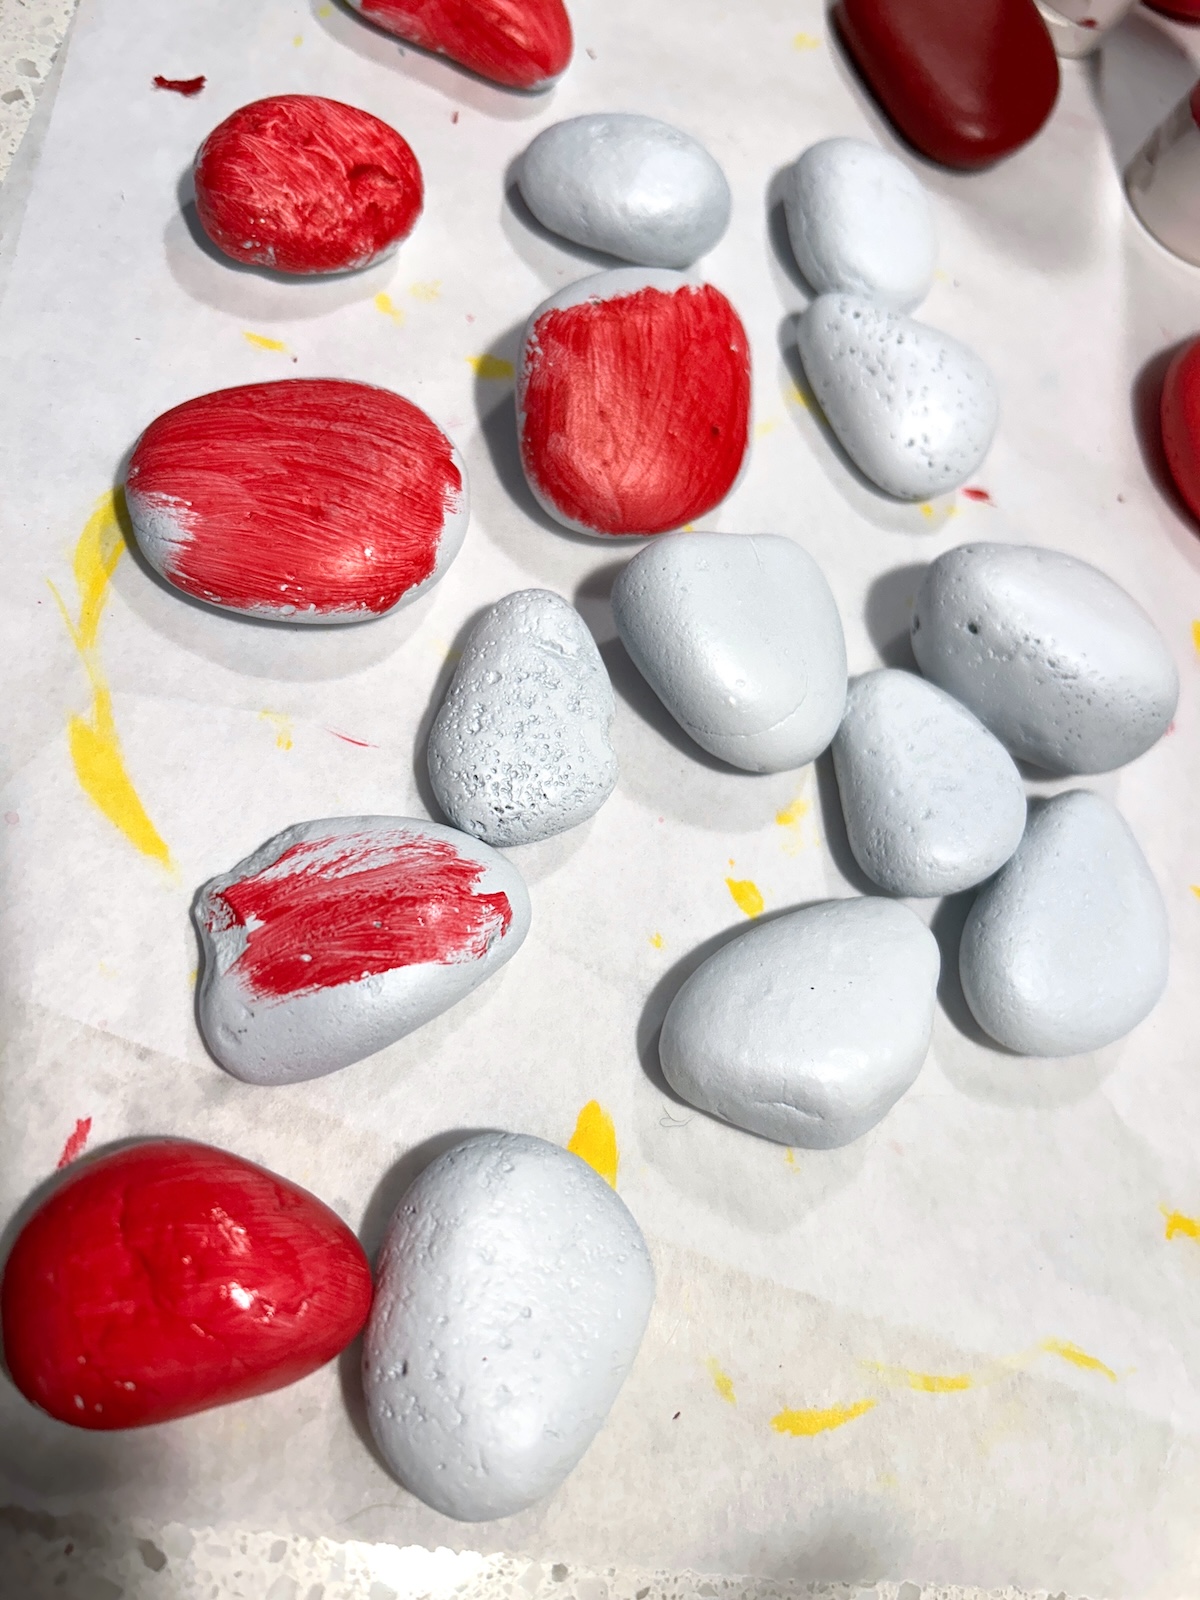
- Flip over and paint on the other side. Keep repeating this process of painting each side until the rocks are covered.
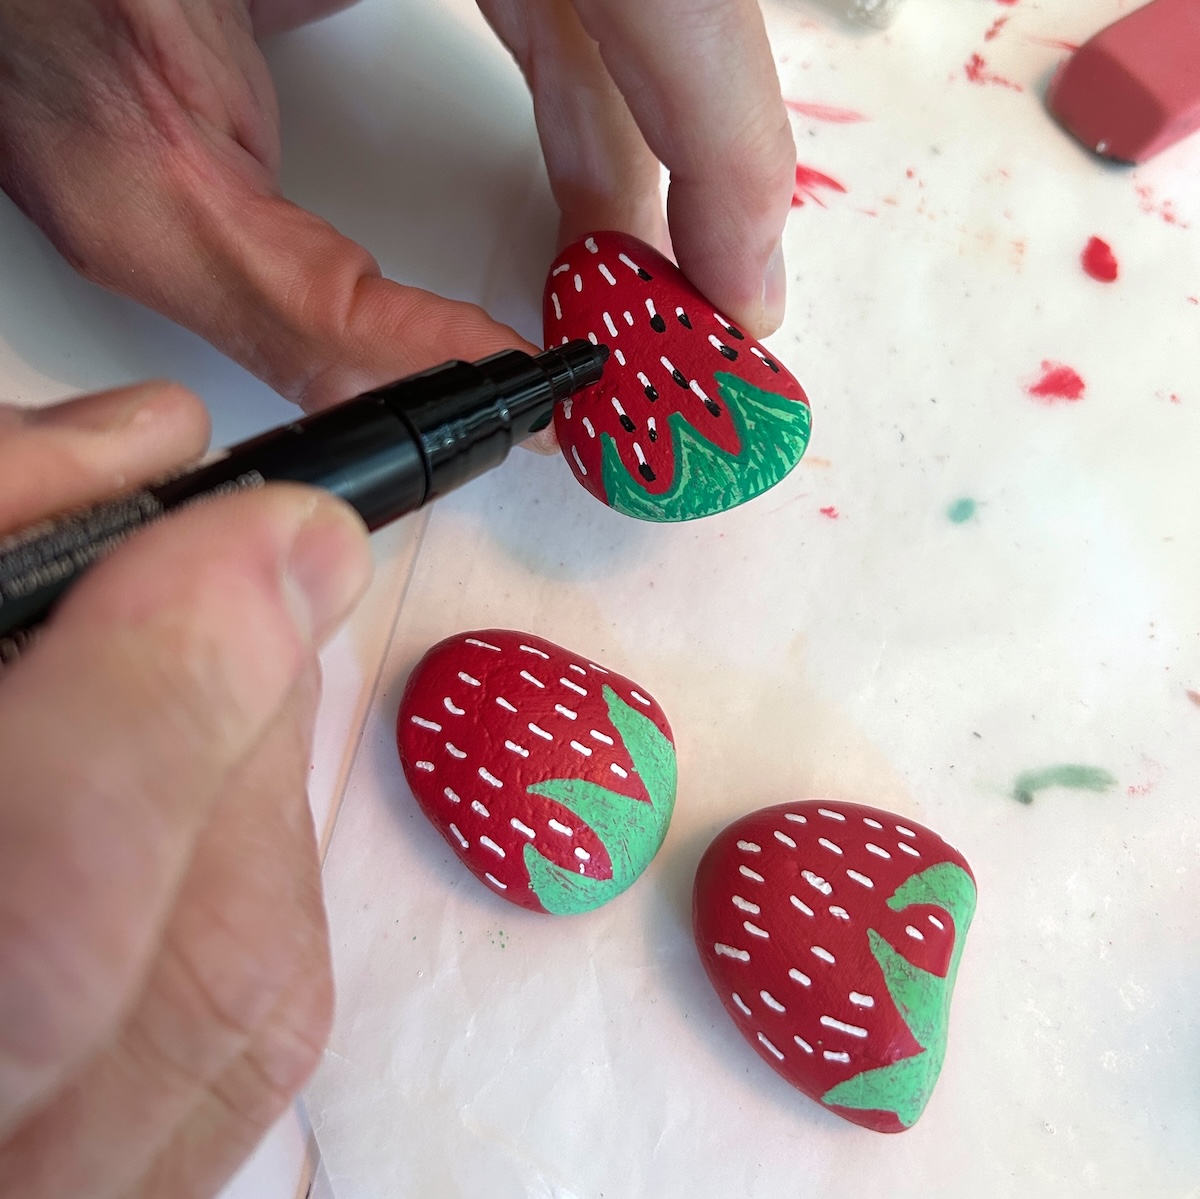
- Draw stems on the rocks with green paint pens. I started with the first layer in a medium green. Then I let dry and added stem accents with a lighter green.
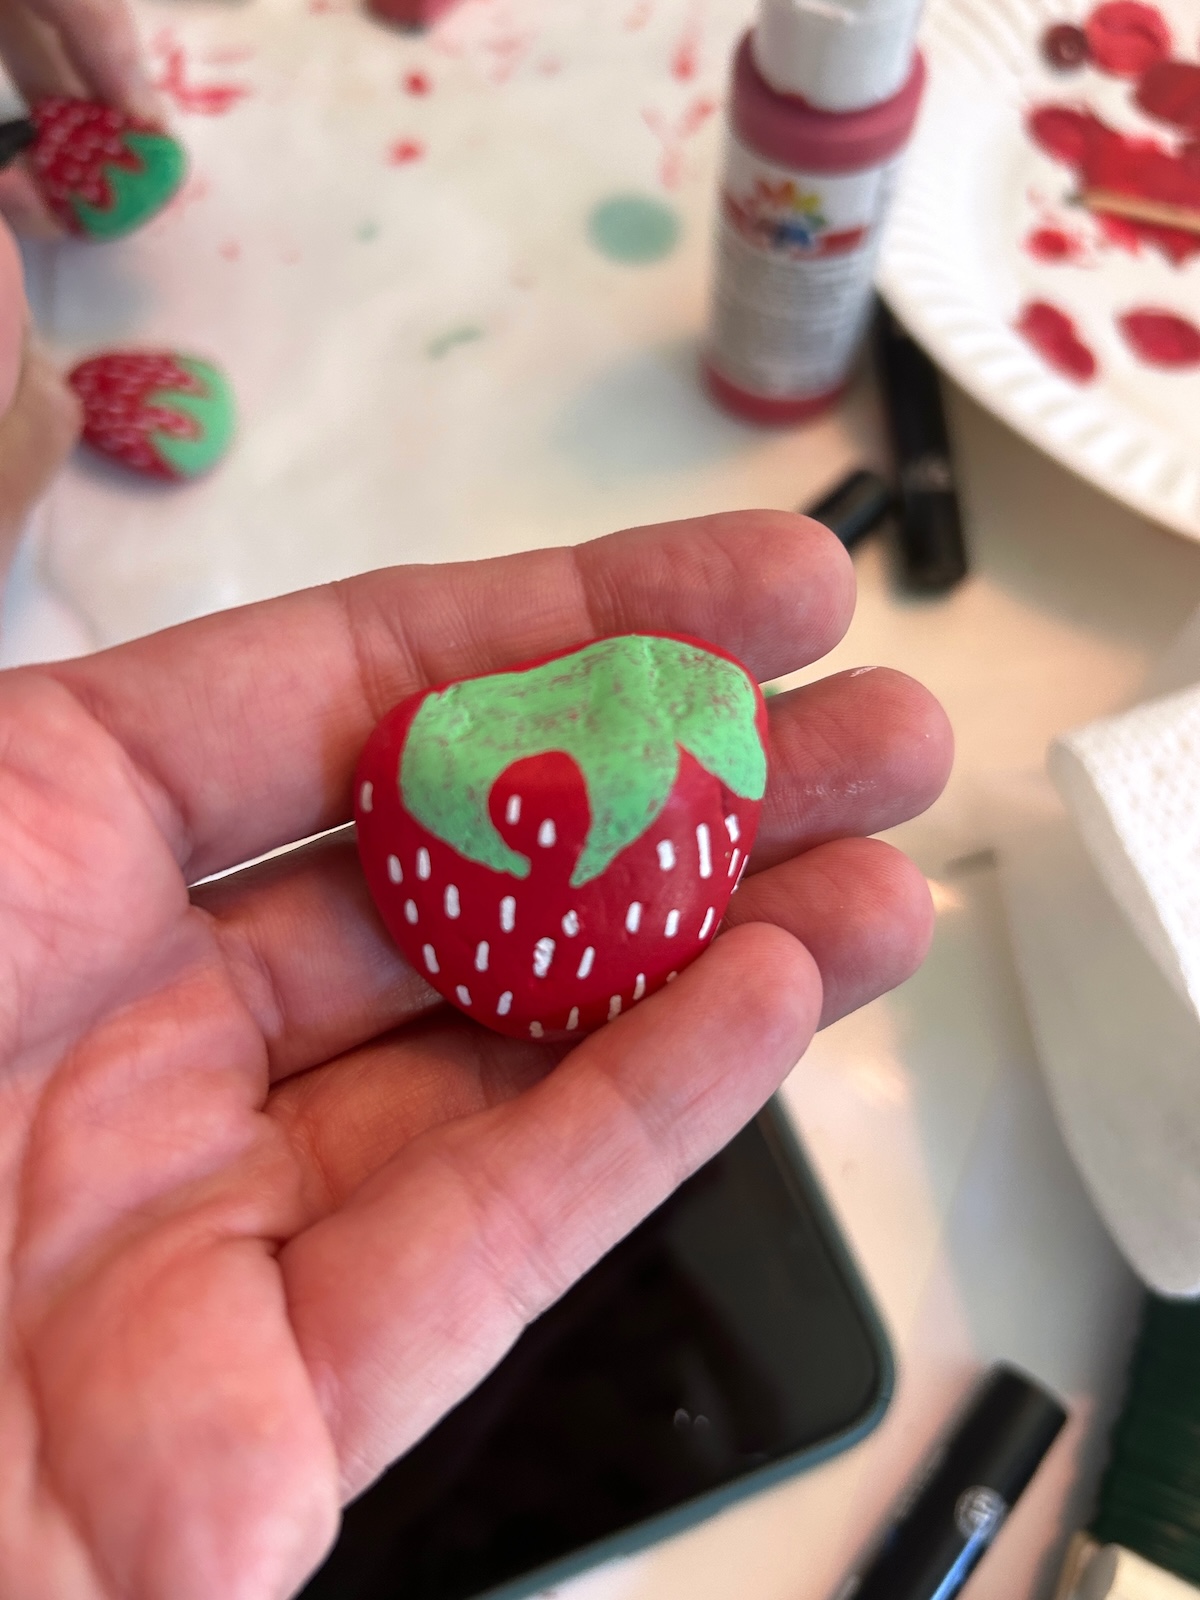
- Draw on the achenes (seed like structures) with black and white paint pens. Make white tick marks all over the red area with a white pen. Let dry. Then make dots on top with a black pen and let dry.
- Seal with several coats of Mod Podge and let dry completely before displaying in your home or garden.
Notes
Did you enjoy this post? Let me know in the comments! I’d also love for you to check out these other posts:


Fantastic project. My wife has a 4 foot tall strawberry tower. I made some of these and put them in a clay saucer on top of the tower. She had to do a double take then realized they were for decoration. And yes, wash thoroughly and use primer. Paint pens help when you have a million little dots to put on each one.