
Learn how to makeover boxes with fabric! You’ll learn how to Mod Podge fabric to cardboard in this easy tutorial that anyone can do.
I can’t be the only one who has a ton of boxes left over after the holidays. And that’s after several trips to the recycling bin!
I’m actually doing some organizing in the studio and am a little bit excited about turning some of those boxes into pretty storage – with Mod Podge, of course.
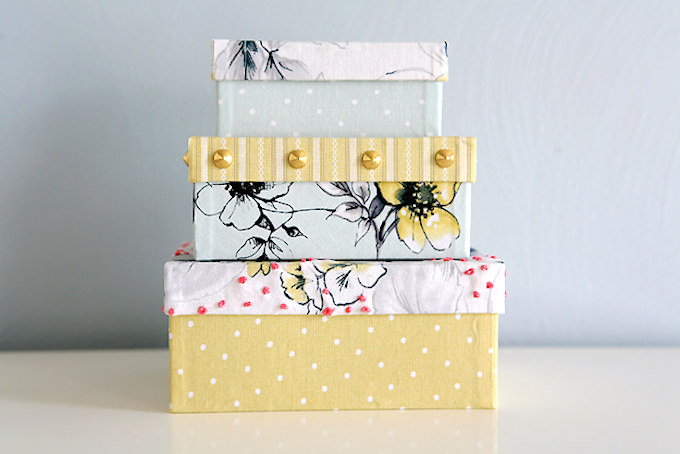
That’s exactly what Erica did with her boxes, Matte Mod Podge, and fabric. I’m a big fan of the embroidery she used before gluing the fabric down and then the nailhead trim. Get her tutorial to makeover boxes below.
My home decor project is a simple decorative box that anyone can make. There is no need for a sewing machine for this one! Plus, this project is a great way to use up fabric scraps, and we could all use a little extra storage space, right?!
Ready to create some fabulous storage boxes?!
Mod Podge Fabric to Cardboard Boxes
Gather These Supplies
- Coordinating fabrics of your choice
- Matte Mod Podge
- Cardboard or paper mache boxes (you could even reuse old shoe boxes!)
- Scissors
- Ruler
- Paintbrush
- Embellishments (anything you’d like to add to give personality to your boxes)
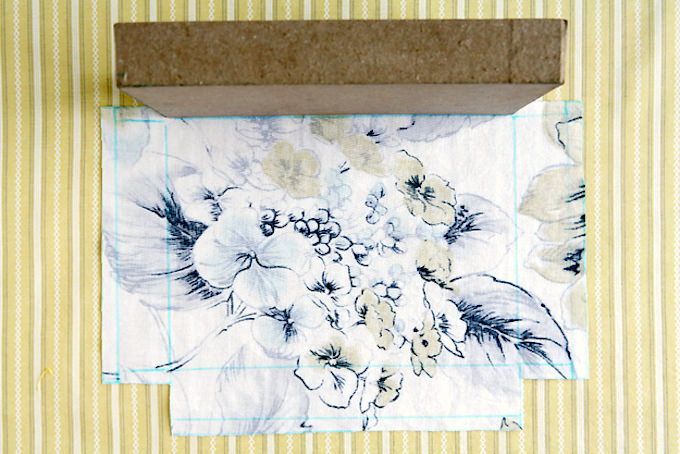
We will need to make a pattern to cover the box. My fabric piece is already cut here, but I’d like to show you how I got the dimensions.
First, put the box top down on the fabric and trace its outline with a fabric disappearing ink marker.

Next, turn the box up on its side and trace along the outer edges. You’ll need to trace along both long ends and both short ends of the box so that you’ve covered all four sides. This will create flaps that we can use to wrap around the box.
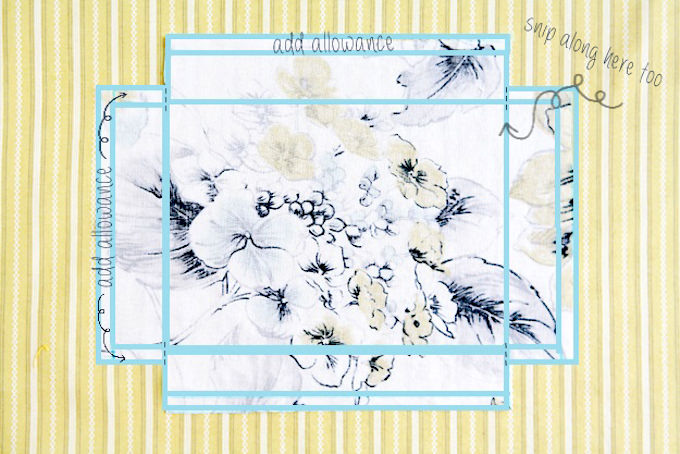
Below, you can see that on the right and left sides I added 1/4 inch allowance on all three sides of the flap.
For the top and bottom, I added a 1/4 inch allowance only on the long edge. Once you’ve added the extra allowance, you can cut out the pattern.
Be sure to snip into the allowance on all four corners (as shown by the dotted lines in the picture below.) This will allow us to wrap the fabric around the corners of the box.
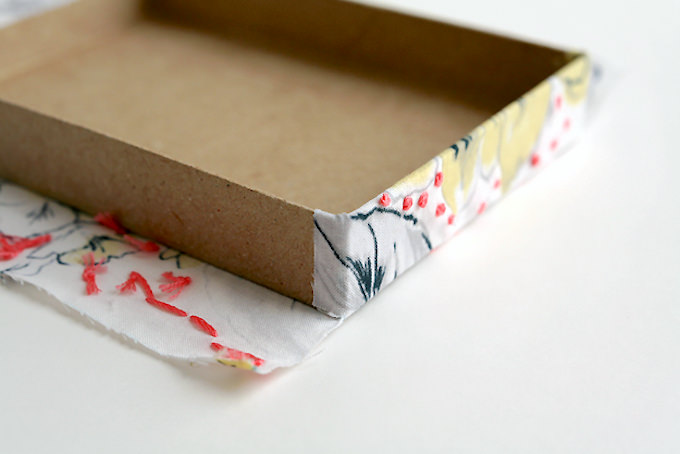
Now, glue the fabric to the base of the box. Be sure to use a very thin coat of the Mod Podge and make sure it isn’t streaky. You don’t want it to seep through the fabric.
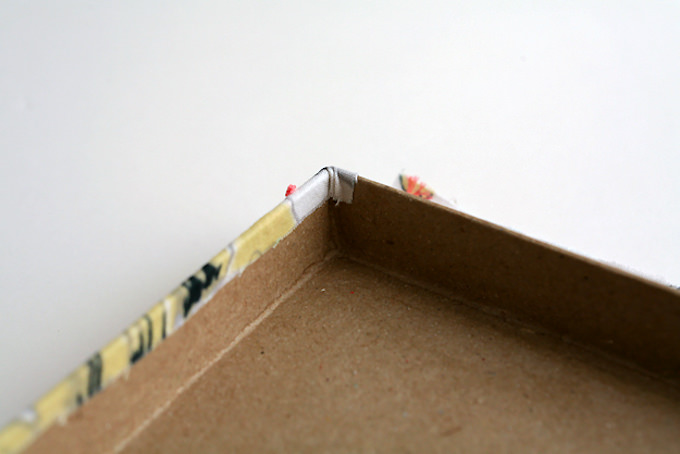
Next, wrap the fabric around the short sides. It is a lot like wrapping a present. Be sure to wrap the extra allowance around the side of the box. This will create a nice clean corner.
Here is what the inside looks like:
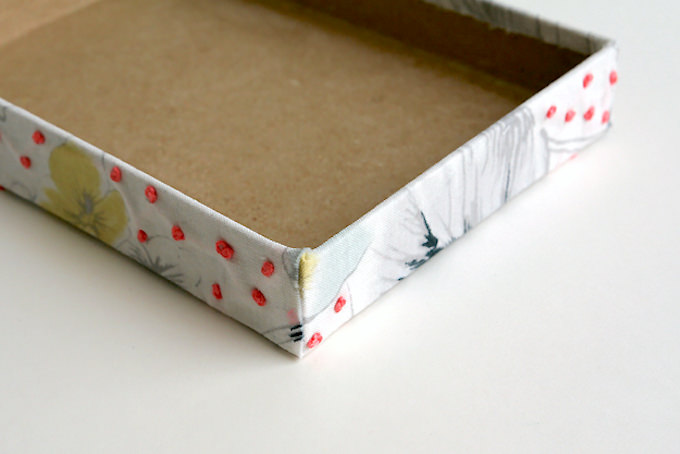
Lastly, fold up the long side of the fabric. Use a dab of Mod Podge along the raw edge of the corner to keep the fabric from fraying.
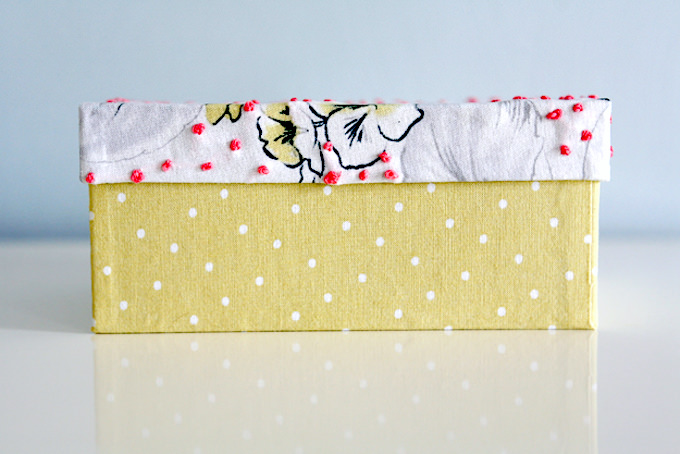
Now that you have the box lid complete, all that is left is to cover the bottom of your box using the same steps. That is all there is to creating a beautiful customized storage box!
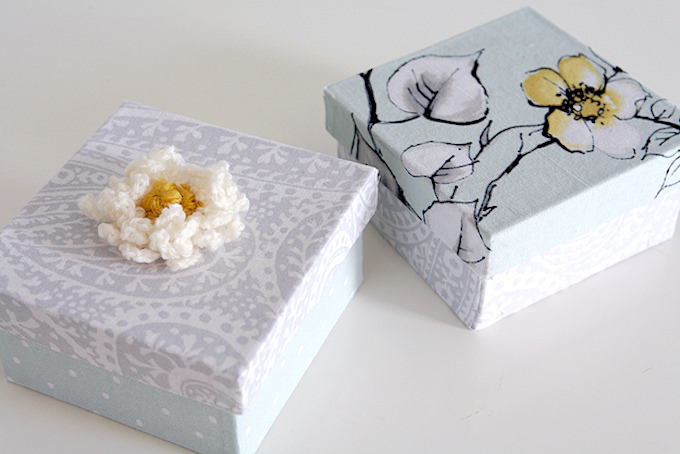
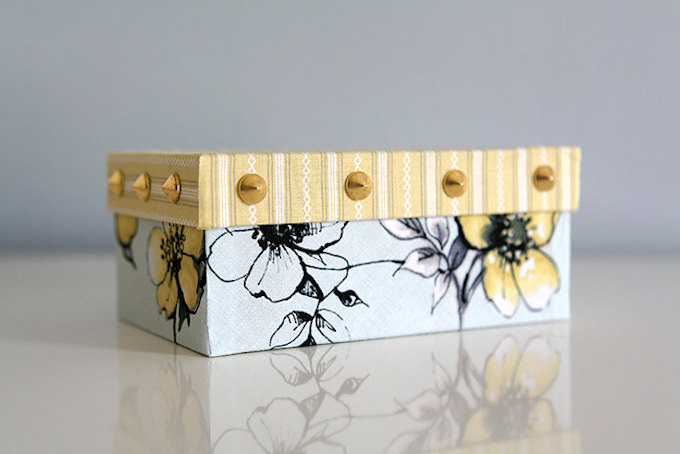
You can have so much fun embellishing your boxes. On this box I did some embroidery before I glued the fabric to the box. These are french knots. I love the texture and touch of punchy color they add to the box.
I also had fun embellishing with metallic studs. These were supposed to be iron-on studs, but I wasn’t able to get them to stick with the iron. I ended up just gluing them in place, which did the trick!
There is always a way to make things work.
(I’m thinking the studs may have adhered better with the iron if I had put them straight onto the fabric before I had attached the fabric to the box. Live and learn!)
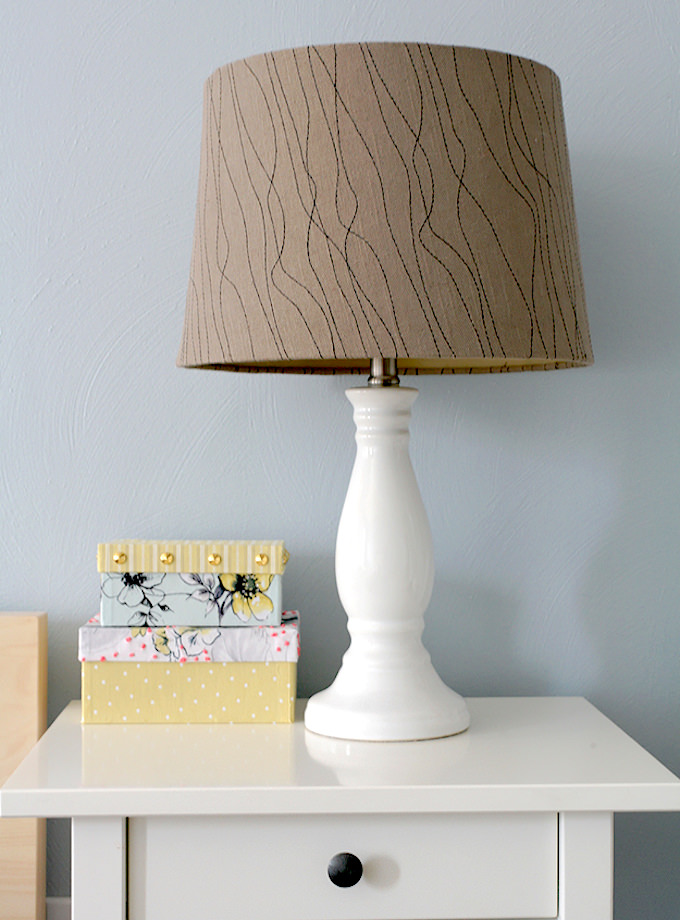
I’m planning to put these beauties in my craft room, because I’m in a desperate need of crafty storage. How is it that us crafters collect so much stuff?!!
So, how would you makeover boxes? I’d love to hear your ideas. And if you’re interested in making boxes like these, I’d love to know in the comments. One last thing – check out these other projects I think you’ll love below:


Wow!
Wow!
These boxes are looking fabulous and beautiful enough to attract anyone’s eye at the very first glimpse.
Thanks for the share Amy, these are looking truly lovely.
This is so cute 🙂 super pretty! Thanks for sharing.
Love those boxes you made over, they look stunning!
Mod Podge is one of my favourite DIY supply.
It so easy to work with and can use in so many different area.