
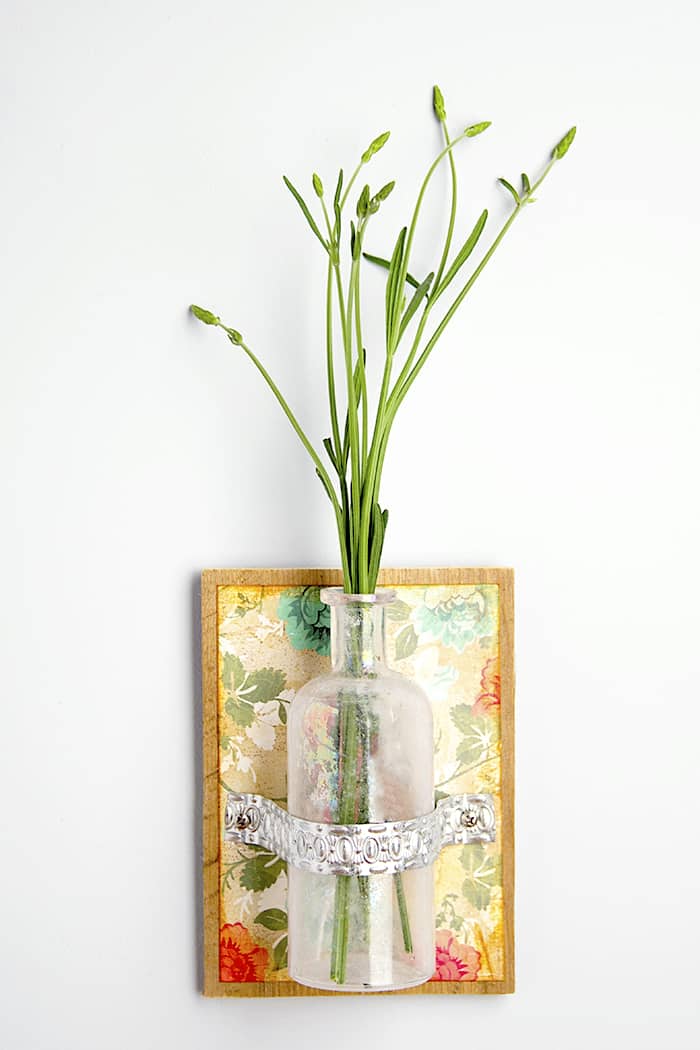
Display fresh flowers and herbs in your home this summer with an easy-to-make DIY wall vase using a recycled bottle.
Skills Required: Beginner. It helps to have some basic crafting experience for this project. You’ll be Mod Podging, cutting wood, using wood screws, and cutting metal trim.
Hello friends!
Does it finally feel like summer at your house too? One of my favorite things about summer is having fresh flowers in my yard.
I am totally not an expert grower, but I do have a few plants that seem to bloom beautifully all summer long.
Since I am always looking at lovely ways to display them inside the house, I thought I would share this simple DIY flower wall vase tutorial with you!
It’s a pretty DIY home decor craft that I think you’re going to enjoy making. It’s really easy!
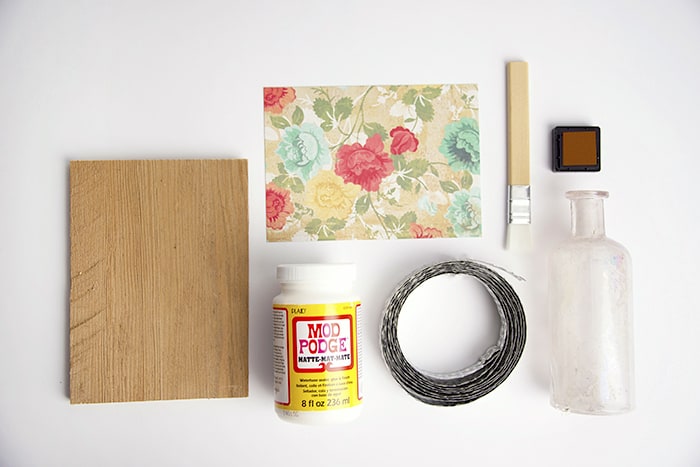
Gather These Supplies
- Scrap of wood
- Mod Podge Matte
- Scrapbook paper
- Glass bottle
- Ink
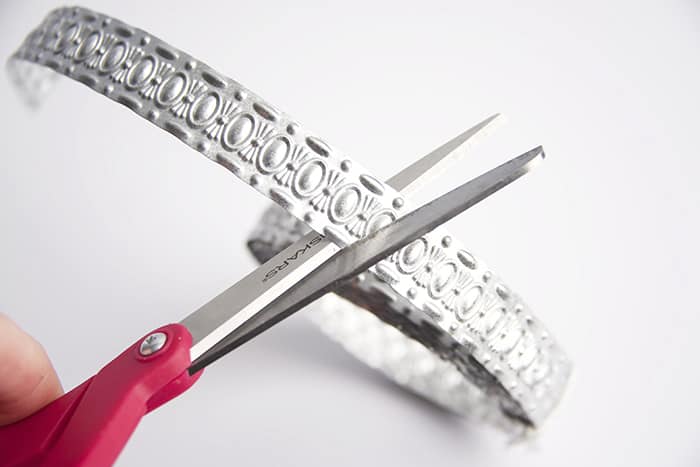
- Metal trim – enough to go around the bottle
- Screws – 2
- Screwdriver
- Paintbrush
If you can’t find an old bottle, a vintage inspired soda bottle would work great too! The metal trim I found at Hobby Lobby, and I noticed a lot of craft stores are now selling something similar in the craft section.
I have a lovely lavender plant in my backyard, and we have been rotating freshly cut lavender for the last few weeks It smells sooooo good!
Get the printable how to below:

DIY Wall Flower Vase
Equipment
- Screwdriver
Materials
- Scrap of wood
- Glass bottle
- Mod Podge Matte
- Scrapbook paper
- Ink
- 2 Screws
- Metal trim enough to go around the bottle
Instructions
- Cut the wood scrap into a 6" x 8" piece.
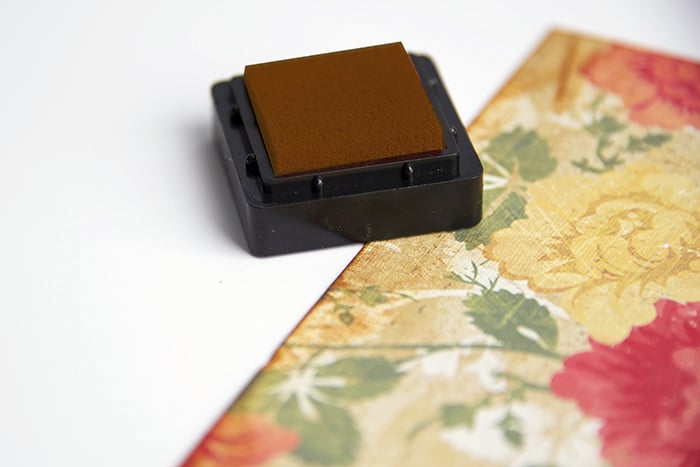
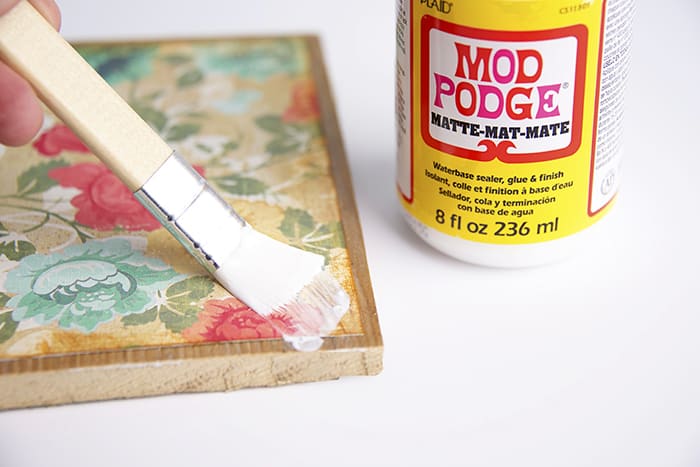
- Trim the paper to fit on top, and ink the edges just to give it an old distressed look.
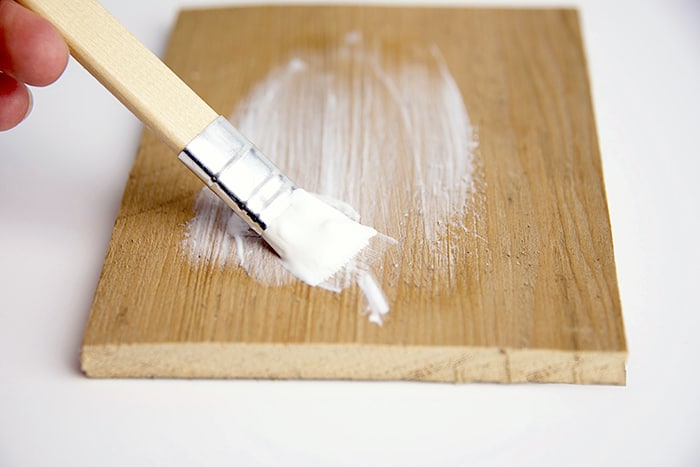
- Coat both the paper and wood with Mod Podge, and smooth the paper down thoroughly to remove any bubbles. Let dry for 15 – 20 minutes.
- Apply an additional thin coat on the top of your paper. If you plan to put your vase outdoors, add a couple of extra coats.
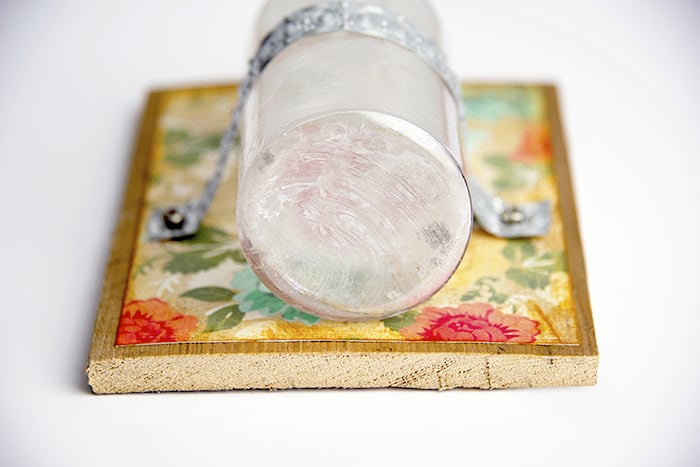
- Center the glass bottle on the wood board. Measure the amount of trim needed; cut with scissors or pliers.
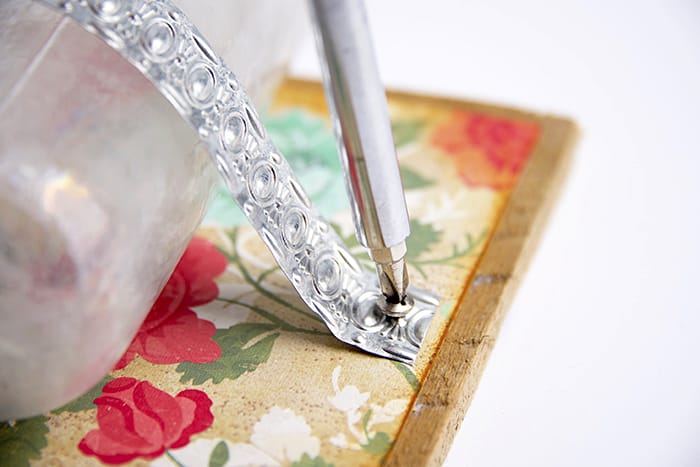
- Take the screwdriver and attach the metal trim with one screw on each side. Make sure to pull the trim very tight so the bottle does not move.
- To hang on the wall, add frame hardware to the back of the wood plaque.
Notes
Goodness, I have so much lavender blooming right now, I may just have to make a few of these vases for neighbors too! Before you go, don’t forget to check out these other ideas:
Decorating Vases • DIY Photo Vases • Dollar Store Glass Vase • Photo Transfer to Glass • Recycled Bottle Vases • Ribbon Vase • Tissue Paper Vase • Winter Village Vases • Yarn Vase


Love this! Great idea! You could use a soda can for the metal strap. I add texture to the can with my cuttlebug. Could also make a patchwork of textured soda cans for background. Ideas are endless.