
You’ll love these no sew DIY onesies. She turned her old boy’s wardrobe into clothing for her new baby girl with Fabric Mod Podge – so easy!
Skills Required: Beginner. The most important thing to watch for is to make sure you don’t have too much Mod Podge coming out the edges of the appliques. Otherwise, easy peasy.
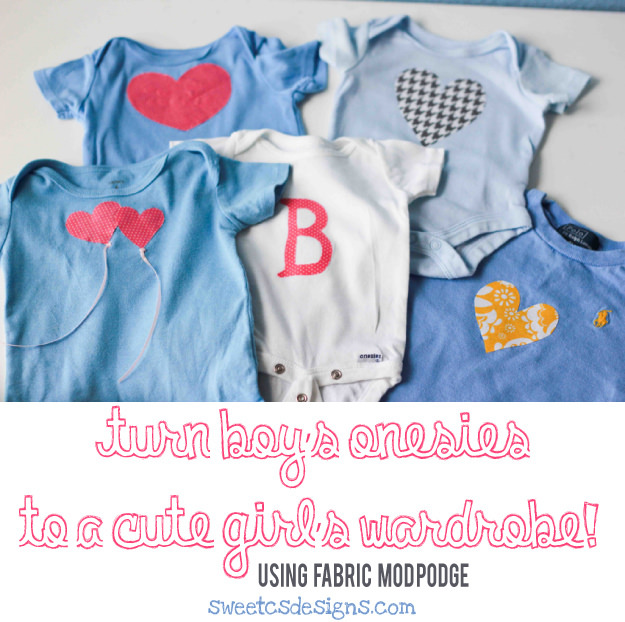
Hi, everyone! I am Courtney of Sweet C’s Designs. I have a fun little blog devoted to craft inspiration, recipes, and photography tips. I am so excited to share one of my favorite recent projects – DIY onesies! I turned my son’s blue infant attire into something suiting a sweet baby girl.
And because I am all about the quick and easy over at Sweet C’s, I promise this doesn’t use any advanced skills, expensive materials/equipment, or much active time. Scroll down to see how I turn boy’s onesies into a girl’s wardrobe using Fabric Mod Podge.
When we had our 20-week ultrasound for my baby due in April, my husband wished over and over for another boy. I know he wanted our little guy to have a buddy, a sidekick – just like he had with his little brother growing up.
He also rightfully realized that having another boy would be really, really easy on our budget. After all, we already had an ADORABLE, fully complete boy’s wardrobe.
I, on the other hand, had visions of pink, ribbons, ruffles, and all sorts of lovely flowery designs. Guess who won out?
Yep – I am having a beautiful baby girl in April! I can’t wait – but I also realize that the adorable girls‘ clothes are WAY more expensive than boys’ clothes.
While I have some fun outfit purchases planned, it seems silly to buy a ton of new clothes when most of little man’s are in perfect condition. While I plan on sending some to friends, saving a few for a baby clothes quilt, I still have a TON of clothes in pale blues or adorable blue and white stripes.
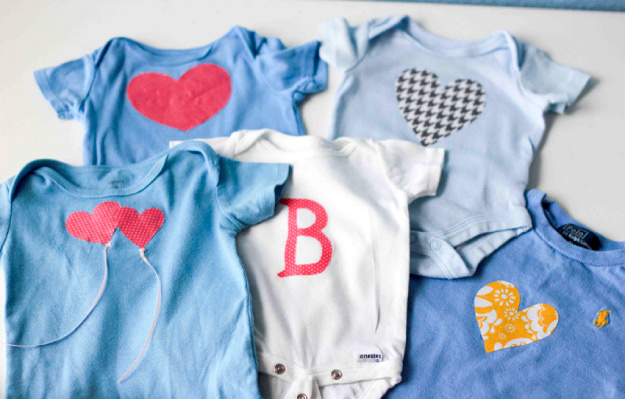
As blue is my favorite color, I knew I had to make some of these adorable outfits work for my baby girl! What resulted was these DIY onesies.
Now, I don’t know about you, but I am kind of a lazy seamstress. I love to sew, but I am admittedly not the best when it comes to appliqué. I just can’t get my lines to be perfect, and it totally annoys me.
I also hate using iron on appliqués – while they are totally easy, I have an aversion to my iron, and they always seem to peel off. So I was delighted when I ran across Fabric Mod Podge the other day while wandering an aisle at my craft store. I just HAD to try it.
Would it work better than iron-on backing? Would it last? Hold up to a washing? How easy was it? Read on and see how this recycled craft went!
DIY Onesies with Fabric Mod Podge
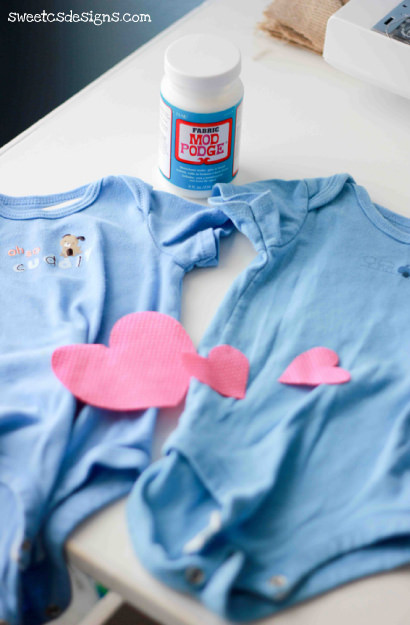
First, gather a bunch of tees and baby onesies (or purchase them from the Dollar Tree), and cut out a piece of scrap fabric. I like to cut large squares to work with, but don’t make it too large that it isn’t easy to manage.
Turn the fabric to the backside, and coat with your decoupage medium. Let dry completely.
Once dry, your fabric will be ready to cut. I ran mine through my die cutter (yes, it really works!!!), but I would recommend using a new/newer mat.
I ended up free hand cutting most of my shapes because I had so many to do; it seemed so much easier than loading and unloading cutting mats.
Just use a fabric pen to trace your shape, and cut (I used hearts primarily because I can freehand those easily. . . and they’re girly!)
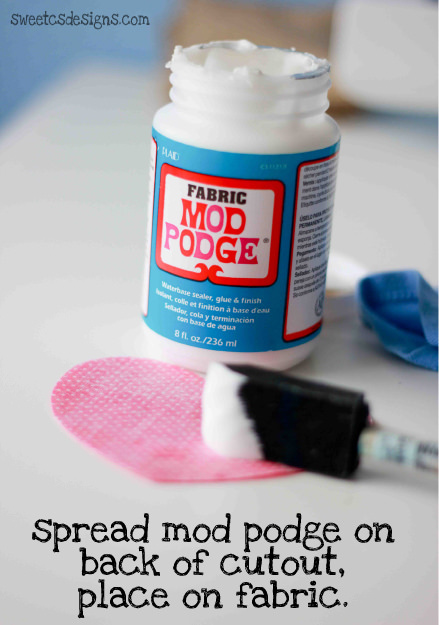
Apply a generous amount of Mod Podge onto the back of your appliqué. Be sure to really get a lot on the edges (you’ll see below what happened when I went light on the edges).
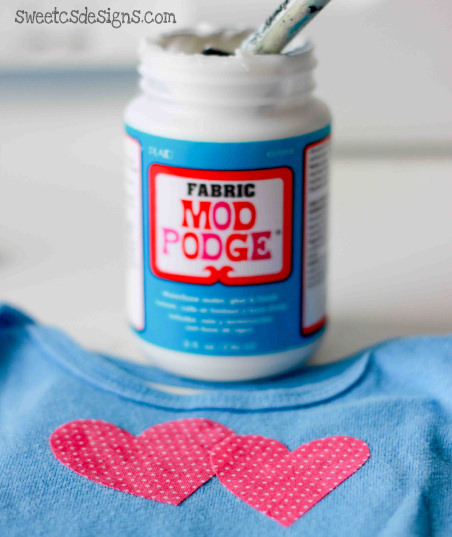
Place your appliqués onto your DIY onesies and press firmly. Be sure to press from the center out to the sides to ensure you don’t have any bubbles.
Smooth with your fingers. If you get any extra decoupage around the sides, wipe it up quickly or dab with some cold water to remove.
Let your DIY onesies dry overnight. I don’t know if it is necessary, but I ironed it once before washing to set the appliqué. Wash like normal.
I didn’t put these in the dryer, as I’ve seen people recommend against it. I live in Colorado – so line drying is not an issue at all for me, with our dry air!
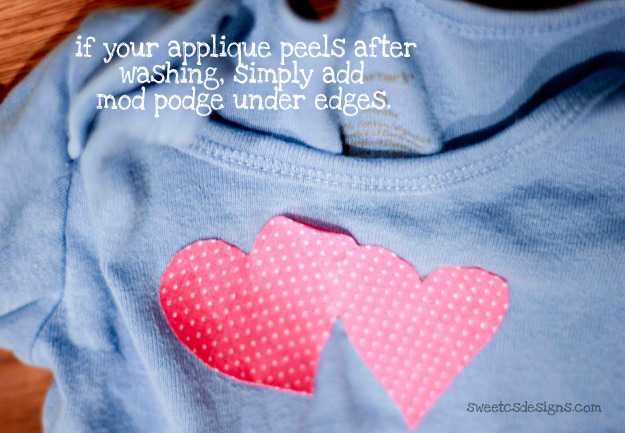
After washing, I did find a few of my appliqués peeled a bit at the edges. I noticed my fatter hearts did, while the skinny B did not, at all.
I know I went a little light on the Mod Podge around the edges on some of my appliqués- and those were the ones that peeled.
I simply took a paintbrush and painted the back of the peeled up appliqués with more Mod Podge. Press firmly, and let dry for about 1/2 hour.
Give the edge a gentle tug – if it comes up, add more decoupage. If it doesn’t you are golden (I only had to add it once).
I washed all my DIY onesies a second time before taking this picture – and the appliqués are still as fabulous as they were before washing!

DIY Onesies
Equipment
Materials
- Onesies
- Mod Podge Fabric
- Fabric
Instructions
- Prewash onesies and dry without using fabric softener.
- Cut large squares of fabric to make the designs. Paint Mod Podge on the back and let dry.
- At this point you can cut designs freehand or run the fabric through a die cutter. If you use a die cutter, I recommend using a new mat to keep the fabric held down while it’s cutting.
- Apply a generous amount of Mod Podge onto the back of the appliqué. Be sure to get a lot on the edges.
- Place an appliqué onto the onesie and press firmly. Be sure to press from the center out to the sides to ensure there are no bubbles.
- Smooth with your fingers. If you get any extra decoupage around the sides, wipe it up quickly or dab with some cold water to remove.
- Let the onesies dry overnight.
- If after the first washing you notice that any of the appliqués are peeling up, simply seal them with additional Mod Podge and let dry.
If you like Fabric Mod Podge, here are some other projects I think you’ll enjoy:


wow what a great find, I will be trying this!! Do you think it will work on patches? I’m not to good with the sewing thing and I have a ton of Girl Scout patches to catch up on for my daughter’s smock!
Patches – use fabric glue. Due to the weight of the patches…you need a heavier glue. It will hold up to a dryer, also. I actually use fabric glue on cut carpet around the raw edges to make our own area rugs! It has held up for over 10 years!
Fabulous Idea!
Wow, I did not know you could Mod Podge on fabric!! You just took my creativity to the next level 🙂 thanks for the inspiration!!
Raychel
Am watching CHAW 2012 Live and saw you!! Happy Birthday!!!
LOVE IT! I love to embellish plain kids clothes. Can you sew on it after it has set? perhaps the applique edge or other decorative stitch? I would not want to give a gift that would peel.
how cool is this! pinned this! gonna make some tshirts for my girls! so fun!!!
very cool! love it!
I really hate iron-ons too. Do these wash better? I’d be really interested to try this!
Brilliant. I love using the blue onesie. It gives it more dimension and warmth.
Cute! and helps dispel the outdated notion that girls have to wear pink!
hey ,
i never used mod podge before so i really don’t know how it works.
Are the hearts made of fabric are is it something else. If you cut fabric it fray out what do you then ?
Hi Kelly! Yes, the hearts are made out of fabric. To keep the fabric from fraying, you can actually Mod Podge it first (just paint a medium layer on top), let it dry and then cut out the heart shape. THEN Mod Podge on top.
Great Idea!!