
This colorful end table makeover is one that you MUST try! It’s so easy and completely changes a room with little effort.
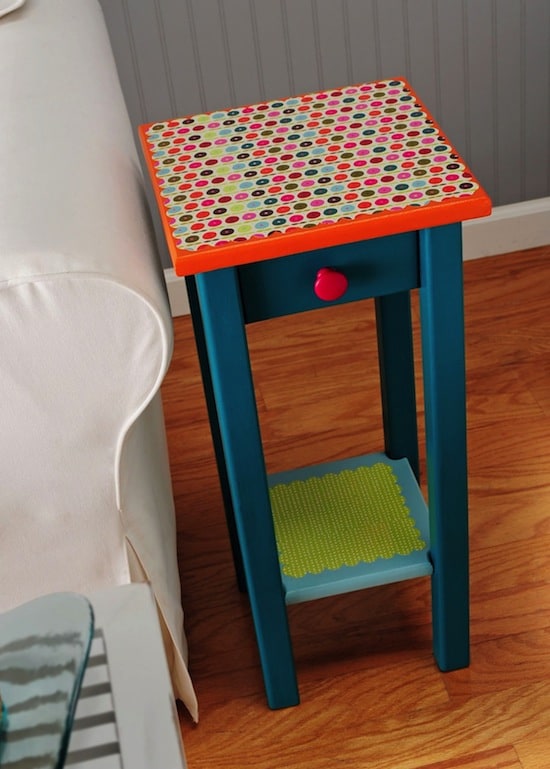
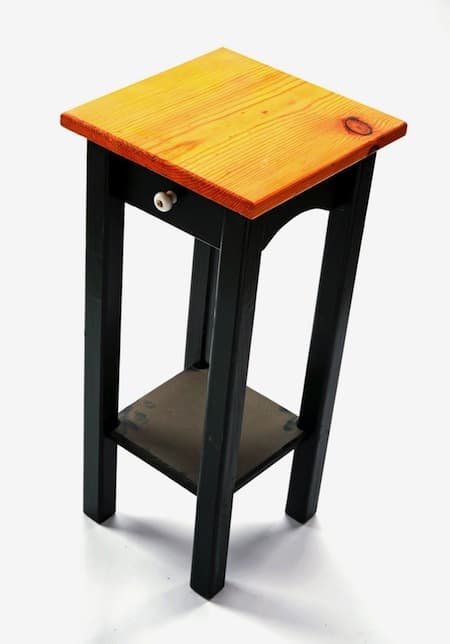
I always get the funny tingles when I get to share a decoupage furniture project that I did with you. It makes me so happy! Here’s one of my latest decoupage ideas – a Mod Podge table. I found the end table above and took a before picture – dusty, kind of boring.
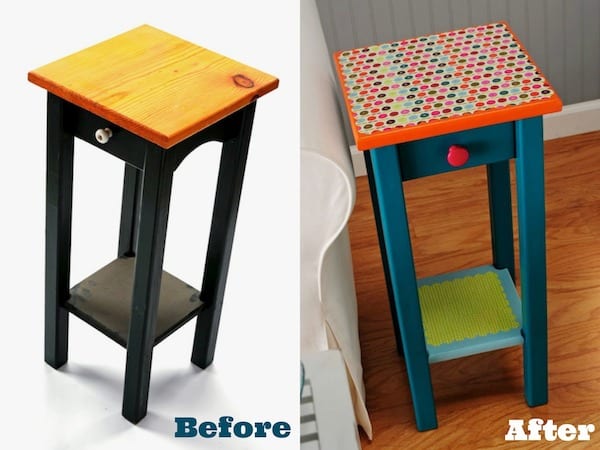
The first photo is what I did to it! I hope you like it. Below are the instructions for my colorful end table makeover. I’d love to see any of your Mod Podge table re-dos, by the way. You know how I love them!
Colorful End Table Revamp
Gather These Supplies
- FolkArt Acrylic Paint – Teal, Glazed Carrots, Magenta, Sky Blue
- Mod Podge Hard Coat
- Scrapbook paper of your choice – 2 sheets (I used Carolyn Gavin Greenhouse papers from K and Company)
- 1” Flat paintbrush
- Craft glue
- Scalloped Edge Scissors
- Pencil
- Ruler
- 1 ½” wood knob
Note: Correspond the paint colors to your scrapbooking papers, like I did! Also, if your table starts out really dark and you are painting with light colors, I suggest basecoating with White to limit the number of coats you have to paint.
- Using the paint brush, basecoat the top of the table Glazed Carrots, the sides and legs of the table Teal and the bottom shelf Sky Blue. You will need several coats of all colors. Allow to dry.
- While the table is drying, select two pieces of scrapbooking paper and measure the size you will need. Cut the correct shape and size out of two different (but coordinating) sheets of paper with the scalloped edge scissors. Set aside.
- Glue the papers down to the table (top and shelf) using Mod Podge. Allow to dry at least 15 – 20 minutes.
- While the paper is drying, paint the knob Magenta. Allow to dry and glue to the front of the table using craft glue. Allow knob to dry.
Coat the entire table with at least two coats of Mod Podge. Allow to dry for at least 48 hours before using your decoupage furniture.
If you enjoyed making this table, I’d love for you to check out these other posts:


Wonderful! I’m hoping to work my way up to furniture eventually. It looks so bright and cheerful.
Thanks again everyone, for the positive comments.
Ashley – MP is different from Elmer’s because it is a glue, sealer AND finish. MP is a stronger formula and also has the varnish properties that Elmer’s doesn’t have. Over the long haul, regular glues yellow and lose their adhesive properties. To use them as a varnish doesn’t work long term because they wear away.
Okay – I’m done talking now 😀
Wow, a whole blog on mod podge! I just recently bought my first bottle and am still trying to figure out how it is different from Elmer’s glue. I will have to read some more! saw you at Kimba’s. 🙂
Ashley
I love it!! It’s so colourful and cute and fun!!
Great transformation 🙂
Kelly @ DesignTies
Thanks everyone! I appreciate the support!
Adorable makeover!
Way to cute. You go girl!
Oh so pretty!
Have a great weekend!
Hello stopping over from Kimba’s. Wow – that turned out TOO cute!
OOH! I love it! I’m still too chicken to start on the dreaded Disney furniture. Thank you for the inspiration. By the way, I love your sleek new look. Fancy!