
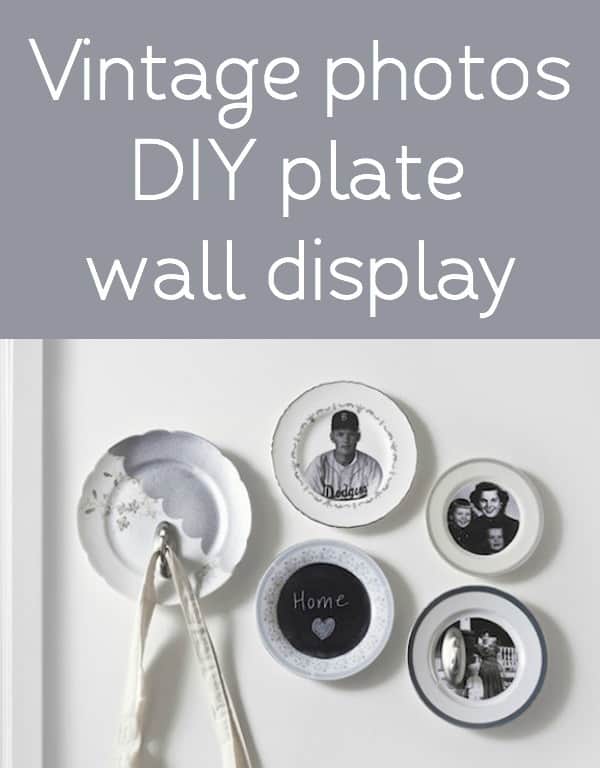
Learn how to create a DIY plate display on a budget! In this project I used vintage photos for the perfect Mother’s Day gift.
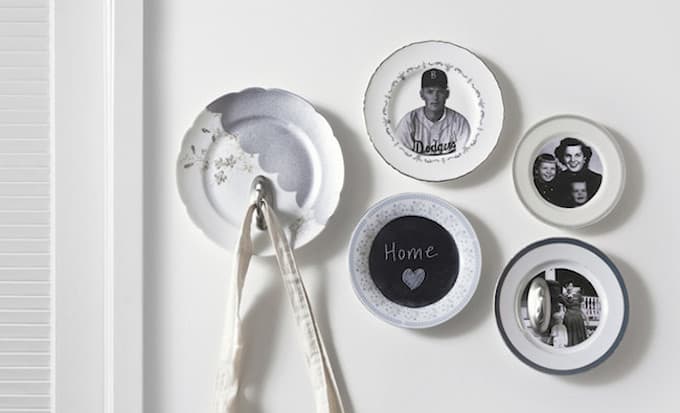
My mom is a very sentimental person! That’s why the best Mother’s Day gifts for her are those made and not purchased. Our Michaels Makers challenge for this month was to come up with a great gift for mom, and I knew this DIY plate display with vintage photos would be perfect in her craft room.
Inspired by some plate wall hangings I’d seen online, I decided to combine antique plates, chalkboard paint, vintage photos and hooks into one display! My plate wall display includes old photography of my mom, dad and grandparents.
I’m pleased at the final result and how interesting this plate collection looks even when a bag isn’t hanging from it. Functional and attractive . . . it’s exactly what my mom wanted.

Make Mom’s Day! Check out custom curated gifts for every mom on Michaels.com. Now onto the tutorial to decorate these plates.
DIY Plate Display
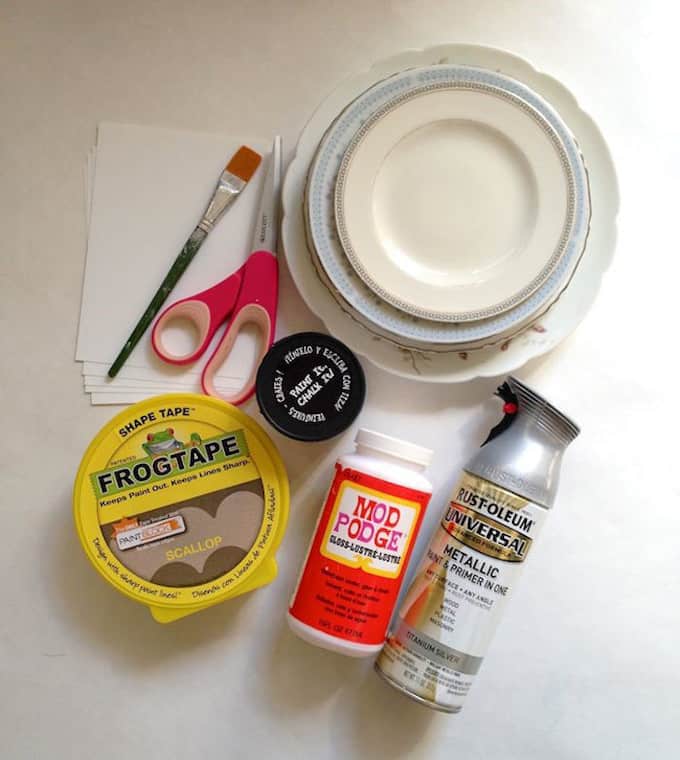
Gather These Supplies
- Printer and ink
- 5 x 7 premium HP photo paper
- Antique plates – five; mine are from the thrift store
- Vintage photos
- FrogTape ShapeTape – Chevron
- Mod Podge Gloss
- Rustoleum Universal Spray Paint – Silver
- FolkArt Chalkboard Paint – Black
- Foam brush
- Paintbrush
- Scissors
- Pencil
- Command Strips for hooks and for hanging plates
- Round surface (like a coffee mug) – optional
Directions:
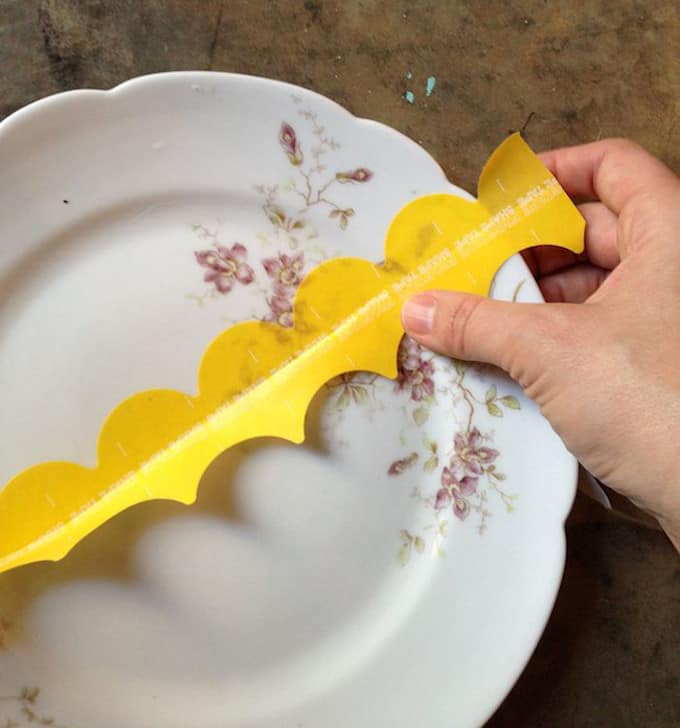
Choose a plate to spray paint. Use the ShapeTape to block off one side of the plate. Spray paint and let dry. Remove the tape.
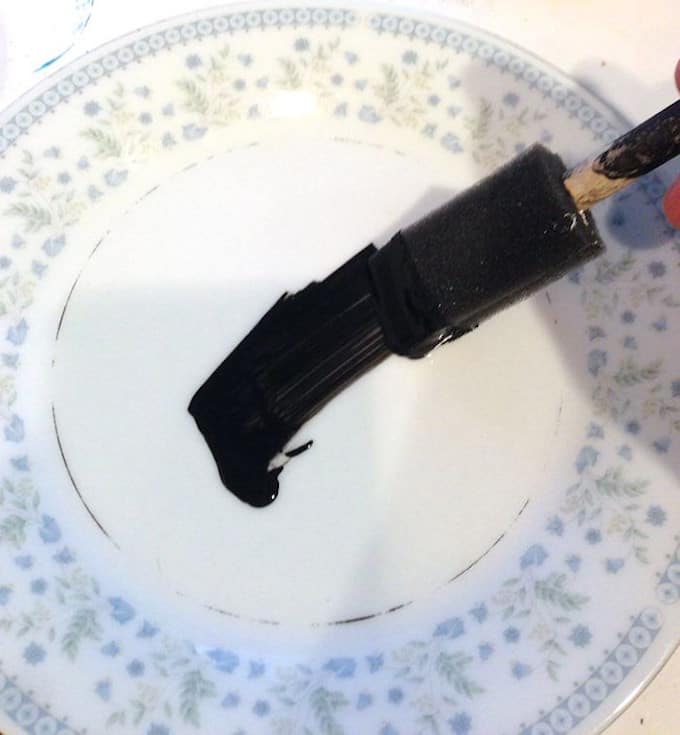
Select another plate to be your chalkboard. Coat the center using chalkboard paint and foam brush. Give the plate multiple coats, letting dry between coats.
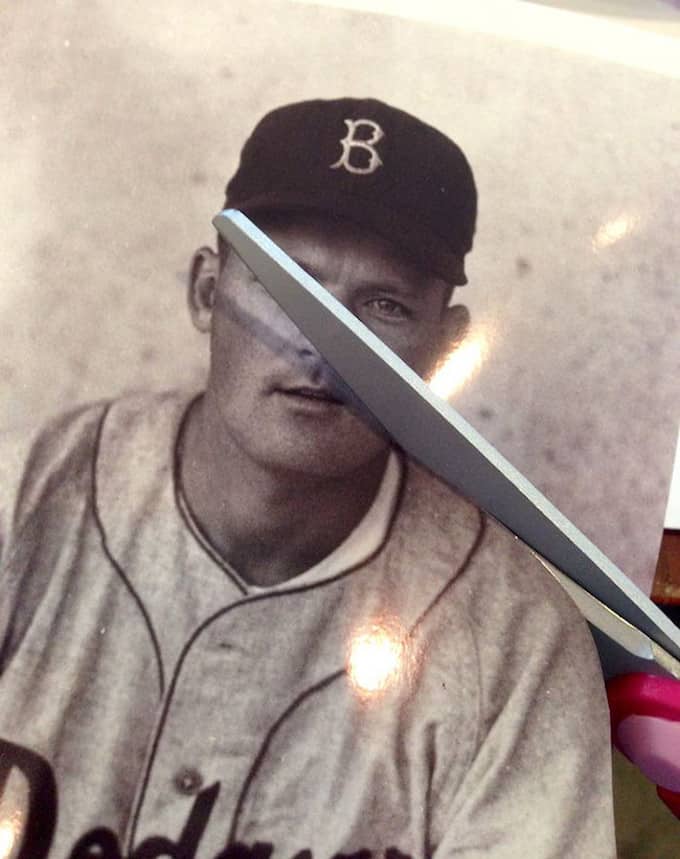
Your remaining three plates will display photos. Choose three vintage photos to print, and print on the 5 x 7 photo paper using your printer. Cut out one of the images using the scissors.
Tip #1: Some images you can cut around the person’s shape; others you can make round like the plate. Experiment with your cuts!

If you decide to cut some of your shapes round, use a surface like a coffee mug along with a pencil to make a circle. This keeps you from having to try to trace the bottom of the plate, which is difficult. Cut out your circles.
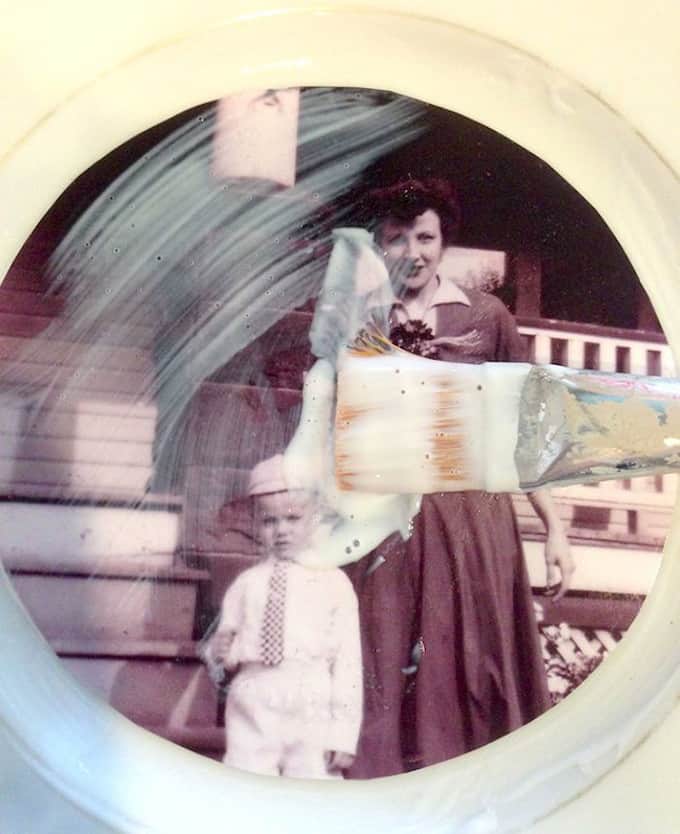
Mod Podge your photos to the insides of your plates. Apply a medium layer of Mod Podge to the center of the plate, smooth the photo down and apply a coat of Mod Podge over the top. Let dry.
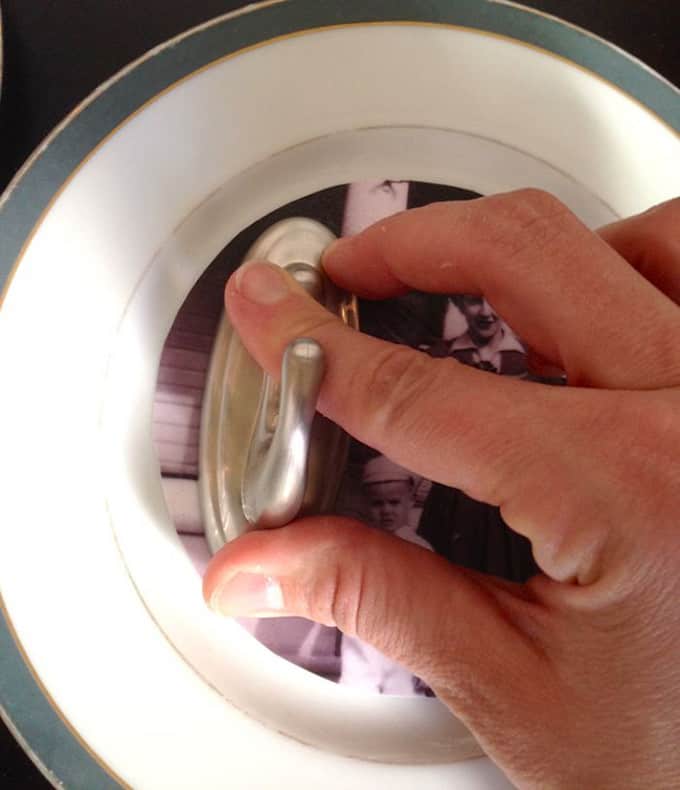
Apply Command hooks to 2 or 3 of the plates, following the instructions on the package. Hang the plates on the wall using Command strips. Make sure you follow the instructions on the package so your plates don’t fall and break.
I love this functional DIY plate display, and seeing photos of my family on the wall makes my mom smile! How would you personalize your plates? Would you use vintage graphics or photos? What about funky door knobs as hooks? Tell me in the comments below!
Looking for more inspiration? I’d love for you to check out these other project ideas:


I love displaying family photos! since my fridge won’t hold them all, I plan to try this.
So I tried this. Seven plates in I realized this would take up a whole lot of wall space and never hung it.
Good feedback! You’re absolutely right.
I never want a plate craft. I never want to hang a plate on a wall.what to do with a broken plate might be interesting.
You have a typo above: “…hear drom…” instead of “from.” Happy Easter! (I won’t be offended if you don’t publish this comment and just fix the typo)
THANK YOU Tracy!!
This is such a great idea! Love it!