If you are wondering how to use Mod Podge photo transfer medium, here are all of my top tips. Learn how to be successful with this article! Scroll down to see a video of the process in action!
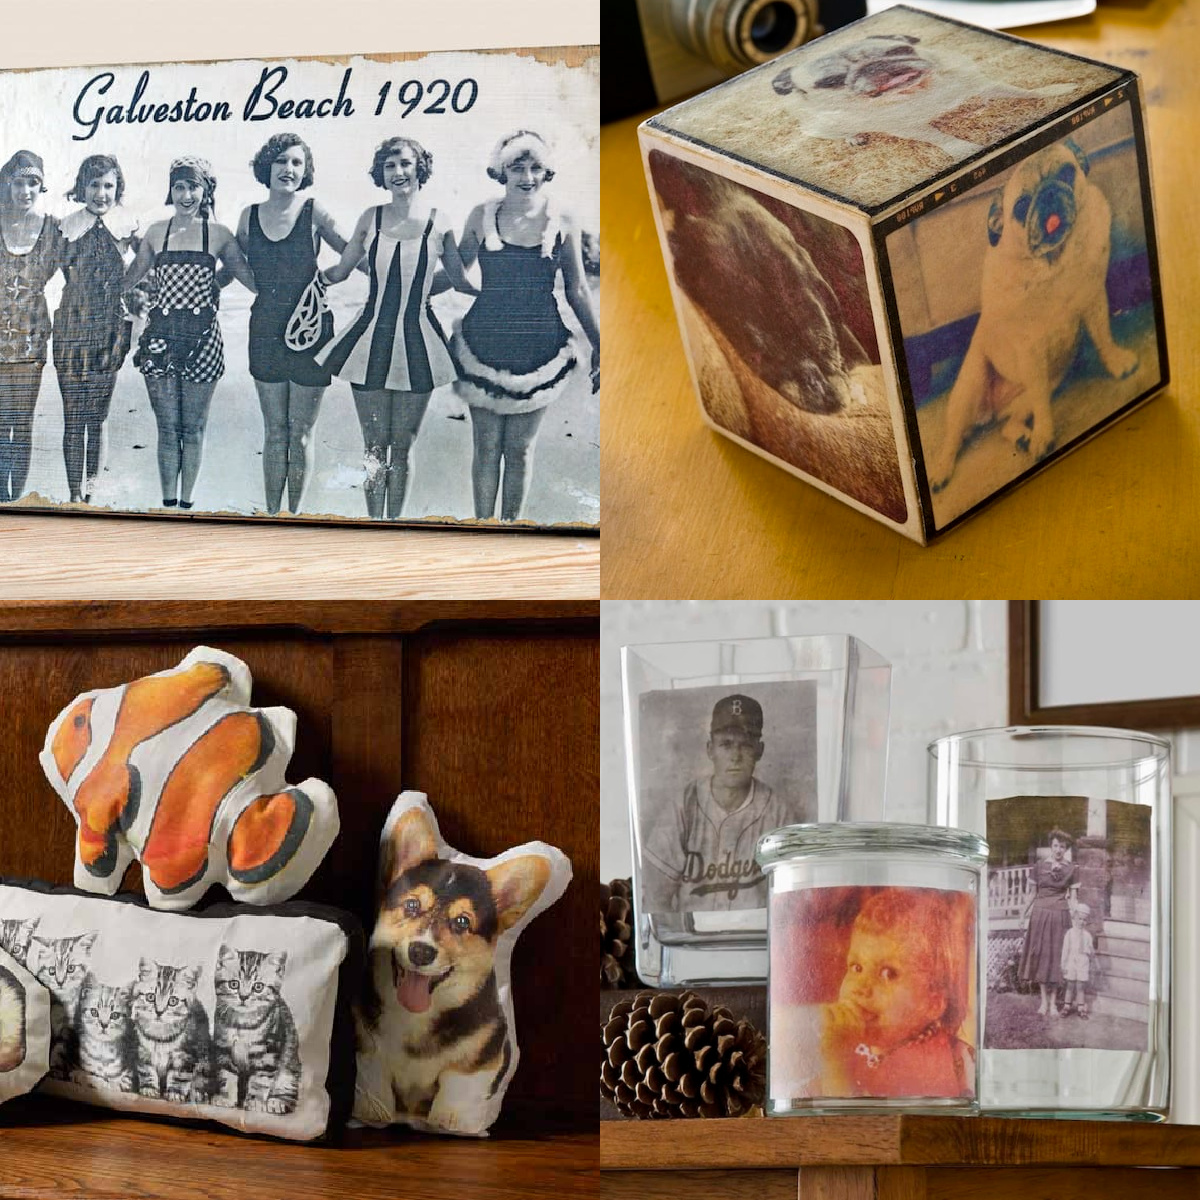
Have you ever used Mod Podge photo transfer medium? It’s a great formula – one of my Mod Podge-y favorites (I use it to transfer photos to wood!).
It’s also one of the formulas that I get the most questions about, so I thought I’d share some tips about using this medium to do a photo transfer with you.
Mod Podge in general is really easy to use, however, the photo transfer medium takes a bit of practice. This isn’t meant to be discouraging – it’s actually meant to be the opposite!
It’s not nearly as hard as knitting, another one of my favorite crafts. I learned to knit at age 15 and messed up like you wouldn’t believe. Yet I kept at it, and now I love it.
And that’s the way I feel about Mod Podge photo transfer medium.
Mod Podge Photo Transfer Tips
So here’s the point: you’re going to master it, I promise! With a little practice and patience, you’ll be a photo transfer ninja. Here are some of my most important tips to use Mod Podge photo transfer medium.
1) Remember that the medium isn’t clear.
When people ask me “why should I use Mod Podge photo transfer instead of regular Mod Podge?” Well . . . this is one big reason.
This isn’t just Mod Podge in a different bottle.
It’s a product meant for photo transfer only, and it will produce an opaque, white background. This means you can use it on dark colored items too. Plan your project accordingly.
2) Print your image on a dry toner printer; don’t use real photographs.
Both inkjet and laserjet will work, it just has to be a dry toner printer. So how to tell if your printer is dry toner? It’s hard to say. Laserjet will work 99% of the time. Inkjet . . . it just depends.
My HP works very well because it has a very dry ink. There are about 10,000 different printers out there, so I’d say your best bet is to do a small test if you’re unsure. This will help you practice too! Grab a small scrap of paper and print out a small image – let’s say 2″ or 3″ square.
Expert tip: if you are printing an image with words – reverse the image on your computer before printing! The words will come out correctly when you do the transfer.
3) Make sure to use enough medium on top of the image.
So here’s my process. I cut the image down to size, and then place it face up on my Mod Podge silicone mat. I use a foam brush to apply the transfer medium over the top of the photo until the image is obscured completely – meaning, I can’t see any of the photo.
Then I use a fingernail or tweezers to pick up the corner of the image, flip it over, and place it down onto the surface. I use my Mod Podge brayer to roll out the image.
If you used the right amount of medium, not much (if anything) will come out the sides. If it does, wipe away, as it will dry and be stuck there if you don’t!
Leave your photo transfer to dry for 24 hours.
4) Take a lot of patience and care when rubbing off the paper.
This is probably the hardest part of the whole thing. You will need to wet your item and rub the paper off, revealing the image below. It’s a little weird to wet your craft project and you’re going to be thinking, “am I doing this right?”
Start lightly and rub off the paper backing – let dry to see what you’ve done. If your image doesn’t look right, wet again and repeat. As you get more experience, you’ll start to see exactly how much you can rub to reveal the image without ruining it.
Because if you rub too hard, you will rub the image away . . . and we don’t want that! I rub with medium pressure, then I typically let dry and rub again if necessary. These days I’m good enough to get it on the first try! You can get there, too.
5) Expect a vintage-style image.
This (to me) is an advantage over just Mod Podging an image down. Well, this and the item is now washable (if it’s fabric). But I do love the vintage-y look that a photo transfer gives you.
It’s a less sharp version of a real photograph, and it has its own unique look that I appreciate. Once you do try it, you’ll see exactly what I mean. The soft, vintage-y look is really nice in home decor. I think you’re going to like it!
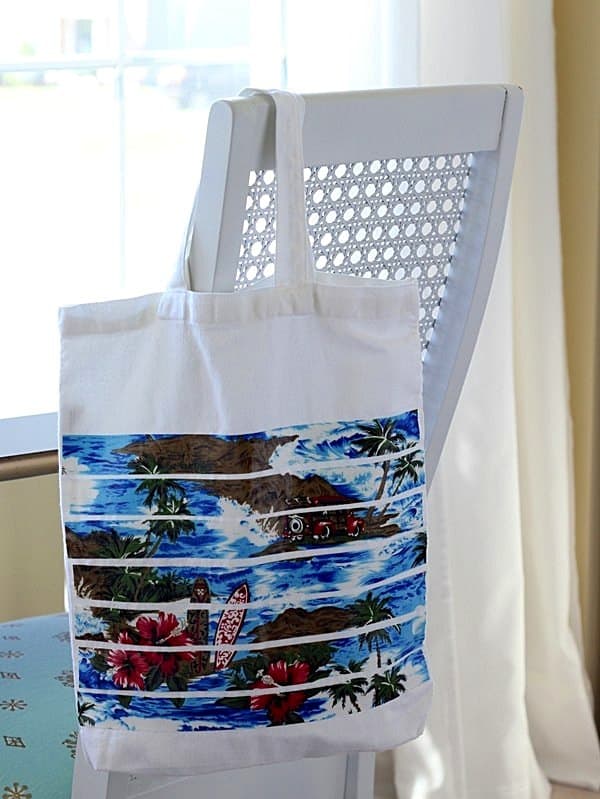
NOTE: This medium is hand washable only. Keep that in mind! No machine washing, my friends.
Now that you know my tips, I’d also love to know what questions you have about Mod Podge photo transfer medium in the comments! And if you’re ready to watch the video of the process, all you have to do is click play below:
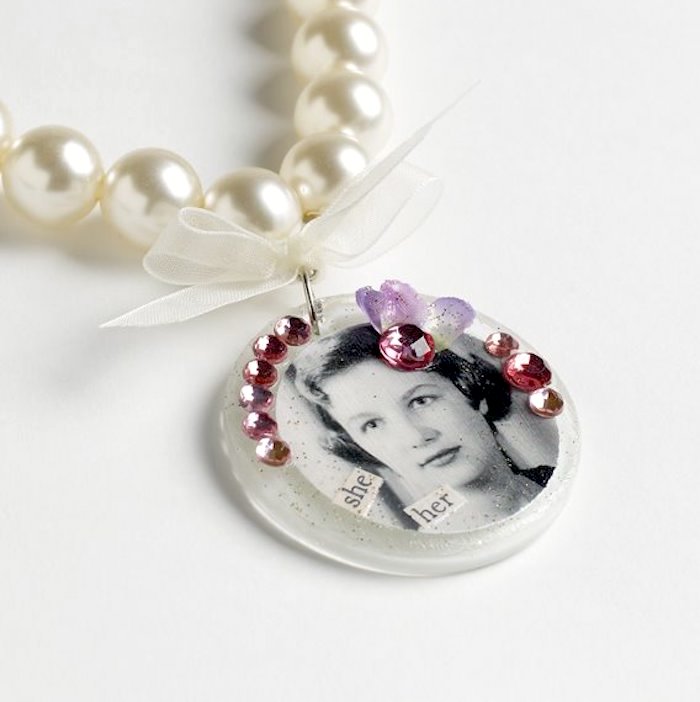
Are you ready to try it?? Visit our Mod Podge photo transfer craft ideas! I’d also love for you to visit the following projects:



Thank you so much, you really are a genius
I’ve never used this product before and didn’t realize that it existed. Thanks for showing me something new!
Thanks so much for the tips. What kinds of surfaces can be used, besides the fabric you mentioned? Any papers, plastic, wood, metal?
I haven’t used Mod Podge photo transfer, but I’ve been wanting to do some photo projects. It looks pretty straight forward.
I’ve been inspired to to try Mod Podge for the first time after viewing some of the projects!
I plan on making a photo collage on wooden initials.
I am wondering if a wood medium can be sealed or if it has to be unsealed before doing a photo transfer.. can you help?
I’ve painted on surfaces and it’s been fine to transfer on top. What kind of sealer?
Hey!! A good tip that works really well….use Artist’s Loft brand tracing pad paper (25 lb paper – you can get it at Michaels for around $6) for all your photo transfers. It may take a few trys to print out your photo
(since it practically feels like tissue paper) but it is so worth it in the end because using this kind of paper makes the rubbing process a piece of cake!! As long as you wait 24 hours for it to dry ( this I had to learn the hard way – I used to wait 8 hours and the images didn’t turn out so good) and take your time when rubbing the paper off, The top layer should come off very easily!! I’m yet to try mod podge transfer medium ( so far I’ve been using Liquitex matte gel medium), but I am looking forward to trying it someday 🙂 Also – I like using mod podge antique matte after the images dry – it makes the photos look extra vintagy 🙂
Kelly I want to try this immediately! It sounds super cool! Thank you for the great tip. 😀
@Kelly, thanks for the tips Kelly! I will definitely try the tracing paper! Did you tape a piece of tracing paper to copy paper before you ran it through your printer or what worked best for you? I’m envisioning it getting stuck in my printer 😉
@Kelly, Hi! Do you have to glue the tracing paper to the printing paper or does it go through with no trouble? How long to wait to dry? I have so much trouble rubbing off the paper after wetting! This tracing paper would be a breeze to rub off – I think LOL Thanks fo!!r this great tip
Can you transfer pics to a curved piece of wood
Hi Jim! I see no reason why not!
thanks for reply am turning wooden bowls and am going to try it on one
Can you bake the project (glass, wood, etc) on a low temp instead of waiting 24 hours? or maybe wait a few hours then bake? I’m very impatient.
Hi Tuck! Honestly I’m not sure what would happen – it’s worth an experiment. If you try it – I would do it at the lowest temperature! Please share your results if you do.
I made a Christmas sign on a large canvas board. I had to use three different pieces of paper because of the three images I had. I noticed that I can see the faint mark of each piece of paper. It won’t come off. Am I best to cut the images out and lay them on the canvas instead of having full pieces of paper? My worry is that the board will look smooth and vintage blotchy. Any help would be appreciated!
Diane, would you be able to send me a picture of what the canvas looks like now, amy at modpodgerocksblog dot com? I’d like to see what we’re working with so I can best advise you. Thank you!
@Amy, I sure will! Let me take a good pic and I’ll send it this evening!
@Amy, Hi Amy – I sent you the photos – were you able to get the email?
can fabric photo transfer be used on polyethylene tote bags?
Hi Barbara! You could try it, but I don’t think so. Mod Podge doesn’t work well on plastic, especially the photo transfer medium.
@Amy, Thank you. Barbara
I did a photo transfer using the mod podge but I can’t get the last bits of paper off and I don’t like the look of it. Can you use another coat of mod podge or a different type of sealer that will make the bits of paper left not so visible?
You can use Mod Podge on top! You can also re-wet (maybe you’ve done that) and try to pick the last pieces off with tweezers.
Is it possible to use a copy of a photo that has been made on photograph paper?
Hi Judy! No, unfortunately not – the photo paper won’t release the ink the way you need it to in order to do the transfer.
Does it leave a slight dusting film on the image once dry as I have tried a couple times to wipe away and it still dries the same
Hi Brian! That’s still a little paper. But you can put Mod Podge on it to get rid of that look – or keep trying with a cloth or sponge!
can you tell me why mine has a white mist all over it and it only comes off when I wet it but as soon as it dries it goes back to not seeing the image (photo to wood)
Hi Jackie! I’m thinking you aren’t getting all the paper off, but I don’t want to comment on your process until I see pics. Can you join this group and share? https://www.facebook.com/groups/craftywithmodpodge/
I ha e tried this twice and both times the picture hazes over when it dries. What am I doing wrong
Hi James! You likely still have paper on top of it. Use a rag to help you remove the excess paper!
After I transfer my photo and let it dry,and then after I remove all the paper backing and let it dry what do I put over it to seal it in?Should I just spray a coat of mod podge clear acrylic sealer over it or should I put a few layers of mod podge gloss or matte coat over it then the acrylic sealer?please let me know!!
Hi Isaac! You don’t have to cover it with anything. However – I Mod Podge over the top with my favorite finish like gloss or matte . . . you could also do the spray sealer. Really up to you!
Hopefully you can help me out, I have been trying this process with reasonable success, but I constantly end up with dry white clumps/bubbles of transfer medium on the image that blister and peel off, ruining the image and exposing the wood underneath. I am smoothing it out, wiping away any excess, and letting it dry for 24+ hours, but this keeps happening. I’d love to hear your thoughts 🙂
Hi Sarah. Can you send me an email amy at modpodgerocksblog dot com – let me know if there are chunks in the formula!
@Amy, there were chunks in mine! Does that mean it’s bad?!
Hmmm – depends on how many and the size of the chunks lol. I would do a small test on a scrap. I don’t think it’s bad but just in case.
Can this be used to transfer pictures onto a candle?
I’ve never used this product, but I’m excited to try! Thank You! I’m making our General Manager a photo collage vase for his going away present. After I get the photos on the glass vase, is there a sealant or anything I need to spray on the outside of the vase on top of the photos to make sure they don’t come off ever?
Hi Sharnese – hmmmmm – I’m thinking you might want to use something else besides photo transfer medium if you’re doing a collage on glass. Glass uses the decal method like this: https://modpodgerocksblog.com/mod-podge-photo-transfer-to-glass/
I would like to put a photo onto shirt and another one onto a rock that I had gotten at the grave site. How do I do that. I have purchased the photo mod podge and regular and sealer
Hello there. Can I use the mod podge photo transfer medium on terracotta pots?
Hi Clancey! Yes, you can. Make sure to clean the pot and let dry thoroughly!
I just did my first round of rubbing the paper off. But my picture has a green tint to it. Is that normal? I know I still need to rub more paper off. Im just hoping the end result isn’t green. Thanks!
Hi Cara! Hmmmm – did you use laserjet? Usually the green is the black ink coming off BUT it could just be on the paper. It sounds like an inkjet image.
Thanks for your excellent advice. I would like to experiment with the photo transfer on an external concrete wall and wood panels. I notice there is an exterior product. would appreciate your thoughts. Thanks Julie
My pleasure Julie! Hmmm – I think the photo transfer would work on the wood, but not concrete. It would have to be very smooth, as the transfer medium needs a smooth surface to adhere to. The exterior product is Outdoor Mod Podge which you wouldn’t necessarily need if you aren’t decoupaging (you could just use an outdoor spray sealer). Basically, I’d be prepared to do an experiment to test first.
What is the best type of printing paper to use for this project. I’ve tried the regular paper from the printer and it seems like the ink is just washing away
Hi Angelynn! Are you using laserjet copies? That’s probably why the ink is washing away – if it’s inkjet, that’s what’s going to happen. And regular paper is fine!
I’m trying to transfer a rather large photo to a live edge piece of hickory. I have divided the photo into two 8×11 photos making it 11×16 total. I used the stencil method with regular mod podge. As I lifted the stencil little pieces of the photo stuck to the stencil. I practiced with a smaller piece first and a few very small pieces stuck. Probably should have asked this question before moving forward. I did let them both dry over 24 hours. Any advice. Thanks.
Hello, I used the photo transfer medium on a sweatshirt, processed it as directed in the videos and instructions, waited about 3 weeks to wash it, and the photo disappeared….. any idea why? is there a sealer that we can use on fabric to protect it from the washing? Or is there another step to it?
Hi Judi! Did you use a laserjet image? That’s the only reason the image would disappear, is it inkjet were used. Otherwise, were you left with a white background on? There is no sealer to use, it’s a product to use by itself.
The video is a little deceptive as it doesn’t show the mess the wiped off paper makes. I made some shirts and the edges look rough. Is there anything I can do to frame the edges or smooth somehow? I want to give as gifts.
I tried this recently, and my black ink turned green in some spots. Not the whole thing.
I admittedly didn’t wait a full 24 hours, but it was at least 18. I stopped trying to peel it to see if the rest would come out darker.
Hi Heidi! Did you use a laserjet printer? Just want to check on that first.
So can I use just regular printer paper to print my pic on to use to transfer the image or does it have to be picture paper?
You want to use regular printer paper so that you can rub it away – which you can’t do with photo paper. You will want it to be laserjet printed! Inkjet doesn’t work with the photo transfer medium. If you’re using inkjet images, this is the tutorial for you: https://modpodgerocksblog.com/inkjet-photo-transfer-to-wood/
what type of paper is best to print the image on to use this product?
“Regular” printer paper works – like around 20 lb. A little less is fine. You just don’t want it too thick to wipe away.
I’m trying to do puzzles for families in my program. So why not actual photos? Ive seen many photos used on wood.
Hi Pakuda – Mod Podge transfer medium doesn’t work with real photos (this post is about photo transfer medium), only dry printed images. You can try using photos with regular Mod Podge on wood. It’s much easier to use printouts, but you can try real photos if you are so inclined!
Can I use it on cardboard?
You can! It works on porous surfaces well.
Hi Amy, there was a product I used to remove the paper from a printed page to transfer to a canvas years ago which is not around any more. What I did was the same removal process, but I stuck it to the canvas on the paper side instead of the transfer gel side which worked really well and made the image sharper. Do you think I can do it the same way with Modge Podge? Bob
Hi Bob! I’m not sure at all – I’d like to learn more about this product. Do you remember the name of it?
Hi Amy! I went to Mount Rainier for the first time recently and last night at 10:52 I used modge podge photo transfer on wood for the first time!!! So now I’m waiting to use water to take the paper off. My question is when I take the paper off can I use my Matte modge to seal the image on the wood? Thank you!
Grace
Hi Grace! Yes you can. Also I love Rainier; I have a forestry degree and lived in Seattle for many years so I’ve spent a lot of time there. Glad you got to visit!
@Amy, yes I loved it at mount Rainier and the modge podge transfer worked!! I was hoping to show you but I don’t know how to send an attachment. Tomorrow I’ll put some Matte modge podge over the image.
Are there any other hints for doing it on seashells
I leave the paper on the wood for 24 hours to dry? Correct. I think I messed up on this section cause I rub it smooth then took the paper off
Yes you do leave the paper for 24 hours. THEN you remove the paper and leave the photo transfer behind!
I’m doing photo coasters (old idea, I know) so I want the surface a little rough. I achieve this on my napkin decoupage by applying several coats of Matte Mod Podge with a ‘pounder brush’, then varnish. Will this do anything funky to the photo transfer medium? I don’t have extra tiles to experiment with. Thanks ahead of time
Hi Sharon! If you want to have the texture, I’d just put photos directly on the coasters like this: https://modpodgerocksblog.com/personalized-mod-podge-coasters/
Photo transfer medium doesn’t really have texture and you won’t be able to spounce it on . . . and with smooth tiles, it won’t transfer well anyway. The tiles need to be smooth/porous.
I followed all the directions and video to transfer my pix onto a pillow case (thick, burlappy, but not burlap fabric). When putting the water on & rubbing off the paper, it looked great, but after it dried, you couldn’t really see the pix. They were VERY cloudy. What did I do wrong???
Hi Darragh! A lot of times that’s because there is still more paper on there. Try wetting and rubbing again. Don’t go crazy because you don’t want to rub the pic off. Just rub lightly, let dry, repeat.
I do woodburning and started to do photo transfers awhile ago and they have turned out wonderful. I’m currently working on a woodburning and photo transfer project that I was asked to make for a friend’s wedding. I don’t know what the problem is this time but on some pictures when I get to the wetting and rubbing off step, it seems like small little sections won’t damped at all or when I keep getting small little sections of white that seems like it’s the dried midge lodge maybe? Any advice? And second question is, I usually seal my photos and boards with the midge lodge acrylic sealer in the spray can, and I did it this time forgetting that I needed to write the names of the people on the photos , what, if anything would be a good ink to use on top of the sealer?
Yes, those small sections of white are the dried photo transfer medium and the only way to avoid those is avoid letting it dry in that spot. And you can use Sharpie on top of the sealer! Keep in mind the more you write it might ruin the pen if it’s a soft tip. You could try an oil based Sharpie paint pen as well.
What is the best way to get a glossy look when transferring a photo to wood?
Hi Patricia! You can simply brush gloss Mod Podge or spray with a glossy spray sealer after the transfer – or use resin on top. The photo transfer medium itself isn’t very shiny.
why are there areas of paper that won’t come off?
Hi Patricia – I’m wondering if you got some medium on the other side of the photo in that area . . . or you can keep trying to rewet and gently scrub away.
Hi!! I’ve been doing modge podge transfer onto wood for a few months now. The problem I have with it is the white fuzzies. How do I stop them from coming back?! So far only two of my transfers I was able to stop the white fuzzies. The one I’m working on now the fuzzies keep appearing and of course it’s a present for a friend. HELP! 🙂
Hi Grace! I use somewhat of a rough surface – like a rough side of sponge – to help with the fuzzies. Just something lightly abrasive. It’s all about getting that paper off!
Can you just use regular photo paper and the mod podge??
I don’t have access to a printer..
You cannot because the ink needs to release from the paper onto the medium, and you need to be able to scrape the paper away. Photo paper won’t work for any photo transfers that I know of. There are online services that will send you printouts and you can also try the library OR FedEx Kinkos!
How can I put an image inside a solid ball Christmas ornament? Also, can I pour acrylic paint inside with the image?
Here’s a tutorial from one of my friends: https://www.fynesdesigns.com/diy-glass-photo-ornament-tutorial/
I wouldn’t put the paint on the inside since you can’t really control it. I’d decorate the outside once the image was on the inside so you know where to paint.
You guys should have add the captions so we deafies can learn from you.
Hi Diana! You can get the videos on YouTube too: https://www.youtube.com/watch?v=LHYPgYDHQcA
You can close caption there! Good news, my network is working on adding captions. But for now, that is a way to access. Thank you ma’am!
Mod Podge photo transfer medium is NOT machine washable and I wish sites would remove this information. I believed them and ruined a beautiful towel. So I researched some more and according to Plaid, it is HAND washable only.
Thank you Frynd! I added that note – good point.
Once you wet the item, rub off the
Paper does it become translucent
As it does in the packing tape method or stays white.
It stays white! There is a clear version though.
I have red streaks in my photo to canvas transfer. How or can this be avoided
Hi Wava! It sounds like you used an inkjet printer. That’s usually when the ink bleeds! For a photo transfer with this formula you need a laserjet.
Thanks for the tips! I tried it last night on a painted board and 24 hours later I attempted to remove the paper. It was as if the paper had turned to rubber and it peeled off! It worked perfectly on wood discs for Christmas ornaments. Will it not work on a painted surface?
Thanks,
Teresa
It works on a painted surface! It has to be acrylic paint though (chalk paint also works). If it’s latex, it will peel right off. I did it on acrylic chalk paint here: https://modpodgerocksblog.com/image-transfer-to-furniture/
I’ve tried a few times and I get bubbles that peel away to the canvas….HELP. what am I doing wrong?
Are you doing it on a painted canvas? Do you know if the canvas is prepped? I’m worried that it’s cheaply prepped. If you could give me a better idea I can try to help!
Thx for this tutorial! After you’ve transferred the image, do you recommend putting on a top coat of regular mod podge? In my case i’m making a game board, so there will be tokens set on the board.
Thx!
Hi Kurt! I recommend at least using a spray sealer. So yes, something that offers protection! 😀
Will this wirk on paper? Like a craft paper notebook?
Yes, it will! The only thing is be really careful when you are removing the paper because you don’t want to soak your notebook. You probably want to use a sponge to remove the paper.
As a new bride without much extra money, I used Mod Podge to make a Christmas gift for my parents 56 years ago. It was a wine poster in greens and golds that I put on a wooden board and decoupaged. It was proudly hung in their home for many years. When they passed in 2003, it was something my daughters fought over. So, a unique and inexpensive gift which made memories for our family was handed down through 2 generations has lasted all these years. A truly great product!
So glad you love it! That sounds like such a special gift 🙂
I am a very experienced wooden furniture crafter. I have done lots of successful decoupage projects on painted furniture using Mod Podge glue. I just made a first attempt at using the Photo Transfer Medium after watching many tutorials and doing plenty of reading. I am trying to transfer dark gray text that was printed on my inkjet printer using regular printer paper. I reversed the lettering as directed and cut out the single lines of text I wanted to apply. I applied a heavy coat of the medium as directed. I made sure I didn’t see the image through the medium. I placed it and pressed it onto the surface. Only a small amount of the medium came out so I wiped it away. I let the image dry a full twenty-four hours, wet it and began rubbing with my finger. Some paper was coming off so i thought everything was on track. I wiped it gently with a cloth and let it dry for a little while. I reapplied water and began to rub a second layer, but the paper was not really coming off well at all. I kept trying with those last few steps of wetting, rubbing, drying, repeating, but the paper simply wouldn’t come off of the lettering or from in between the letters either. After hours of this, I decided to chuck plan A. It took literally a couple of hours of sanding, scraping, using Goo Be Gone and finally I got three long lines of text off enough that I could paint primer over the area. It will need another primer coat and probably two coats of chalk paint to put my project back where it was three days ago. I get that the rubbing process is a little fiddley, but I have seriously watched so many videos I feel like I know what to do. If you have any ideas on what happened here, I’d love to hear from you. Otherwise, I have thrown $10 bucks out the window with nothing but lots of lost time to show for it. I like Mod Podge but this one has me flummoxed! Thanks.
Hi Pat! I have a tutorial for you: https://modpodgerocksblog.com/image-transfer-to-furniture/
First issue I see is the inkjet – it needs to be laserjet printed. And printer paper shouldn’t be photo paper (just checking on that). Check out my tutorial and see what you think. I did it on chalk paint as well. Thanks!
I am going to transfer photos to a metal tin initial for a wedding and it KS going to be a collage of pictures all grouped together. What is the best way to put the pictures all together and mod podge it at once?
Just put all the pictures together, make a laserjet copy (or have Kinkos do it for you) and then Mod Podge that. You need a laserjet copy anyway for the transfer: https://modpodgerocksblog.com/metal-photo-transfer-art/
Is it machine washable, or only hand washable? I’d like to make a garment for someone, but want to ensure that it’s something that lasts…and that I give them proper care instructions.
Machine washable cold and hang dry 🙂
Do we have to print on a certain type of paper when transferring to metal? I’m looking to transfer designs onto metal to use in jewelry.
Hi Marcia! Just regular printer paper. You want something that you can rub away, so no coated papers (like photo papers). The idea is that the photo transfers to the medium and that goes on the surface, while you wet and wipe away the paper. 🙂
Hi. I spilled a large amount of laundry detergent on my finished product. It’s messed up my image so I rubbed the image away completed leavening me with the white background. Can I try laying the image on that same spot using the transfer medium again?
Hmmmm . . .. I think you could layer it just fine. I’m not 100% sure because I never have, but I think you could. This is a disclaimer though that it might not work . . . I’d try it personally though 🙂
Can you mod podge with a page that’s double-sided? Will the other print come through over the one I really want?
It depends on how thick the paper is. You’re commenting on a photo transfer post, so if you’re doing a photo transfer, no it can’t be double sided. If you’re just Mod Podging, it should be at least 80 weight paper. So way heavier than regular printer paper. I can decoupage doubled sided scrapbook papers without the other side showing through, and those papers are 80 – 100 lb weight plus. So thicker papers 🙂
Why doesn’t my mod podge dry clear. I used a thin layer on the wood and on the face side up of the photo. I let it dry 36 hours.
Hi jean! If you used the photo transfer medium, that doesn’t dry clear. You need to use regular Mod Podge.
Can I use this to print images on tights? Or will the image stretch too much and crack? Is it a thick print or actually inked into the fabric? Maybe I should stretch the tights out first with a cardboard form to print on them? I have been looking around the internet but I can’t seem to find if anyone has tried using it on a thin stretch fabric before. Also how durable are they as far as hand washing? Will the image fade a lot over time ?
Unfortunately it won’t work. Acrylic products will not work on lycra or similar stretchy materials, which are essentially a form of “plastic” (polymer) fabric. I’d look for a service online where you can upload your own art or images and print them (they exist – I just Googled).
Can you do photo transfer onto paper? I was planning on some paper tags and now I wonder with the wetting of the surface….
I was hoping for a faint image. can I remove the original before it is completely dry?
Hi. Can I apply the photo transfer medium -directly onto the wood? Then lay my reverse pic on top,, smooth & dry? I will test.. but it seems safer than applying directly to the paper first,?
You could but it’s harder to make sure the photo is obscured in every area. But I would experiment to see what works best for you!
I simply don’t get it! Why on earth is Mod Podge Photo transfer medium NOT to be used on photographs???? This is so stupid it defies belief. Call it image transfer medium, OK – but phototransfer medium it is NOT. Only an American company would name a product after the one thing you shouldn’t use it with.
The paper something is printed on doesn’t define whether it’s a photograph or not. . . . Also, there are Polaroids and many, many types of photo paper. What is so stupid it defies belief is that anyone would think the definition of a photo is that it is printed on one type of paper. The medium defines the paper you use – not the other way around. There is no medium that will ever work with all the types of photos, papers, and chemicals that have been used in developing over the years.