
Learn how to make this unique photo art using the initials of your choice! SO easy that anyone can do it. Such simple and unique DIY decor.
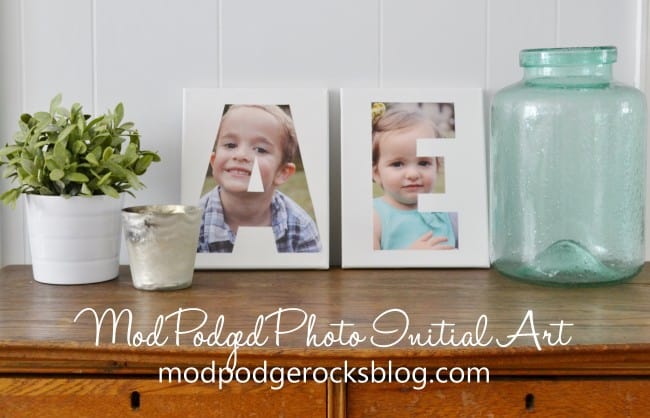
Hello Mod Podge fans! I am so excited to share this canvas idea with you all today – I just love how it turned out and it’s so simple to make. The gifting possibilities, too, are endless!
This photo initial art would be perfect for a baby gift, a family holiday gift, or even a wedding present (just use the couple’s last initial). So, without further ado, let’s get started!
DIY Photo Art
Gather These Materials
- Mod Podge Gloss
- Vellum paper
- Cardstock or photo paper
- Foam brush
- 8×10 canvas
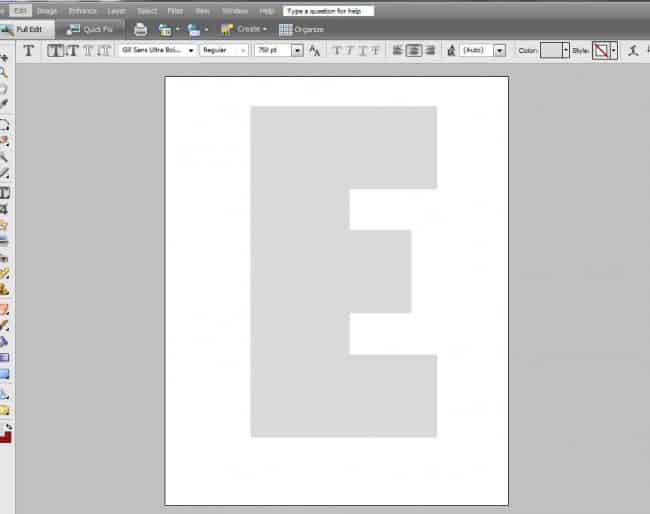
Step 1: The first step is to go into your word processing program (or Photoshop, if you have it), find the font you want to use, and print out the initial of your choice on 8 x 10 vellum paper.
Here’s a screenshot of my image right before printing. As you may be able to see, I used Gil Sans Ultra Bold for my font, 750 pt. Other fonts that would work well for this project are Berlin Sans and Impact, both of which came with my Microsoft Word Program.
Basically, you just want a heavy, chunky font. Print out your letter on vellum (use a light gray color for printing, instead of black), and cut your letter out.
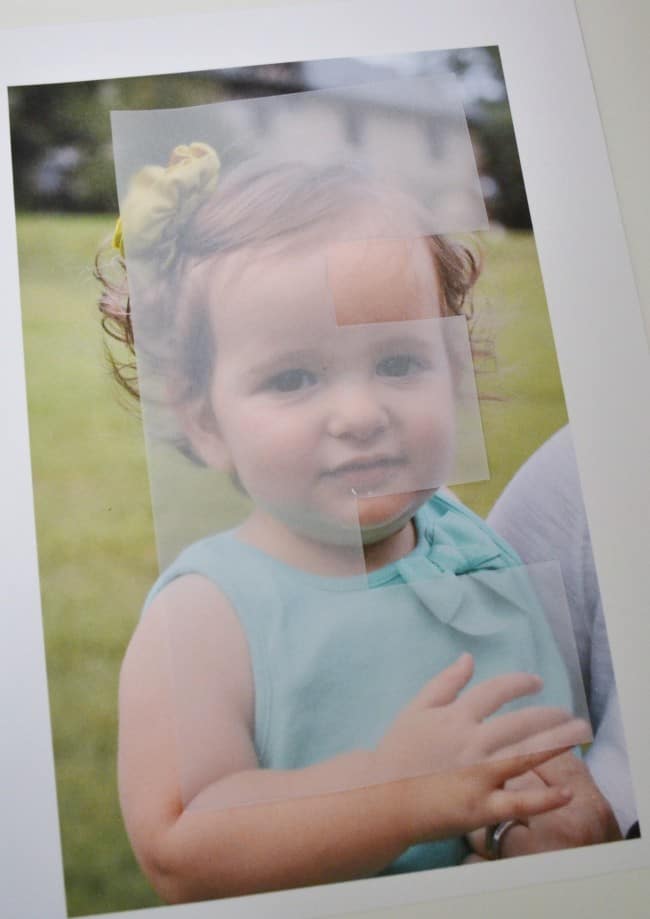
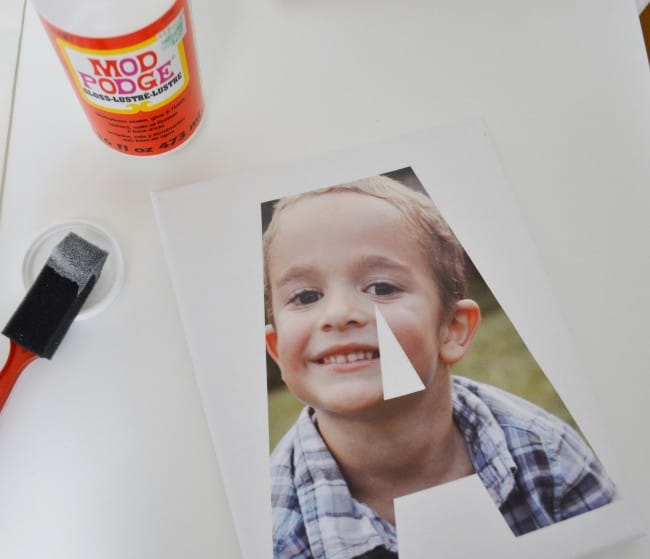
Step 2: Print your photo out onto cardstock or photo paper. Take your vellum letter and position it over your photo, moving it around until you are happy with the placement (the portion of the image that shows through the vellum is what will be displayed on the canvas.
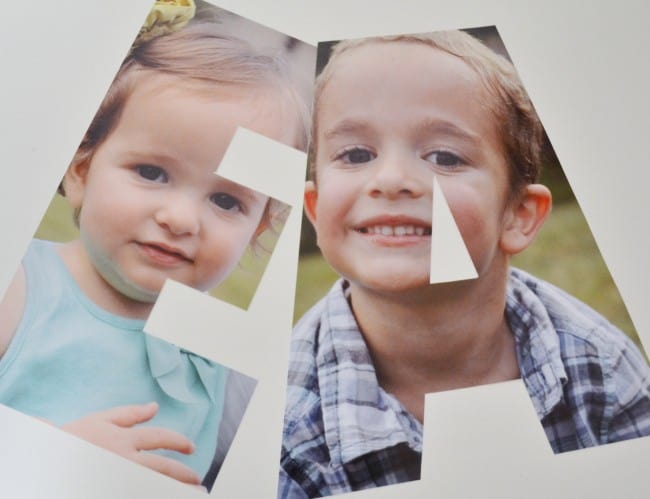
Step 3: Cut out your initial. You may be able to do this with scissors, or you may need to use an X-Acto knife and mat to get a clean cut.
Step 4: Take your initial and apply a layer of Mod Podge to the back. Position onto your canvas and press firmly. Let dry completely.
Step 5: Apply three thin coats of Mod Podge to seal. This is one project where multiple thin coats are preferable to fewer thick coats. Let dry completely between coats.
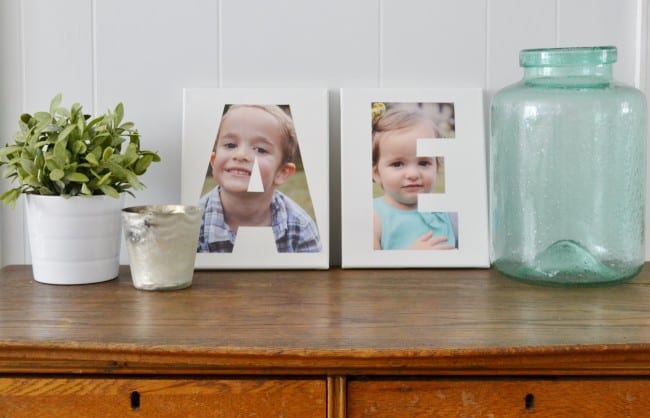
And there you have it! There are so many amazing ways to customize and be creative with this photo craft project, everything from using a black and white photo to painting the canvases a bright, bold color before applying the initial.

Photo Art
Equipment
- Scissors or craft knife and mat
- Computer and printer
Materials
- Mod Podge Gloss
- Vellum paper
- Cardstock or photo paper
- 2 Canvas(es) 8 x 10
Instructions
- Find the font you want to use for your letters. Use a Word processing program to print out the initials of your choice on 8 x 10 vellum paper.
- Print your photos out onto cardstock or photo paper. Take a vellum letter and position it over a photo, moving it around until you are happy with the placement.
- Cut out an initial using a craft knife or scissors.
- Take the initial and apply a layer of Mod Podge to the back. Position onto your canvas and press firmly. Let dry completely.
- Apply three thin coats of Mod Podge to seal over the entire canvas. Let dry completely between coats.
- Repeat with your second canvas. Let dry before displaying.
Notes
Thank you so much for letting me share my photo art with you all today! I would love for you to check out some of my other tutorials:


This is a really creative photo design, thanks for sharing!
I love this idea. Thanks.
Quick question, I’ve never used mod podge. When you say apply three thin coats to seal…do you mean on top of the photo as well?
Yes, the three coats go on top of the photo:)
I love this, what a wonderful idea! I’m going to try it for my sons.