
Transform your lampshade with decoupage using magazine pages! This fun and creative DIY project is perfect for unique and stylish home decor.
Skills Required: Beginner. You’ll be cutting pages and applying them to a lampshade with Mod Podge. There is a lot of room for error given that the pieces you are working with aren’t large.
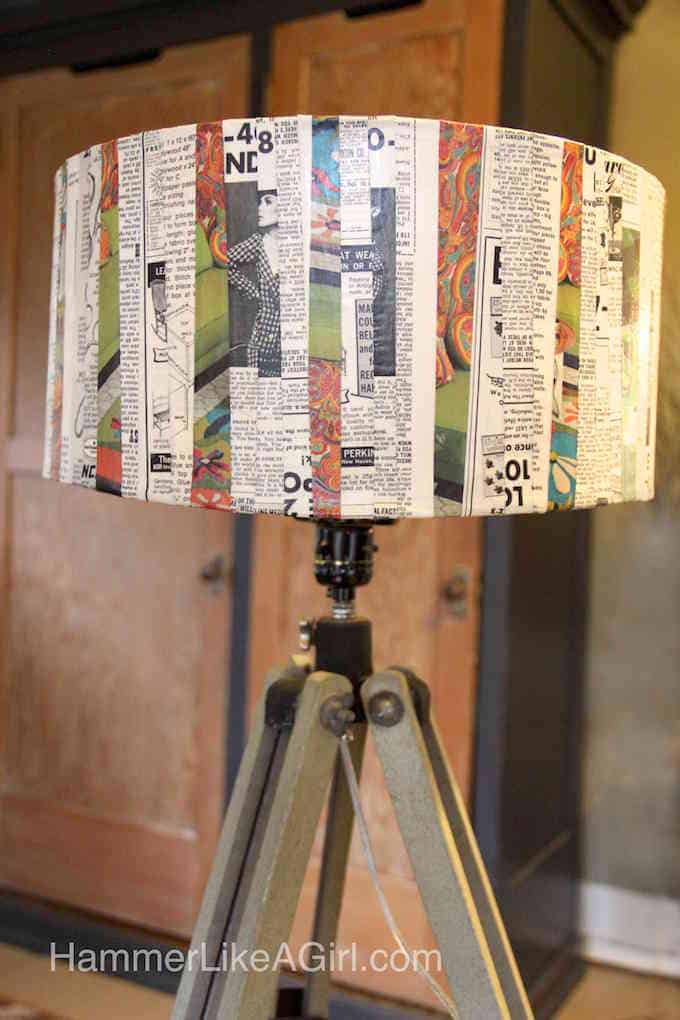
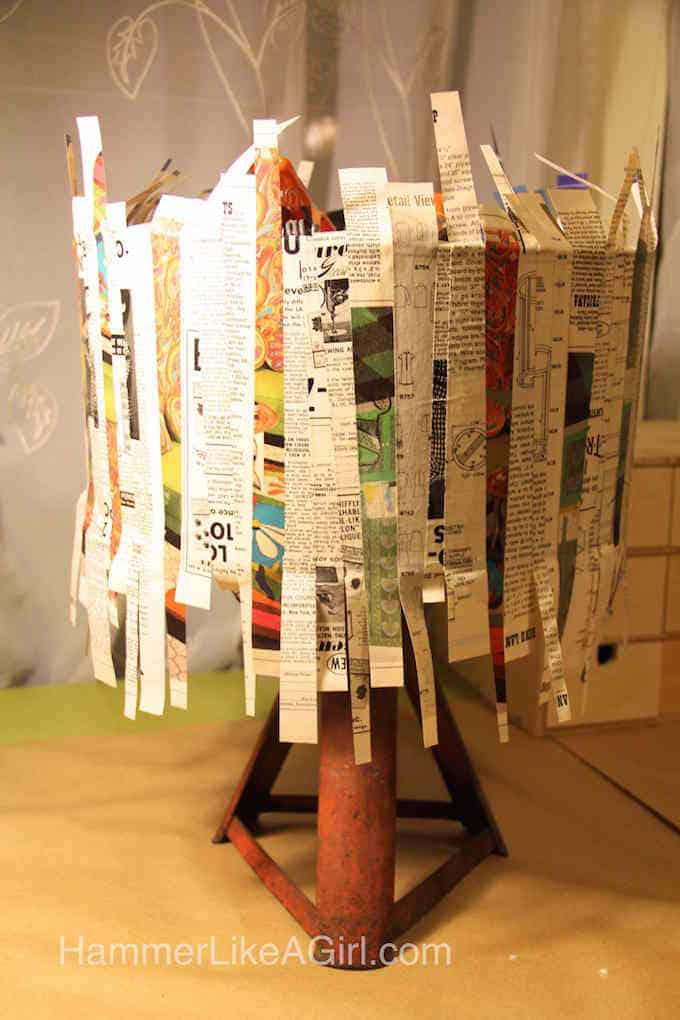
A while back, we made a lamp from an old tripod. It needed an unusual lampshade so we made one from galvanized duct work. But time went by and it was time for a change – something lighter and brighter and funkier.
When I think funky, the first thing that comes to mind is 60’s fashion (doesn’t everyone?). I grabbed old paper magazines from that era and decided to create something more along the lines of farmhouse decor.
With a wooden tripod lamp base, I’m really happy with the way this DIY project turned out! Learn how to create a decoupage lampshade below.
Gather These Supplies
- Plain white drum lampshade
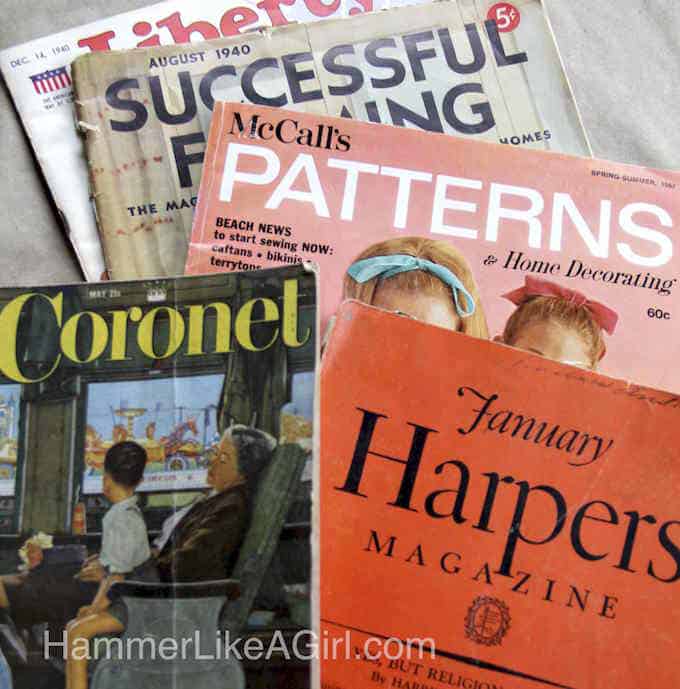
- Magazine pages and ephemera (we used a 1960’s McCalls Pattern and Home Decorating Magazine)
- Mod Podge Matte
- Paintbrush
- Paper cutter (scissors would also work)
- Scissors
- Tape measure
- Large paper, for pattern
- Pencil
- X-Acto knife
- Flexible tape measure
- Cardstock, for pattern
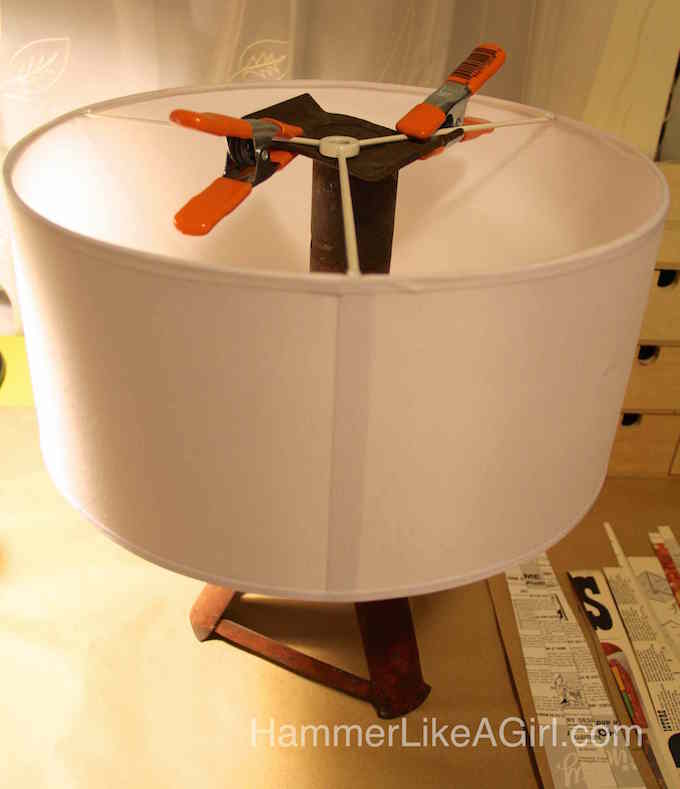
- Clamps & something to clamp the shade to, OR just use the lamp base if it’s a table lamp
We found our lampshade at a lighting outlet store for $5, which made us pretty happy.
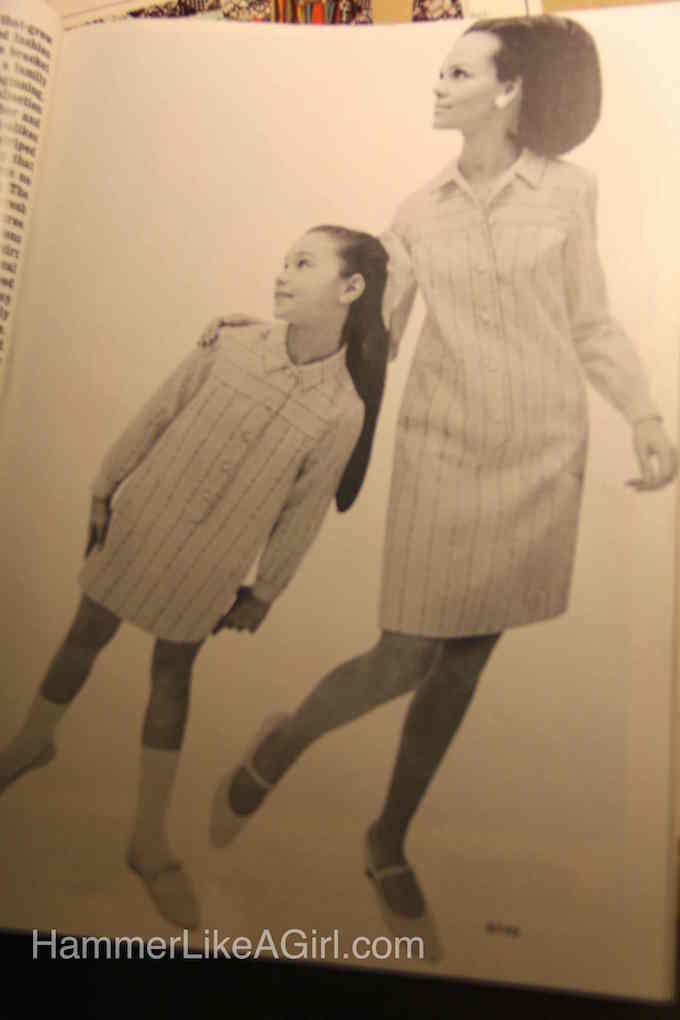
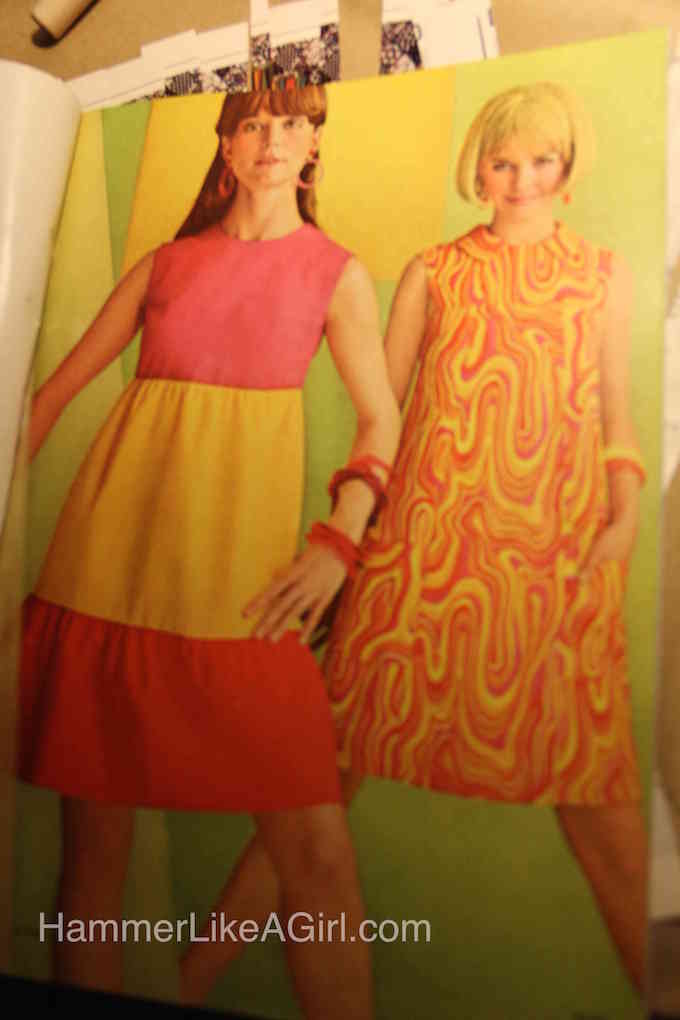
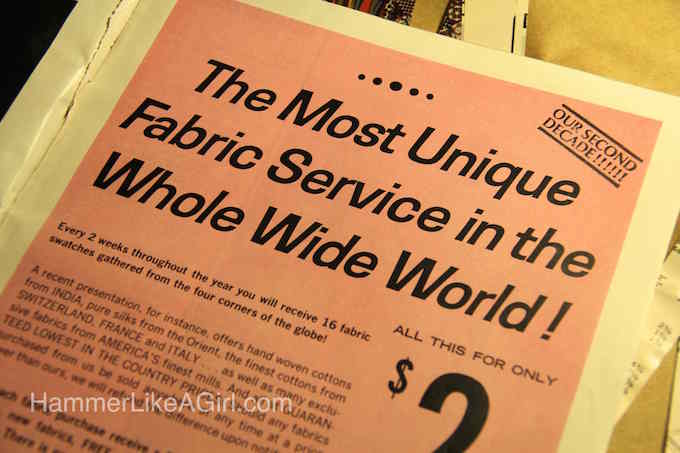
We gathered up our wacky old publications and pondered a theme for our decoupage lampshade. Farming? Literature? 60’s fashion won out, primarily due to those bows on the models’ heads. And the mother/daughter dress-alike duo. And the stylish dresses . . . and the most subtle advertising (in the whole wide world):
This lampshade is a pretty easy project with plenty of room for error. An added benefit: when the lamp is on, there’s interesting show-through from the inside.
Get the printable how to below!

Decoupage a Lampshade
Equipment
- Scissors or paper cutter
- Tape measure
- Clamp(s)
Materials
- 1 Drum lampshade white
- Magazine pages or graphics and any other ephemera
- Mod Podge Matte
- Large paper for pattern
- Cardstock for pattern
Instructions
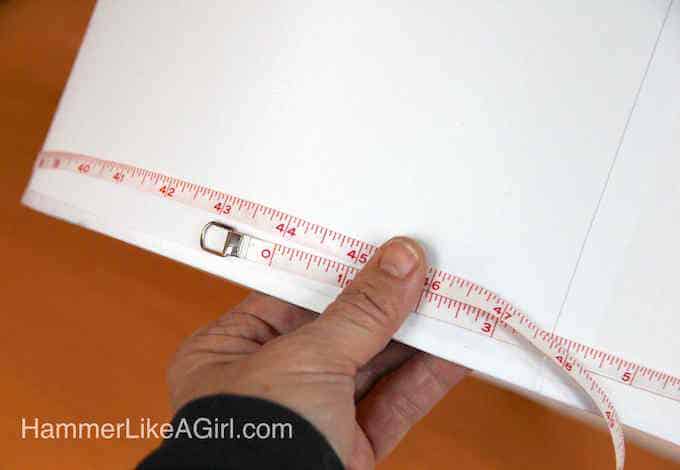
- Measure the circumference and height of the lampshade using the tape measure.
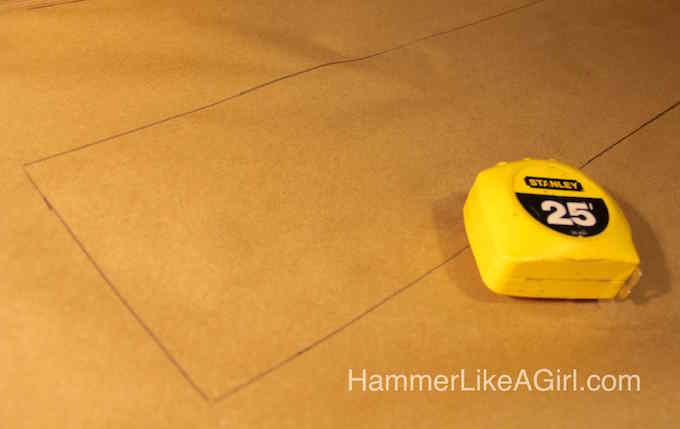
- Mark the dimensions out on a large piece of paper. This helps you decide how many pieces you need, how you'll organize them, and the pattern you want to make.
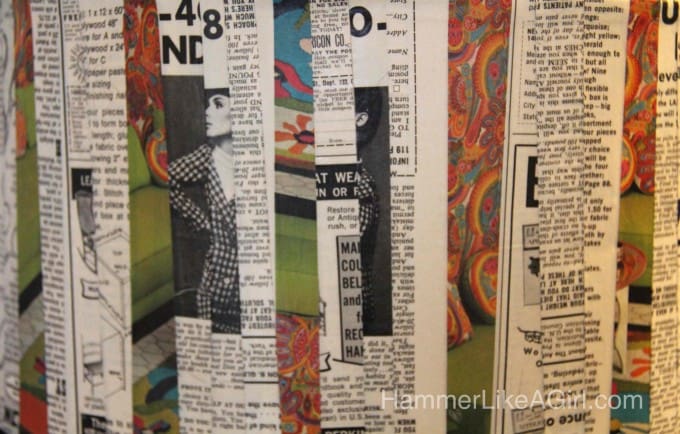
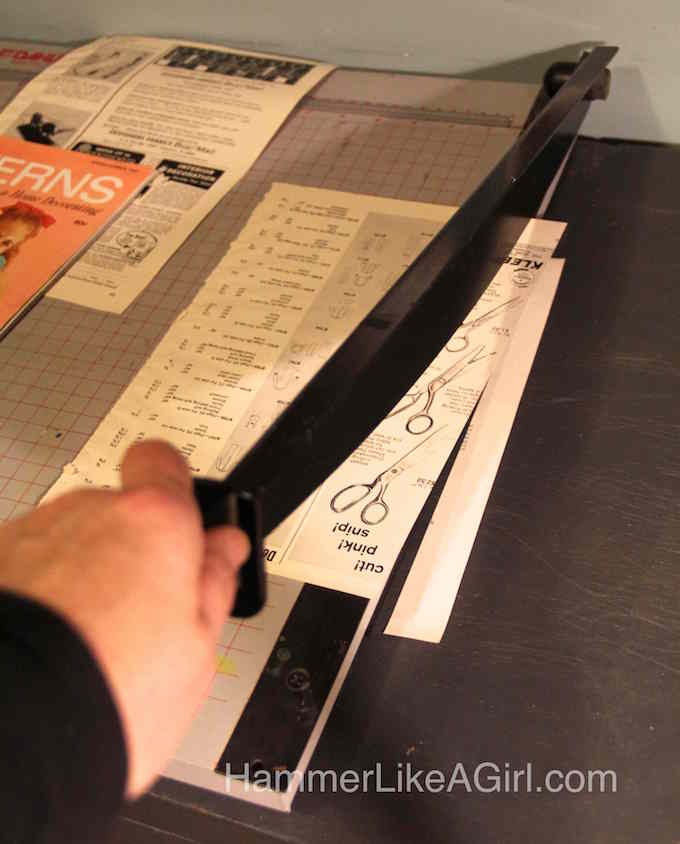
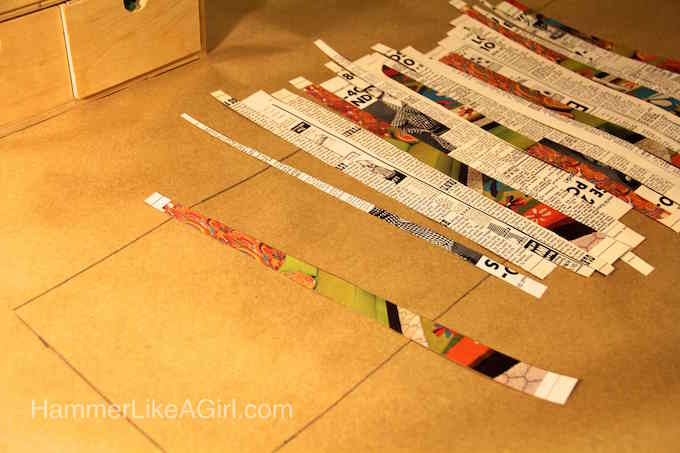
- Select interesting pages/patterns, remove from magazine by slicing along binding with an X-Acto knife. With a paper cutter, cut irregular strips of magazine pages varying from 1/2" to 1" wide.
- Place the strips onto the template and start laying out the design. We alternated black and white with color.
- Once the pattern is laid out, clamp the lampshade to something to hold it while you're working.
- Working with one strip at a time, apply medium to the shade and the back of the strip. Smooth down. Let the tops and bottoms of the strips hang free.
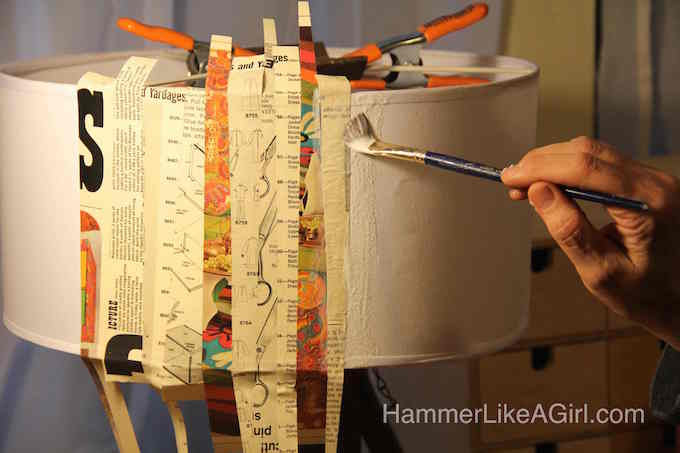
- Work your way around the shade, slightly overlapping the strips. When you have finished, let dry for several hours.
- Go around the top and bottom of the lampshade, marking (with a pencil) where the strips should end so you can fold them over.
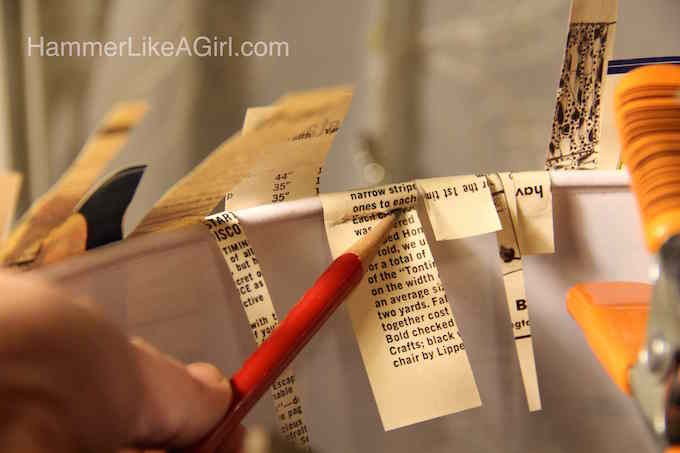
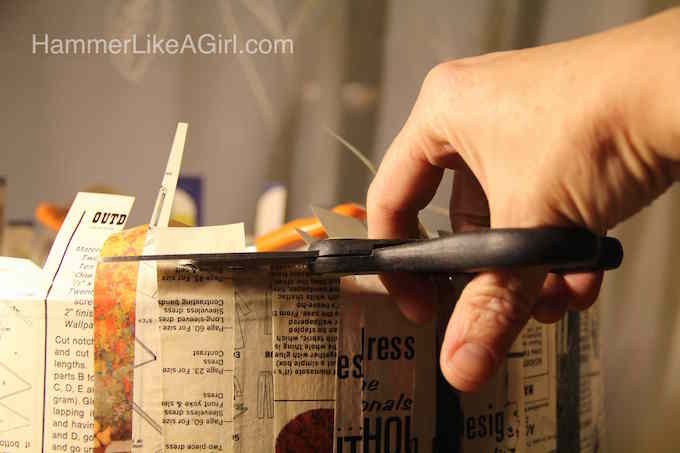
- Trim along the pencil marks with scissors. Repeat on bottom edge.
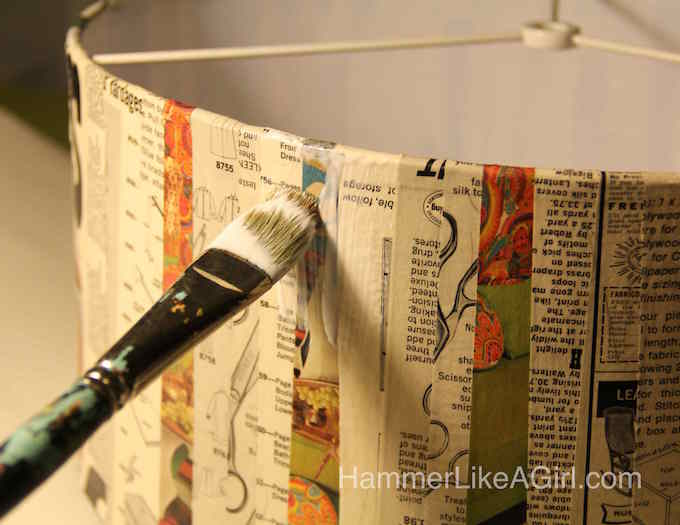
- Working in sections of about 5", apply Mod Podge to the area where the paper will fold over. Fold the paper over with your fingers, pressing down as you go. Hold down if necessary, and apply more Mod Podge.

- Let dry for a couple hours, then coat the entire shade with Mod Podge to seal. Let dry completely before using.
Notes
For more vintage themed decoupage projects from Hammer Like a Girl, visit these posts:


I recently covered my bedside lamps with the same wallpaper as my feature wall. I cut the wallpaper to size first and soaked it in warm soapy water for 20 minutes. This meant I could peel off the top patterned layer of the paper so when it was glued to the shade the light still shines through.
I love your lampshade! The excellent instructions will be so helpful as I copycat your brilliant design!