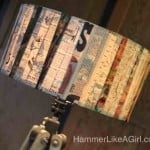
Decoupage a Lampshade
Learn how to decoupage a lampshade with vintage themed magazine pages! This is such an easy project with a cool effect.
Yield: 1 lampshade
Cost: $10
Equipment
- Scissors or paper cutter
- Tape measure
- Clamp(s)
Materials
- 1 Drum lampshade white
- Magazine pages or graphics and any other ephemera
- Mod Podge Matte
- Large paper for pattern
- Cardstock for pattern
Instructions
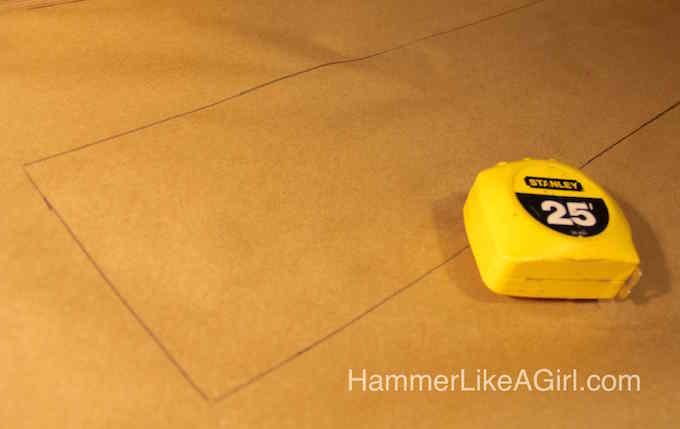
- Measure the circumference and height of the lampshade using the tape measure.

- Mark the dimensions out on a large piece of paper. This helps you decide how many pieces you need, how you'll organize them, and the pattern you want to make.
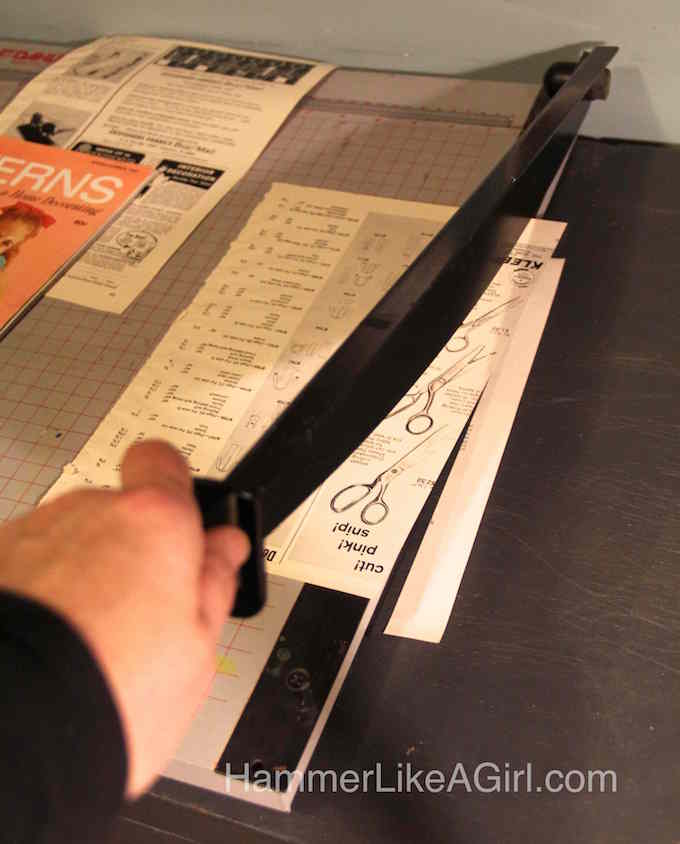
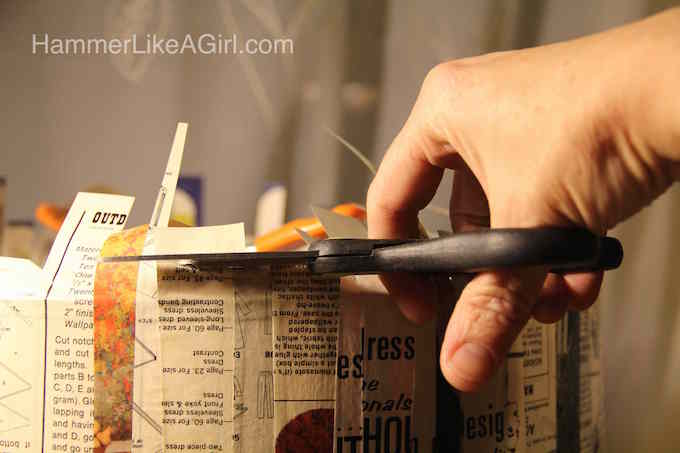
- Select interesting pages/patterns, remove from magazine by slicing along binding with an X-Acto knife. With a paper cutter, cut irregular strips of magazine pages varying from 1/2" to 1" wide.
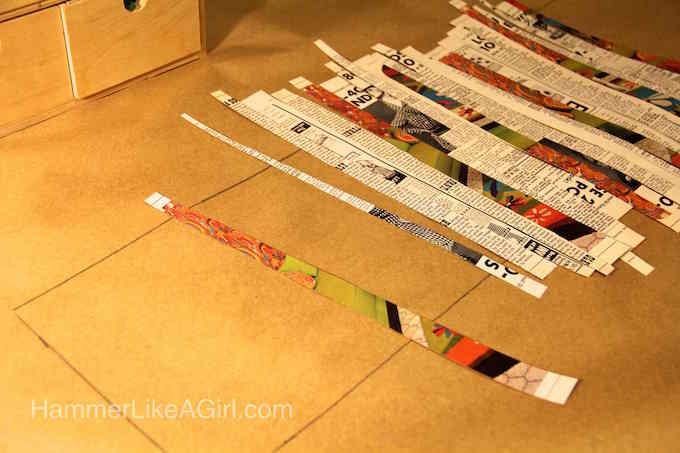
- Place the strips onto the template and start laying out the design. We alternated black and white with color.
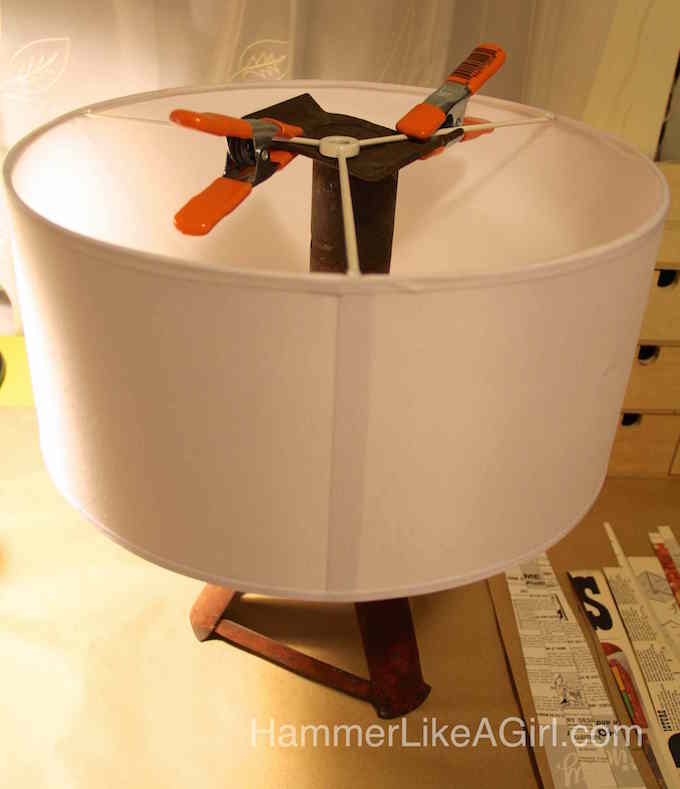
- Once the pattern is laid out, clamp the lampshade to something to hold it while you're working.
- Working with one strip at a time, apply medium to the shade and the back of the strip. Smooth down. Let the tops and bottoms of the strips hang free.
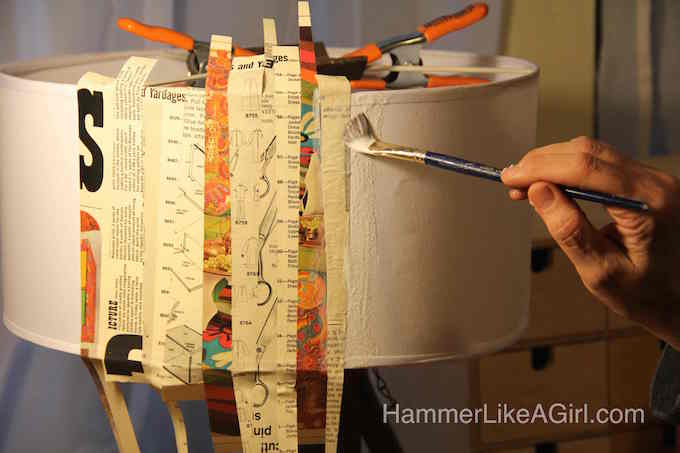
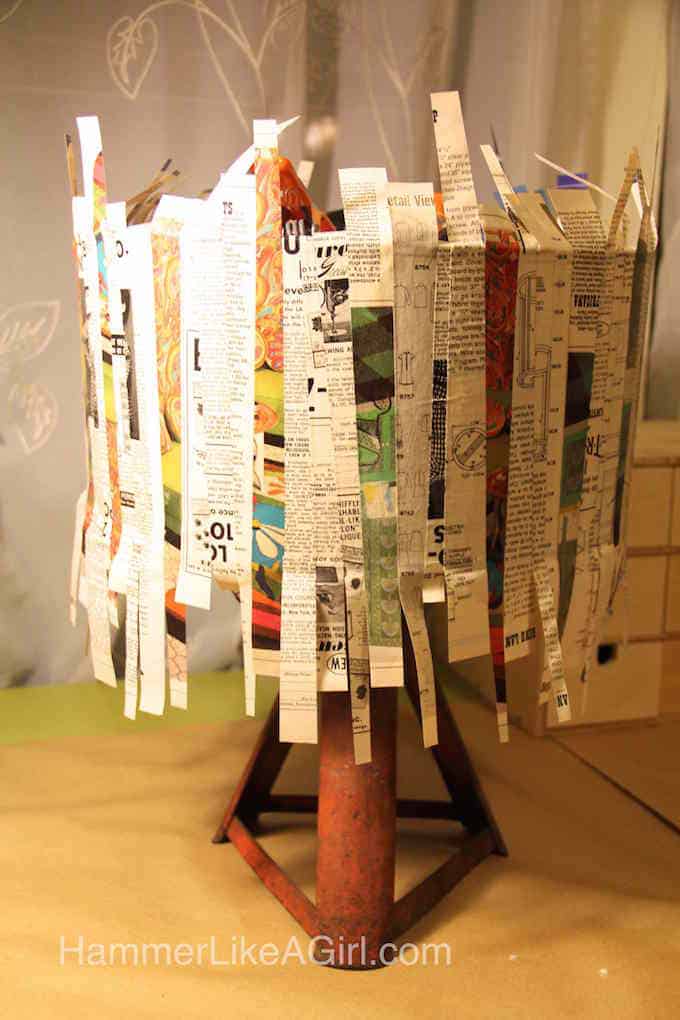
- Work your way around the shade, slightly overlapping the strips. When you have finished, let dry for several hours.
- Go around the top and bottom of the lampshade, marking (with a pencil) where the strips should end so you can fold them over.
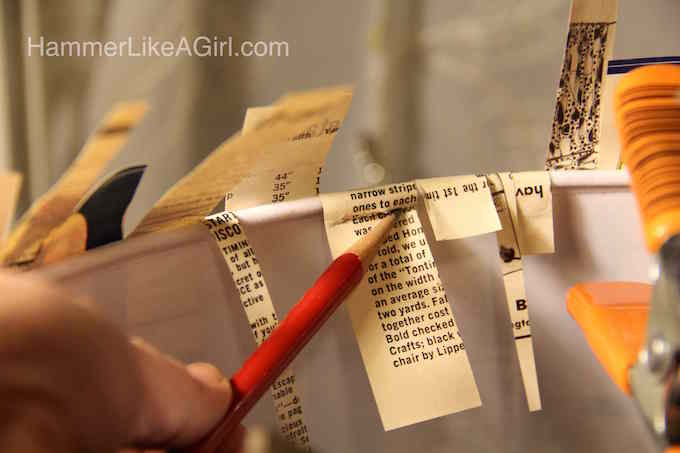
- Trim along the pencil marks with scissors. Repeat on bottom edge.
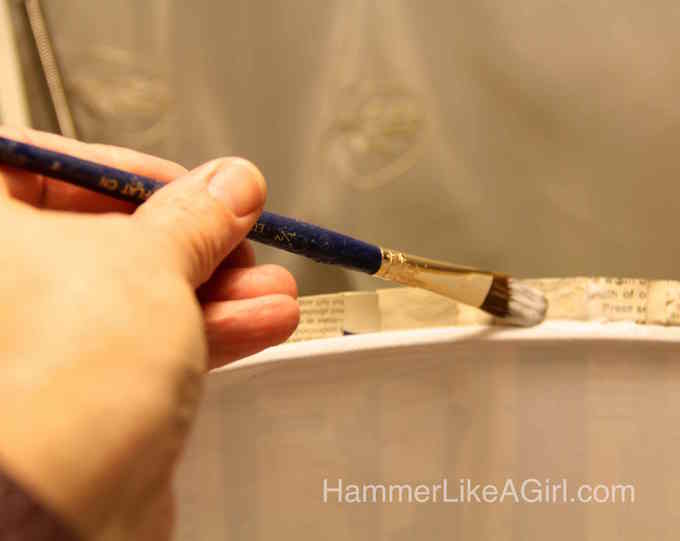
- Working in sections of about 5", apply Mod Podge to the area where the paper will fold over. Fold the paper over with your fingers, pressing down as you go. Hold down if necessary, and apply more Mod Podge.
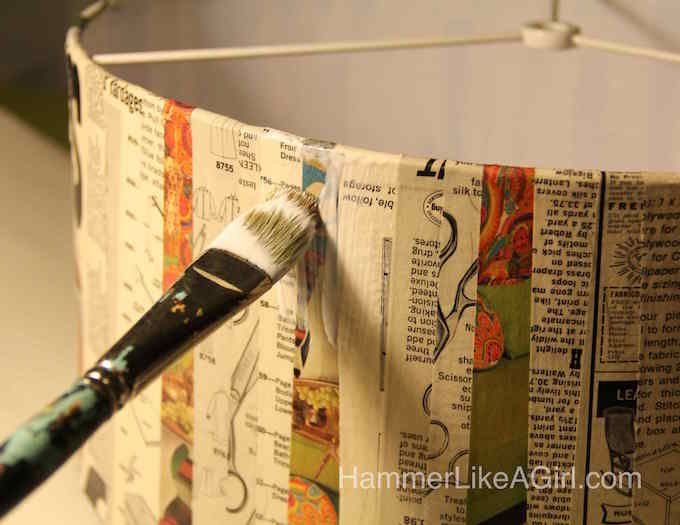
- Let dry for a couple hours, then coat the entire shade with Mod Podge to seal. Let dry completely before using.
Notes
Step 2 is optional: you can freehand it and simply Mod Podge paper directly to the lampshade instead of planning the design.
Step 4: We alternated three black and white text strips with one color strip so the design would have obvious stripes. We kept the color palette limited to reds, oranges, and greens so it wouldn't get too busy.