Make a stunning Mod Podge vase with tissue paper! This easy DIY project is perfect for creating custom home decor that’s colorful and unique.
Skills Required: Advanced Beginner. I recommend having some experience with Mod Podge to complete this project, since tissue paper tends to wrinkle.

Are you a fan of flowers? If you are a chick like me, then the answer is likely “yes.” I can be picky about my flowers, and this might be funny, but I really like white flowers. I find white cut tulips to be particularly beautiful.
They are smooth and simple and look great in decorative vases, which I have several of (hello, decoupage addict). I’m going to show you how to decorate a vase with tissue paper and make it pretty to hold flowers!
I recently decorated a tall glass vase with tissue paper, and I think it’s lovely for displaying white tulips. I love a vase in the kitchen to brighten my mood in the morning, or even decorating a vase just like this one and giving full of tulips as a gift.
The tissue paper makes it a perfect budget craft, and I love the ombre pattern. If you want to Mod Podge on glass, this is a perfect craft idea to get you started. Here’s how it’s made.
Gather These Supplies
- Tall glass vase – Dollar Tree
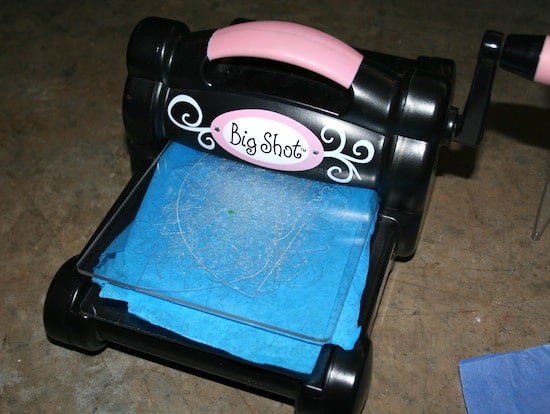
- Sizzix Big Shot (if you don’t have one, you can use an online template and cut out the tissue paper with scissors)
- Sizzix die – Plain Leaves
- Mod Podge Satin
- Tissue paper in at least 3 colors
- Paint brush
I’m so thrilled with the finished project. Now you know how to decorate a vase with tissue paper! My method keeps the tissue from wrinkling, because you’re using smaller pieces. Just like my wine bottles!
Get the printable how to below:
Tissue Paper Vase
Equipment
- Die cutter OR a pair of scissors and design to cut out
Materials
- 1 Glass vase
- Mod Podge Satin
- Tissue paper
Instructions
- Use a cutter and die to trim the shapes from the tissue paper. If you don't have a Big Shot or similar, you can simply use a paper template and cut the tissue with scissors.
- Apply Mod Podge to the glass and gently smooth one tissue paper piece down. You can use your finger or the brush.
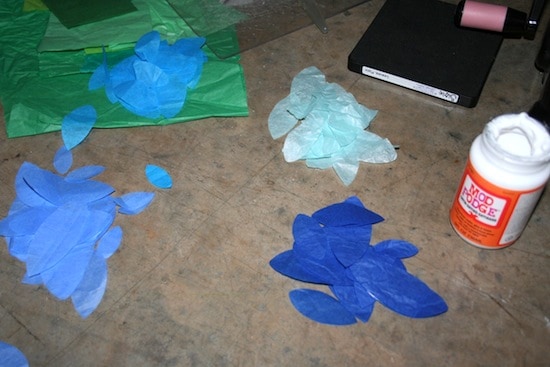
- Paint Mod Podge delicately over the top. Just be careful not to brush too hard so that you don't tear the tissue paper. Repeat with the remaining pieces until you reach the top. Let dry.
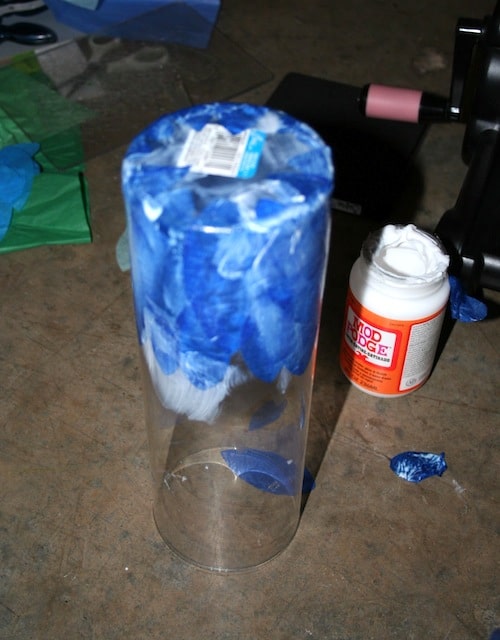
- Use the X-Acto to trim the any excess dried tissue paper that overlaps the edge. Then seal the entire vase again with a coat of Mod Podge. Let dry before displaying.

Notes
Did you enjoy this craft? I’d love for you to check out these other ideas!



Now I can’t think of anything other than “vase”, because I love how this one turned out! Funny story- my husband once ordered tulips for me, because he knew I love them. We were both confused when the florist, out of tulips, substituted an Easter Lilly. And defended it as an absolutely appropriate substitution. (?)
When I first started dating the Monkey Scientist, he kept telling me he had tulips in his front yard and I had no idea what he was talking about. One day he finally pointed them out to me and I had to politely explain that those were daffodils. That year for my birthday he sent me tulips at work with a note that said he picked them from his front yard. It’s always been our flower of choice since!
I’d love to create a canvas with tulips on it for our room since it’s our special flower. I would probably paint it and then mod podge printed flowers onto it.
i’d make a personalized vase with tulips in it for my mom for mothers day!
i just got surprise white tulips for my birthday last week from a gf, so this is the perfect tutorial! in my head i am cataloging all my vases – especially the ugly ones – and coming up with ways to decorate them all….i think i’ll start with the leftover tissue paper that came wrapped around my white tulips
Wow this turned out so beautifully! I love blue ombre and I love the shape of tissue paper you used. I’ll have to give this project a try!
I love tulips, especially knowing the penny trick to have them stand up straight! I love bases but my new hot to trot item are glass pitchers! They are so universal and gorgeous!
Looking forward to starting my creation soon!!
Wow! I think I want to make a vase like this. Beautiful!
I love this! I pinned it to the group wedding board I have with my daughter because I think she’s going to love this idea for her wedding!
I really like this! BTW if you don’t have a fancy “doohickie” you could cut them out by hand. It would take longer though. I think I would do something similar only using pink colors.
Anne
quite honestly I am not crafty at all…I really like your idea-I would use red paper thanks
this is so cool!!!
I wish to do a bottle with lights in what do you suggest for base as then want to put napkin print on it
I would use chalk paint!
Love this idea for a project I have ahead…. is it translucent enough for fairy lights to shine through? Thanks so much