
Create your own hot glue jewelry using silicone molds and glue sticks! This necklace and ring are easy to paint and customize.
Skills Required: None. You’ll be adding hot glue to molds, then painting it and attaching jewelry pieces. You don’t need any crafting experience to do this project.
By now I’m hoping that you’ve heard of the Mod Melts and Molds program by my friends Cathie and Steve, but if you haven’t, let me introduce you! You can make all sorts of things with these products, like decoupage jewelry that you see above.
Basically the gist is that you use Mod Melts sticks in your hot glue gun and melt them into Mod Molds – creating your own embellishments. Cool, right?
These embellishments can be painted, decoupaged, crackled, glittered . . . pretty much anything you want to do with them.
It’s pretty amazing. You can reuse the molds over and over, too. I want to show you how I used the Mold Melts and Molds to make a necklace and ring. Read on to learn how I did it!
Gather These Supplies
- Dimensional Magic
- Pendant bezel blank and a ring blank
- Metal charms
- Floral silicone molds
- Glue sticks
- Craft paint – Citrus Green, Parisian Pink
- FolkArt Extreme Glitter – Hologram
- Mod Podge Gloss
- Scrapbook paper – patterns of your choice
- Jewelry glue
- Jewelry findings – necklace chain and one jump ring
- Rhinestones – two small
- Tracing paper
- Pencil
- Scissors
- Hot glue gun
- Paintbrush
- Jewelry tools
Tips and Thoughts for This Project
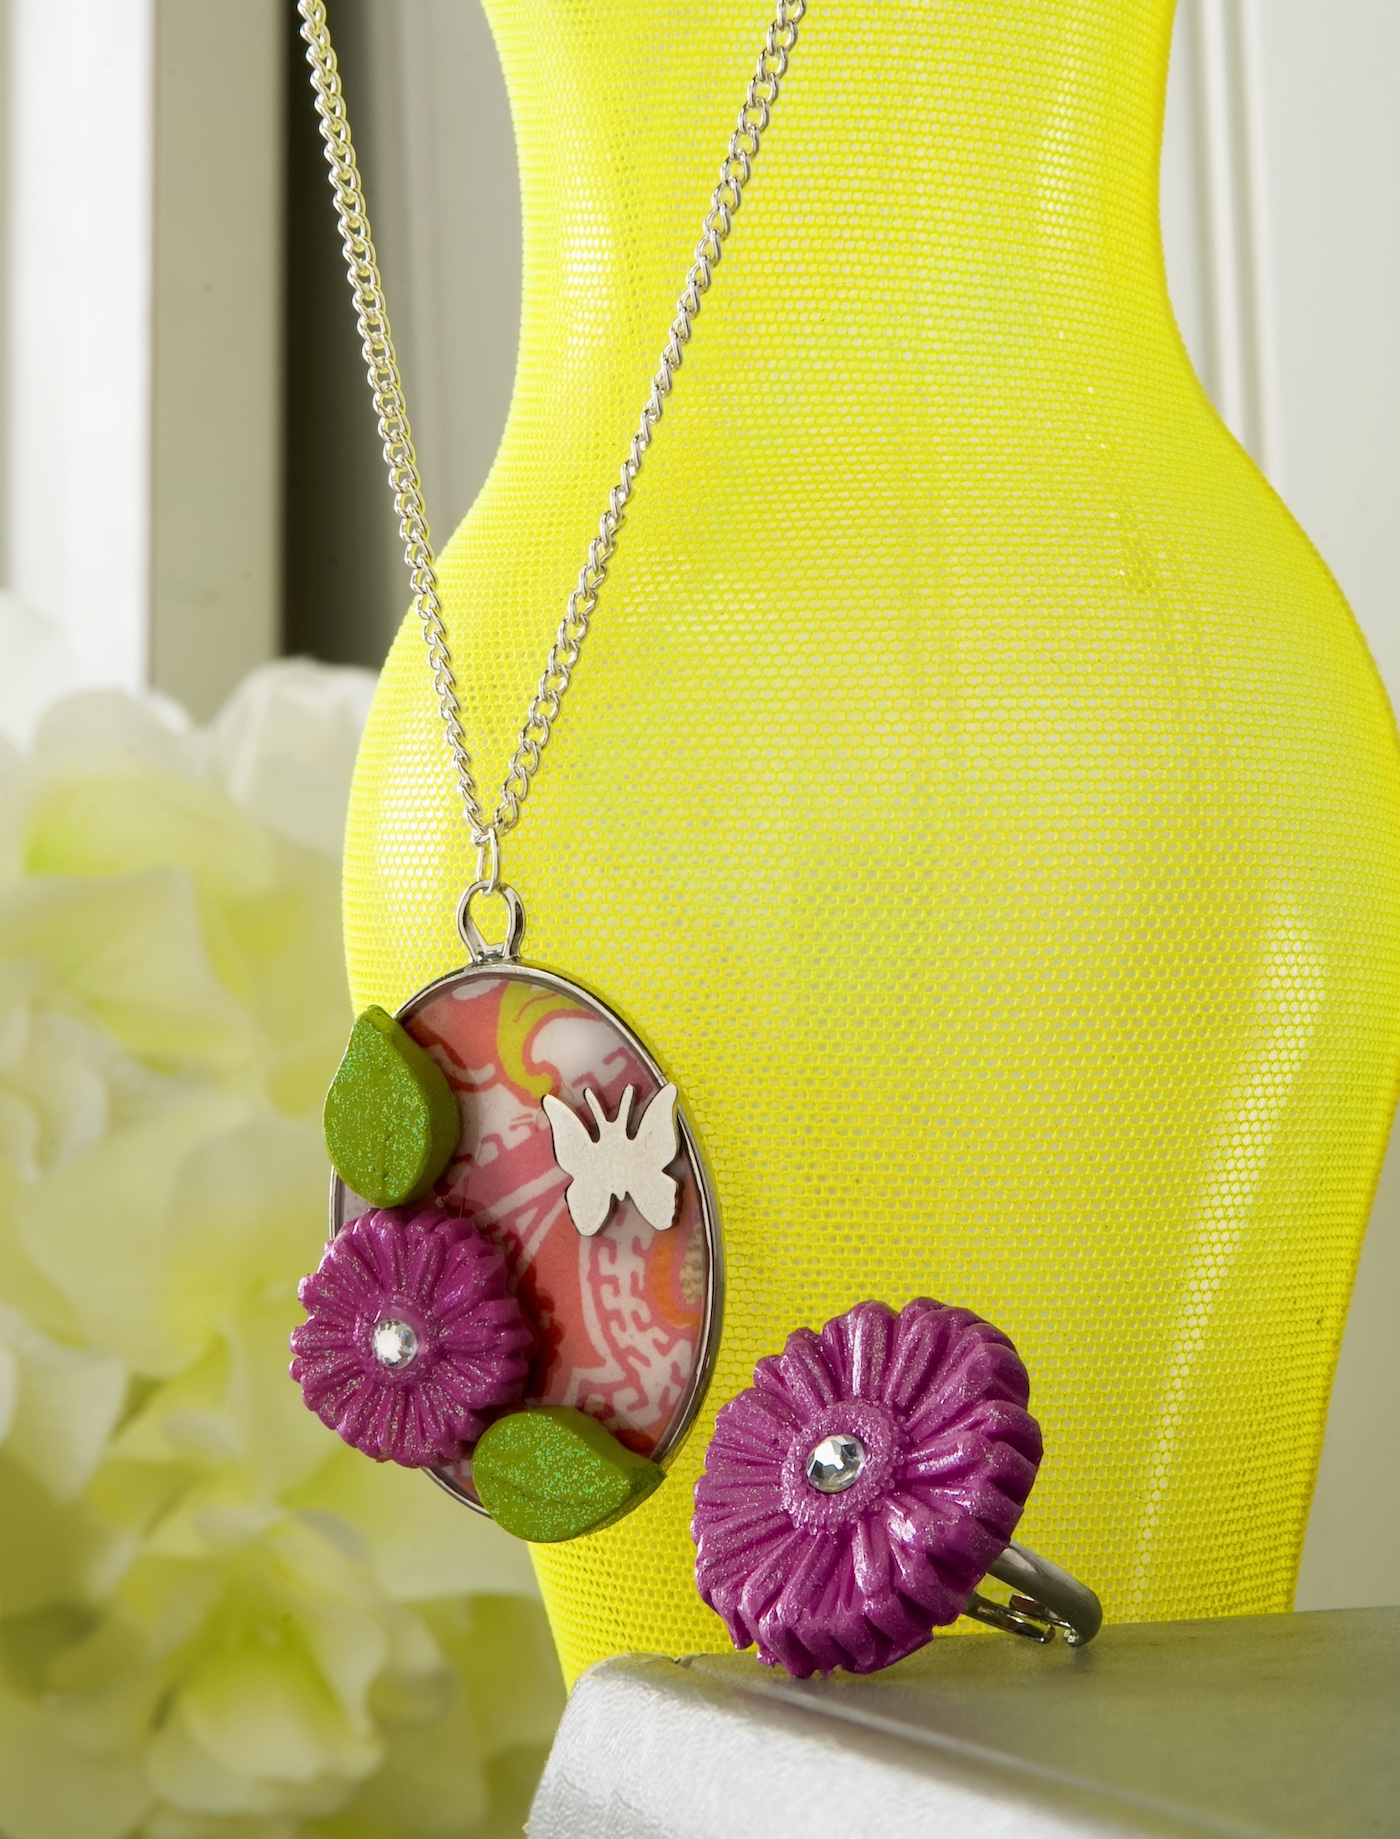
It’s fun to choose the shapes you would like to use from your silicone molds. I chose a larger flower, a smaller flower and two leaves.
The Dimensional Magic gives a nice clear dome effect over the scrapbook paper on the bezel style pendant. You can also use a flat pendant and omit the Dimensional Magic.
You can use Sparkle Mod Podge instead of Extreme Glitter.
I LOVE how my jewelry turned out. Even I’m surprised how quickly I made these projects. Amazing, yay!
I hope you enjoy your DIY necklace and ring. Personalize using any scrapbook papers or paint colors of your choice – that is the fun part.

Hot Glue Jewelry
Equipment
- Jewelry pliers
Materials
- Mod Podge Dimensional Magic
- Pendant bezel blank and a ring blank
- Metal charms
- Floral silicone molds
- Glue sticks
- Craft paint Citrus Green, Parisian Pink
- FolkArt Extreme Glitter Hologram
- Mod Podge Gloss
- Scrapbook paper
- Jewelry glue
- Jewelry findings necklace chain and one jump ring
- 2 small Rhinestones
- Tracing paper
Instructions
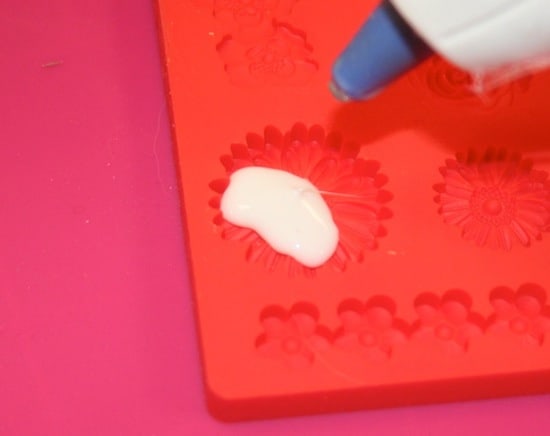
- Using a warmed up hot glue gun, spread the hot glue sticks into the silicone shapes of your choice (read the package if you need to). Fill the entire mold and let cool.

- Pop the embellishment out of the mold and trim with scissors.
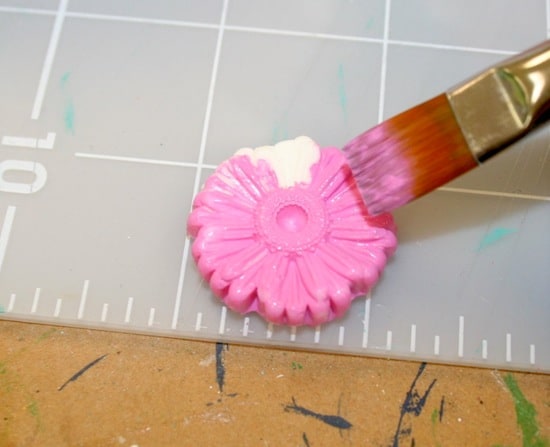
- Paint the shapes using the FolkArt colors of your choice. Once they are dry, add Extreme Glitter to the top. Let dry.

- If desired, glue rhinestones in the center of both flowers with the jewel glue.
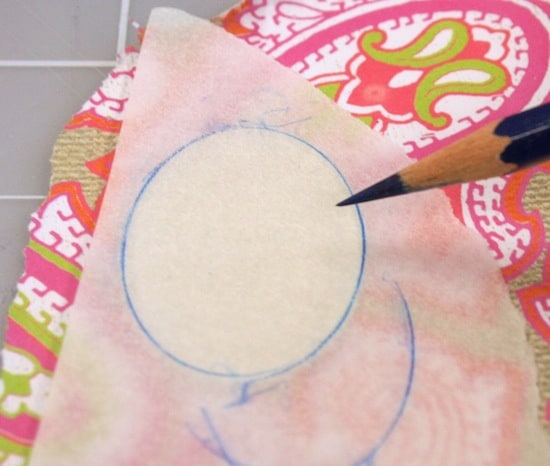
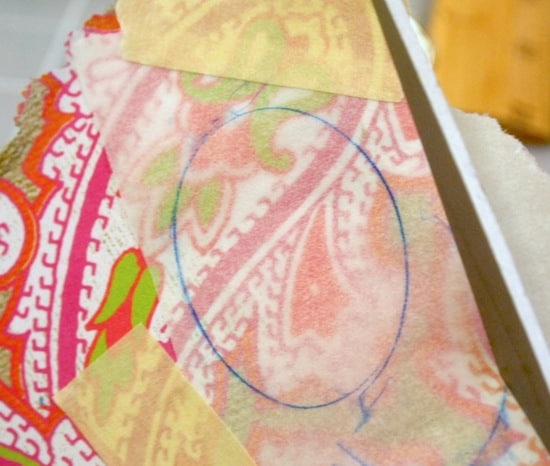
- To decorate your pendant, first trace your blank with tracing paper and a pencil. You can even use a piece of computer paper if you want, but the tracing paper is a little nicer because it's thinner.

- Use the tracing paper shape you created to cut the scrapbook paper to fit inside the pendant. If it doesn’t fit, trim until it does.
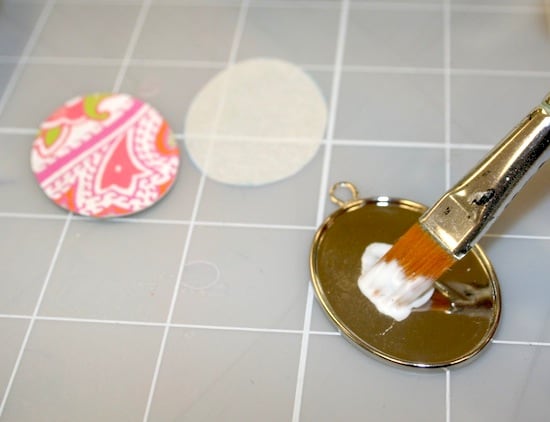
- Decoupage your scrapbook paper on the inside of the pendant. Let dry. Paint a top coat of Mod Podge onto the paper and let dry again.

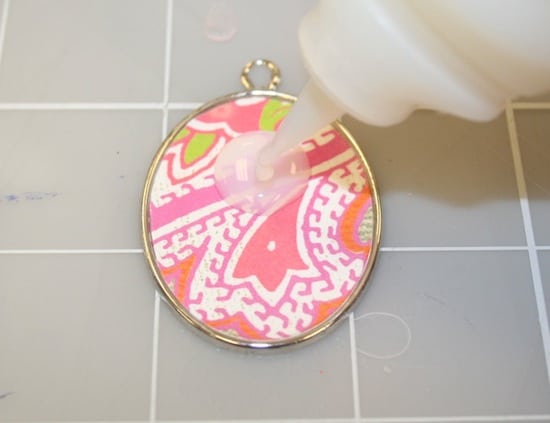
- Add Dimensional Magic to your pendant. Place metal charms in the wet Dimensional Magic and let dry for 8 hours (or until completely clear and solid).

- Glue your smaller flower to the lower left hand corner of the pendant with jewelry glue – add a leaf on either side, too. Glue your larger flower to the ring blank.

- Use jewelry pliers to attach the pendant to the chain, using the jump ring.

If you love this project, let me know in the comments! I’ve also got some other related crafts you might be interested in with hot glue:


I loooove this DIY and will for sure be trying out soon! Been getting into molds to make jewelry currently. 🙂