Spice up those boring kitchen cabinets with DIY kitchen cabinet hardware that you can make with Mod Podge! You can change them out whenever you like.
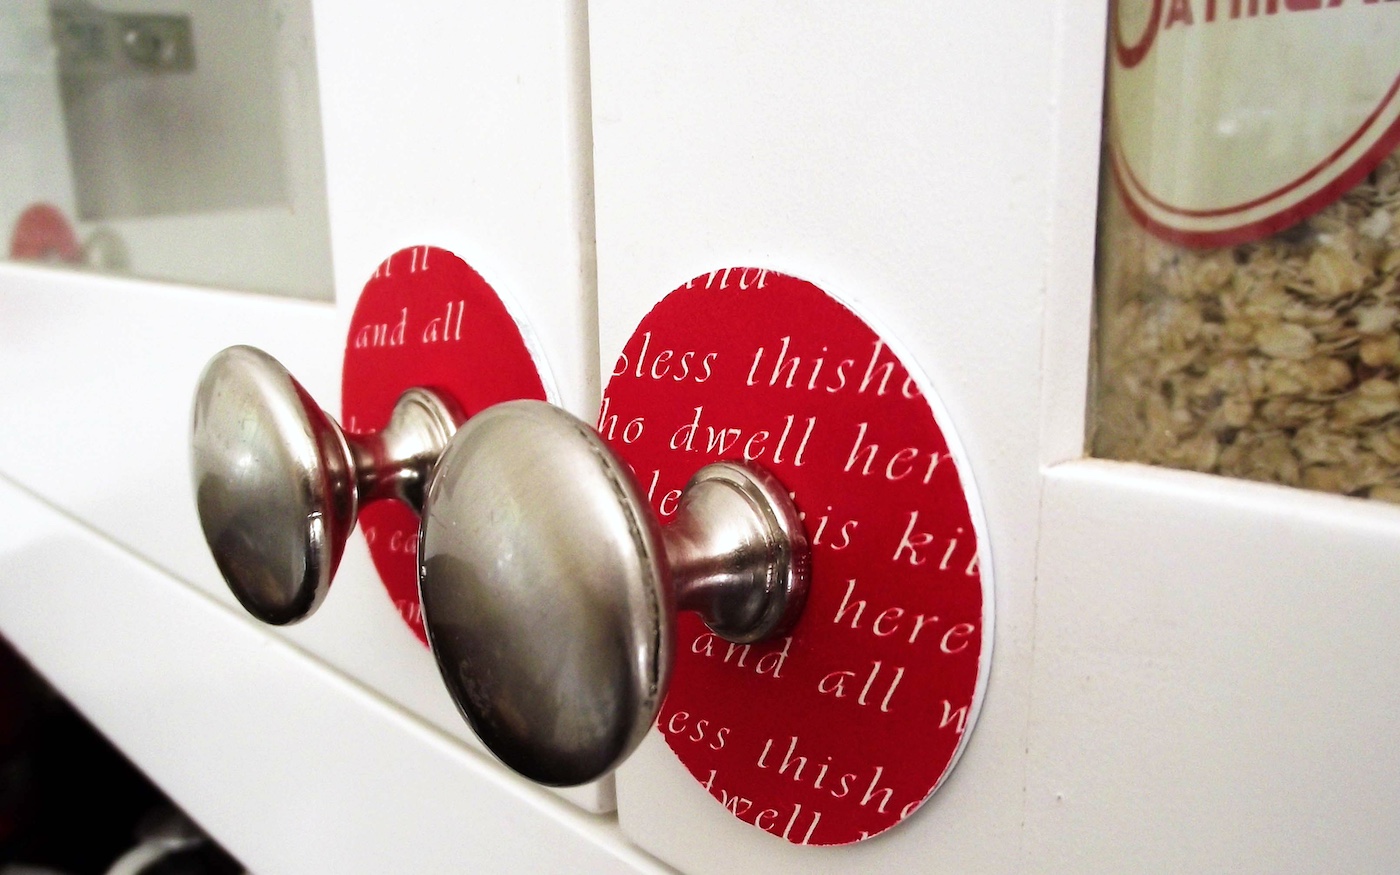
Man Podger David has come up with a really interesting idea for DIY kitchen cabinet hardware. It’s an affordable solution if you are forced to go with the “standard issue” handles that you can get in a bin at Lowe’s or Home Depot.
It just goes to show that just because you are on a budget doesn’t mean your decor has to look like it.
Take a peek at David’s project, and then visit all the rest of the David’s Mod Podge projects.
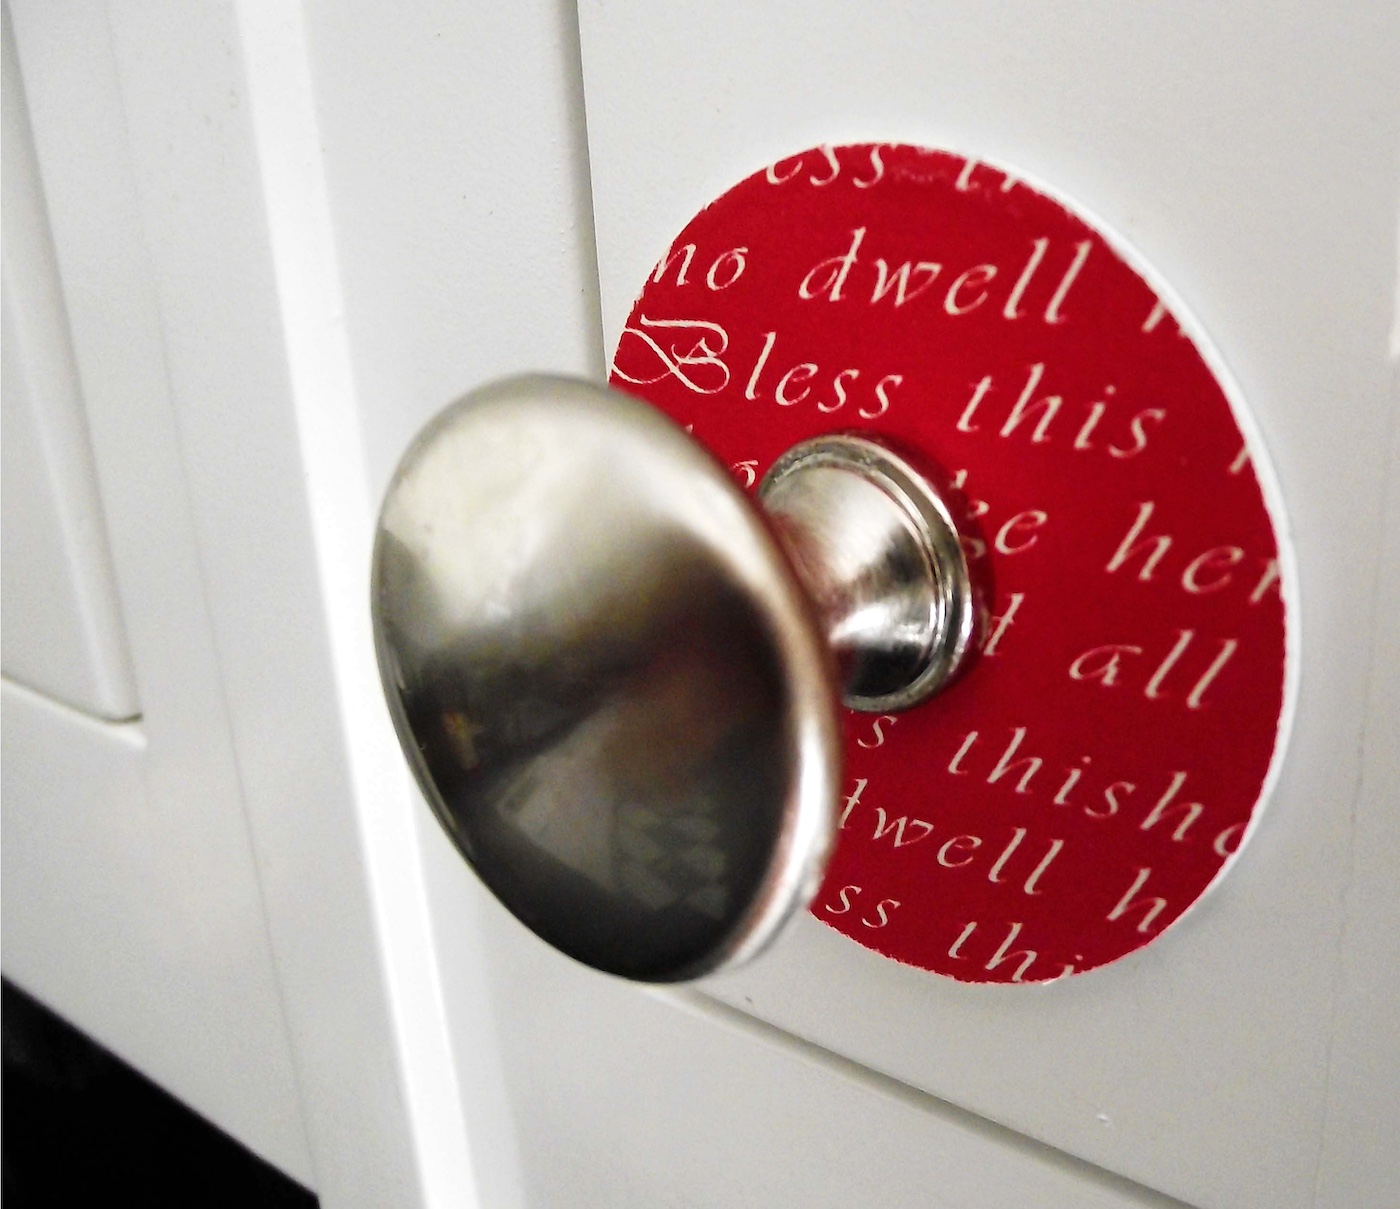
I recently renovated my fixer-upper kitchen. I’m very happy with it, but in an attempt to save a little money, I kinda wussed out on the handles for the cabinets and went with pretty basic, affordable knobs.
They look fine but I’ve wanted to “kick it up a notch” (as Emeril would say), as well as keep it affordable.
DIY Cabinet Handles
I was wandering through the hardware store when I saw these really big washers that cost $.39. My mind started percolating. That’s how this idea was born!
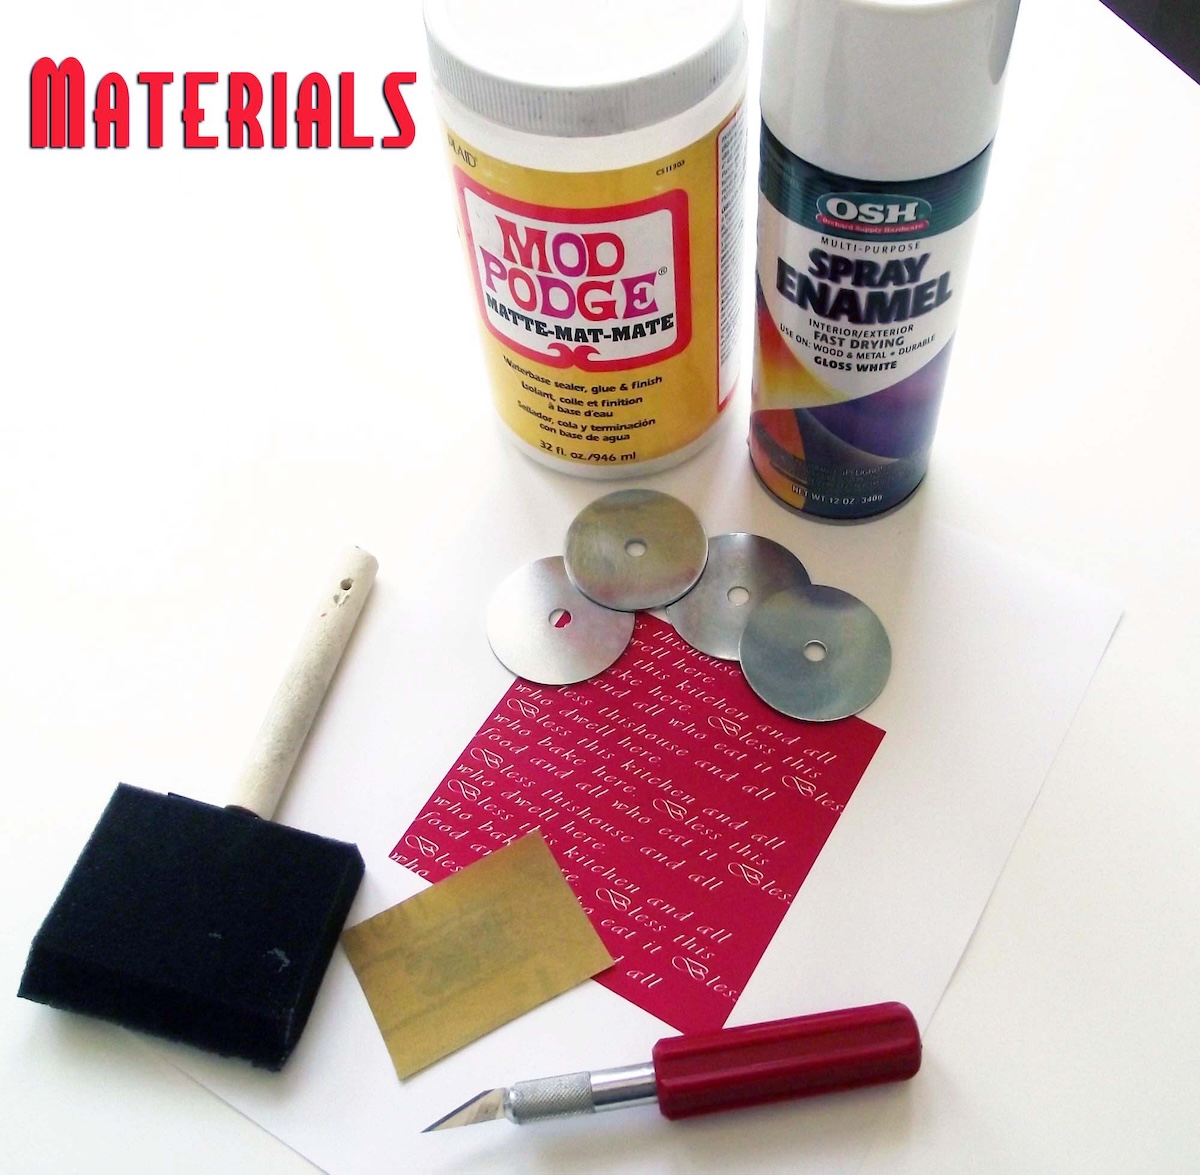
Gather These Supplies
- Washers – size is up to you (they come in a bewildering number of sizes) – just make sure the hole in the middle will fit the screw for your knob handle
- Paper – I didn’t have any red paper that was the right color, so I made my own based on a kitchen blessing/poem I found; but this is the perfect place to use up those scraps of paper
- Mod Podge Matte – Gloss or Satin are fine too
- Spray Paint
- Sandpaper – 220 grit
- X-Acto knife
Sand the Washers
Lightly sand the edges and one side of the washers. This will help the paint stick to the edges and give a little bit more traction for the Mod Podge later on.

Spray Paint the Washers
Spray paint the edges of the washers. I did this so the edges would blend in with the white cabinets, instead of showing the metal. Allow to dry.

Trace Washers Onto Paper
Lay your washers out on the back of the paper and draw cutting lines that give yourself about a half an inch extra all the way around.

Attach the Paper to Washers with Mod Podge
Using your foam brush and Mod Podge attach the paper to the side of the washer that you scuffed up in Step 1. Use your fingers or a roller to squeeze out any air bubbles or excess Mod Podge and allow to dry.

Seal the Fronts (Paper) with Mod Podge
Flip the washers over and give them a nice seal coat of Mod Podge. This will both stiffen the paper making it easier to cut around the washers.
It will also make the finished product stand up well to cleaning (cause we all know the area around a handle of any kind gets dirty). Allow this top coat to dry thoroughly.
Step 6
Using a very sharp craft knife, carefully cut around the edges of washers. Make sure your knife is really sharp otherwise the edge can get a bit ragged. Then flip the washer over (image side up) and cut around the edge of the hole in the middle.

Attach to the Cabinet
I used this method in the kitchen, but I’m also thinking this would be a good way to dress up any piece of furniture. This technique would be particularly nice for inexpensive finds (I’m lookin’ at you, IKEA dresser!).
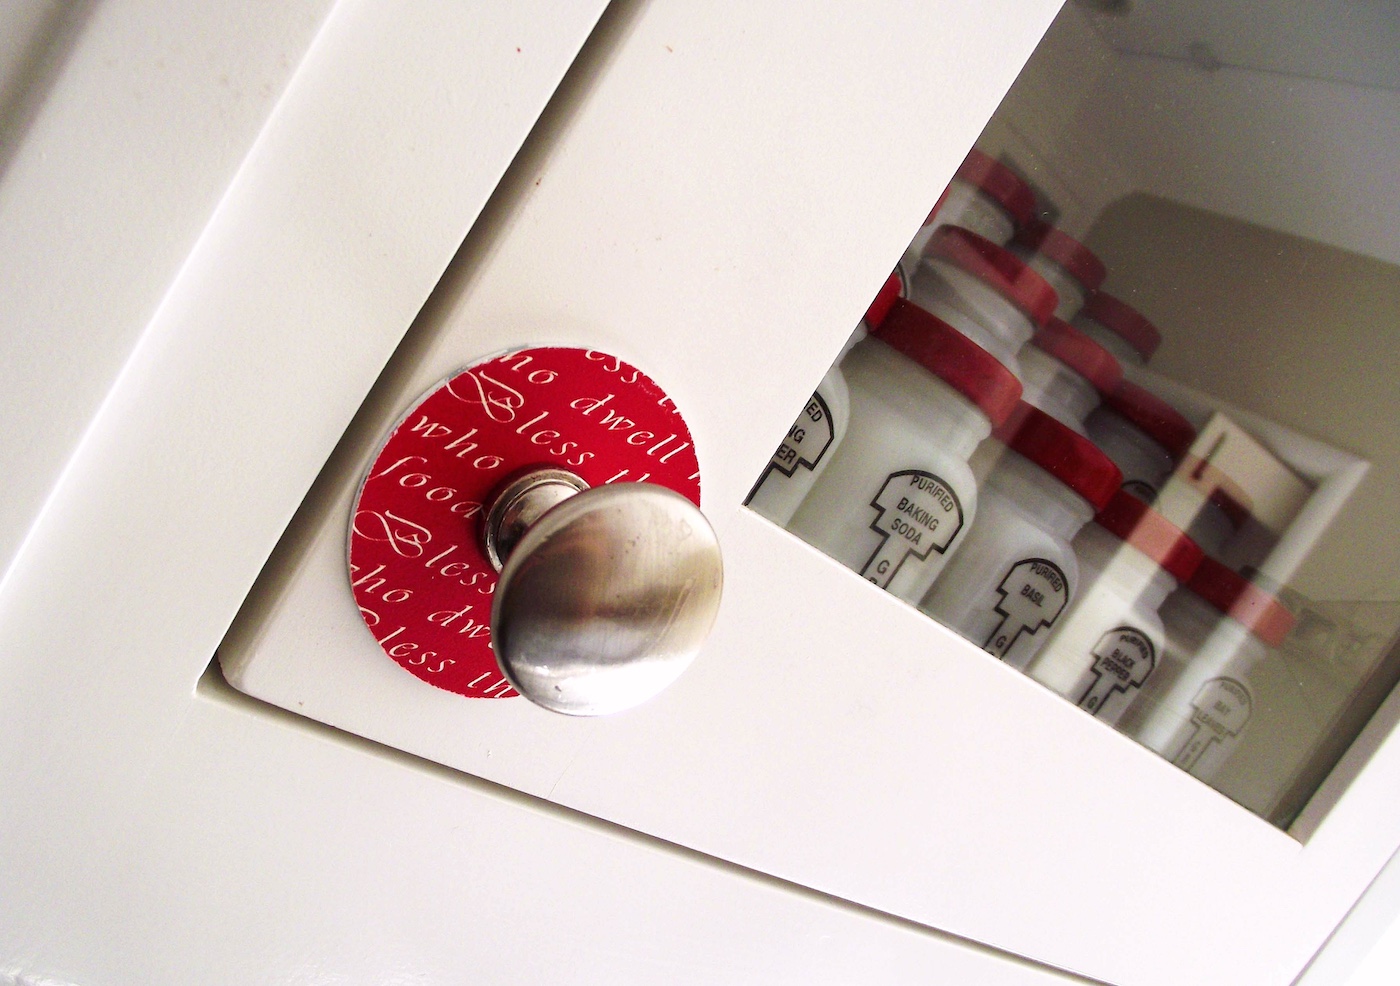
I’d love to know what you think of this DIY kitchen cabinet hardware in the comments! Also please take a moment to visit the following projects:



I’d like to see the whole kitchen not just one knob
Its wonderful idea, and not a tough job to do 🙂
so many ideas are sparking in mind right now!!
Thanks for this detailed post 🙂
Love ~
thx 4 the great idea!!!
greetz from germany
That looks really cool. More than anything, though, I’m really fascinated by the little bottles in your cabinet. What is in them??? 😉
I’m going to have to agree with Helana…I want to see all those fancy containers! I especially am in love with all the little ones! The knobs are great too.
Wow, your site is AWESOME! Thanks for stopping by my blog this week to leave a kind comment! What an inspiring blog you have!!!
OMG! I love this…I remodeled my kitchen last year and didn’t want the same old knobs……it took me longer to find knobs than the actual remodeling. Had I seen this I wouldn’t have gone with much cheaper knobs and done this to them. I’m definitely going to try this on some other piece of furniture. Thanks for sharing!!
Liz
Hi – this is David,
V. I’m sorry – my camera wasn’t up to the challenge and my shots of the whole bank of cabinets just looked like red blobs. I’ll work on my photography skills.
Helena and Jamie, as far as the canisters go – they come from Ikea and I just spiffed them up with some paint and labels I designed.
You can see the before and after at my blog and download the templates for the labels if you’re interested:
https://cheltenhamroad.wpcomstaging.com/2011/07/01/kitchen-cannisters/
https://cheltenhamroad.wpcomstaging.com/2011/07/07/free-kitchen-label-download/
Best,
David
Sorry for the double post.
The smaller jars are vintage Griffith Spice Jars from the 30s and 40s – you can find them at flea markets and antique shops. I just painted all the lids to match.
David
David – for some reason I can’t comment on your blog, but I really like what you did with the kitchen and especially the canisters! It is so neat and organized. I always get aggravated with the different sized boxes and bags and how they never fit. Great solution 🙂
What a great idea!
Brilliant. I particularly like the fact that when I decide to redo the kitchen (I repaper/repaint periodically when the mood strikes) I could put up a new set of washers and have a whole new look without major renovating. Thanks for combing the aisles of the hardware store scouting out these treasures.
We’re in the process of getting some hand-me-down kitchen cabinets from my in-laws (long story), so I’m delighted by such an easy way to add a little of my own personality to what is 90% my mother-in-law’s taste. Yay!
Wonderful insight & idea! Thanks!
That’s a great idea!!! I’m going to put that in mind and apply it when we update our kitchen very soon!
That is a sweeet idea! I love the look and little touch it adds.