Are you wondering how to decoupage napkins on canvas? Learn how to do it with this emoji canvas project. Such a fun idea and very easy!
Skills Required: Intermediate. Napkins are thin and challenging to work with. I recommend having some experience with Mod Podge before you try this project.
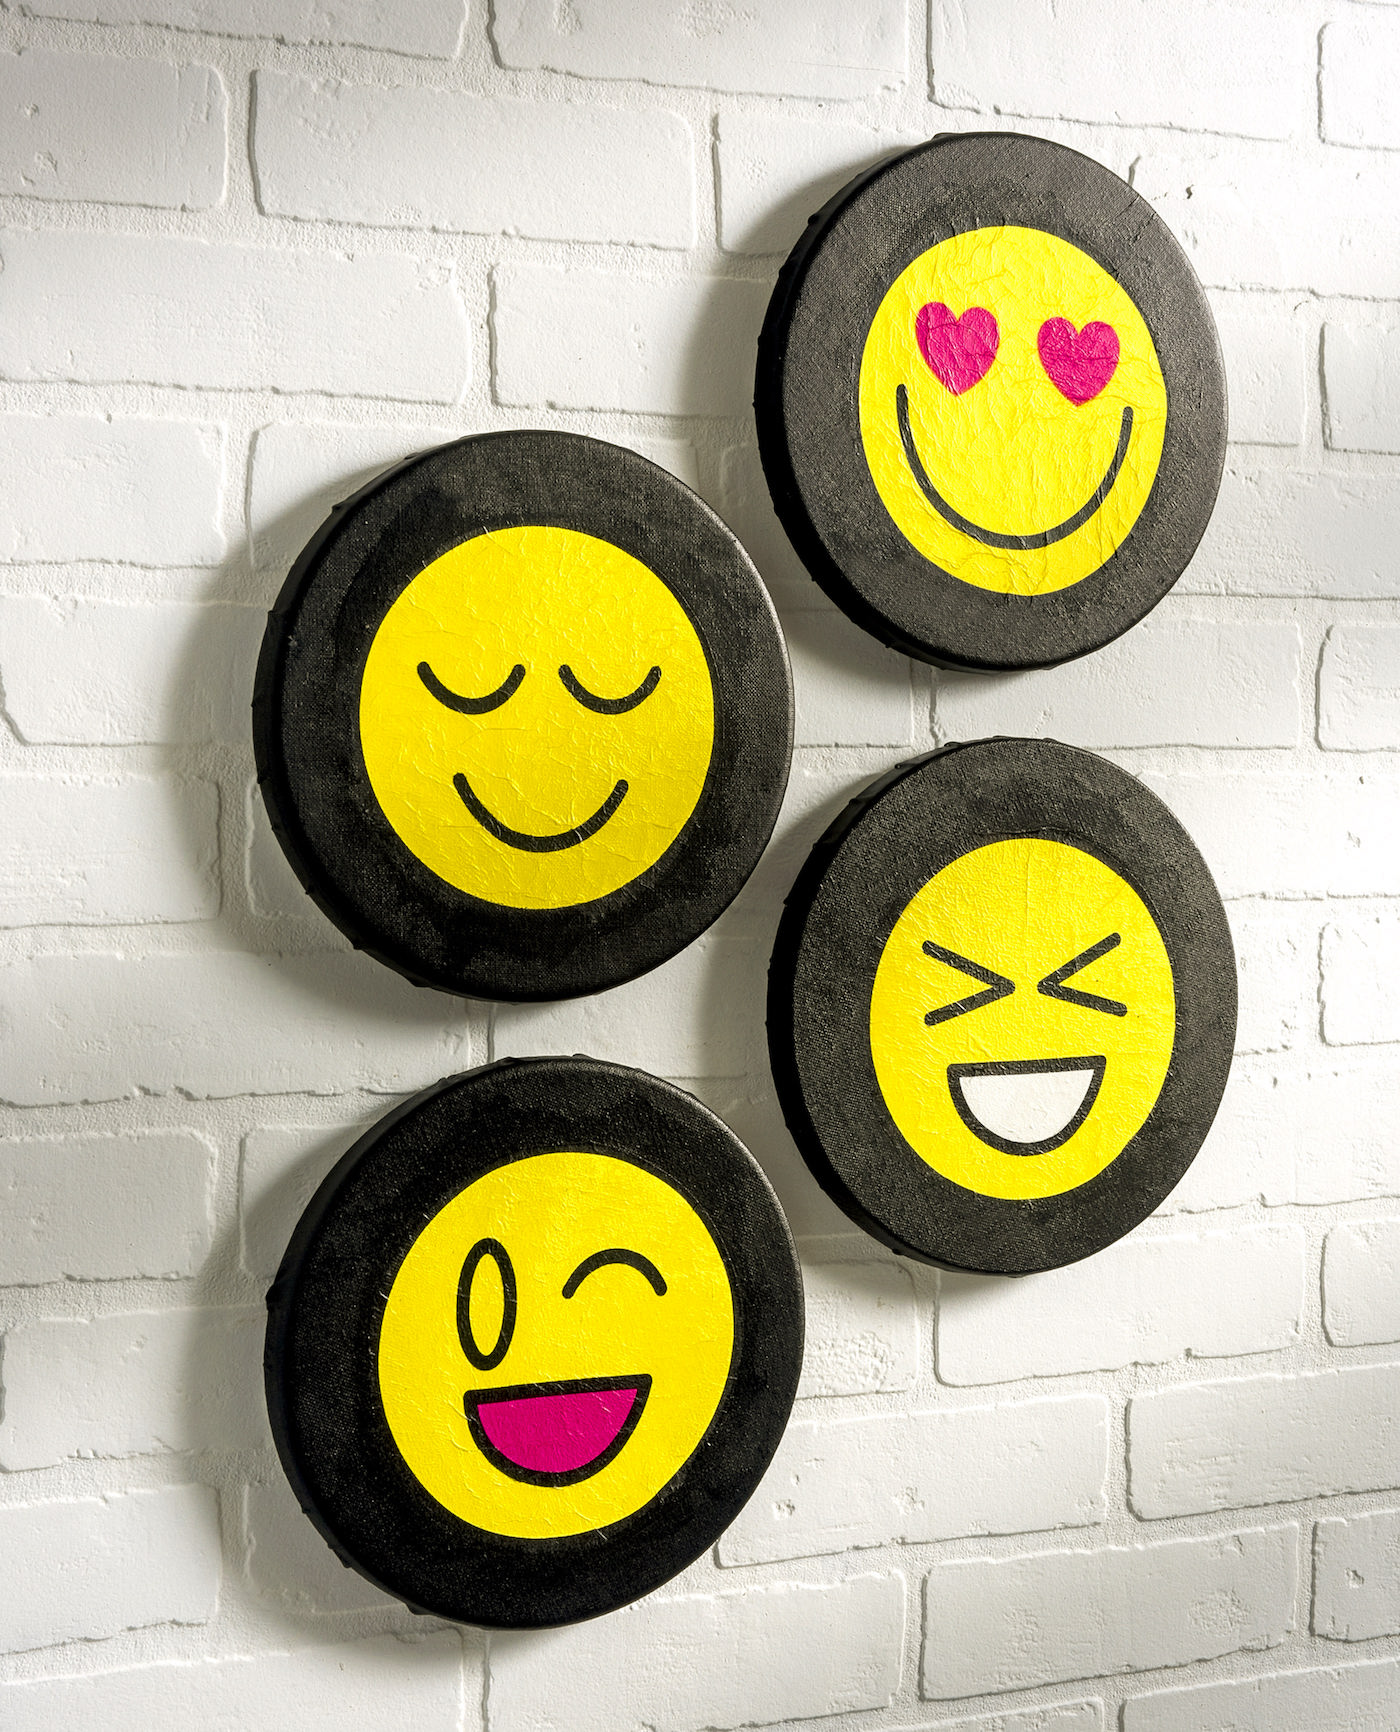
Did you know you can decoupage napkins on canvas and make wall art? I know . . . now I’m just “talking crazy talk.” Napkins are flimsy and used for parties – you might not consider them to be art materials, especially for decoupage projects.
However, they are! I haven’t done much decoupage with napkins so I decided I’d give it a try. When I found some round canvases AND some cute round emoji napkins – I knew it was a marriage that was meant to be.
These Mod Podge canvases would make a perfect decoration for a kid or teen’s room. Here’s how I made this canvas idea!
Decoupage Napkins on Canvas
Gather These Supplies
- Round canvases – 4
- Mod Podge Gloss
- Round napkins of your choice – or you can cut your napkin design round
- Acrylic paint – coordinating
- Paintbrushes
- Plastic wrap (optional; see the steps with the napkins to learn why)
You’re going to need canvases for this project. I decided to go with round canvases that I found at Target. I always work with rectangular canvas so this was a welcome change!

Then I found round napkins at Hobby Lobby. Aren’t they fun? And cute?
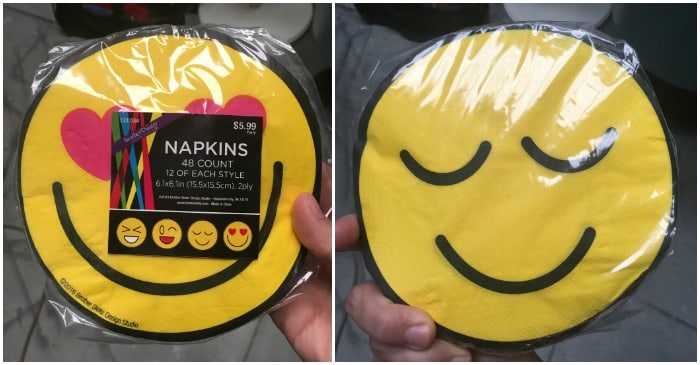
Separate the Napkin
The first thing you’re going to do is pull the back off of the napkin. Did you know you were supposed to do this? Yes – every time you decoupage napkins, you should pull the back off. Slowly and carefully (and at the very end you can trim with scissors if you need).

Add Mod Podge to the Canvas
Place decoupage medium down on the canvas and spread it around. Spread a medium layer.

Place Down Napkins and Smooth
Place the napkin down and smooth – but before you do that – read these tips. This is what I learned while Mod Podging napkins:
- Don’t try to peel the napkin up once it’s down unless you want to start over. You’ll rip it.
- The easiest way to spread the napkin around and smooth it out is to place a piece of plastic wrap on top as a barrier between your fingers and the napkin. This is one of the most invaluable tips I’ve ever been given! It’s not going to stick, I promise.
- SLOWLY manipulate the napkin with your fingers. You can’t be rough with napkins or they’ll tear. Work out as many of the wrinkles as you can.
- If you want to flip the canvas over and smooth from the back, make sure the plastic wrap is still on top of the napkin, between the napkin and the surface.
- Peel off the plastic wrap when you turn it over and let dry. Embrace the wrinkles if there are any. You’ll get better as you practice!

Some of the wrinkles went bye-bye as I smoothed out the napkins. There are still a few, but they are hardly noticeable in my opinion. Let dry.
Paint the Canvas
Paint around the edge of the canvas with the acrylic paint color of your choice. The reason I didn’t paint the entire canvas is because napkins are VERY thin . . . so if you decoupage napkins to canvas that has been painted underneath, you will see the paint colors through.

Repeat with the other canvases, let dry, and then hang!! This is the cutest little quartet of decoupage canvases I’ve ever made . . . and I can’t believe those are napkins!

Do you want to try decoupage with napkins? Let me know in the comments! I’d also love for you to check out these projects:



I finally found a true and triedvway to decoupage napkins on canvas without a ten-minute talkathon about how to do it. Thank you.
Did you put the Mod Podge over the napkin too? I see a pic you are doing it, but not read it? Am i missing something here? Great idea! Thanks
I love those,their cute..
Thank you so much!