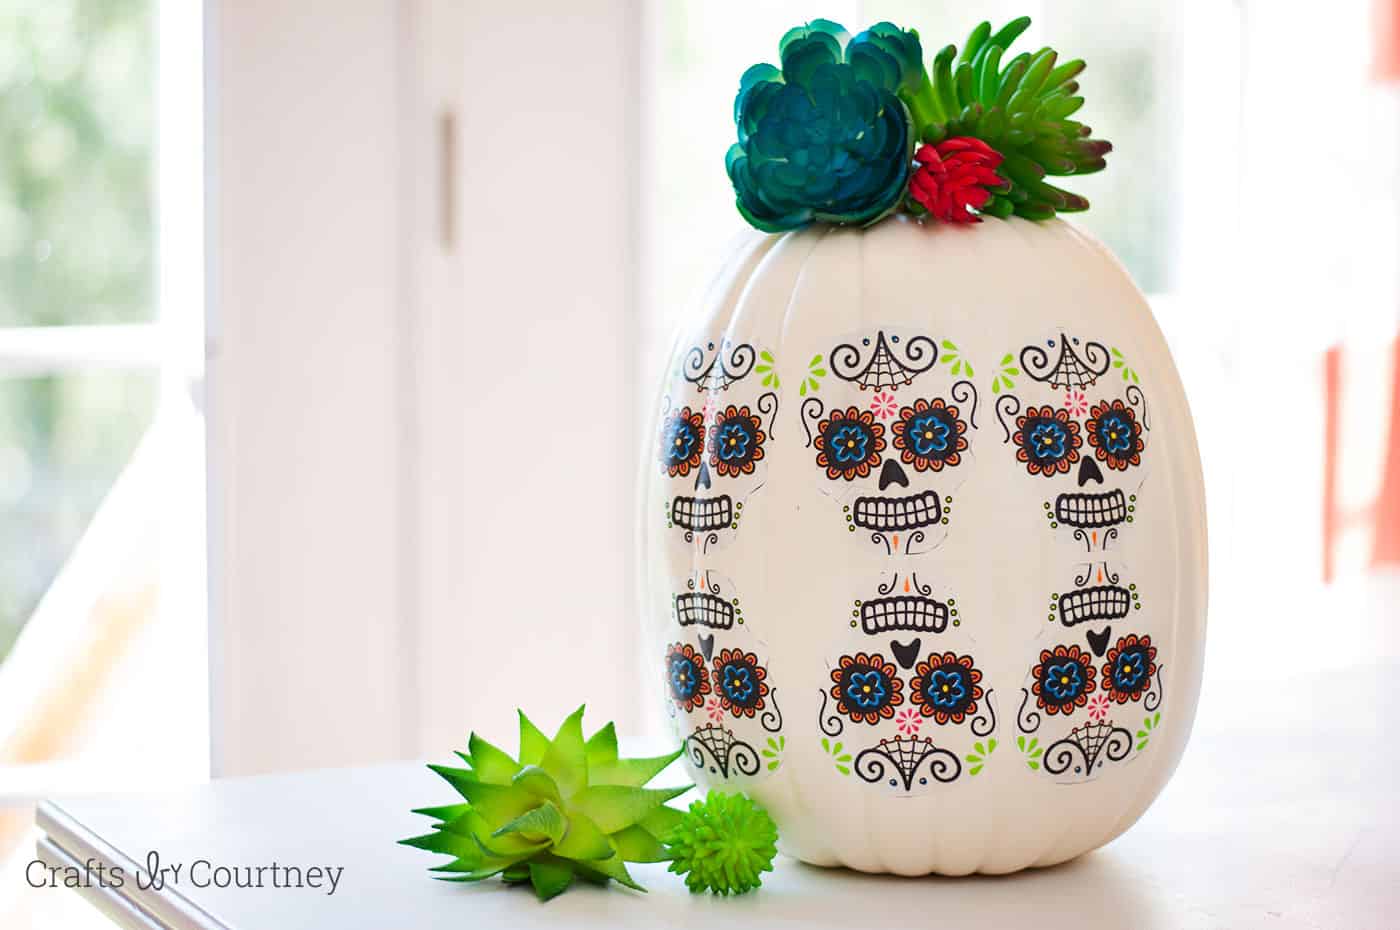
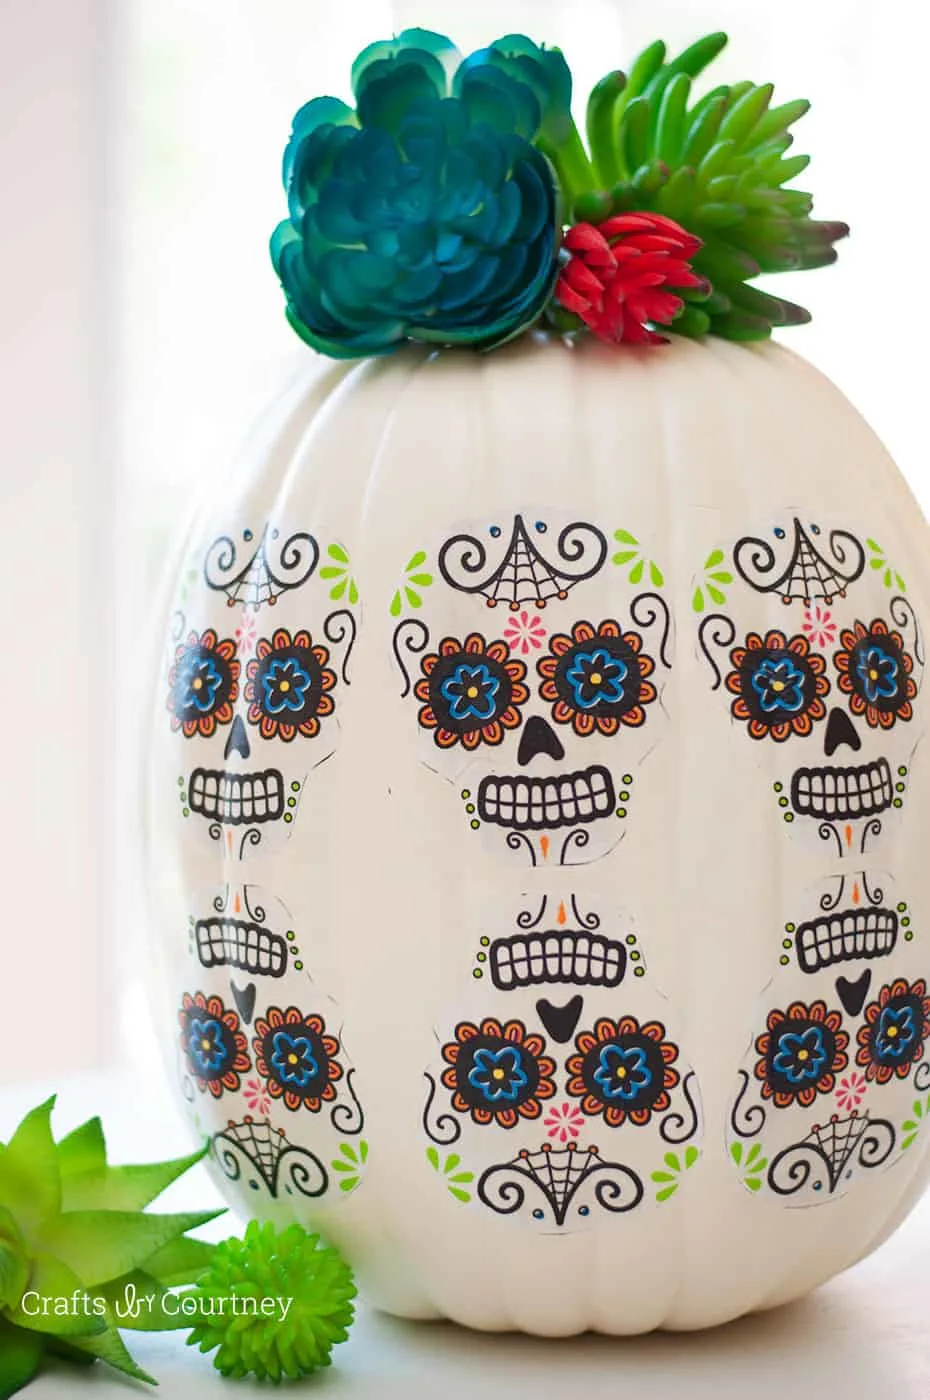
Are you ready for a cool Day of the Dead pumpkin craft you can make in a matter of minutes? You can customize this project with any napkins you like.
Skills Required: Beginner. Napkins are thin so you probably want to have a little bit of experience with Mod Podge to prevent wrinkles. Overall, it’s an easy craft.

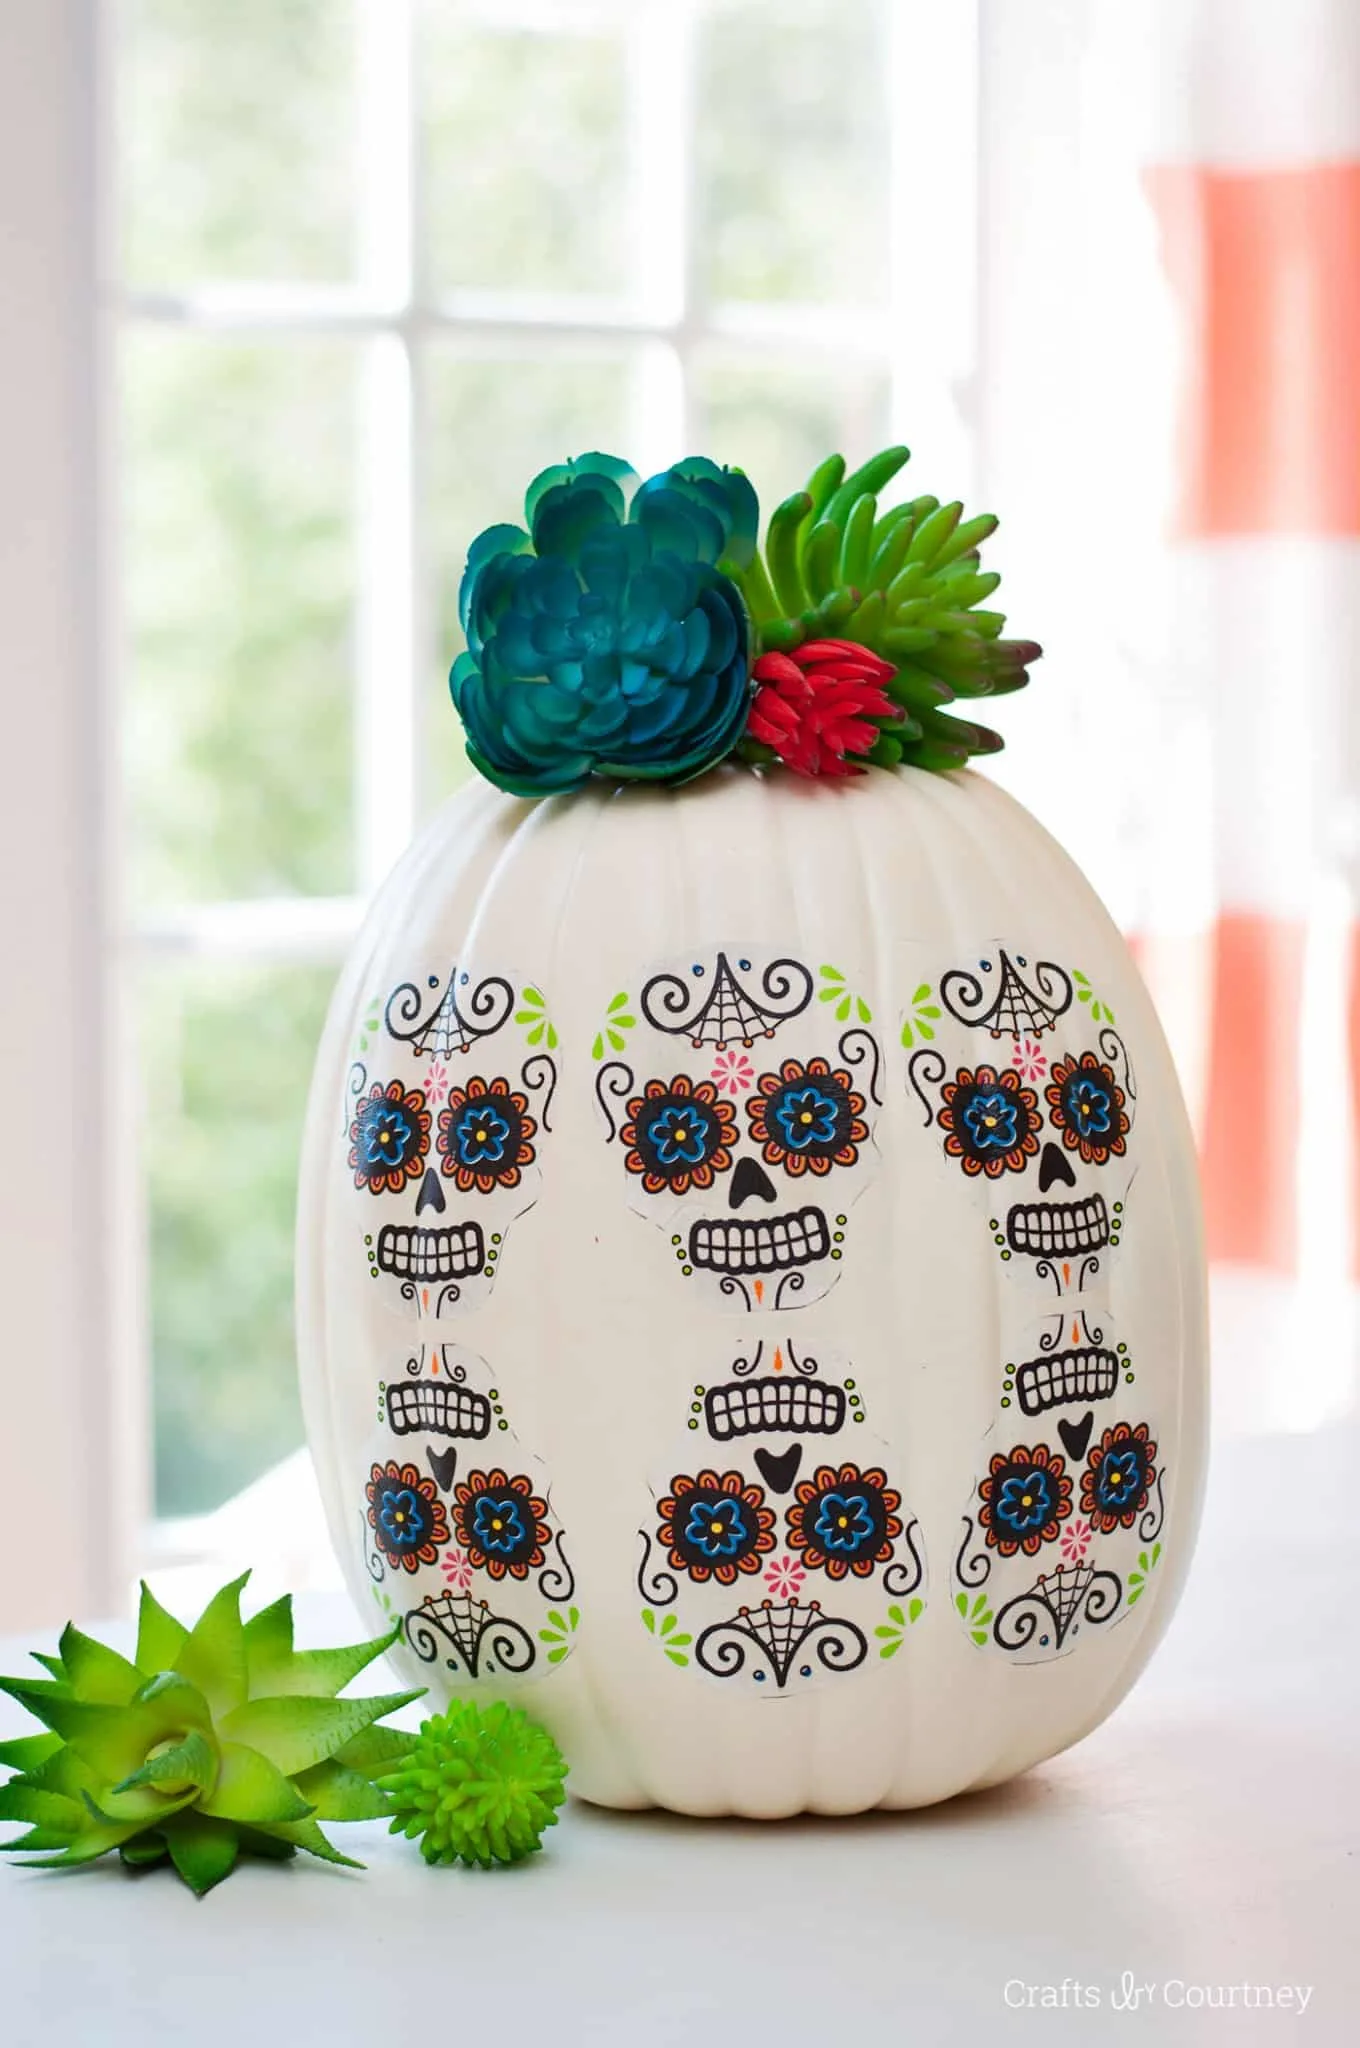
It’s that time of year again . . . FALL! I love getting the house ready and working on new projects. One of the first projects I got started on was a Day of the Dead pumpkin craft for Halloween.
It’s so popular right now, everywhere you go they have a Day of the Dead section for Halloween. So I had to make a craft inspired by it. Learn how to decorate this pumpkin below.
Day of the Dead Pumpkin
Gather These Supplies
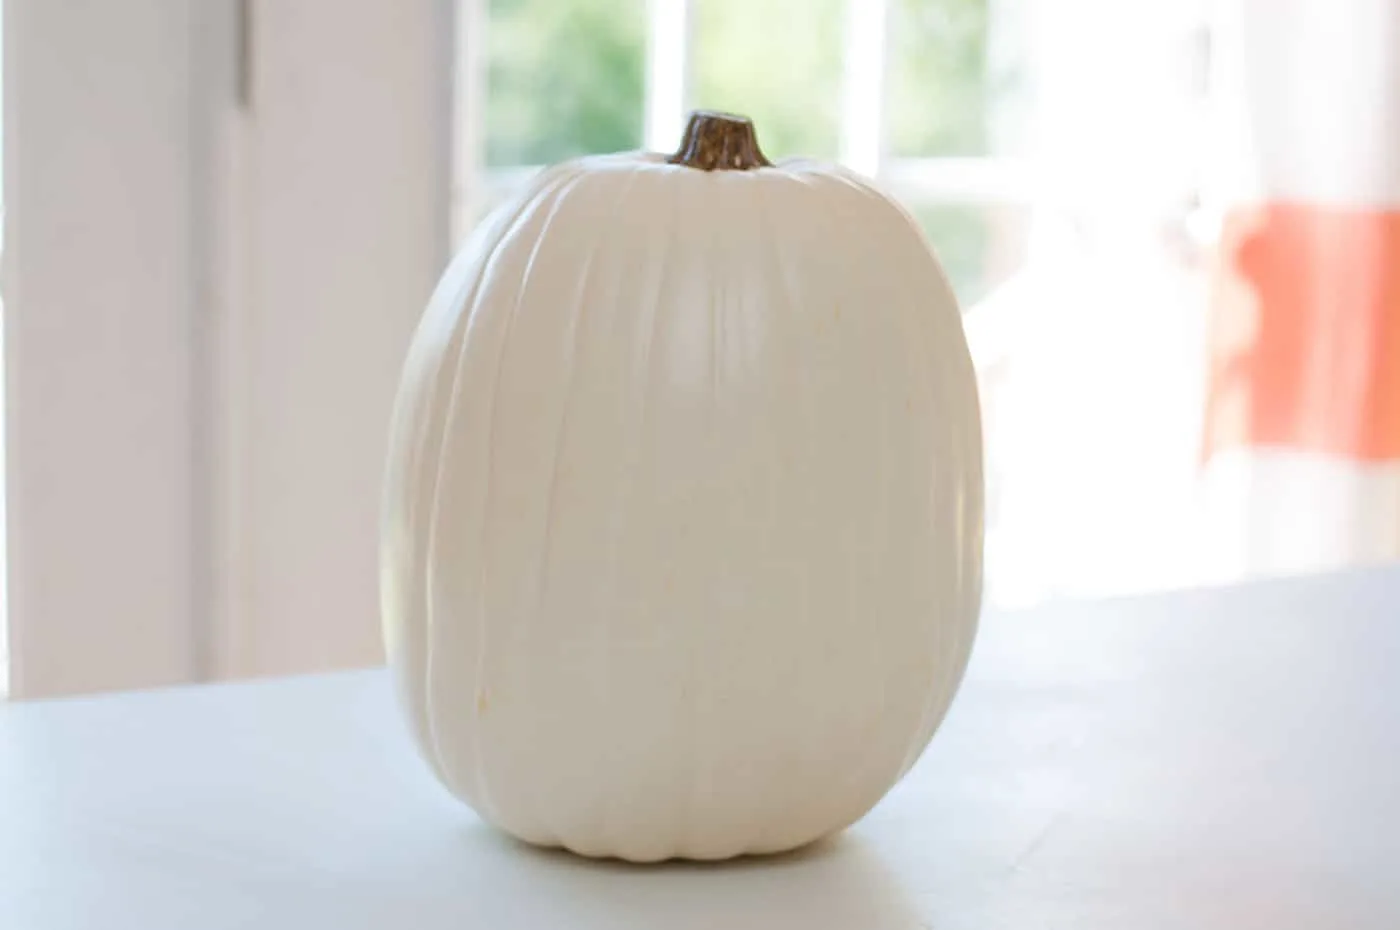
- Faux Pumpkin
- Napkins
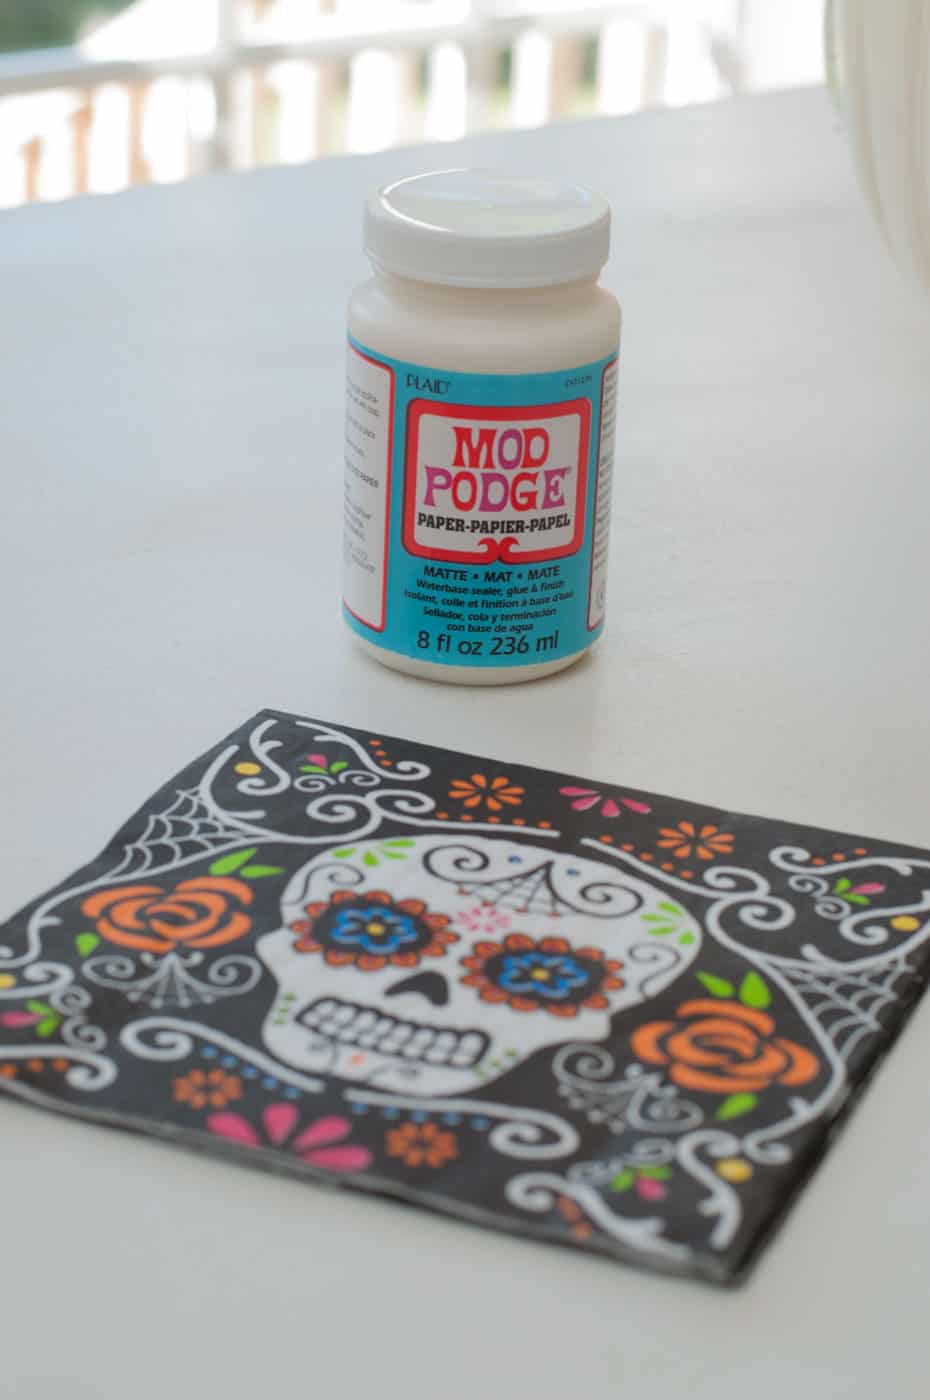
- Paper Mod Podge (Gloss, Matte, and Satin will also work)
- Succulents
- Hot Glue Gun
- Push Pins
- Scissors
Getting Started
I got some great pumpkins at Michaels for this project.

I found some cool napkins that I thought would be perfect for this project. I got the pack for $1.00!
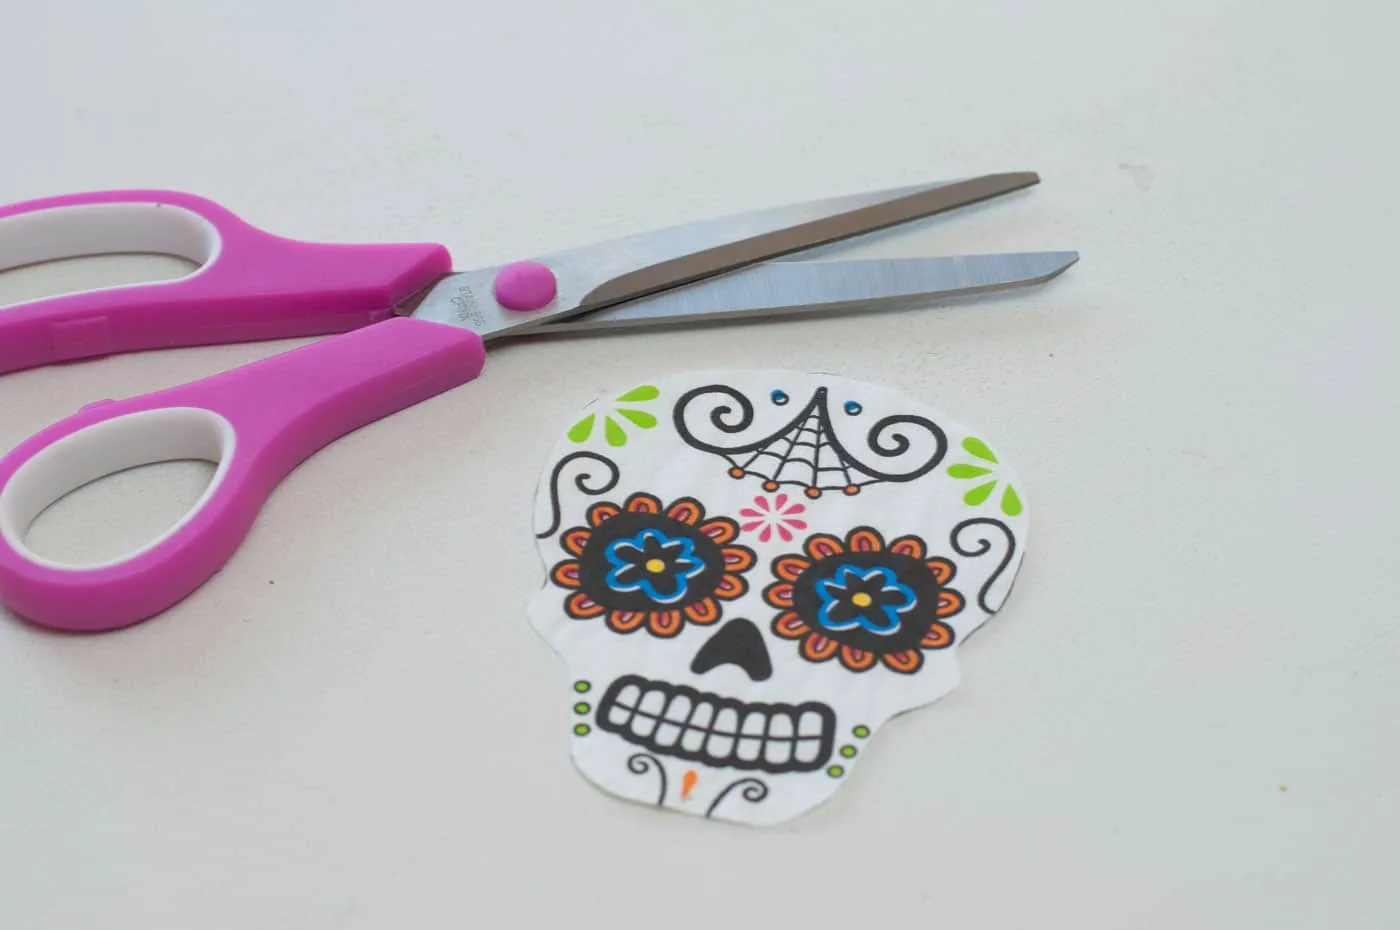
Step 1 – Cut Out Shape
I cut out the shape I wanted to use for this project from the napkin. You’ll separate the layers, too.

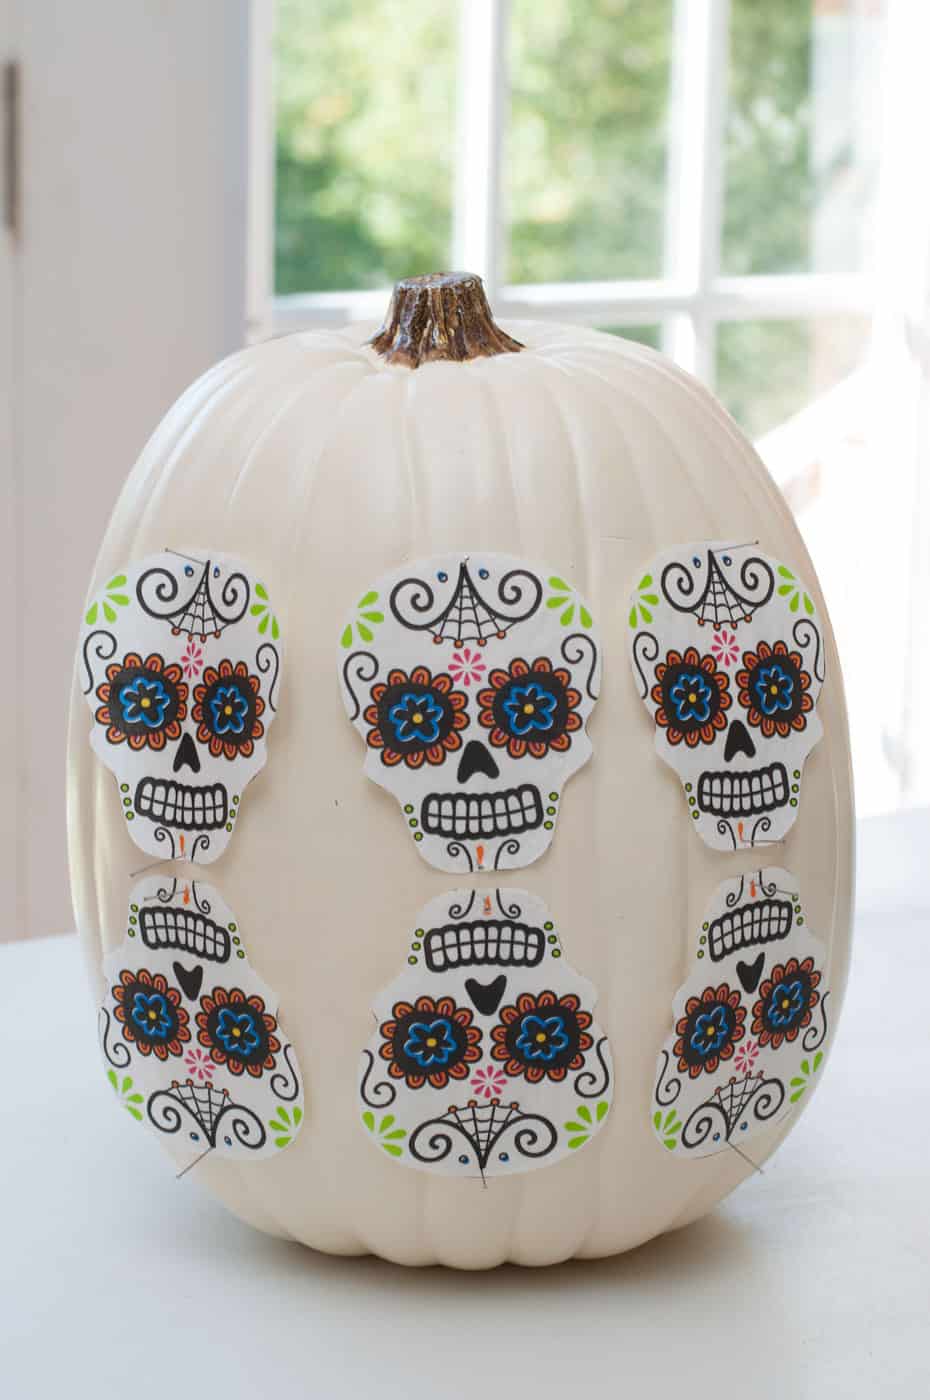
Step 2 – Pin Shape to Pumpkin
I created the pattern I wanted and used some push pins to help keep in place.

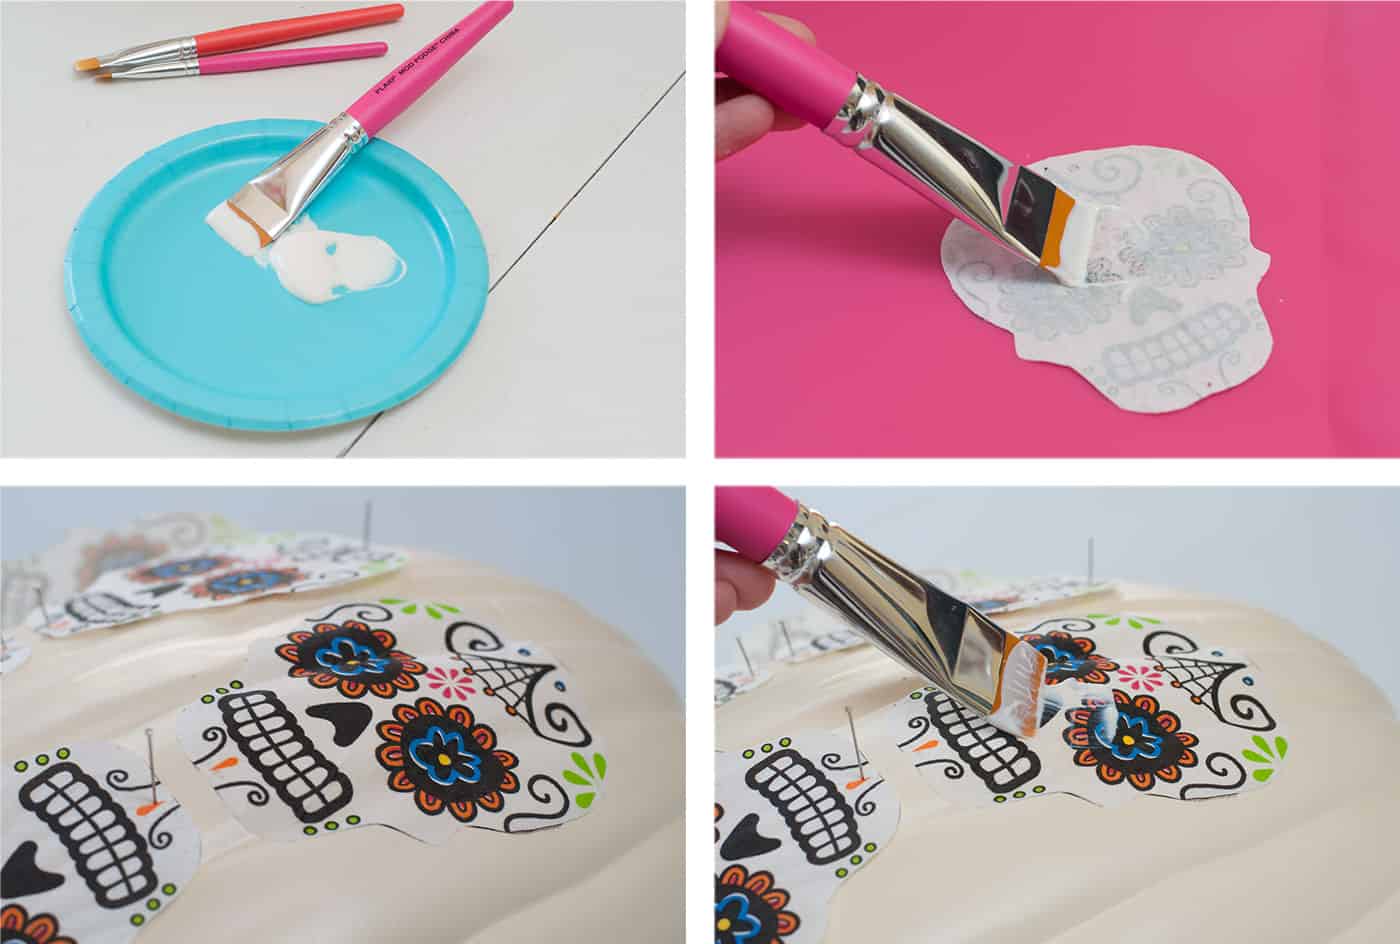
Step 3 – Add Mod Podge
Now it’s time to add Mod Podge to your Day of the Dead pumpkin!
I added a little to the back of the napkin design and firmly pressed it onto my pumpkin. Then I smoothed it down with my fingers. Finally, I added another layer of Mod Podge on top. Let dry 30 minutes.

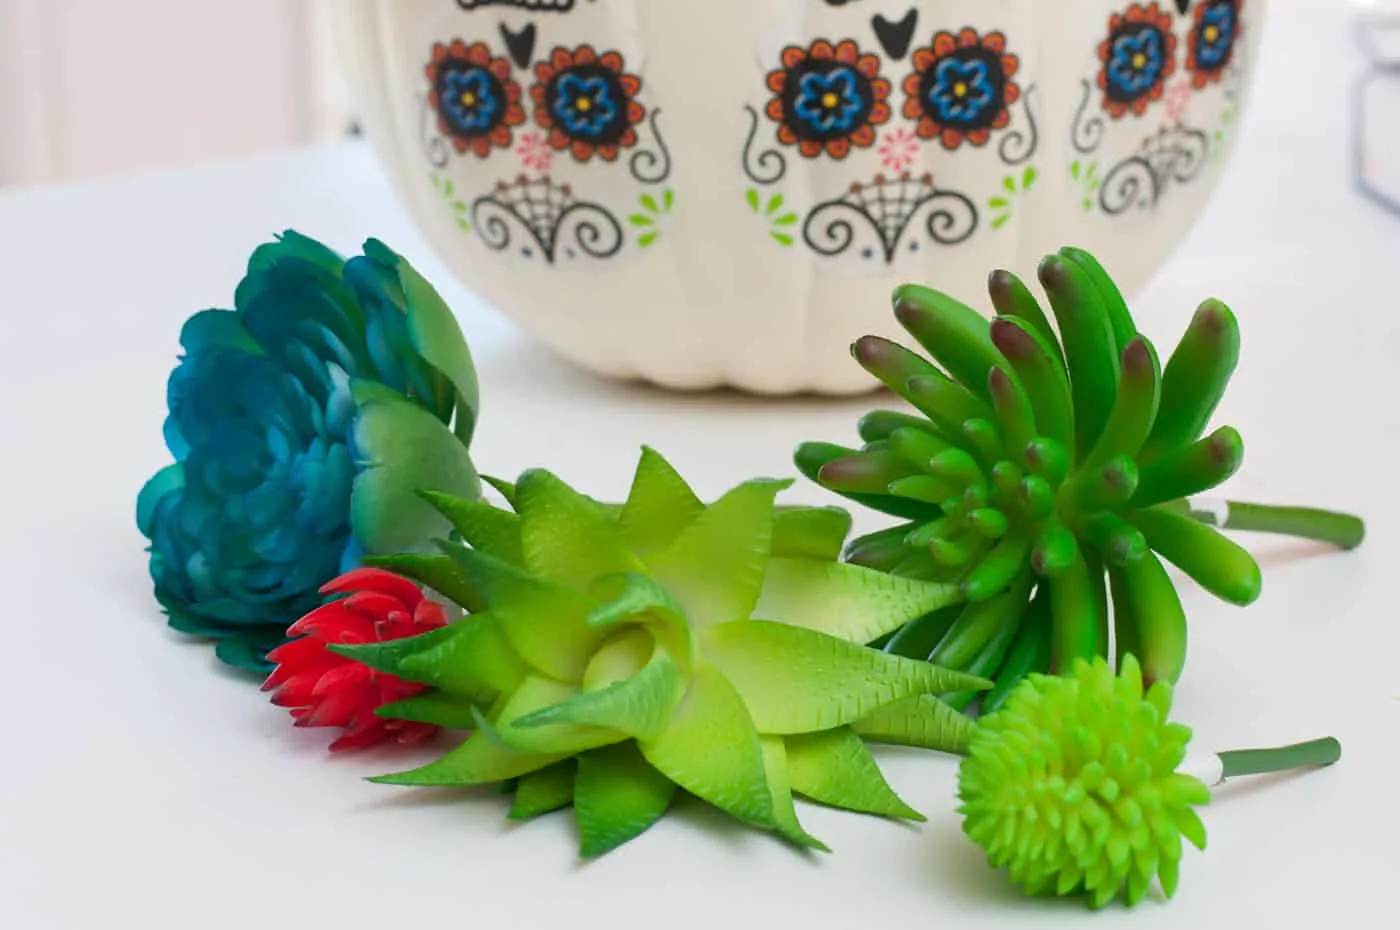
Step 4 – Add Embellishments
I decided I wanted to add some succulents I had on hand to the top. I cut the stems off and hot glued the succulents on top.

Finishing Touches
Now that I’m finished I can display! I think the pumpkin turned out super cute.

This is a super simple Day of the Dead pumpkin craft you can have done in no time!

If you’re not a Day of the Dead kind of person, you can add whatever design you like to your pumpkin using the napkins of your choice!
If you enjoyed this project, I’d love for you to check out these other ideas:
flowergirl
Thursday 20th of October 2016
This is a really cute idea! I already have my pumpkins, mod podge, napkins and everything! I think I'll do it today.