I made this unique key wall art from an old portrait. I added my favorite paint colors and Mod Podged the background with fabric – I love it!
Skills Required: None. You’re just going to be doing a lot of painting with a brush so you need patience. But it’s not hard at all, so you don’t need any prior craft experience.
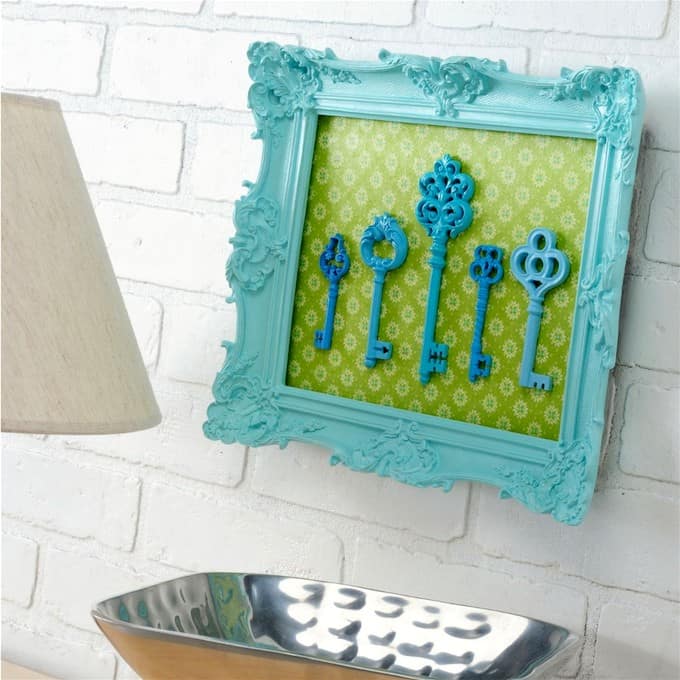
My friend LollyChops is going to love this DIY wall art project – it uses shades of her most favorite color, TEAL! I found this sad little piece of key art, broken and golden, at Hobby Lobby.
I’m sure it wasn’t supposed to be broken, and what likely happened is someone said “Do these keys come off?” and then tried it. Not that I’ve done that myself.
I’m not really a gold person, so I decided to brighten up this key art with some paint and Mod Podge. Here’s how I made my key portrait.
Key Wall Decor
Gather These Supplies
- Sad wall art
- Mod Podge Gloss
- Mod Podge Clear Acrylic Sealer – Gloss
- FolkArt Acrylic Paint – Jamaican Sea, Ocean Cruise, Calypso Sky, Titanium White (optional)
- Apple Barrel Acrylic Paint – Pool Blue, Cool Blue, Regency Blue
- Fabric, coordinating piece to cover your background
- Paintbrushes, one small and one medium
- Craft glue
Remove the Keys
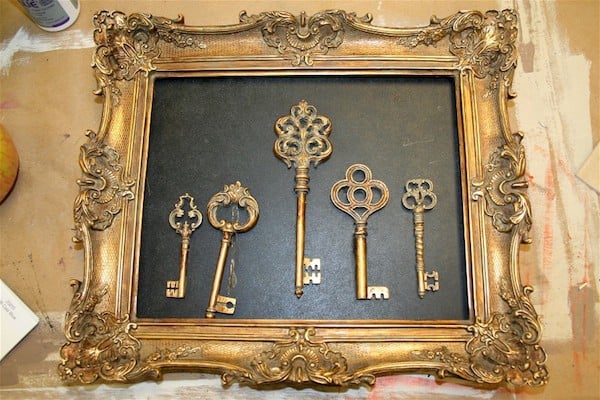
Start with a fun piece of wall art. It can be broken. Or not.
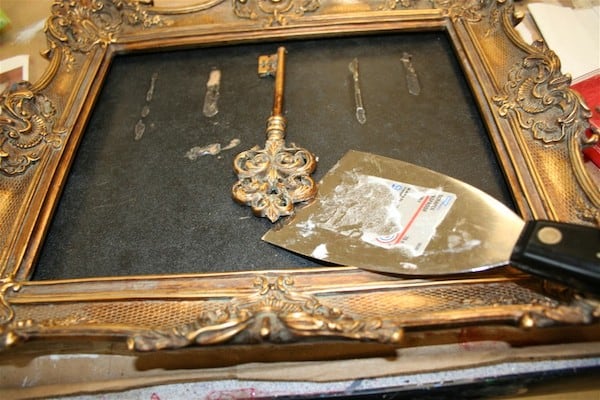
Take the goods off. I had to pry slowly so as not to break my keys. Patience is a virtue, my friends. Remove the back of the portrait from the frame.
Paint and Add Fabric to the Background

Sand down the background (if you need to) and then paint it Titanium White. My background was dark, so it was necessary to paint a lighter color so that the background doesn’t show through. It will definitely show through if the background is dark and the fabric isn’t thick. Allow to dry.
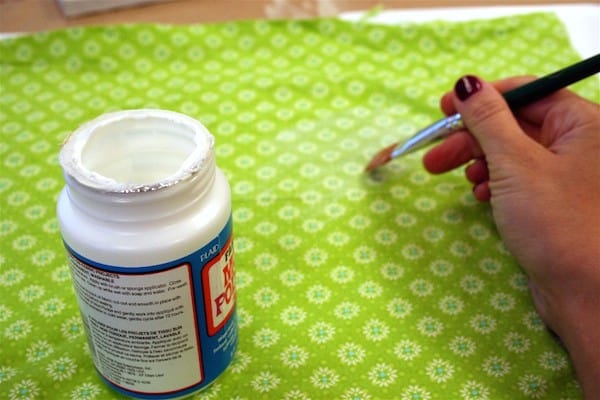
Make sure your fabric is washed, dried and ironed. Prepare the fabric with Mod Podge – this means putting the fabric down on a non-stick surface and applying a medium layer of Mod Podge.
Allow to dry. You can now cut the fabric without it fraying, and it’s easier to apply to a finished surface because it won’t wrinkle.
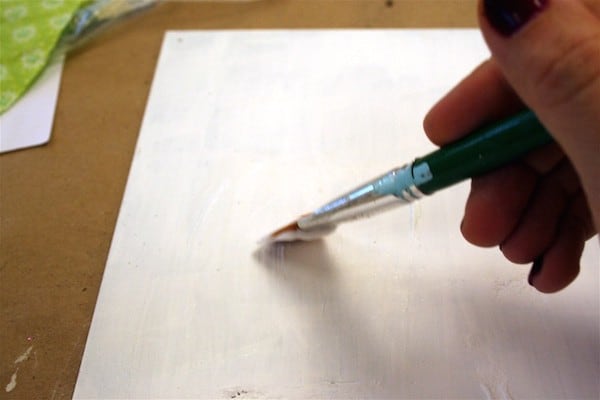
Here I’m applying Mod Podge to the back piece. Apply a medium layer and then lay your fabric down – smooth, smooth and smooth!
Push all of the air bubbles out and wipe away any excess Mod Podge that comes out the sides. Allow to dry. Once the fabric has dried to the back piece, give the top another coat of Mod Podge. Allow to dry.
Paint the Keys
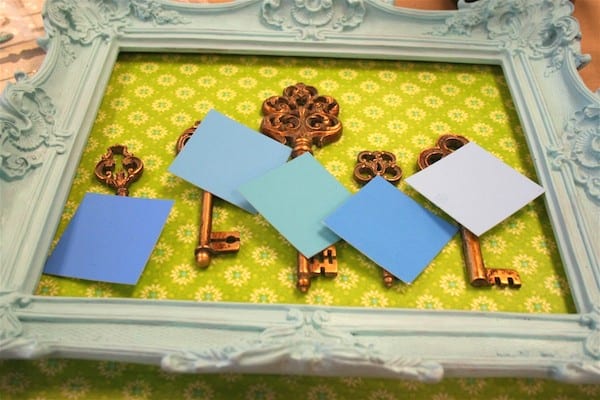
Paint your frame with Jamaican Sea. I used the tiny brush and gave it several coats. It went on surprisingly well, and I really enjoyed the painting. Very cathartic.
TIP ALERT: So what am I doing in the photo above? It’s a technique I’d like to share with you. I’ve laid the frame over the background, put the keys back in and then put some color chips down to figure out what colors I wanted to paint my keys and in what order.
MAKE COLOR CHIPS for your paint colors now if you don’t have them – even if you simply paint strokes in a notebook.
It will help you immensely when you put color palettes together or are trying to match something, because colors in the bottle DO NOT look the same when dry. I’m done preaching now.
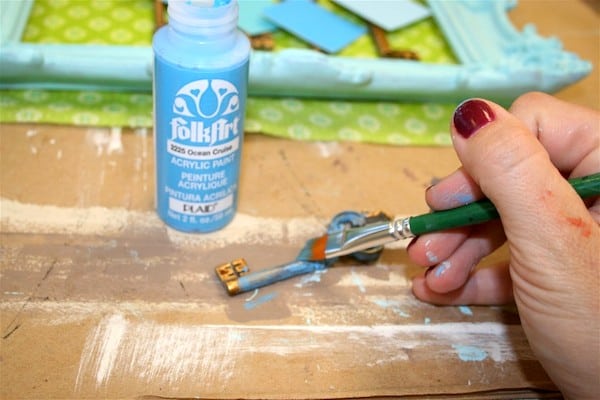
Paint your keys with your paint colors. It’s going to take several coats, but it’s fun.

Don’t forget to use your small brush to paint inside the little grooves and holes.
Glue the Keys Down

Glue the keys down with your craft glue. Allow your DIY wall art to dry and then give the key portrait several coats of Mod Podge Gloss sealer. It shines and then it’s chip proof.
I’m so excited about my easy key wall art that I can barely stand it. Do you like it on my wall?

If you like this DIY wall art, check out more in our archives here! I’d also love for you to check out these other ideas:





I love that!! I have lots of silly little collections of things that would be awesome grouped this way. Love the colors too.
Beautiful! I LOVE the colors!
Love this! And what a great way to incorporate fabric! Excellent!
Lolly might try to steal this! LOL – a really great looking project!
I like! I like! 🙂
I LOVE it! especially LOVE the colors you chose
ohmylantailovethis!!! Teal is my favourite colour too! This is just awesome. I would’ve passed that ugly key set by if I’d seen it…just incredible.
Oh Amy just recently bought a box of assorted keys with no particular project in mind. Used some of the smaller ones for tags but this is just perfect for the larger keys. Love this blog.
QMM
So fresh and bright!
I LOOOOOOOOOVE THIS!!!!!!!
It is great! You just gave me the most wonderful idea for a gift for my sister. And I love the colors. Thanks for sharing!
I LOVE this, Amy! The colors are great!
Wow – that is adorable! This is such a great idea. I’m saving this one for later. 🙂
Amy, I LOVE it! Love the colors, the fabric, the keys! Great job:)
This is stunning!
LOVE this! The varied teals are so, so pretty. Ya know, you oughtta do more projects, hint hint.
It turned out so great Amy! The turquoise really pops on that white brick wall! Love it!!
I just bought some fabric to recover a chair for my soon-to-be craft room, and it’s these same colors! Love to see they look so good in other projects too!
Great Job,
sooo cute,
hugs Isabel
Argentina
It’s so cute!! Great job, Amy.
I dunno about all that teal. I kinda like the gold better.
BARF!
OH how I love this!!!!! You used the exact same fabric backing that I did in a project with a cork butterfly. Great minds!!!!!!!!
P.S.S.T. Thanks for the linky love.
O.M.T. HUGS!
I am going for a record here… most comments on a single post. How’im doin?
Love the color palette you put together. Thanks for the tip on creating color chips! What a great idea! I have so many paints and it will be helpful to pull out a ring of color chips instead of looking through all those bottles!
Ok, see I would have totally ignored that sad little key art at Hobby Lobby. And it totally rocks once refurbised!
This is adorable, and blue and I get along sooooooooo well!
What a gorgeous frame!
I loooove this!!!!! I love keys, so this is a perfect project!
~The Mama Monster
This is gorgeous–the colors are amazing! And, I love the tips about Mod Podging with Fabric!
I went to her site to post a comment but I can’t find her key art anywhere! I just want to say that I am so freaking in love with this project!! LURVE it!!!
Brilliant. I so want one.
~Allison @ House of Hepworths
you’re right Lolly would love this project.
WOWZERS… This is amaaaaazing! Love it!
love, love, love (+ love) That color is to DIE for. I think this is one of my favorite “makeover” projects in a long time! Did I say L-O-V-E?
I love it on yourwall. And I’d love it on my wall too. Hubby even commented it looked much better but he didn’t like the background color. Then he procceded to tell me what colors he would have done it in. LOL!! Like he’d ever!!
This is awesome and something I would love to do. Great idea!
I just picked up a frame like this at a garage sale, and was wondering what I would do with it!
Thank you so much for the great idea!!
I would totally buy this!!! It’s so cute. My goal as a crafter and blogger is to take the time to look at ugly borken things and ask myself what a pretty coat of paint and some scrapbook paper could do for it. Great job!
How creative….and I’m sure your friend will love it…..this is a great idea……love it….thank you for sharing…
Love it!
mod podge,
i abso lutely love it. i became disable unexpectedly in 1998,after a 10+yr. battle with the soc.security dept.,i finally won.but,not until after i lost everything.my dgtr. has helped me tremendously,but,i don’t want her to go broke. so,i have been trying to find ways to furnis a rental for me and my 12yr. old son.i wanted to do it the cheap way,i LOVE this idea,in fact i love several of the ideas on this site,so i am now in the process of saving up so i can buy a few well, more than a few of your supplies.
thanks mod podge,
barbara hopkins at
nanniespiperdayle
love it! But if my Hobby Lobby doesn’t have the sad art, any ideas on where I could get some old keys like that?
Really cute idea and the colors you chose are great! I have a thing for old keys and have even quilled some because the shapes are so similar to filigree scrolls.
THANK YOU everyone!
Sarah! If you don’t have sad art, what I would do is go on Etsy or Ebay to get old keys. Shouldn’t be too hard at all! You could always get any ornate frame from a Goodwill – or a craft store like Hobby Lobby. You can cut cardboard to cover with fabric and stick into it. Hope this helps!
Love it. I have to say your vision speaks volumes as the original piece, not so fantastic.at.all.really.
Awesome. Looks much better now. Such a fun color.
What a fun project. I will keep my eye out for broken and ugly wall art so I can spice it up…..very fun
This looks great!!! Amazing job… I have just done some decoupage with Mod Podge myself!!!
Pretty pretty, so unique
That is only like a thousand times cuter than the original!!
Wow – what a difference, I love it!
So so awesome!
It looks so great and I love your color choice! Most people would just look at that on the shelf and walk right by because it was broken! Great find and makeover!
How lovely! I always love these two colors together!
LOVE this!!! The colours are FABULOUS!
Love your funky bright wall art! I love how you re-invented the “sad wallart”. Love the idea of vintage things with a fun twist.
http://www.veronicahurly.blogspot.com
i like the color you used. they are so pretty!
I Love this!! What is cool is..I have been looking for keys to decorate with.. so this gives me really great idea!!
oh my my my!!!!!! This is gorgeous!! I love the frame and keys, and the colors you chose!! GORGEOUS!!
LOVE the colors! come on over and link up to MMM 🙂
LOVE! LOVE! LOVE! I’ve been looking for something like this for my kitchen so now I can’t wait to create my own version. Thanks for sharing!
Just love the colors!
I LOVE those colors! I made single key frames for my daughters room a few years ago, but they were pale pink and white! I think I might have to re-do with these colors! 🙂
I love it, what a great idea
Wow this looks amazing!!
Great job! It looks fantastic! I love the color combination…you really took something that was sad and broken and made it fresh, cheery, and new.
Love it!
How fabulous is this?!? I love it!! 🙂
Such a great makeover ! Love the new colours
LOVE the colors! Your project looks fabulous. Thanks for sharing your great project. I will be linking to it.
Brooke
thecraftcave.blogspot.com
umm this is amazing!! I love everything about it!! SO CUTE!! I’d love for you to link them up at sundae scoop! http://iheartnaptime.blogspot.com/
Too funny- I was at Junk Bonanza this weekend and bought some old keys. I didn’t paint them- they were cool enough/aged on their own, but the overall look is similar. I love my new key art as well 🙂
You rule and make everything look great!
That turned out fantastic – love the makeover! 🙂
This pops. Love it!
Fantastic! Now I want to find some cheap art at Hobby Lobby and try this myself!
You once again rock your projects, bringing life to them, it is amazing. I saw a post on Handmade Spark and noticed you like that deep red nail polish 🙂 You manicured nails look just as beautiful as your projects.
It looks AMAZING!!! I never thought I’d love a little collection of keys so much! And the frame is gorgeous all by itself! Huge thanks for listing the colors you used!! But I must say, I don’t like how it looks on your wall. Not at all. Maybe you should send it my way… 🙂
Oh you did such a good job! I’m gonna have to keep my eye out for one of those at hobby lobby. I’m pretty much there every other day!
I love this! Thanks for sharing!
http://www.youngnester.blogspot.com
Fantastic work! I LOVE this finished product! Keep up the amazing work! I just “followed” after finding you on “Where Women Create”
Thanks!
Drew
Can I buy this from you? If so, please e-mail me a price. Thanks!
Yours is so much cuter than the original! : )
That is so cute! ^^
Love, love, love this! The colors are great together and I love the look of all the different old keys together!
Dead gorgeous.
Any ideas on where to find these keys?
Hi Terri! I got this piece from Hobby Lobby – you can try to find faux antique keys on Etsy!