
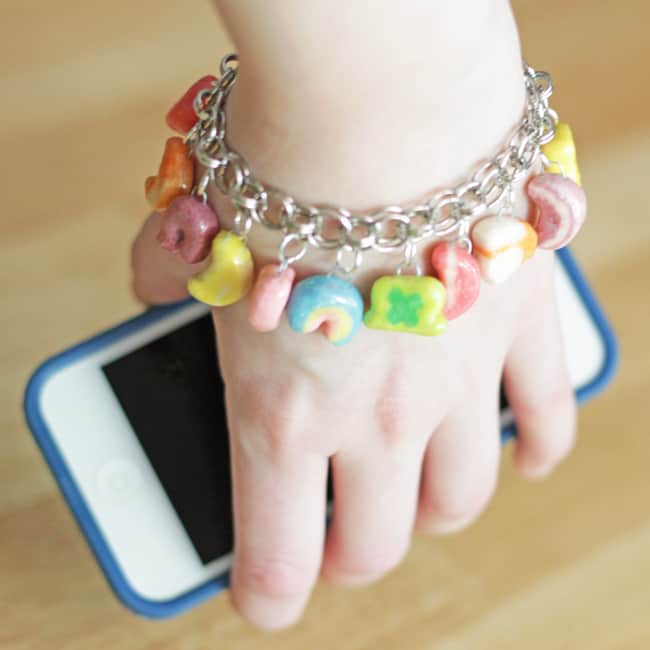
This Lucky charms bracelet is so fun and made from an unlikely ingredient: cereal! Use Dimensional Magic to make the coolest St Patrick craft ever.
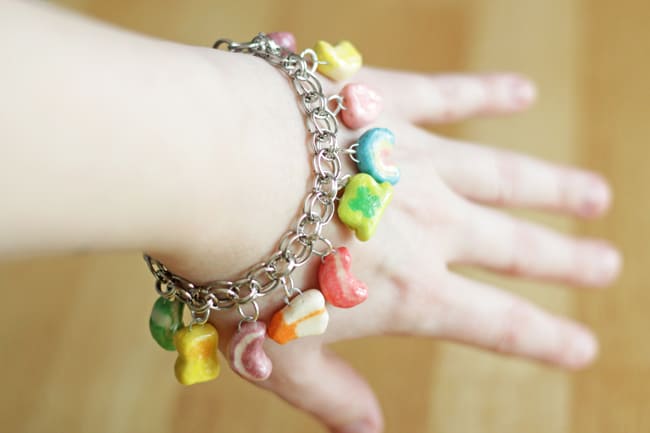
This is Heidi from the blog Hands Occupied. Today, I’ve got a St Patrick craft project for you that’s literally made with Lucky Charms cereal – I’m not kidding. It’s a DIY bracelet!
I had the idea for this project long before I figured out how the heck to accomplish it. Doing my due diligence, I googled and found a few folks who’d made Lucky Charms inspired bracelets out of clay and glass. I couldn’t find anyone who’d used the cereal itself for a project.
I’m probably insane, but this Lucky Charms bracelet is dope. There, I said it. Now, you, go make this – you’ve got plenty of time before St. Paddy’s to get this look for yourself!
Lucky Charms Bracelet
Gather These Supplies
- Lucky Charms marshmallows (you can buy them separately!)
- Mod Podge Dimensional Magic
- Crafting wire (mine was 28 gauge, very low duty)
- Two pairs of jewelry pliers
- Small wire cutters
- Charm bracelet chain with clasp (I made my chain, but many stores carry similar items)
- 5mm or 7mm jump rings that match your bracelet chain
- Paint brush
- Waxed paper
- Small plate
Directions
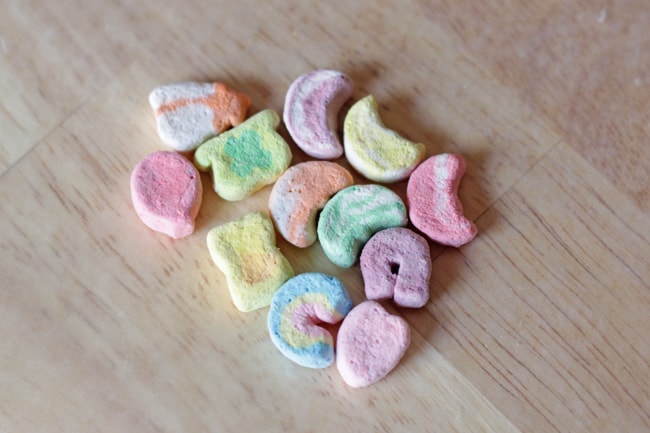
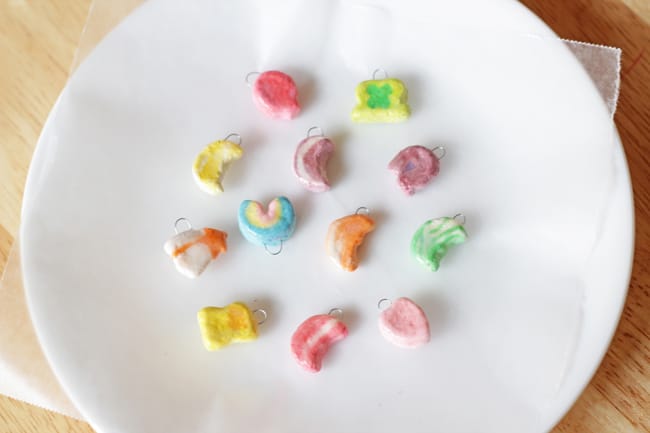
Separate one of each kind of marshmallow from your cereal. Not having eaten Lucky Charms in a zillion years, I don’t know where or when all the moons came in to play, but they’re colorful and swirly, earning them a place in this project.
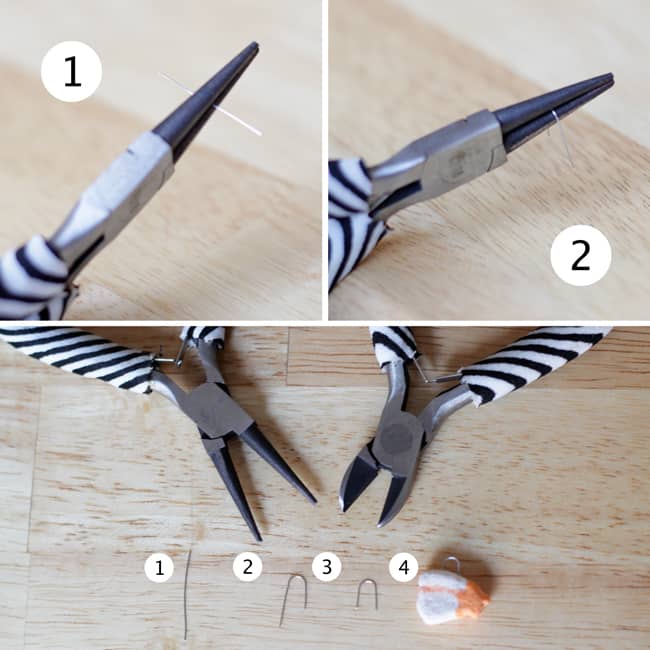
Count up your total amount of marshmallows and cut an inch-long piece of wire for each of them (I needed twelve pieces). Then, following the images below, fold each wire into a horseshoe shape by holding it with a jewelry plier and bending the ends down with your fingers.
Use your wire cutters to even out the ends with a snip. Push one horseshoe of wire into each marshmallow. Be careful – marshmallows aren’t super sturdy.
Lay out all of your wired marshmallows on a piece of waxed paper on a small plate.* Use a paintbrush to paint a thin layer of Dimensional Magic (DM) on the top of each marshmallow. Let dry completely.
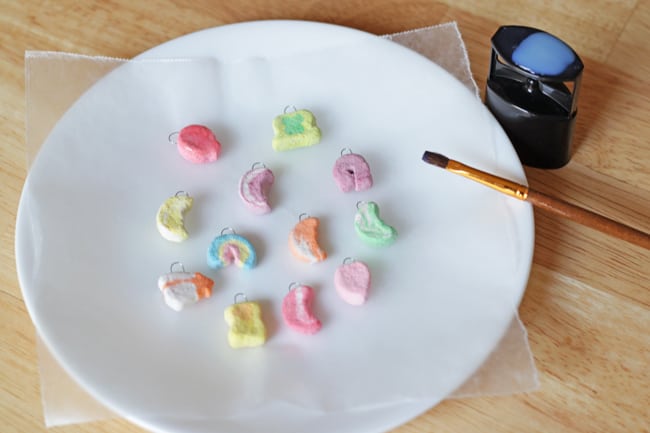
*The small plate is so you can easily and carefully move your marshmallows out of the way to safely let each layer of Dimensional Magic dry. If you just do this on waxed paper, you can’t move the drying marshmallows around without them sliding all over the place, sticking to each other, sticking to the waxed paper, etc. It’s just a practicality thing.
Flip your marshmallows over, Dimensional Magic-ed sides down, and paint another thin layer of DM onto the marshmallows. Again let dry completely. Then, carefully paint the sides of each marshmallow, again with DM.
The sides are the trickiest part because you don’t want to put too much DM on them and accidentally glue your carefully made creations to the waxed paper. DM is strong stuff when it’s dry!
Repeat painting the top, bottom and sides of the charms 3 to 5 times. The more layers you do, the stronger the seal will be. You’ve got to be patient with this project for it to turn out well. The thinner the layers of Dimensional Magic the better.
I initially tried to make this bracelet by pouring Dimensional Magic on the marshmallows straight from the bottle. This was a dumb idea. The marshmallows got melty, the DM went everywhere, and the wires detached.
It was a total disaster, so take it from me, slow and steady totally wins the Lucky Charms bracelet race. 🙂
3 – 5 layers of Dimensional Magic later . . .
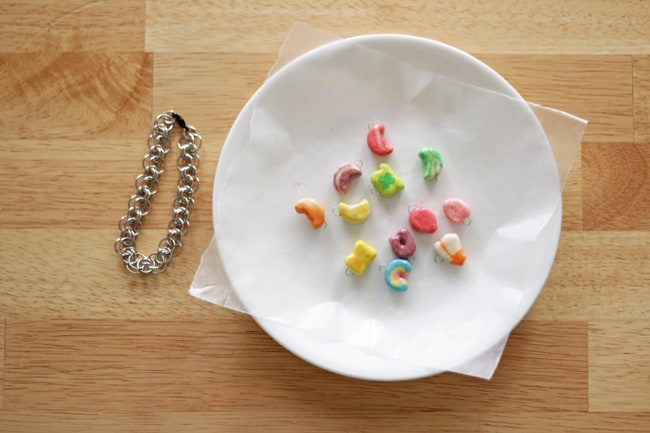
All right! You’ve conquered the hard part! The rest is as simple as adding charms to a charm bracelet. Begin by opening a jump ring. The best way to open a jump ring involves two pairs of jewelry pliers.
Hold one side of the jump ring steady and push the other end of the ring away from the steady side as shown with the arrows below.
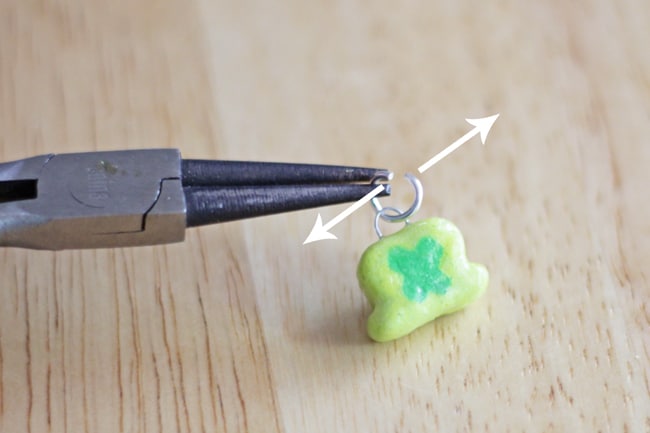
Hook your charm onto the jump ring, hook the jump ring onto your bracelet, and close the jump ring by pushing it back together with a motion exactly the opposite of what you did when you opened the ring. The ends of the ring should be touching to be secure.
Take a few minutes to decide on the arrangement of your charms. I didn’t want too many charms of the same color or too many moons next to each other, so I spent a few minutes arranging my charms until I was satisfied before attaching each charm to the bracelet.
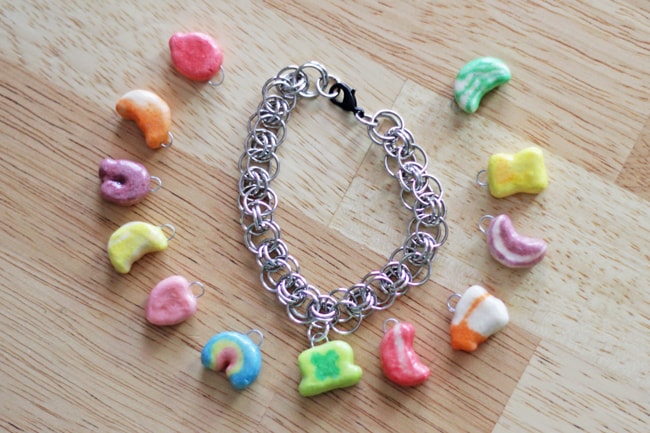
I’m really excited about how this turned out! It really wasn’t all that much work in the end – it just involved a bit of patience and figuring out the right way to apply the Dimensional Magic. I’m looking forward to wearing this on St. Patrick’s Day!
Like this Lucky Charms bracelet? Let me know what you think in the comments!
If you enjoyed this St. Patrick’s Day craft, check out these other holiday ideas you might also like:


Hi I will love to make jewelry please send me some more information thank u for ur time Kimberly Fava
I love Mod Podge!
what a waste of marshmallows lol – those are yummy! super cute though 😉
Very clever! Love this.
I’d LOVE to try this but I’m wondering how long the charms would last, as they’re food? The MP permanently preserve it??
After coating nearly 200 marshmallows, and making a bracelet or myself, I have found that my mallows are cracking??? Did you have this problem? Any ideas why they would do this? I mean, are they THAT fragile? I made matching earrings and they didn’t crack, so I’m thinking that it’s because the bracelet got more beat up throughout my day??? Help!
What would happen if you let the marshmallows get stale first?? 🙂
Super cute!!
This is awesome Amy!! What a smart idea!
Does modge podge gloss work just as good?
This is so amazing! I love the idea. I can’t wait to try it out! 🙂