
Use junk mail to create unique recycled art for your wall. All you need is a few basic supplies and Mod Podge – and some creativity!
Do you get a lot of junk mail? Use it to make this unique recycled art! My favorite retailer sends me many catalogs and sale mailers.
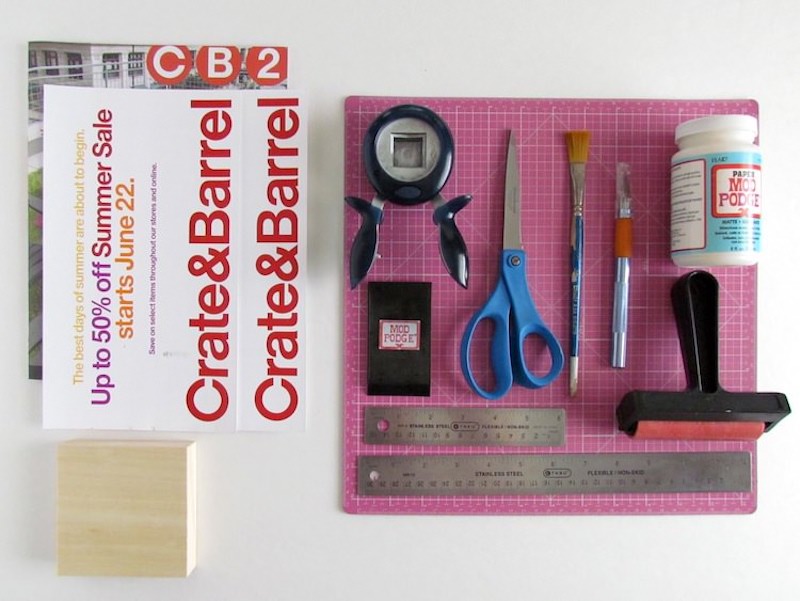
I must say, I always get excited when a Crate and Barrel catalog arrives. There’s a lot of inspiration to be had from looking through them. AND the quality of the paper is great for decoupaging, especially the CB2 catalog!
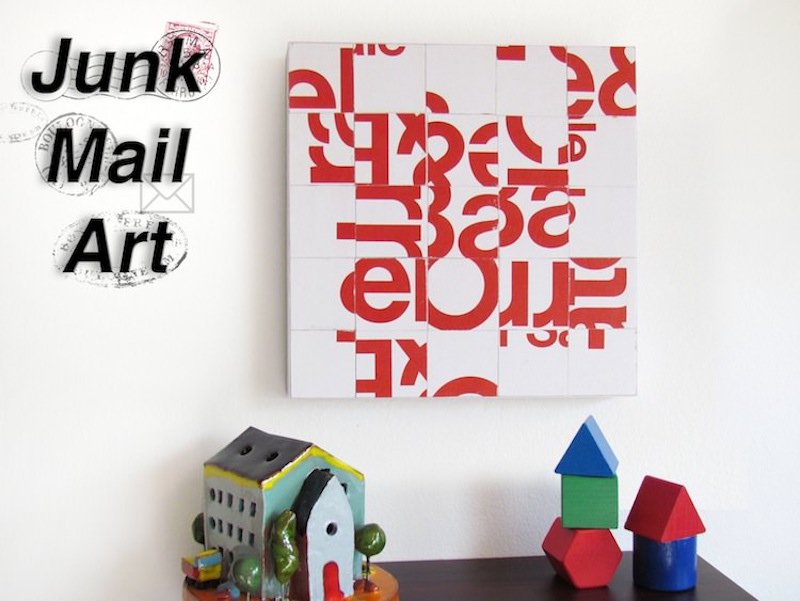
I made this AWESOME re-arranged typography wall art with two junk mail postcard sale mailers. This is what you need to make this junk mail wall art plaque. This recycled craft tutorial will showcase each step I took to complete this art piece.
Junk Mail Art
Gather These Supplies
- Substrate of your choice: cradle board, canvas board, illustration board, plywood or wood ( I used a 5″ x 5″ x 3/4 piece of plywood that I primed and painted with FolkArt Wicker White paint)
- Cardstock
- Cutting tools
- Ruler
- Mod Podge Tool Set
- 1″ square shape paper punch
- 2 mailers (for some reason I got 2 in the mail)
- Any decoupage medium, I used Mod Podge Paper and Mod Podge Gloss
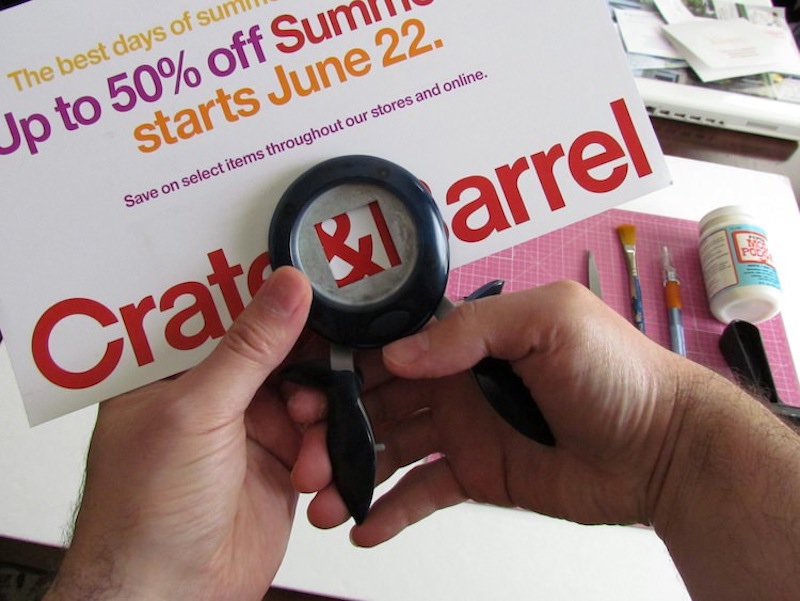
Step One: Cut 25 pieces (1″ squares) of the red and white section only.
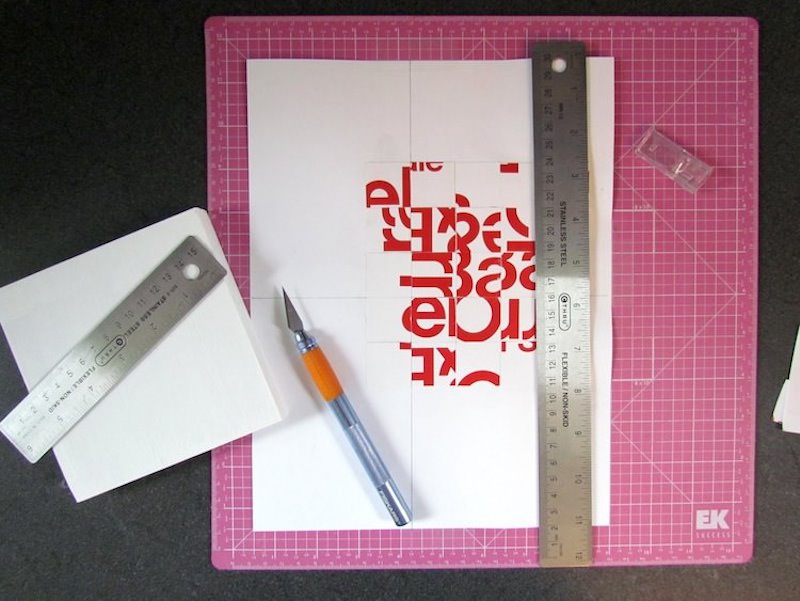
Step Two: *TIP: I taped a piece of cardstock to my cutting mat. This type of mat has measurements printed on it, so it is easy to make accurate lines (see photo). I made two straight lines: one vertical and one horizontal. This made my layout easy to place.
For my junk mail art, I knew I wanted five rows of 1″ squares across since I was working with a 5″ x 5″ block. I used Mod Podge Paper to mount the squares in place . . . then let dry for 15 minutes. Then, I cut the mounted pieces at 5″ x 5″.
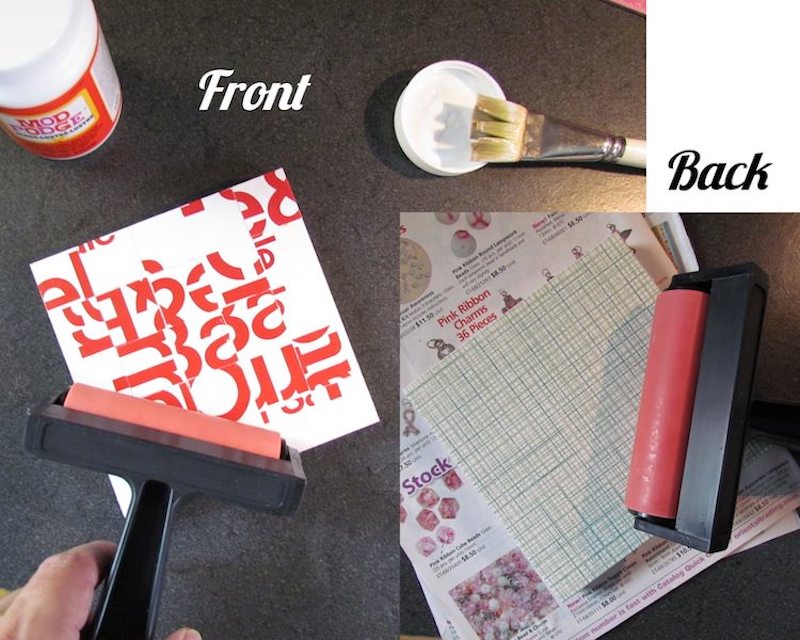
Step Three: Decoupage the FRONT with the re-arranged 1″ square blocks. *TIP: I used a brayer that had some dried Mod Podge from previous projects, because when I run it over the paper it will give it a aged, rustic look and scuff it up.
If you don’t want that look, use a clean brayer. Next, I decoupaged the back with a random piece of printed cardstock.
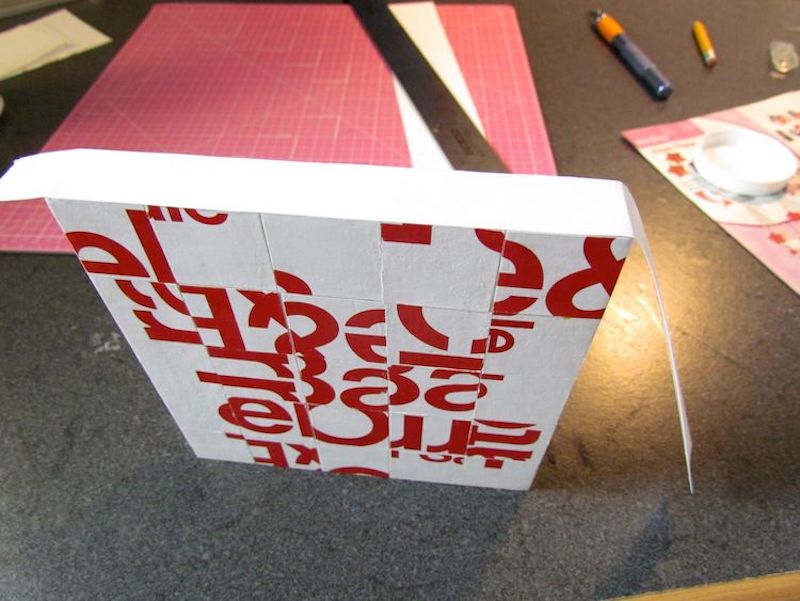
Step Four: I decoupaged the sides of my junk mail art with 3/4″ white cardstock.
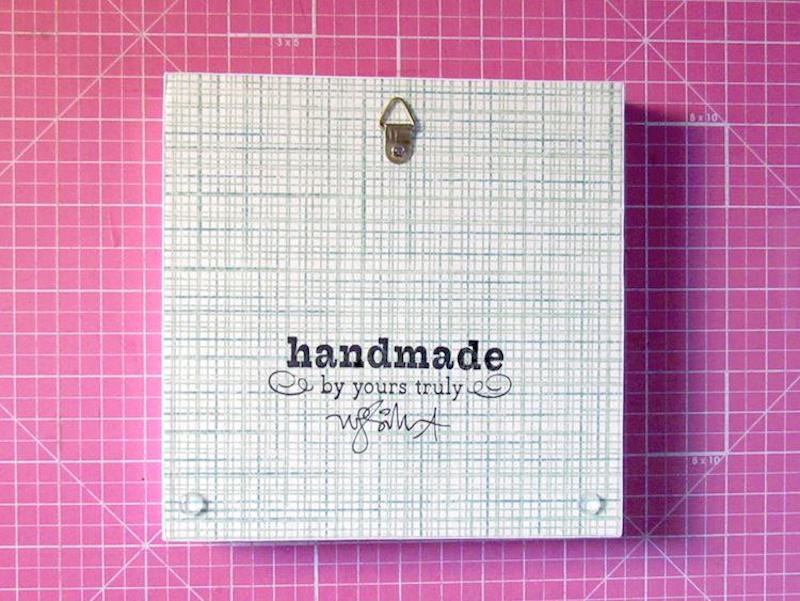
Step Five: Attach hanging hardware to the back. TIP: I find for something small like this a triangle hanger is easiest! All, you do is find the center, mark it with an awl, then insert a screw. . . Then I attached two bumpers to the bottom.
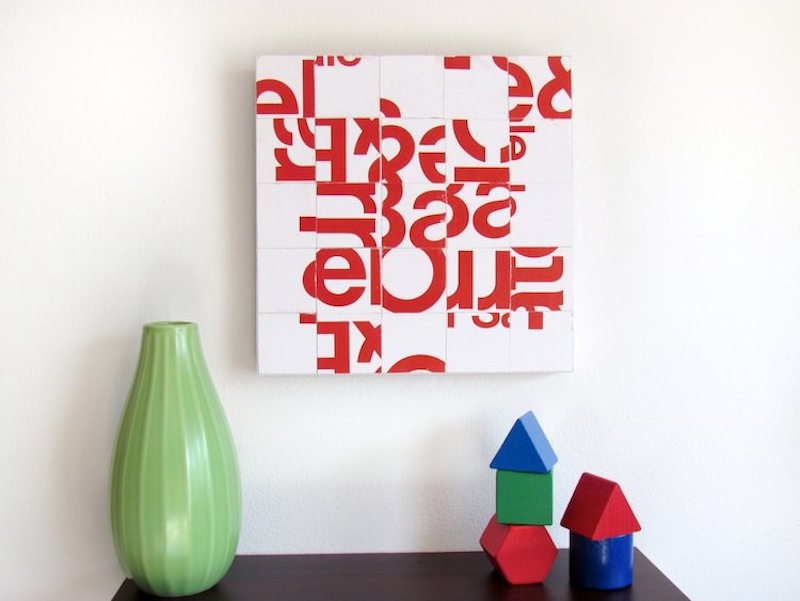
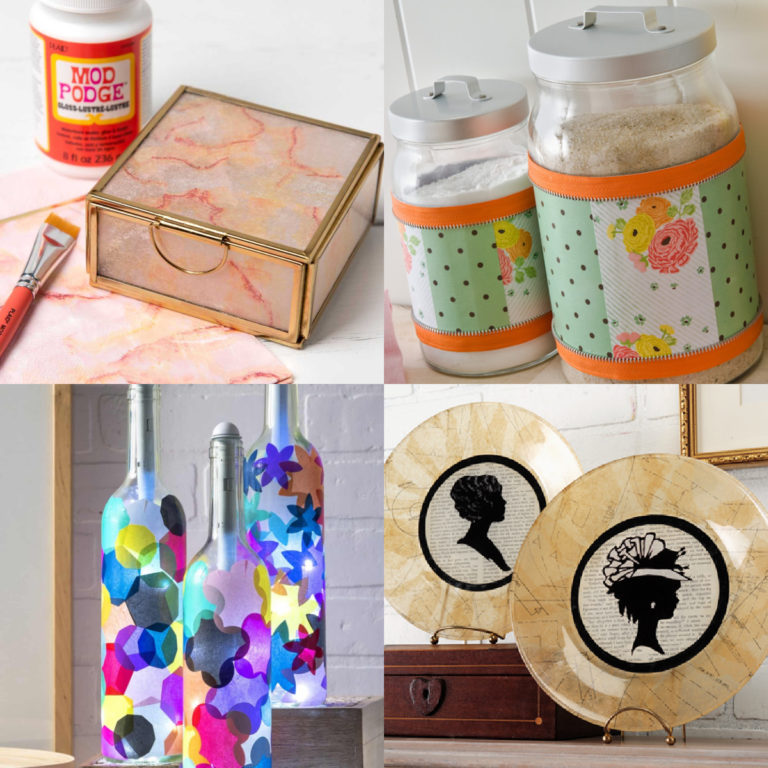
Your junk mail art project is ready to hang and just think – you didn’t spend that much for it! Wouldn’t it be fun to try this on a huge scale? Don’t forget to visit these other unique projects:


very creative project!
and to think I’ve just thrown those things away in the past. Seriously clever Walter!
Love this and I think it should be in the next book. Now my mind is whirling with ideas, including how to use the inside of some of the envelopes! I received my copy of Mod Podge Rocks yesterday and it is delightful! I can’t wait to play.
Gladd you like the book! Thanks billiejo!!
Love this! Added a link to my Junk Mail Crafts article on Squidoo.
Thanks Peg! Appreciate it!
very cool, something like the Schimmel Art collages made from junk mail
Gotta say, that looks so chic! Can’t believe what it’s made of. Really great tutorial! (Love the dirty brayer tip!)
That’s so cool! Is it sad that I knew that was Crate & Barrel right away? I’m too familiar with that store! LOL! Great project!
fantastic remake! i have sever square punch envy though – mine has sadly given up the ghost (1 million squares later, its a great tool to have) 😉