Use fabric and Mod Podge to upcycle an old organizing cabinet. This IKEA furniture makeover is really easy – you’ll love this technique!
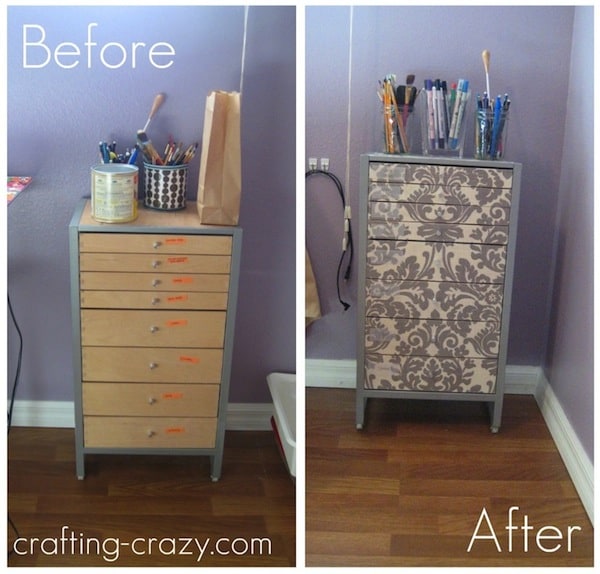
I have a dirty little secret, which is that I love assembling furniture. When it’s time to put a piece together I huff a little bit and say, “Oh, okay . . . if I have to . . . ” Then I smile as I pull the allen wrench out of the box. I get what I want AND look like a hero!
IKEA Furniture Makeover
Natalie loves assembling furniture, which is not the only thing we have in common. She also likes a good furniture makeover, which I also love. Nat did an amazing job putting fabric on the front of this IKEA piece, and the fabric she picked is so pretty.
It completely transformed the piece, don’t you think? You can do a furniture makeover just like this yourself – here’s the tutorial from Natalie below!
I’m loving this IKEA Office Drawer Makeover!
It’s time to get craftin’ around here a bit more. I have been spending the last few weeks really cleaning out my craft room and getting it organized. It’s getting to be pretty awesome.
Now all that remains is plowing through some projects so that I can clear off the bed, since the room is also technically a guest room.
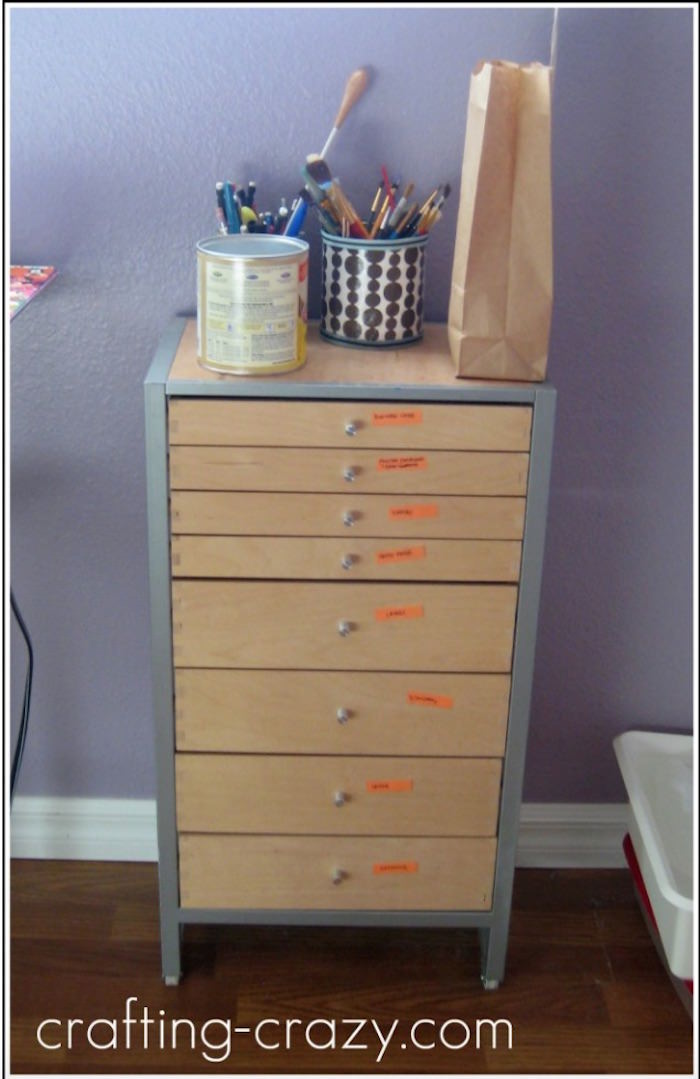
I’ve had this little drawer organizer for over 10 years. It’s one of the first things I ever bought from IKEA, and it’s one of the only things I’ve bought from there that did not require assembly. I LOVE assembling IKEA furniture. I’m weird like that.
I decided that since we are going to be in this house until our kids are grown and in college, it’s time to commit to spiffing this thing up. I also organized all of my office stuff, and purged a lot, so it’s much more feasible to use this in a logical way.
The little orange tabs you see above are what I used to temporarily label the drawers while I pondered what to do with this thing. I decided my IKEA furniture makeover would be with fabric and Mod Podge!
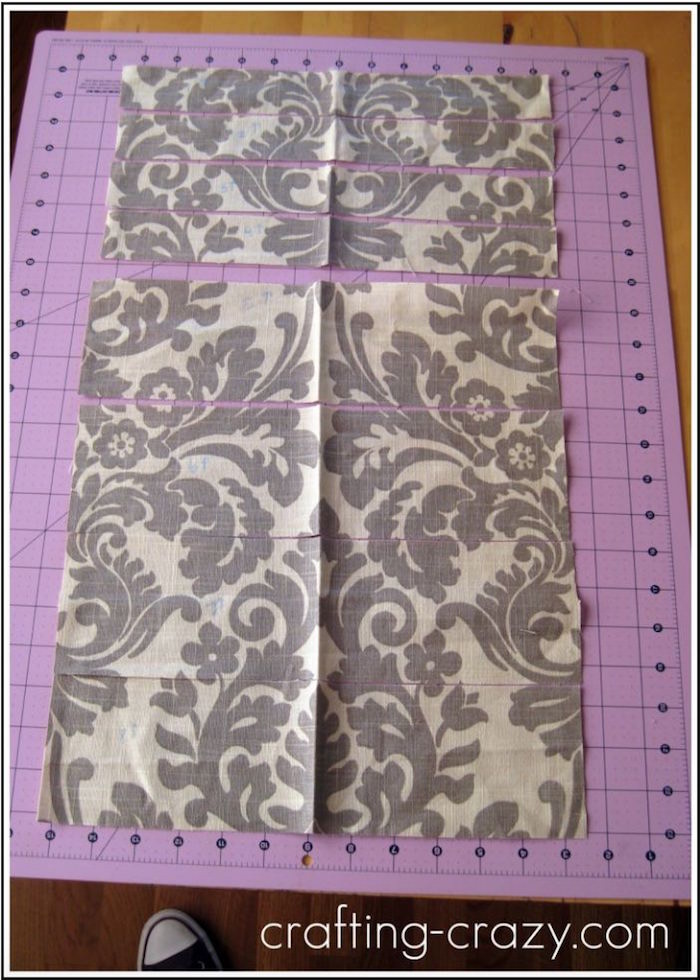
To prepare the fabric, I measured the width of the drawers. I know that fabric tends to stretch a bit when you use it with Mod Podge. But I also wanted a wrap around on the drawers, so I added about 1/2 inch to the measurement.
I pressed my fabric in the middle of the pattern- you can see the crease below. Then I measured the height of the drawers and cut very precisely. I actually had to do this twice because I messed up and Mod Podged a piece on upside down. Whoops.
Note: once you put the fabric on, it’s never going to be the same, so if you mess up, you mess up. It’s best to have extra fabric for this project, unless you are perfect in every way. Ha.
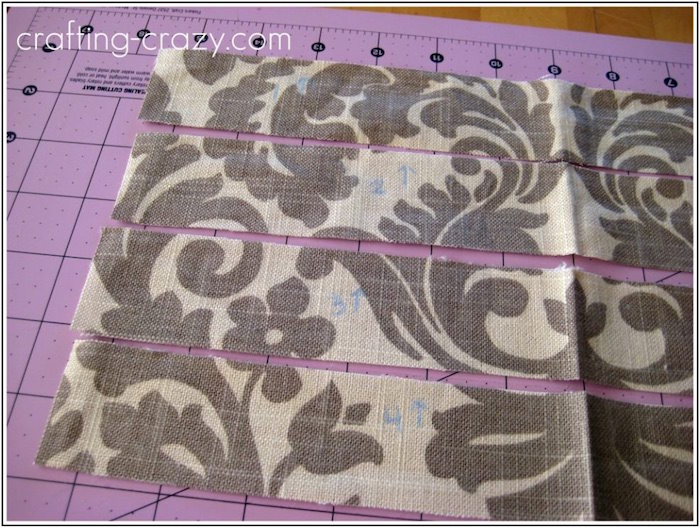
I knew that I’d be working on this in spurts, so I labeled the pieces of fabric with the corresponding drawer and also an arrow to remind me which was way up.
To do this, I used tailor’s chalk, so it just brushed off before I Mod Podged. I didn’t want to leave anything to chance- that’s dangerous for me.
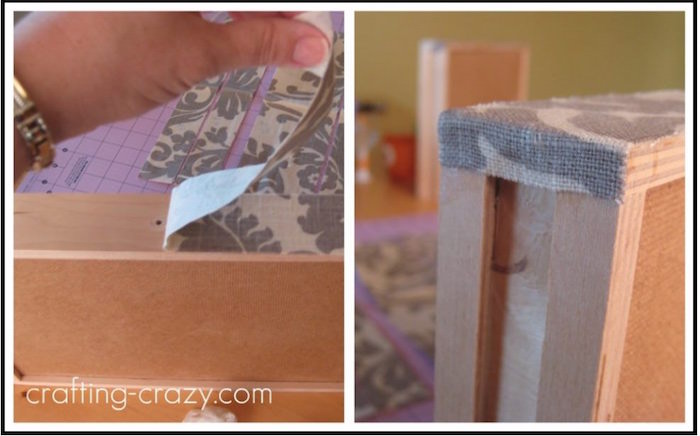
To attach the pieces, I applied a layer of Mod Podge to half of the drawer face, pressed the fabric down, and smoothed. Then I did the other side.
Before the MP dried, I also poked a hole where the drawer pulls would go back in later. I just used a sharp pair of scissors.
On the right below, you can see the little bit of fabric that wrapped around the edge. These were stubborn – I had to hold them down for about 30 seconds while the MP did it’s work. I coated the top of the fabric with two coats of MP.
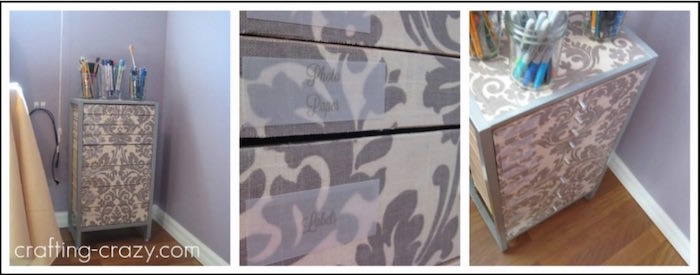
For the top, I measure the fabric and cut to size. There’s a metal trim, and the fabric stretched over it. After it dried completely I used an X-Acto knife and trimmed it off.
I coated the top with Hard Coat Mod Podge, and then sprayed acrylic sealer on it (just one coat). This is so it wouldn’t be tacky on the top where I am putting some often-used supplies.
The drawers I labeled with vellum so that the pattern of the fabric wouldn’t be interrupted. I just love it.
Here’s the IKEA furniture makeover before and after again:

Also, you may have noticed my sewing machine cords back there on the left. I stuck two 3M Command Strips to the wall and I hang my sewing machine cords on them.
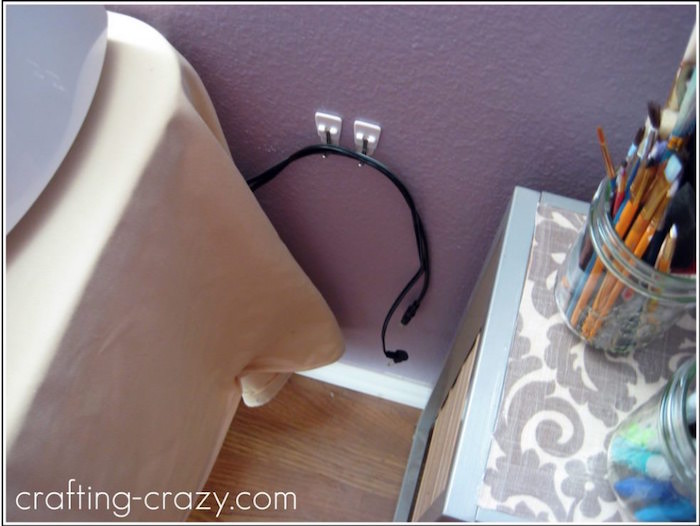
That way, when I’m not using my machine and it’s covered up, the cords aren’t under the table in the way. Genius, right?!?
You know you want to check out more Mod Podge DIY furniture projects.


Thank you, Amy! This totally makes my… my… YEAR. I have such respect for you as a blogger & crafter- you do it well and you do it right. Such an honor to be a part of your blog!
This is adorable! I am fully impressed as I have no crafty bones in all of my body.
Awesome! I love it! I’m going to try it.
Yay for featuring Natalie from Crafting Crazy! She’s is absolutely adorable and super talented!
I really love this project…gives me all sorts of ideas. Old blonde dressers – easier than repainting and it will be fun to find just the right fabric!
Bonnie
I also love assembling furniture. Never tried fabric yet with mod podge..just might need to buy a new (assembly required) nightstand.
I love putting together furniture, and I LOVE Ikea. What a great way to customize a boring piece of furniture!
I’ve never used Mod Podge before, but I can feel a crafting extravaganza coming on now!
I lived with a mish mash of some clear and some red plastic boxes in my IKEA EXPEDIT system for a year before I got a Mod Podge epiphany. I am a born-again crafter (married into a crafty family). I found two coordinating shades of fabric and Mod Podged them directly onto the front of the box. My five-year old daughter had a blast. We did one or two a day until all 15 were complete and now the playroom looks almost decorated! Yay for Mod Podge!
That was very nice and interesting I really liked it