
Learn how to decorate sandals using a unique technique that is REALLY easy! Take a simple pair of shoes from boring to fabulous.
Skills Required: None. Even if you’ve never crafted before, you’ll be able to decorate your sandals. You’ll be using hot glue in a silicone mold – it’s very easy.
There’s nothing like a cute pair of sandals to complete a summer outfit, but let’s be honest – affordable shoes can sometimes be a little… uninspired. If you’ve ever picked up a pair and thought, These could be cuter, then you’re in the right place!
Today, we’re taking plain sandals from “meh” to “oh wow!” with an easy embellishment technique using hot glue and silicone molds. Yes, you heard that right . . . hot glue!
This project is a total game-changer because it lets you customize your shoes without spending a fortune. Whether you love bold and colorful accents or prefer something sleek and metallic, you can completely tailor the look to your style.
There are other options as well. Imagine customized footwear for your bestie’s birthday, a unique bridesmaid gift, or even a fun summer camp project with the kids (with a little adult supervision for the hot glue, of course).
And let’s not forget: they’ll make a perfect addition to your own warm-weather wardrobe.
So if you’re ready to give your sandals a glow-up, grab your glue gun and let’s get crafting.
Once you see how easy this is, you’ll be looking around for other things to embellish – I won’t judge! Get the printable how to below:

How to Decorate Sandals
Equipment
- Heat gun
Materials
- Silicone molds
- Sandals
- Spray paint
Instructions
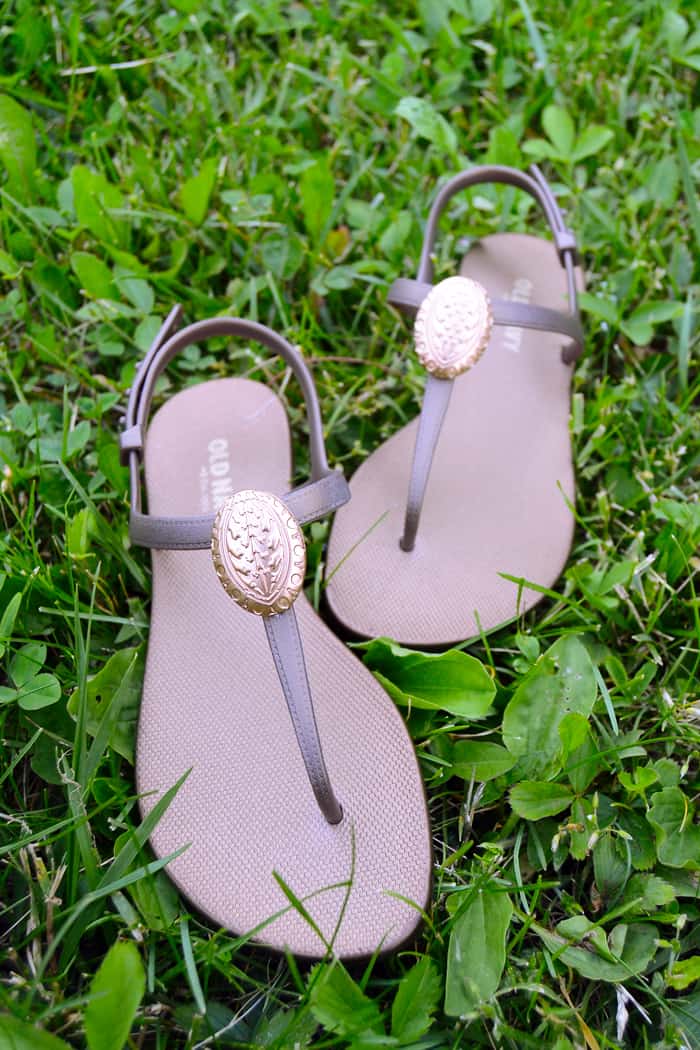
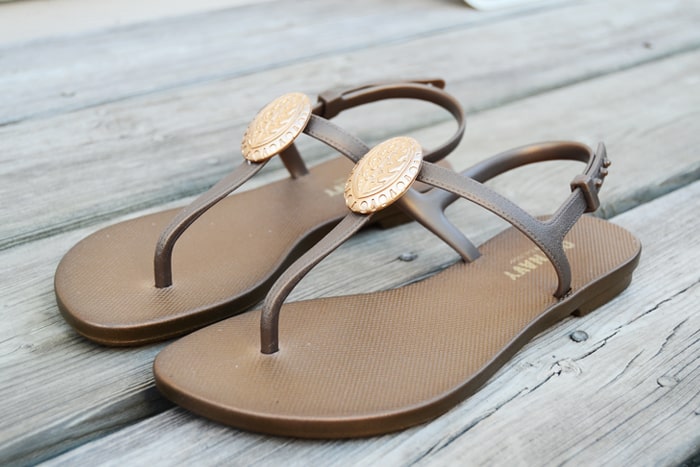
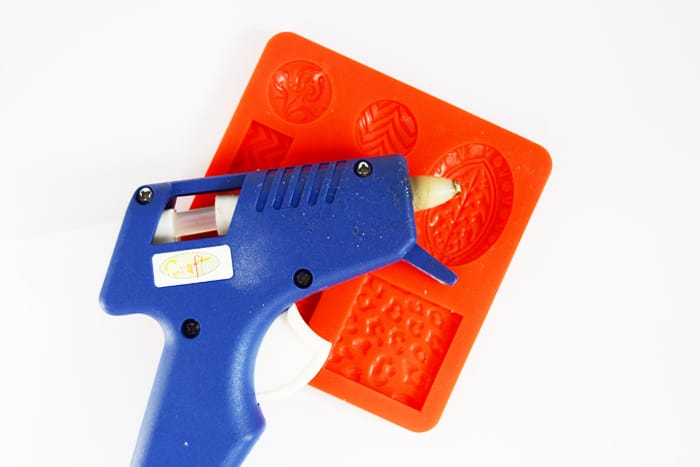
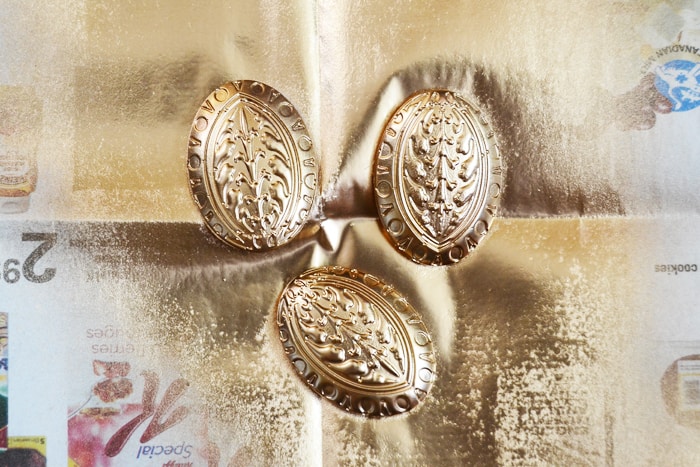
- Select your silicone mold and pattern. Fill the mold with hot glue. Spread the glue into the mold using the tip.
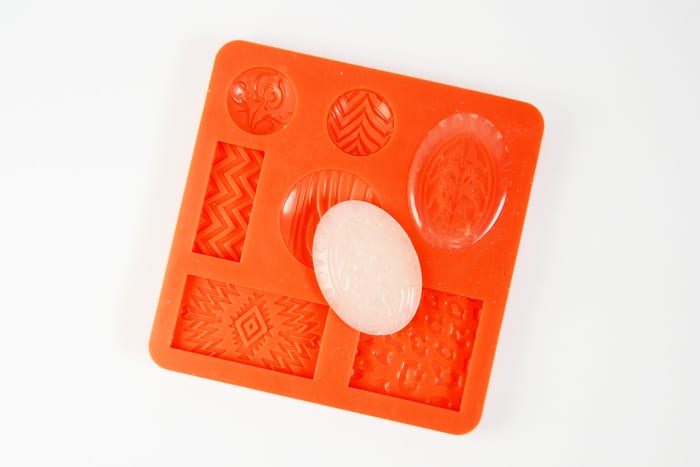
- Wait for it to cool and harden, about 5 minutes. Pop it out of the mold and trim with scissors, if needed.
- Paint the embellishment with either acrylic paint or spray paint. Let dry. If you used acrylic paint, spray on a clear acrylic sealer.
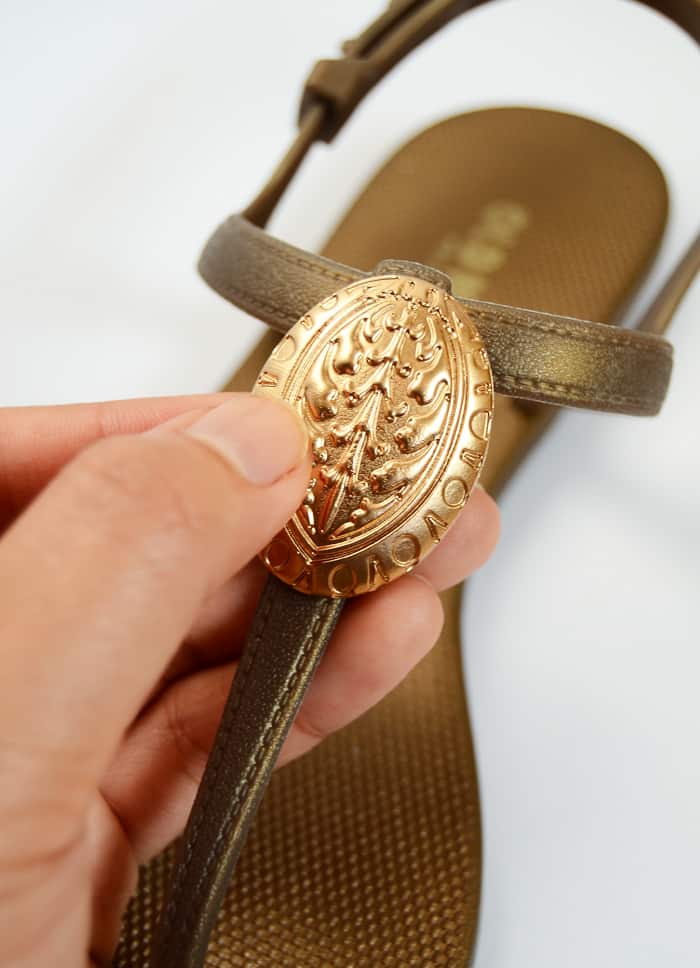
- Attach the embellishment to a sandal with a line of hot glue on the back. Repeat for a second embellishment.
Notes
Don’t forget to follow my blog and social media for more projects like this – happy crafting, friends! I’d love to know if you’ve ever decoupaged shoes. Leave me a comment! Now that you know how to embellish sandals, why don’t you try these other projects?


This is too pretty! and very easy as well. thank you for sharing 🙂