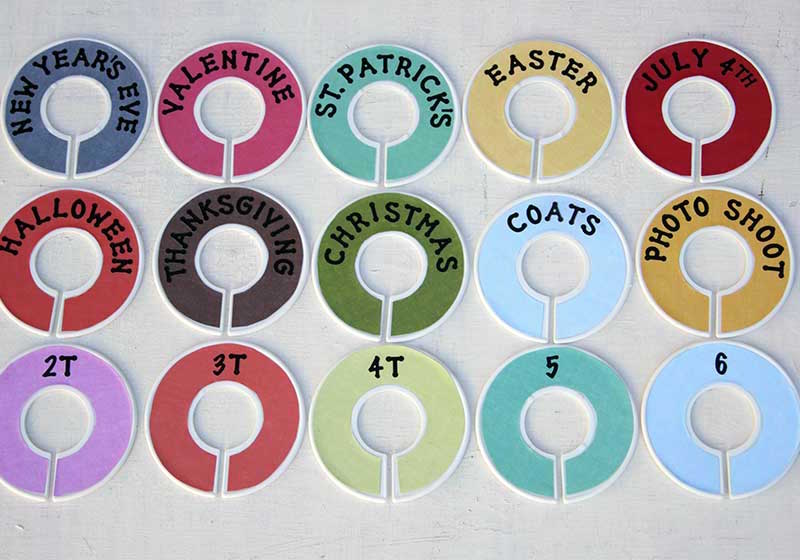
Use your favorite scrapbook papers and decoupage medium to create unique DIY closet dividers that are perfect for kids’ rooms. Scroll down to the bottom to see a video of the entire process.
Skills Required: Beginner. I recommend having experience with Mod Podge before attempting this project, however, it’s easy if you’ve used Mod Podge before.

I absolutely love organizing. Okay, that’s a bit of a lie . . . I don’t love the process, but I love the results. When I spotted this decoupage project from Cathie and Steve, I realized it was something that would be totally useful, especially for parents.
Because I’ve seen children’s closets.
They are hard to keep organized! Especially when the clothing is so small, and you’ve got your own closet to worry about (plus maybe other kids’ too!). Maybe your children are sharing a closet too, which makes these dividers even more crucial.
These wardrobe organizers are SO easy to make, and I promise they’ll make your life easier. Some people say they are high maintenance, but to me, they give peace of mind.
Because you can go in the closet in the morning, before you’ve had coffee, and you don’t have to think. And that works for me.
Learn how to make this craft below!
Gather These Supplies
- Plastic or wood closet dividers
- Mod Podge Hard Coat
- Scrapbook paper
- Scissors
- Paintbrushes
- Pencil
- Stickers

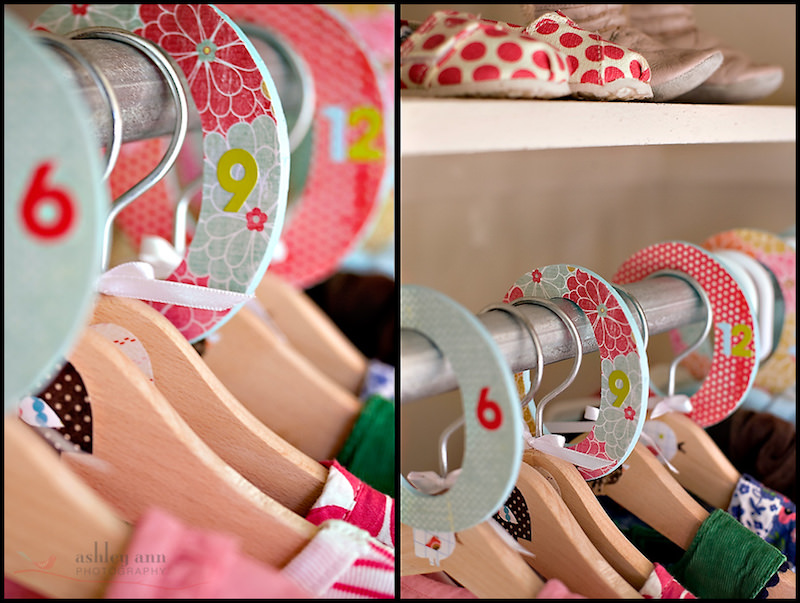
This post was inspired by the wood craft above from Ashley at Under the Sycamore. Her house must be amazing (do you remember her paper bird paintings?) if her closets look like this. For the complete tutorial, go here.
DIY Closet Dividers
Equipment
- Copy machine
Materials
- Plastic closet dividers
- Mod Podge Hard Coat
- Cardboard
- Scrapbook paper
- Stickers
Video
Instructions
- Create a template by making a photocopy of one of the dividers. You can glue the photocopy to a piece of cardboard before cutting it out to make your template sturdier.
- Using the template and a pencil, trace onto scrapbook paper. You’ll do this twice for each divider. Cut out.
- Apply Mod Podge to one side of the divider and to the back of the paper. Position the paper down and smooth with your fingers to remove any air bubbles. Apply a top-coat and allow to dry.
- Once dry, apply letter and number stickers to the divider for labeling. Apply a small amount of Mod Podge over the letters to secure them.
Notes
Do you want to see a video of how Cathie and Steve made their closet dividers? Just click “PLAY” on the video in this post!


Thank you for showing us this….I really need to try this…..
I purchased some like this long ago before I started blogging, these are way cuter!
Amazing, I’m off there now to check out the tutorial 🙂
I wonder how you could make them for closets where the poles don’t come out from the wall…hmmmm….
Use cereal boxes to make the circles with, and leave a little half inch slot cut through to the center of the circle. That way the circle will be flexible enough to slide (with a little wrangling) over the pole, and it is even cheaper!
Those are so adorable! I’ve seen these before, but not this pretty.
that is so cute! love the idea!
Thanks everyone!
Morgan, I wonder if you could use the letter “C”? 😀
Love these!
Looks cute–off to check it out.
And, I’m your newest follower!
Thanks for the link…now I’m thinking I need to go organize her closet again. It isn’t looking that pretty right now!
Glad you thought the same thing I did. I saw it and said “well I don’t have any small children” (or any children for that matter) but I want to separate my closet by colors!!!
This is so clever!!! And way more practical than other options like this I’ve seen, love it!!!