
Learn how to make paper earrings from cardstock that are both sturdy and lightweight – you can create them in any shape you like! Seal with Mod Podge.
Skills Required: Beginner. You’ll have to know how to use a die cutter and basic jewelry tools. It’s quite a simple project once you get the hang of those things.
Hello friends! It’s Aki again from Minted Strawberry, swinging by for another tutorial. As you know, I love DIY jewelry and fashion crafts! This time I’m showing you how to make paper earrings that look like seashells, but you can make them any shape you like.
Summer is in full swing – it’s so hot out all the time now! One of my favorite activities to do in the summer is go to the beach – I love the water, swimming, the breeze, the sand and most specially collecting shells and driftwood.
Last year I spotted some seashell cross-section necklaces on my beach adventures and they looked so pretty!
I forgot about them soon after until recently when I was collecting shells. And while I can purchase them online, where’s the fun in that?
I decided to make paper earrings out of cardstock; it’s more affordable than purchasing them online and you won’t have to worry they’ll break easily!
Let me know show you how I made these shell earrings . . . then you can take the same idea and customize them in any shape you like. If you’ve never made earrings before, you’re going to have fun.
Gather These Supplies
- Die-cutter
- Cardstock
- Template – download here
- Mod Podge Matte
- Silicone Mat
- Liquid Gilding or Spray Paint
- Mod Podge Hard Coat or other sealer
- Earring hooks
- Jump rings
- Flat nose pliers
- Paintbrush
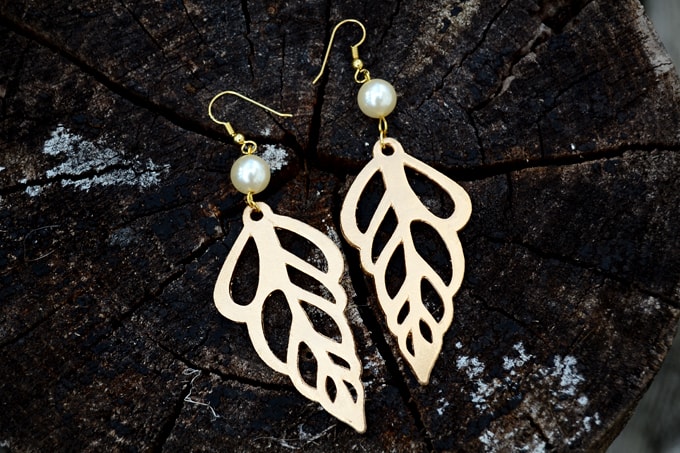
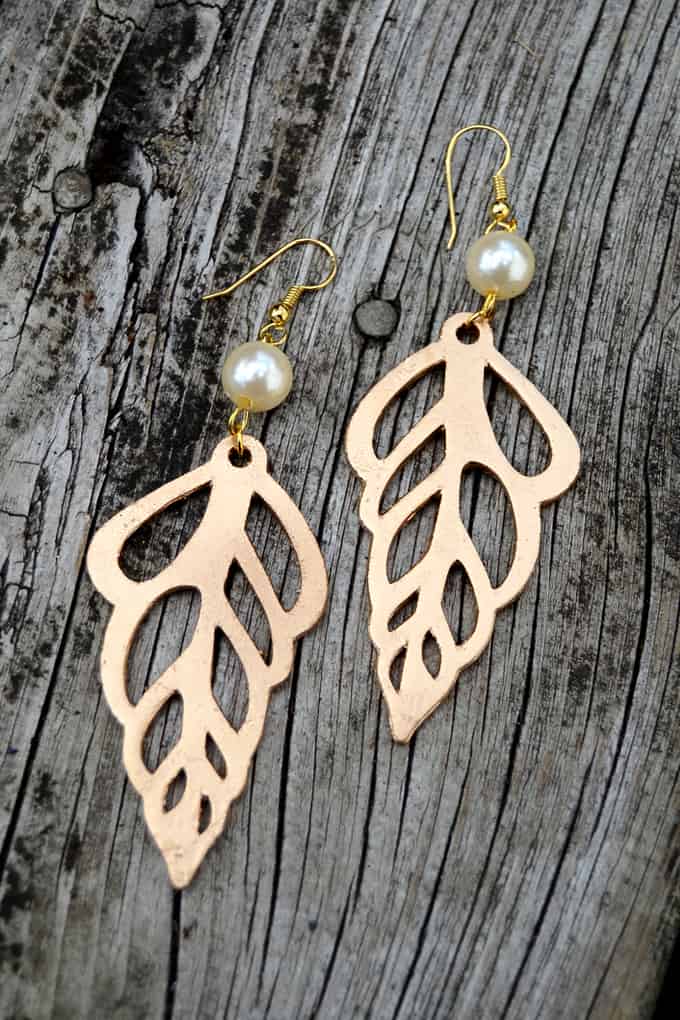
I totally love how pretty these paper earrings look in person – the photos do not do them justice! These shells are a great and affordable addition to any summer wardrobe. They look very abstract and organic, and I am in love.
They make the cutest gifts too. Especially Mother’s Day gifts!
What shapes would you use? What color would you paint them in? I’d love to hear in the comments! Get the printable how to below:

Paper Earrings
Equipment
- Flat nose pliers
- Books
Materials
- Die cutter and vinyl
- Cardstock
- Shell template free for personal use
- Mod Podge Matte
- Treasure Gold or other liquid gilding or metallic craft paint
- Mod Podge Hard Coat or spray sealer
- 2 Earring hooks
- Jump rings
Instructions
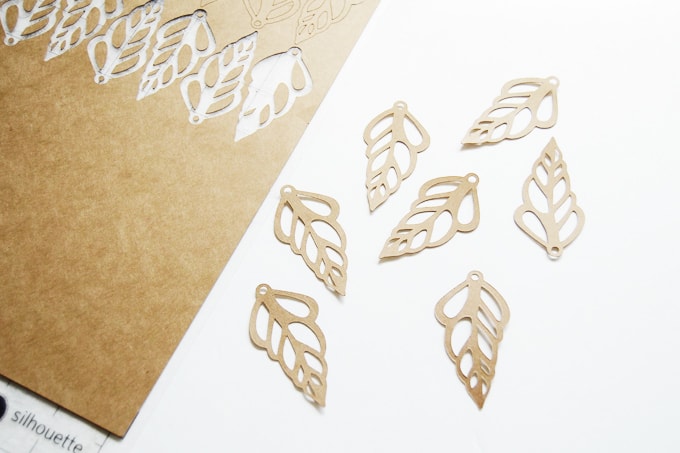
- Draw a sketch of the shape you want to use or select something from your die cutter's library. Cut seven pieces of the shape for each earring (a total of 14) out of cardstock. Make sure that you include a hole in the same place at the top of each piece.
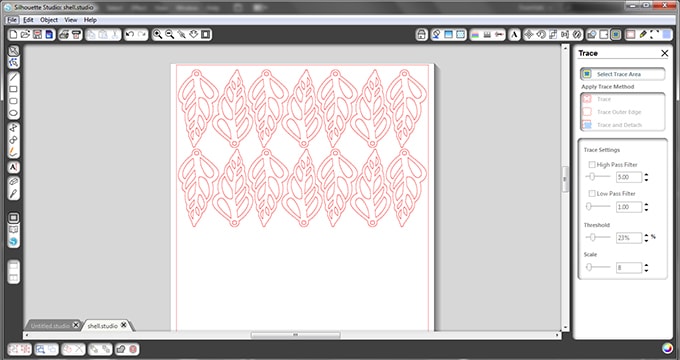
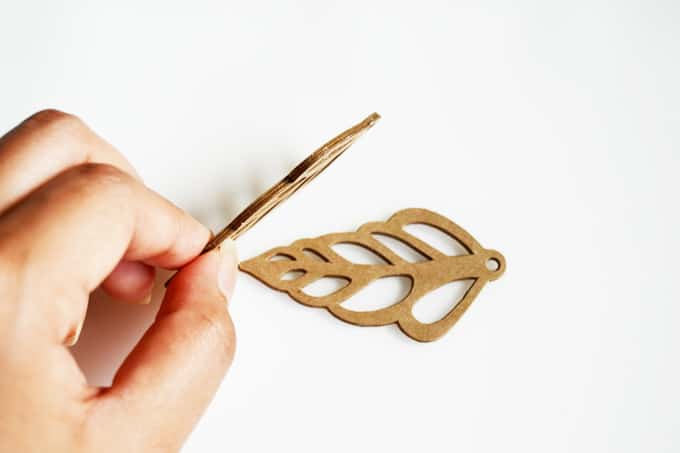
- For a perfect cut, you may want to double-cut your pieces. If the edges don’t cut perfectly, tidy them with a craft knife.
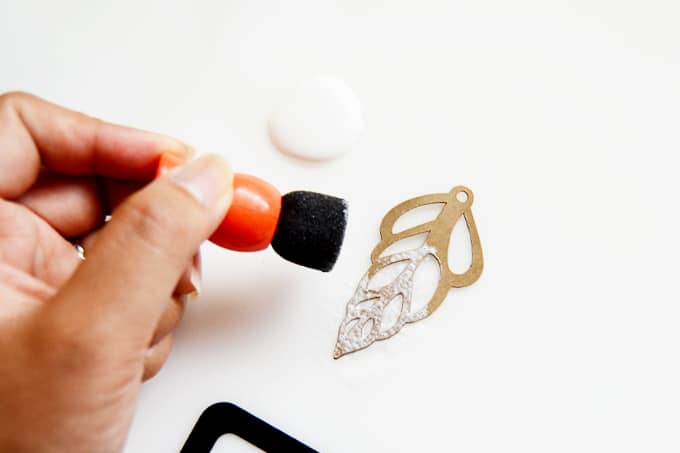
- Using a foam brush or spouncer, use Mod Podge to adhere the cardstock layers together. Let dry.
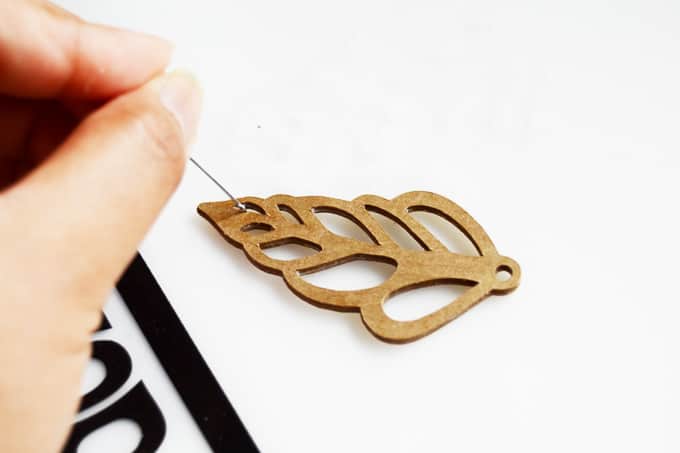
- Remove the excess glue in the nooks and crannies of your earring using a thin object such as a sewing needle or pin.
- Sandwich the paper earrings between two big books while drying to encourage flattening of the pieces.
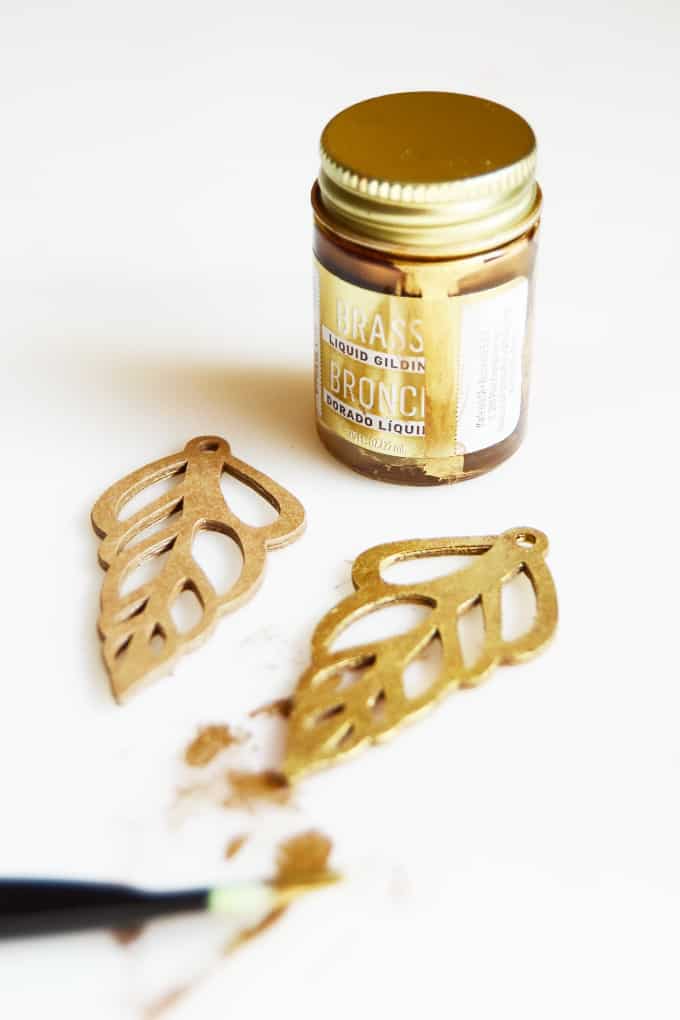
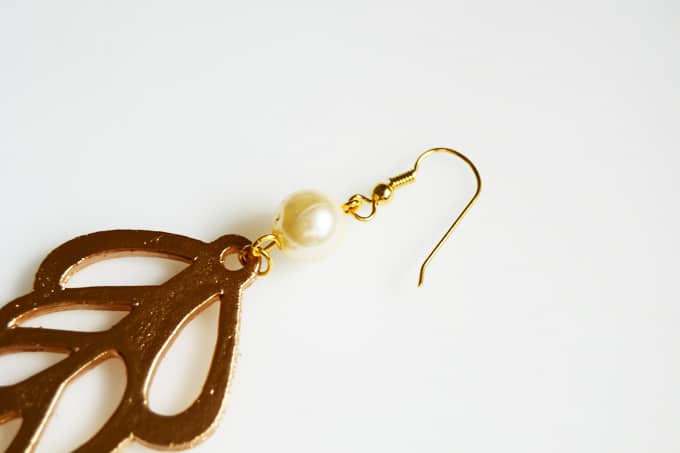
- Use liquid gilding (or acrylic paint) to paint both earrings. Paint multiple coats if needed and let dry. Coat them with Mod Podge Hard Coat or Mod Podge spray sealer to seal and strengthen them when finished.
- Make the pearl jewelry links. Thread one pearl bead onto an eye pin, cut off the excess wire, and loop the end to secure the bead on the eye pin.
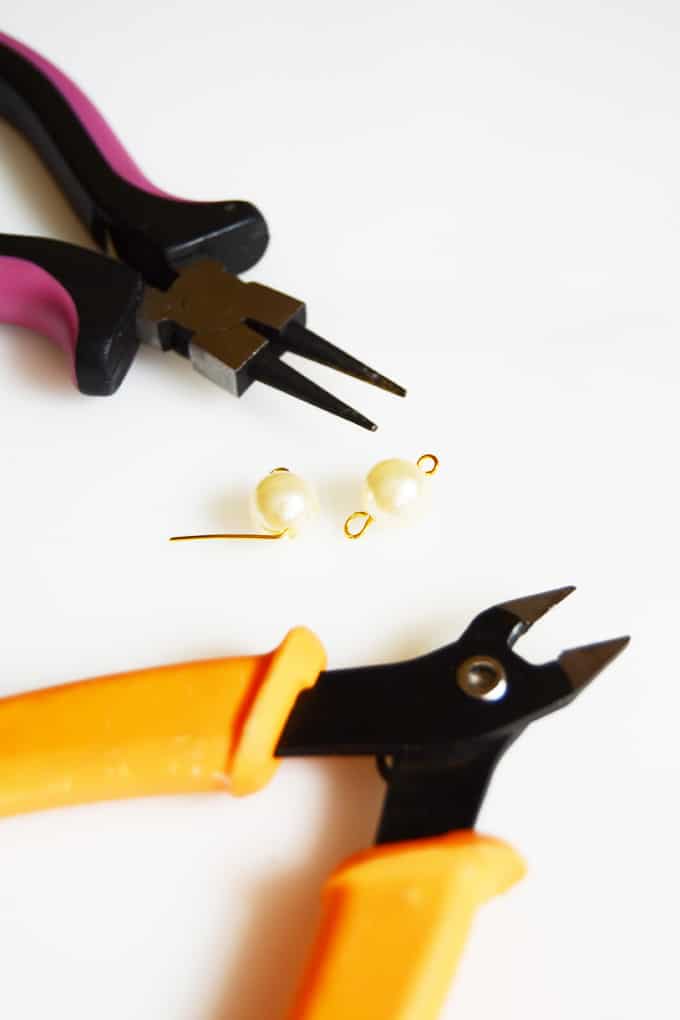
- Attach the pearl link using a jump ring on the circle on top of the shell. Attach the pearl link to the hook. Repeat with the other earring to finish.
Notes
I hope you enjoyed this paper earrings tutorial! Don’t forget to visit any of the links down below and to be inspired with more projects like this! Happy crafting, friends 🙂


These look so amazing. Thanks for sharing. I’m beginner level, but these are on my list to try.
I’ve been trying to make basic wooden earrings with inkjet paper and experimenting with different MP formulas…I think it falls into the category of decoupage(?). I’m using an Xacto to trace out shapes of the paper using the wooden blanks (teardrop/circle/etcetc). If I really suck at cutting a straight line (or following any wooden blank shape), would a die cutter essentially “automate” that step so that my hands couldn’t mess it up? 😀 And is there one in particular, a brand or a model that you’d recommend starting my search with?
A lot of times I’ve gone for the wrong (and more expensive) tool when trying other crafty stuff (like getting two hundred different fancy pliers from Michael’s when I was trying to do wire jewelry), so as I get into decoupage and trying to use paper for jewelry, I don’t want to let myself do the same dumb thing lol.
I GREATLY appreciate any advice or info. Thanks again for sharing this project.
Hi Stephen! A die cutter would definitely help you and I personally recommend Cricut. HOWEVER – if you just doing a circle or rectangle or shapes that basic, there are usually punches available in the scrapbooking section of the craft store or online. For example, there are circle punches in various sizes that make cutting exact shapes really easy. Otherwise, grab a Cricut 🙂
These are gorgeous! Who could have known that paper could look so good? I think any of the metallic colors would look great, or even white in a glossy finish. Since I do not wear earrings, I am thinking necklace with about five to seven shells in graduated sizes, with your 2.5 inch high size n the center and perhaps a few small pearl beads between the shells. I think this project is the coolest thing I’ve seen in quite awhile.
Two things stopping me from beginning this project immediately: I need both kinds of mod podge – I do have some of the Mod Podge Matte left from a previous project (not enough, I fear) but have no Mod Podge Hard Coat at all – and I have no die cutting machine either. :/ My shells would need to be hand cut (probably a very difficult Xacto knife project) since there’s no way a die cut machine will fit in my budget this year.
Thank you for such a detailed explanation of making the very stylish earrings. The only problem is…not everyone has a die cutter machine. And this type of shell would be hard to hand cut. But I due like the idea.
Hi Maureen! What I’d recommend if you don’t have a die cutter is using the outline to hand cut – and then painting in the “cut outs.” At least that’s what I would do (not with black, but with a complimentary color).