
Do you save all of your used Altoids containers in the hopes of making something with them? You’ll love these Altoid tin crafts!
If you’ve ever read my blog, you may know that I appreciate teeny-tiny foods. I can’t get enough when it comes to sweet little desserts and bite-sized appetizers.
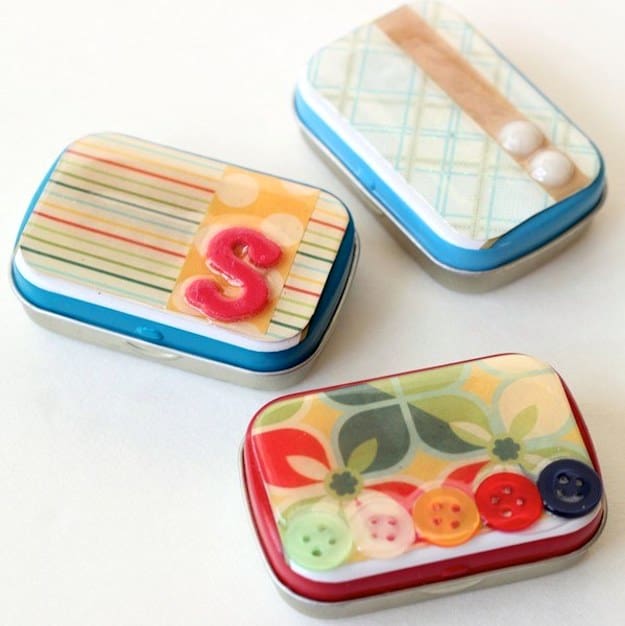
But I ALSO love tiny and cute storage solutions, too. And if I can repurpose and recycle something for storage, that is even better! This decoupage post teaches you how to decorate Altoid tins. This is a perfect summer craft for kids or craft for teens – but I think adults will love it as well.
Decorate an Altoids Tin
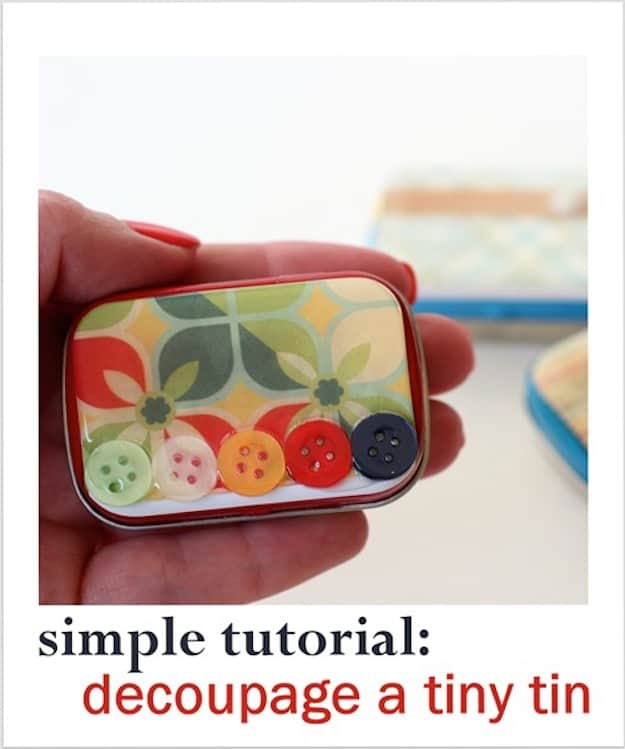
I recently used Mod Podge Dimensional Magic (DM) to decorate little mint tins that I did not want to throw out. Now I want to teach you how to decoupage a tiny tin.
Have you ever used DM? It is a very thick decoupage medium that dries with a resin-like finish. I love that you can embed fun decorations in it, too! It is just another way to personalize your tin a bit more.
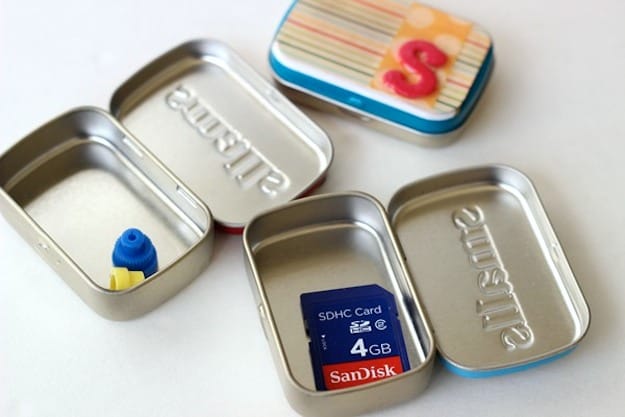
What can you store in these cuties? Just about anything!!!
I use one to hold tiny craft supplies (like the caps for the blade on my crafty cutting machine). I keep my extra camera SD card in another one in my camera bag.
The third one held my ear buds for my iPod for a while. But it could even work for storing jewelry when traveling, too!
Want to make a fun little storage tin? Just follow these steps!
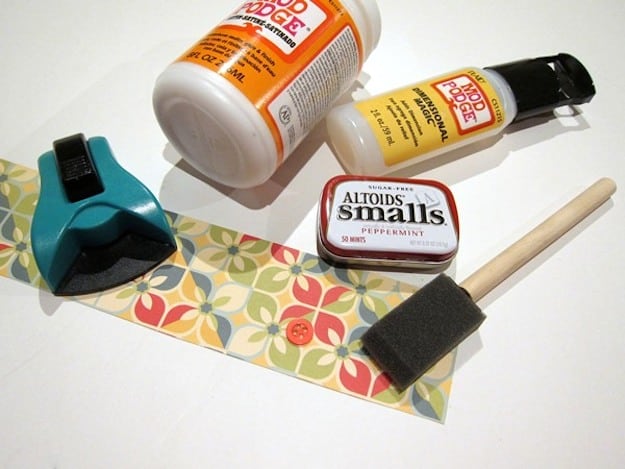
Step 1: Gather These Supplies
You will need:
- Small Altoids tin – 3
- Scrapbook paper
- Round corner punch
- Foam brush
- Scissors or paper cutter
- Decorations (buttons, more paper, ribbon, beads, puffy stickers, etc.)
- Mod Podge Satin
- Mod Podge Dimensional Magic
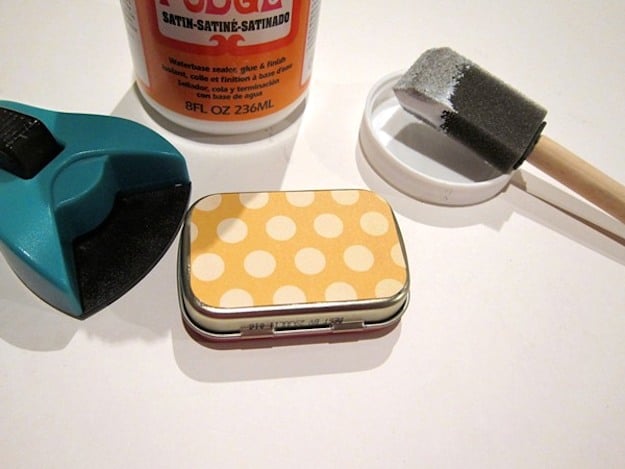
Step 2: Attach panel to the bottom. Cut two panels of coordinating scrapbook paper to fit snugly on the top and bottom of the tin.
You can use a rounded corner punch to give the paper a more finished look if you want.
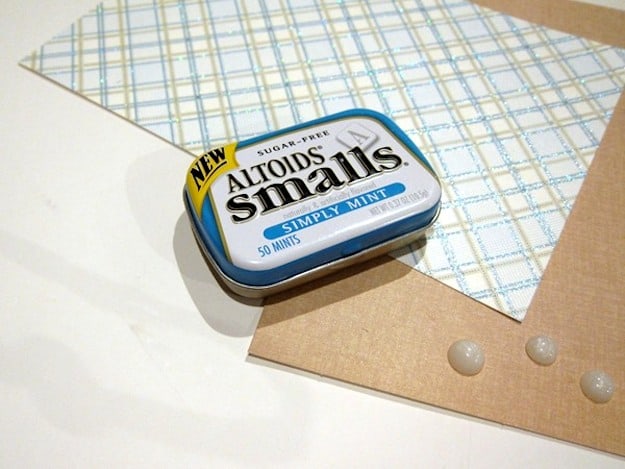
For the bottom, brush a coat of decoupage onto the tin and press and smooth one of the pieces of paper on top.
When dry, brush another coat of decoupage over top of the paper to seal it. Allow that to fully dry.
Step 3: Decoupage the panel to the top. Use the other piece of paper and brush more Mod Podge on top of the lid to adhere the paper down. Allow that to dry.
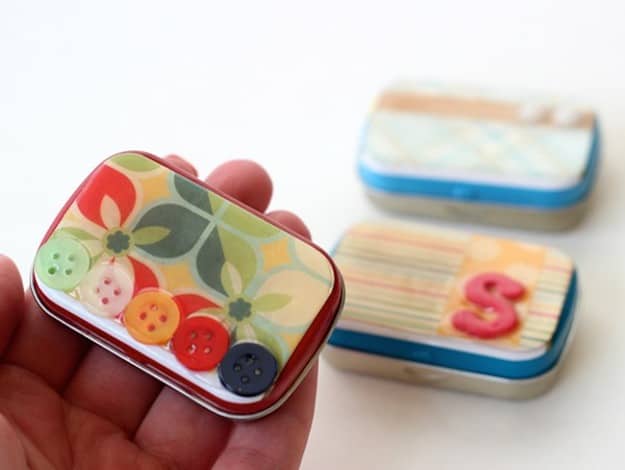
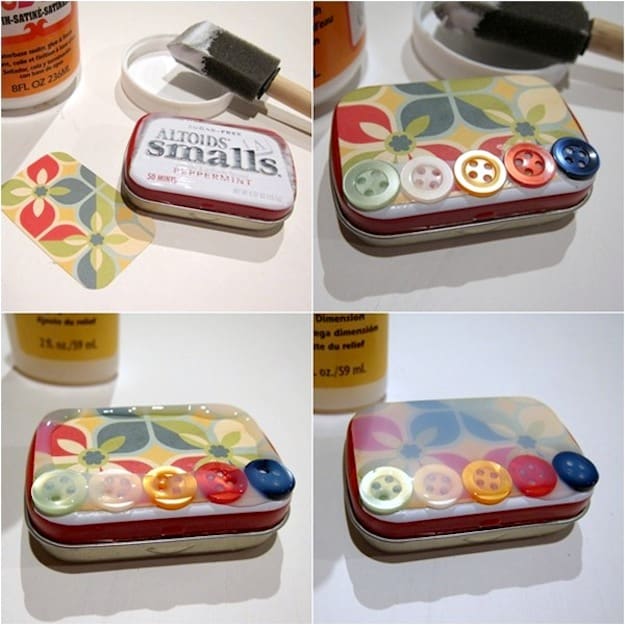
Step 4: Glue embellishments onto your Altoids tin. You can add something decorative and cute on top of that panel to embed underneath the DM. I’ve used ribbon, buttons, beads, brads, puffy stickers, etc.
Those objects can ‘float’ in the DM if you do not secure them. So, just use a little bit of Mod Podge and glue the decorations down and allow that to dry.
Step 5: Carefully add Dimensional Magic. Then very carefully, pipe the DM around the edges of the top paper panel. Fill in the remaining area with DM. Work slowly because the medium will spread a little.
Taking your time also helps avoid creating bubbles in the glue. Allow the DM to dry thoroughly overnight. Enjoy your pretty new Altoids tin and . . .
Step 6: Repeat the process with other cute little containers!
Please tell me I’m not the only one that loves wee little (and fun!) storage solutions. So, don’t throw out those tiny containers you may have around the house. Decorate and use them!

Altoid Tin Crafts
Equipment
- Round corner punch
- Scissors or paper cutter
Materials
- Small Altoids tin
- Scrapbook paper
- Mod Podge Satin
- Mod Podge Dimensional Magic
- Embellishments buttons, more paper, ribbon, beads, puffy stickers, etc.
Instructions
- Cut paper to fit the bottom of the Altoids tin. Use a pencil to trace the tin, then cut with the scissors. Repeat for the top.
- You can use a rounded corner punch to give the paper a more finished look.
- On the bottom, brush a coat of decoupage onto the tin and smooth one of the pieces of paper on top. Let dry.
- Brush another coat of decoupage over top of the paper to seal it. Allow that to fully dry.
- Decoupage the panel to the top. Use the other piece of paper and brush more Mod Podge on top of the lid to adhere the paper down. Allow that to dry.
- Glue down embellishments with craft glue.
- Carefully add Dimensional Magic. Very carefully pipe the DM around the edges of the top paper panel.
- Let dry completely before using the tins.
Now that you’ve learned how to decorate Altoid tins, check out these Altoid tin crafts from some of my friends!


I make necklaces with tiny tins.
I would love to see the tiny tin necklaces?
So cute..keep rocking dear Shannon 🙂
I love love love reusing altoid tins! I have so many that I don’t know what to do with them! (pics in my blog). I spray paint the outside before I decoupage. I recently bought some spray paint used by graffiti artists and such. The colors are so cool, can’t wait to use it to neon-out a few more altoid boxes!
I love tiny tins too! And I’ve been using ModPodge since waaaaaaaaaaaaay way back. But I did not know about the DM. Looks like way too much fun!
Very cute. I like the button embellishments. I did the same with a doggie breath mint tin (yes, you read that right – a doggie BREATH mint tin! go figure.) You can see it on my blog.
I love these tins as well! How do you work around the raised print on the tins?
Now if I could just get some tins and do this project like NOW! Thanks for sharing this!
These are so cool! I recently used Mod Podge on tins, but for the inside. Looks like you’ve now inspired me to decorate the outside!
Here’s the link if you want to check them out:
https://artclubblog.com/2012/05/23/treasure-tins/
you can never have too much of them. great.
I linked to your tutorial on my blog – thanks for sharing!
doro K.
This is one more great idea for recycling those tins!! one can never have enough of these ideas! they look great!
I wonder if a gift card would fit in one of these tins? It would be such a cute gift card holder!
In the regular sized Altoid containers, yes (I made one once)! These are a little too small 😀
Thank you so much for this tutorial. My husband has saved me like 50 of these tins and I keep looking for a project to use them for. I’m a Girl Scout leader and this idea is perfect for them to decorate and make their own lip gloss in. I hadn’t done it before because I wasn’t sure how we would hide the logo and make them pretty. Bingo!! Thanks!!
What is dimensional magic?
Hi there Ina! I wrote a post about it here: https://modpodgerocksblog.com/mod-podge-dimensional-magic-questions/
How in the world can I print this up for late use, Christmas Ideas! I do not see any place to print, i.e. embedded or a print button.
Hi Suzi! You can go into the file menu on your browser to print – there’s no embedded print button my blog posts. Thank you!
What is a corner round punch and where can I buy one?
It rounds paper corners evenly! You can get them on Amazon: https://www.amazon.com/s?k=corner+round+punch&ref=nb_sb_noss_1
I’ve tried to find them at craft stores – which they should normally have – but a lot of craft stores have low stock on things right now so I’m not sure if you will find them there or not (Michaels, Joann, etc).